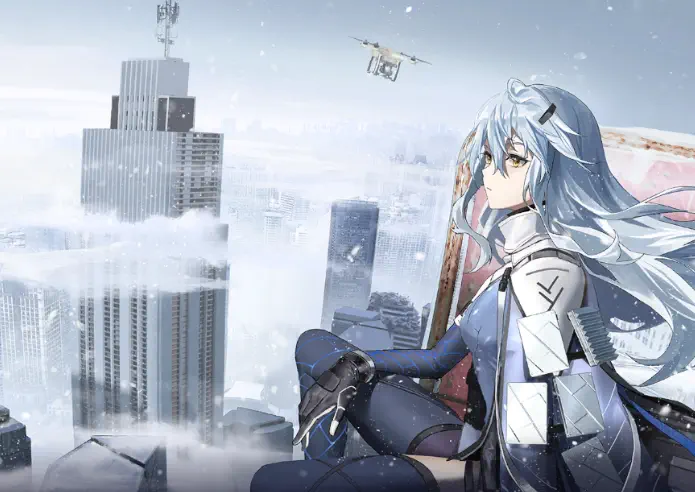
You open your eyes, groggy from the long cryosleep. The blaring alarms barely register in your mind, but your instincts kick in, telling you to wake up, put on a protection suit, and get to the escape pod. Dancing fragments of a life you once knew flit through your mind – a younger sister, a major sporting event, the clash of two giants of a sport. You never imagined you’d see exactly what a giant meant a few moments after that. When the first of them – Ymir – fell, what followed was unprecedented chaos and turmoil as mankind scrambled to fight a foe they knew nothing about…
…or did you just imagine all that? Your memory seems notoriously unreliable these days. Either way, it’s time to wake up, soldier. We have a war to fight.
Snowbreak: Containment Zone is a fast-paced 3rd person shooter set in a world devastated by the Descent of the Titans heralded by Ymir. In this game, you’ll take on the shoes of an adjutant who was part of a secretive project to take the planet back. Your place in the world is made even more difficult thanks to the Theotropic Nerves infesting your brain and scrambling your memories while giving you superhuman strength and endurance.
To fight back against the monsters that have ravaged humanity, you’ll need to rejoin Yggdrasil and take the helm of the Heimdall Force, a ragtag bunch of driven volunteers dedicated to rebuilding civilization, and spearhead operations not only against the Titans and their ilk but also to fight against the malcontents that seek to turn the apocalypse into their own twisted playgrounds.
Your mission in Snowbreak: Containment Zone begins on both the Google Play Store and the App Store, as well as on PC via a standalone client or the Epic Games Store. I’ll be using the standalone PC client version in this guide as it’s faster, better, and more suited to Snowbreak: Containment Zone’s fast-paced action, though those with powerful phones – I’m not exaggerating, this game chugs on my Samsung Galaxy A23 and wow, the heat – can continue to join the fight on mobile.
In this Snowbreak: Containment Zone beginner’s guide, we’ll build a solid grasp of the basics so that by the end, you’ll be more than ready to overcome any obstacle on your own. To that end, we’ll be covering:
- Your many operatives and everything about them: who they are, what they can do, their weapons, their stats and skills, and so on.
- Strengthening your operatives to survive combat in the Titagen-infested world.
- Combat maneuvers – when all else fails, you can always fall back on your basic training.
- Gacha basics and how to navigate the many banners of Snowbreak: Containment Zone.
Operatives, Assemble!
The operatives of Heimdall Force, like you, are infected with Theotropic Nerves that grant them increased capabilities beyond the average human, with super strength and durability just being the tip of the iceberg. Despite these advantages, humanity is still fighting an uphill battle against the Titans, so you’ll need to familiarize yourself intimately with how to analyze the many operatives you’ll manage.
Quick Tips:
- Snowbreak: Containment Zone takes a minimalistic approach to stats. You can tap “View Details” to get more info on an operative’s stats.
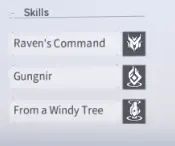
- All operatives have 3 skills – a Standard Skill that’s fired on demand, a Support Skill that they use when summoned as a support character, and a powerful Ultimate.
- Standard and Support Skills both consume S-Energy, which recovers over time. Ultimates consume U-Energy, which builds up as you fight.
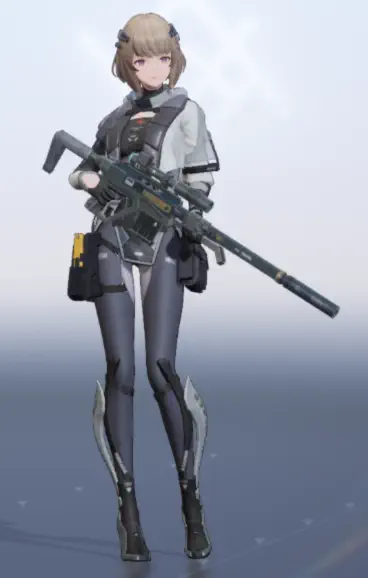
- There are five weapon types in Snowbreak: Containment Zone – pistols, submachine guns, assault rifles, shotguns, and sniper rifles. Each of these weapon types has their own strengths and weaknesses.
- On top of this, each operative comes with a default weapon and can equip any weapon of a compatible type in your armory (ex, all SMG users can equip any SMG you have in your inventory).
Operative Stats
Stats! The foundation of any RPG, whether tabletop or digital. Without these numbers, we’d have a hard time establishing the capabilities of each operative. Stats are divided into basic and advanced stats, which can be viewed by tapping on “View Details” while in an operative’s info screen.
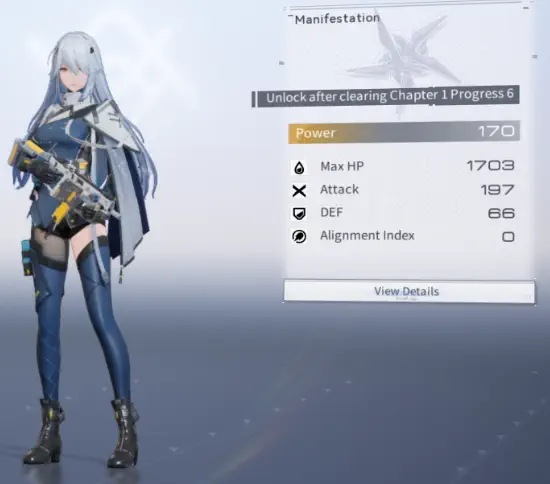
The basic stats in Snowbreak: Containment Zones are:
- Power – a rough estimation of how strong an operative is based on its raw numbers. This doesn’t account for tactics, positioning, and player skill, so don’t be misled by big power numbers!
- Max HP – health. Determines how much damage an operative can sustain before they’re down for the count. Important for everyone but especially for tanks and shotgun users.
- ATK – attack power. Measures how much damage you do. Most skills base their numbers on a percentage of their operative’s ATK.
- DEF – defense power. A measure of incoming damage mitigation. Very important for tanks and shotgun users.
- Alignment Index – represents how in sync an operative is with their Deiwos. This comes into play later on when you unlock Neuronics (AKA increasing skill levels).
Operative Skills
Each operative has access to three skills to assist them in combat, whether that’s by dealing a chunk of damage to enemies in an AOE, disabling them via paralysis or stuns, creating shields for themselves and/or their allies, or restoring HP.
The three skills are:
- Standard Skills is an ability that can be used on a timer. Using these costs S-Energy, and they have a cooldown too. S-Energy regenerates on its own over time.
- Support Skills are triggered by calling in team support. These skills also consume S-Energy, meaning that selecting between an operative’s Standard or Support Skill can be a tactical choice.
- Once an operative gathers enough U-Energy through combat, they can use their Ultimate Skill, an incredibly powerful skill with a wind-up cutscene.
Note that while there are only three skills per operative, some operatives have passive skills tied to these. Lyfe, for example, has a Raven Drone attached to her active skill.
Weapon Types
You could say “Each operative has a gun” and you wouldn’t be wrong. The kind of gun that they’re equipped with really matters though as its caliber and range largely determine that operative’s role in combat.
The different weapon types in Snowbreak: Containment Zone are:
- Pistols in Snowbreak: Containment Zone are powerful but slow-firing weapons. Thanks to their large calibers, they can demolish shields with ease but require more skillful gunplay than other dedicated frontliners.
- Submachine Guns, or SMGs, are automatic weapons that use handgun rounds. While their damage and range are below average, SMG users compensate with a high rate of fire and quick reload speed that makes them perfect at taking out masses of weak enemies.
- Assault Rifles, or ARs, are the middle ground. They don’t particularly specialize in any role but are very versatile and have both respectable damage and range.
- Shotguns trade range for power. They’re capable of amazing damage output if every pellet hits, but this necessitates getting up close and personal with enemies, meaning that operatives that use shotguns need to have good health, defenses, and preferably a way to recover HP on the move. Note that using aim down sights on shotguns tightens the spread a bit, but you still won’t far-off targets.
- Sniper Rifles are the undisputed rulers of pure damage. They pack an amazing damage-per-shot ratio and are capable of shredding even the toughest foes. The downside is that they’re extremely reliant on your aim and real-life skill and benefit the least from the game’s aim assistance.
Weapons
Operatives can also be given new, better guns to fight with. Whenever you roll in the gacha (or the dedicated weapon gacha if that’s your thing), you can also get different weapons to give to your operatives.
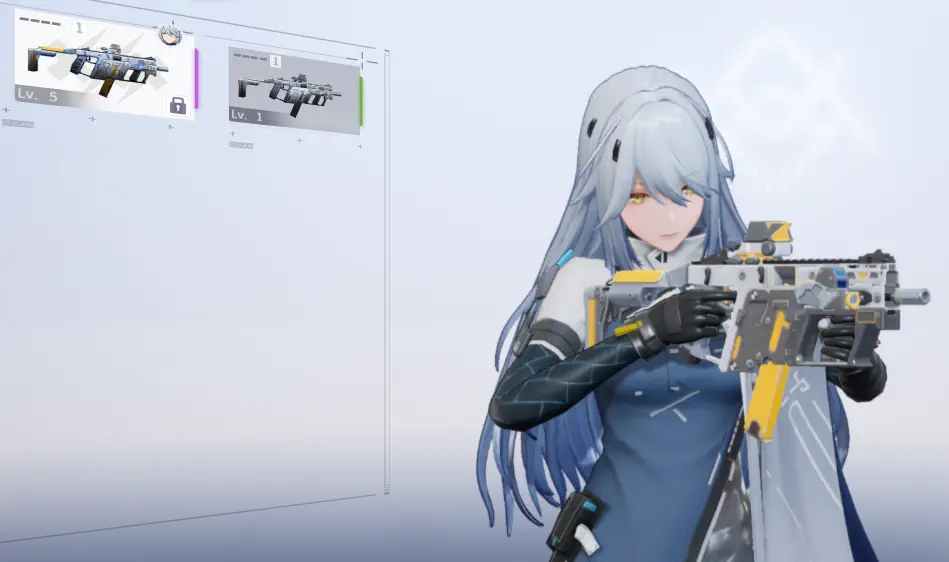
Each of these weapons also comes with different rarities and skills, with higher-rarity guns having unique and maybe even build-defining passive abilities. This gun stash is also shared with all characters that use that gun type, so plan accordingly.
Honing Heimdall Force
Understanding how to use and maximize your operatives is one thing, but fighting alongside them is another. While tactics and knowledge can get you far, you’ll still need raw strength to defeat your foes in the containment zones. Here’s a quick rundown of how to make your operatives stronger.
Quick Tips:
- Each level gives an operative higher base stats. Operatives gain experience by participating in battle or by eating combat records.
- Note that only main story quests give experience points for completing them. You can grind stages so long as you have the stamina.
- Skills are upgraded via the Neuronics system. This involves investing materials into 6 clusters, each of which has a capstone passive that significantly improves a skill. Minor nodes in skill clusters can also increase an operative’s Alignment Index and increase a skill’s level.
- You cannot switch to another skill cluster once you’ve committed to increasing one. You must complete all nodes to select another skill cluster.
- Logistics are akin to equipment systems from other games. Each operative can equip up to 3 logistics officers.
- Logistics officers from the same set provide a set bonus.
- Weapons can be upgraded for more stats and modified (eat duplicates) to boost their skill levels. Weapon skills tend to boost a certain damage type, so match operatives with weapons that boost the damage type of their skills.
- You can build relationships with your operatives via the Base system. Every 10 trust levels result in a 1% damage increase.
- Pulling duplicates of a character gives you some of their extract. A character’s extract can be spent via the Manifestation menu while in an operative’s page to provide passive boosts to that operator.
- There’s a lot of free stuff for growth if you know where to look: special operations, the shop, missions, quests, etc.
Leveling Up
The easiest way to make an operative stronger is to increase their level.
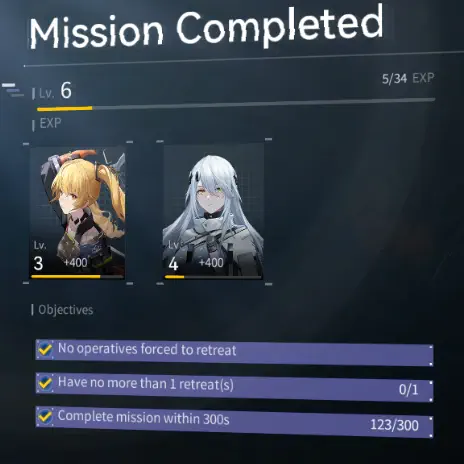
Whenever you bring an operative into combat, they’ll gain some experience points. Fill up your experience points, and you gain a level – which gives a slight boost in stats. Levels don’t give explosive results, but they form the basis of an operative’s strength.
The faster way of leveling someone up is by force-feeding them combat records. The higher the rarity, the more experience the operative gets. This can be used to quickly train up a new operative who caught your eye or just to make sure that everyone is keeping pace.
There are a few caveats concerning experience, though. One thing you should note is that only main story quests give out experience on stage completion. The good thing about this is that you can keep grinding on stages you’ve already cleared for more experience points, though this will cost stamina. Another is that certain levels require you to be at a certain account level. For example, you can’t level anyone up past level 15 until your account level is at 16.
Skill Upgrades and Neuronics
The next simplest (though not easiest) way to strengthen an operative is to bump up their skill levels. Upgrading skills is done via the Neuronics system, which is unlocked as you progress through the game.
Neuronics involve hijacking and upgrading the Theotropic Nerves in an operative’s brain to further improve their connection to their Deiwos, which in turn augments their powers. In gameplay terms, this means strengthening their skills through various augments.
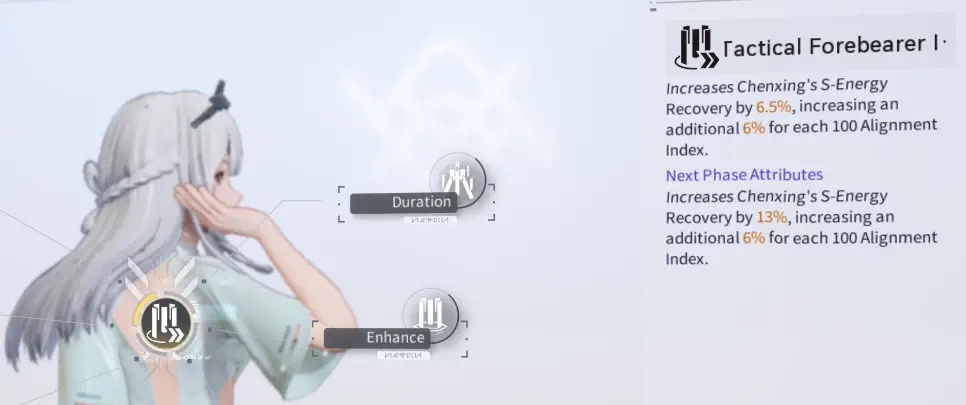
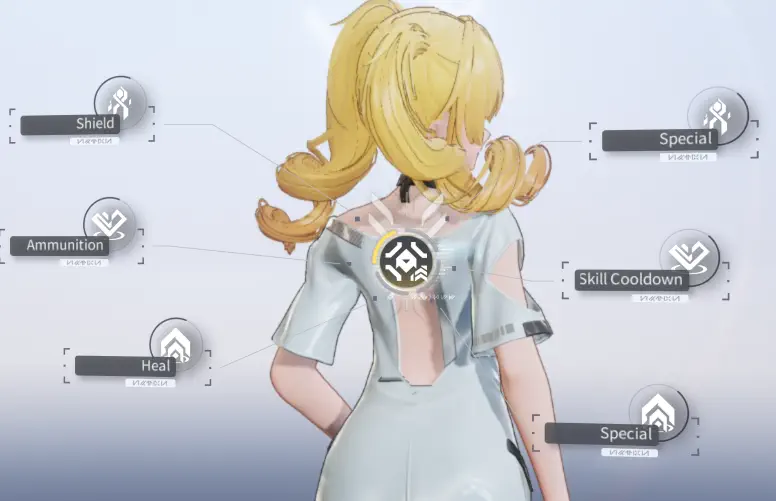
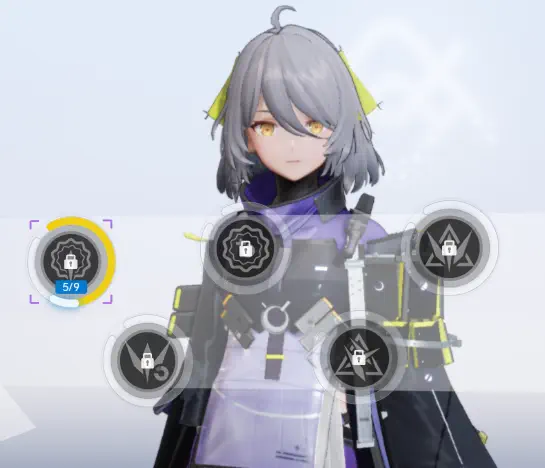
Operative development via Neuronics is separated into 7 easy chunks, dubbed Theotropic Cluster Channels. The central cluster – the one on an operative’s back in the menu – provides a potent passive boost to its operative but can’t be directly upgraded. To increase the central cluster’s power, you need to level up the six branching clusters and reach a certain level. After that, just tap the central cluster, pay the material cost, and bam – stronger passive. Note that this central passive is usually dependent on an operative’s Alignment Index stat.
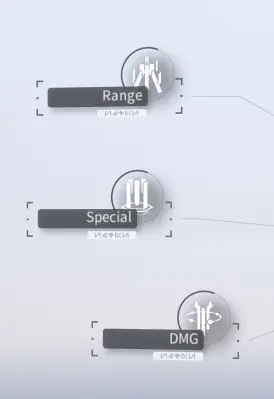
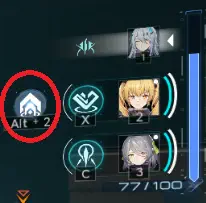
The six clusters surrounding the central one improve a specific aspect of a particular skill. You can tell what skill they’ll affect by matching the icons to that operative’s skill. You also get a preview of how, exactly, finishing that cluster affects the skill, like so.
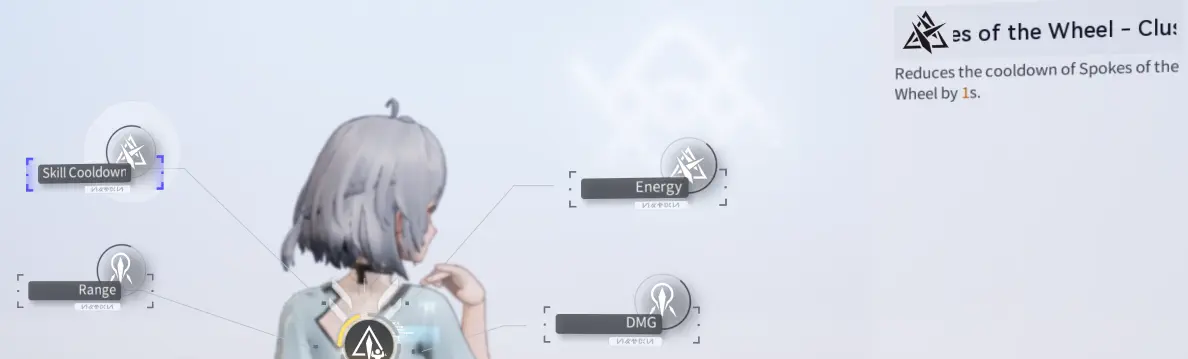
In this image, I’ve selected Acacia’s upper-left cluster. The symbol matches her Spokes of the Wheel Standard Skill. As you can see on the right, completing this cluster also grants a -1 second cooldown to Spokes of the Wheel.
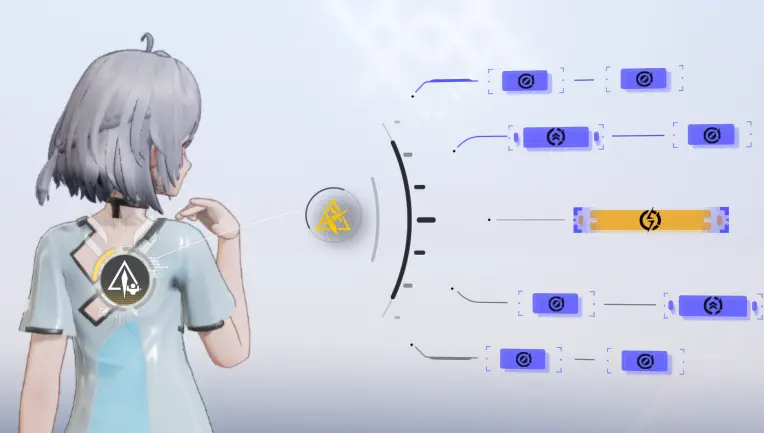
Tapping on a cluster brings up its sub-nodes. You’ll need to invest in each of these sub-nodes to unlock the capstone passive, which in this case is that sweet -1 second cooldown to Acacia’s Spokes of the Wheel. But it’s not just the capstone that’s important. Each of the minor nodes grants bonuses to its operative, such as an increased Alignment Index score or even increased skill levels, leading to more effective skills!
Note that once you select a Theotropic Cluster Channel to invest in, you cannot switch to another cluster until you’ve completed the current cluster.
Logistics
Logistics, unlike what the name would suggest, is not moving supplies around – it’s closer to any other game’s equipment system.
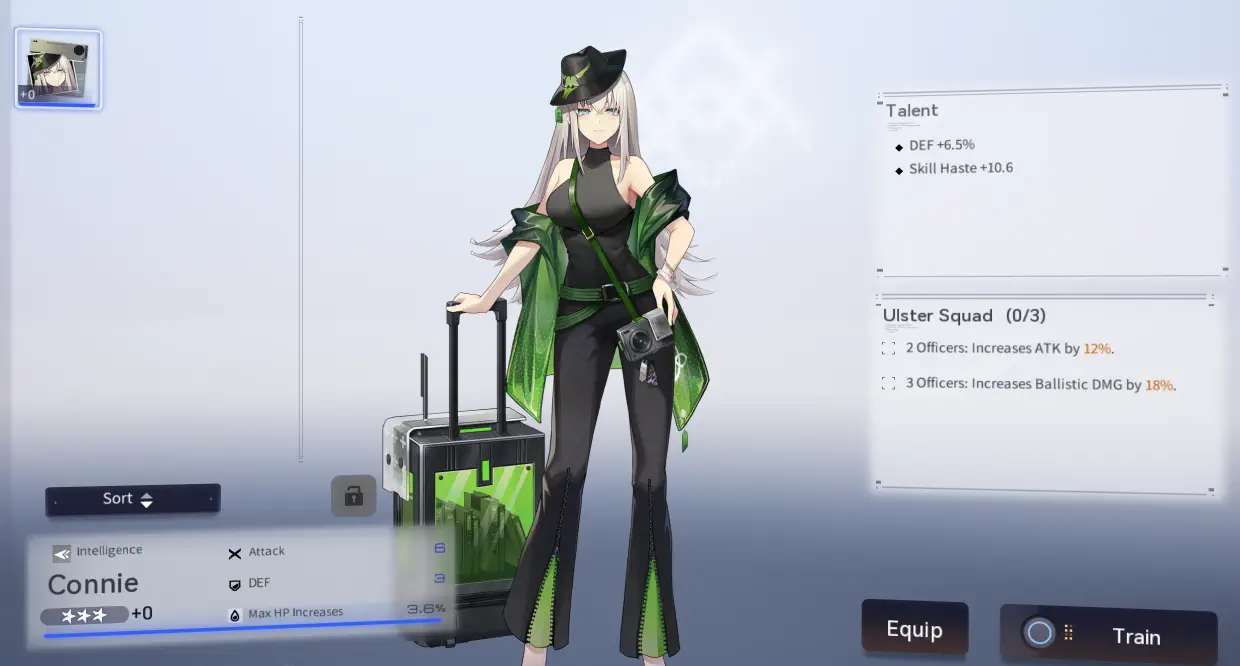
Each operative you have can equip up to three logistics officers. These officers impart very hefty stat bonuses, so keep your logistics slots filled. The rarer the logistics officer, the more stats it can boost and the more effective it will be at boosting those stats. Logistics officers can also be upgraded much in the same way as you level up your operatives, which will boost their stat bonuses even further.
As if this wasn’t enough, logistics officers of the same set also have a powerful set bonus, so pick logistics officers that best suit each of your operatives’ combat roles.
Weapon Upgrades
Remember when we talked about giving operatives new weapons? Those weapons can be further honed via equipment and modification to improve their efficiency.
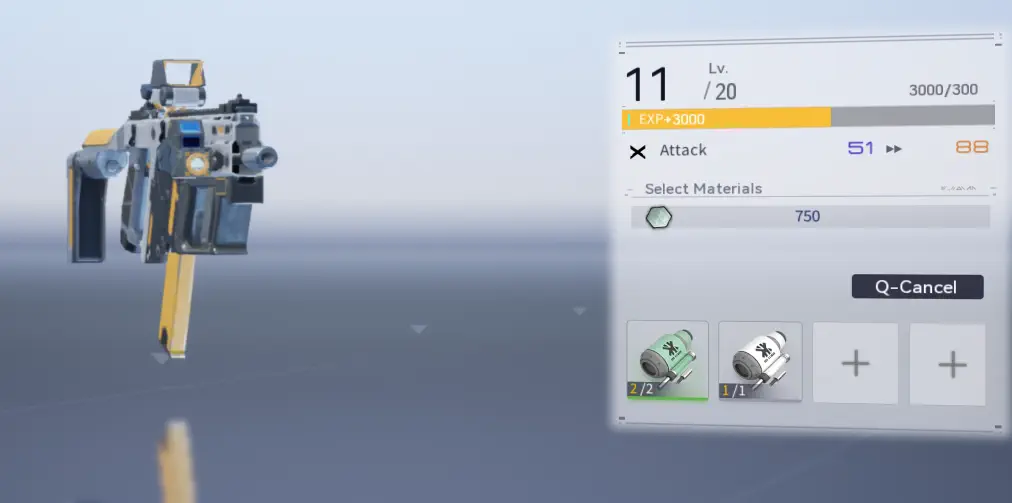
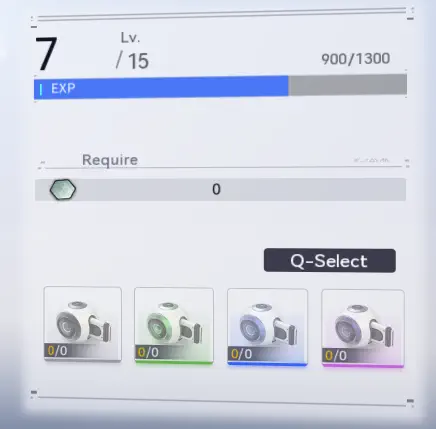
The easiest way to make weapons stronger is by leveling them up to raise their base attack power. As with operatives, it’s a small boost, but every bit counts. Weapon upgrade levels, just like operative levels, are tied to your account level.

Each weapon also has a unique skill, which is usually the main point of the weapon. Of special note are weapons that increase the damage output of a certain type. As an operative’s skills usually revolve around a single damage type (for example, Lyfe’s Wednesday form uses electrical damage while Fenny’s Lionheart form focuses on kinetic), it’s a good idea to match up your starting operatives with a weapon that boosts their skill’s damage type.
Weapon skills aren’t static, either. These skills can be enhanced via weapon modification. By feeding the weapon a duplicate of itself, you increase that weapon’s skill level.
Because of the various skills and damage types of weapons, it’s a good idea to diversify your armory so that you’ll be well-equipped to deal with foes that can mitigate different kinds of damage.
Trust Boosts
If Heimdall Force is to be an effective fighting unit, you’ll need to be able to work together. The more your operatives trust you, the stronger they become. To be precise, operatives gain 1% bonus damage per 10 trust levels they have.
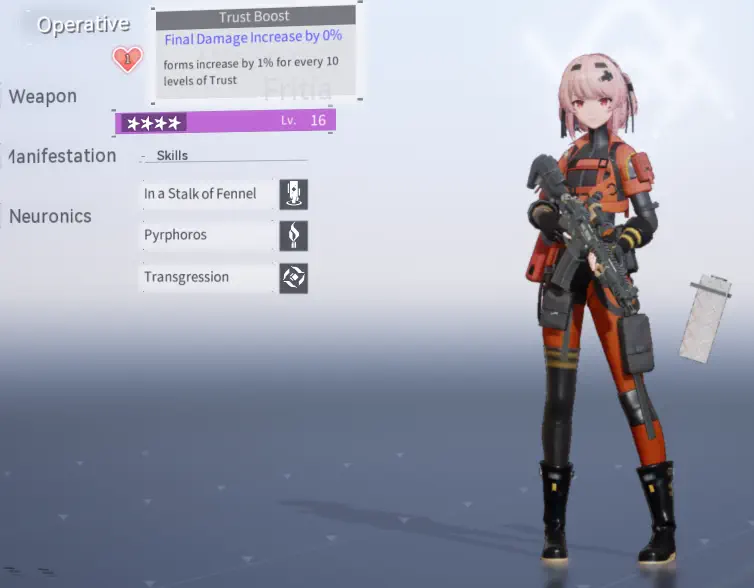
Trust is primarily gained via the Base system. At the Base, your operatives will be able to get some well-deserved downtime. You’ll also be able to interact with them and give them gifts to increase your relationship levels. You can also gain trust by bringing an operative into battle.
Manifestations
All gacha games have a way to make use of a character’s duplicates. In Snowbreak: Containment Zone, this is via the manifestation system.
Whenever you pull a duplicate of a character, you’ll instead get some of their extract. This extract can be poured into five manifestation passive skills that provide powerful augmentations to that operative’s skills – sort of like constellations in Genshin Impact or Eidolons in Honkai: Star Rail.
The catch here is that each manifestation skill requires multiple extracts to unlock. The passive skill won’t unlock until the skill is fully manifested, either. Fortunately, each time you stimulate a manifestation skill (which consumes 6 extract) the operative in question gets a minor stat boost, so it does add up.
One other thing you should be wary of is that manifestation skills must be unlocked in sequential order. You must unlock the 1st skill to start work on the 2nd and so on.
Sourcing Materials
The question remains – where do you get all the stuff you need for leveling and enhancing your characters? There are a lot of resources in the game. All you need to do is know where to look, but here’s a quick list anyway.
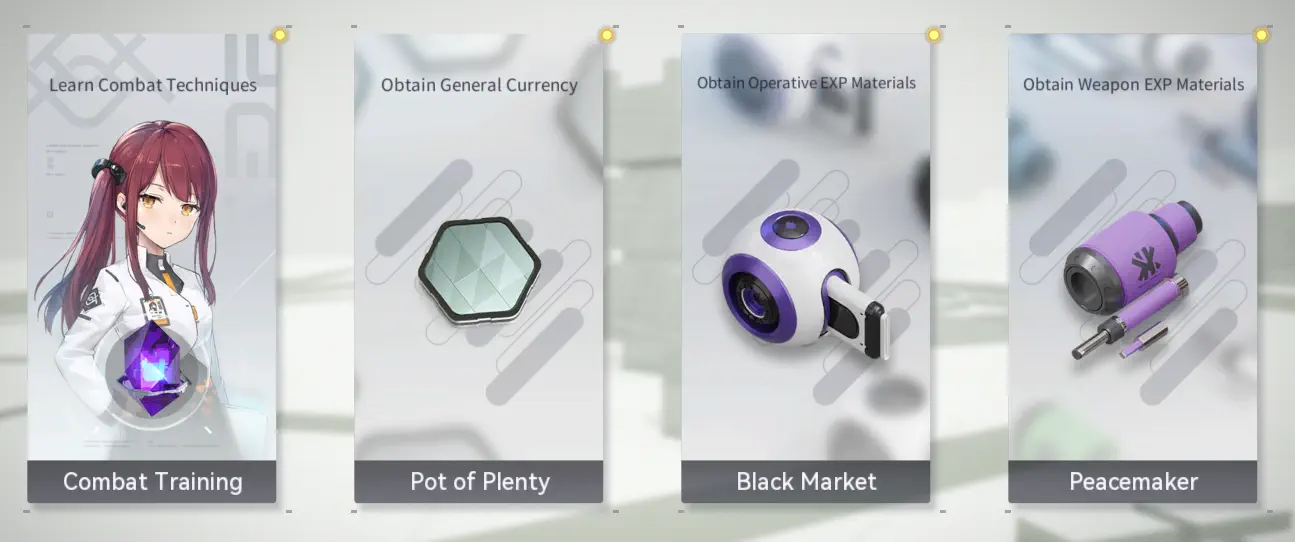
- Operations allow you to grind for most growth items – SilverBucks, combat records, weapon experience items and ascension materials, Fiber Axons for Neuronics, logistics items, and so on.
- Your daily and target missions and story achievements can be found by tapping on “Tasks” in the main menu. Completing all daily missions nets you 50 DigiCash – premium currency, in other words.
- You can get a small amount of materials by clearing stages.
- You get up to 3 clear marks per stage if you completed all its objectives. These stars go toward your total rating for that chapter. The more clear marks you earn, the more rewards you can redeem. Note that this is a one-time thing.
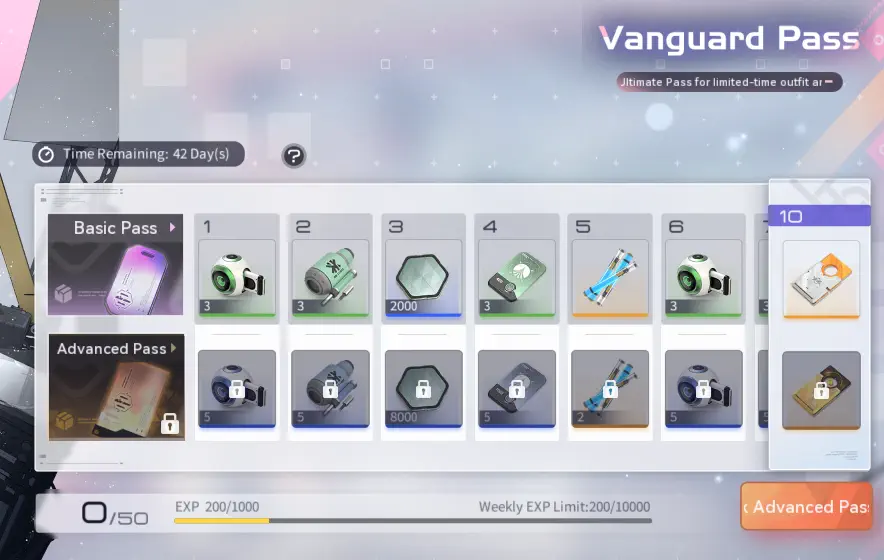
- Snowbreak: Containment Zone’s Vanguard Pass serves as the game’s battle pass. There’s both a free and a paid one, and you can access this screen by tapping “Vanguard Pass” in the main menu.
- New players get the SuperNova series of missions that challenges them to complete multiple tasks over one week. The SuperNova quest not only gives you a ton of resources but also hands out an orange-tier sniper rifle, Olympus, if you manage to fill the activity bar all the way.
- Character stories in the Personal File mode give out a small amount of extracts, great for giving your favorites a little extra boost.
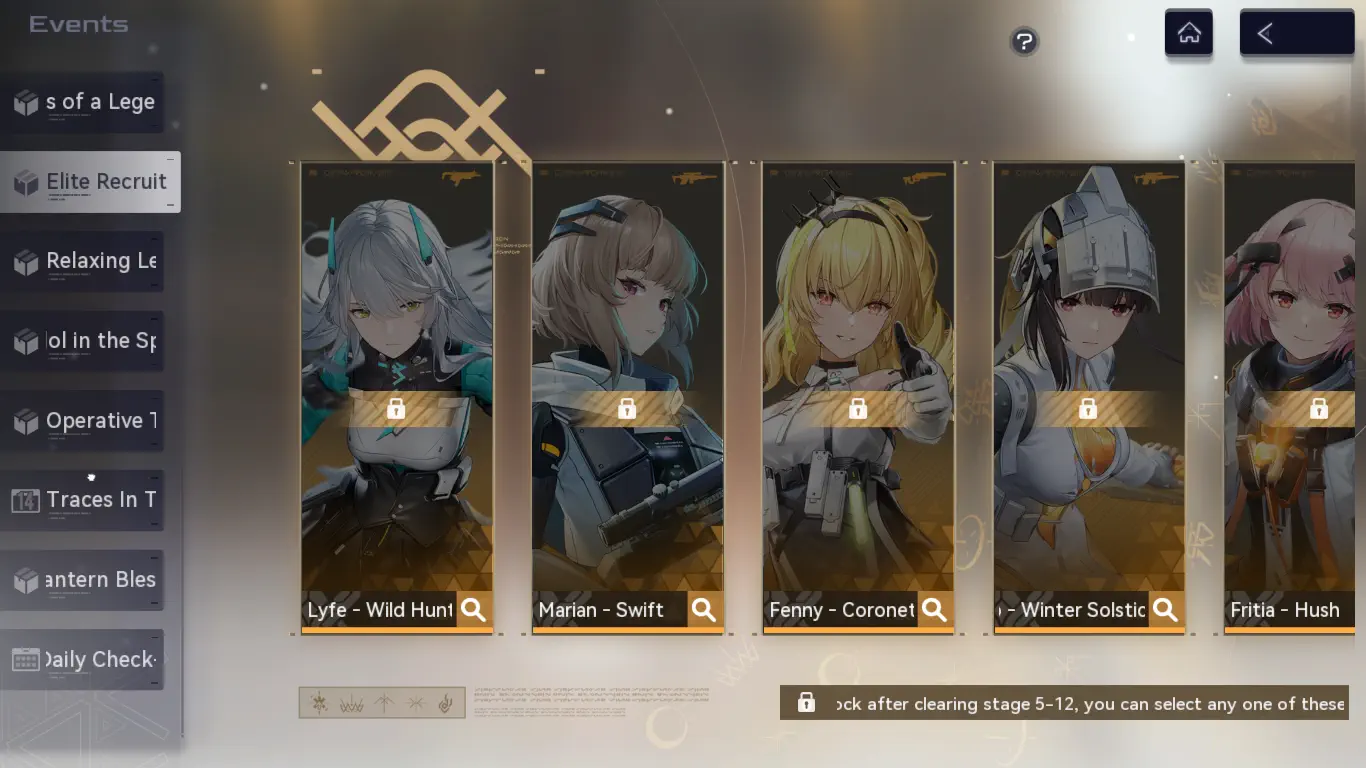
- Events tend to give out quite a bit of both free and earnable stuff. Always check the current events. On a side note, completing stage 5-12 as a beginner allows you to pick an orange-tier character from the standard banner to join you. Motivated yet?
- The shop (lower right of the main menu) has a variety of enhancement materials for sale that refreshes every day. You can even nab extracts from here, though it’s too irregular to be a stable source. As you unlock more game modes, be sure to visit the shop as it has multiple stores that accept different currencies!
Mastering Combat
Most everyone these days has played a shooter game, whether it’s an FPS or an over-the-shoulder TPS. The basics of modern combat are all here – reloading, aiming down sights, rolling, dashing, cover, mounting, and so on, and lots of players will be familiar with the basics. That said, some of these basics are revisited in Snowbreak: Containment Zone, so let’s go back to boot camp and review some of the things you’ll need to master to successfully weave in and out of combat.
Quick Tips:
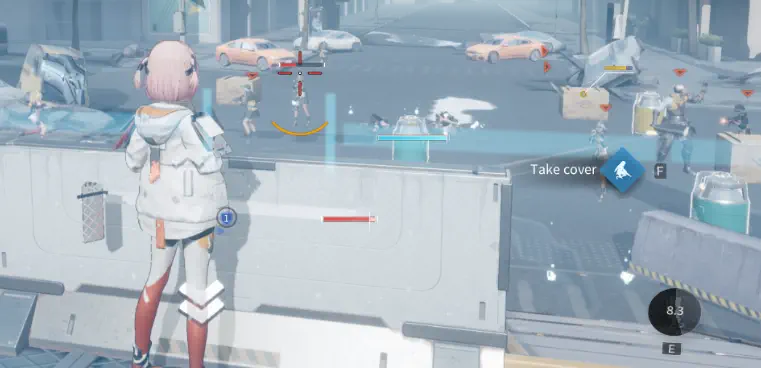
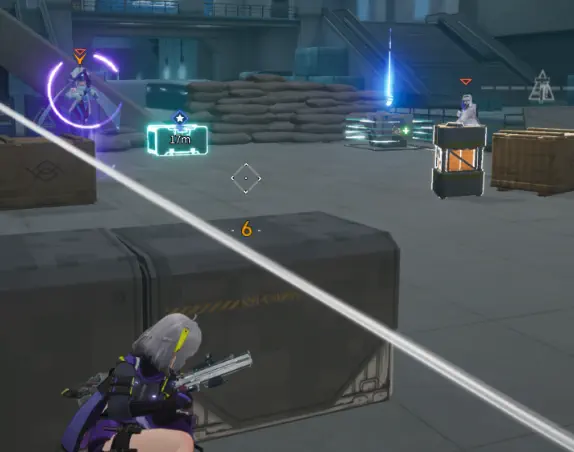
- Use cover to protect your advances and reduce the number of angles enemies can attack you from. Good cover is key to staying alive and minimizing the damage you take.
- If you can fight from high ground, do so. You get a better field of vision and force enemies to attack from more predictable angles.
- Be wary that enemies will use the same tactics against you, so pay attention to the stage’s layout!
- Always use stage elements and hazards to your advantage. Avoid taking positions that can hurt you in the long run – like hiding near an explosive barrel.
- You can use your dodge roll to both reposition and protect yourself. While in the dodge roll animation, you don’t have a hurtbox.
- Dodge rolls cost stamina. You can only dodge roll 3 times in a row before fully depleting your stamina.
- Enemies tend to flash before they launch their attack. The flash indicates the perfect time to dodge roll.
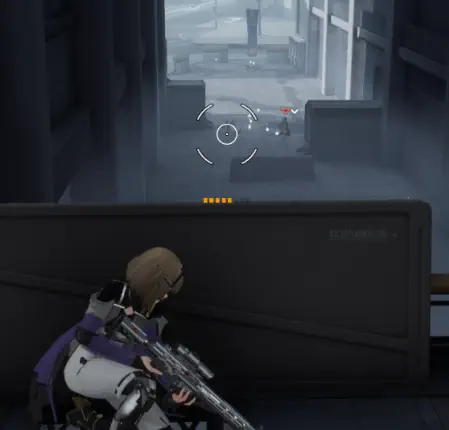
- Enemies have weak points that can be shot for critical damage. Critical damage numbers appear bigger and bolder than normal damage numbers.
- Some enemies have armor. Armor can consist of different types – frontal shields or expendable outer layers. Master each enemy’s armor type, take countermeasures, and remember that each of them has a weakness.
- Some enemies have white shield bars above their hp. They can’t take damage until these shields are broken. Ballistic damage is usually the go-to for taking these out.
- Especially tough armor can cause bullets to ricochet, deflecting them harmlessly. Enemies with this armor type are best damaged with strong, single-shot weapons like pistols, shotguns, and sniper rifles.
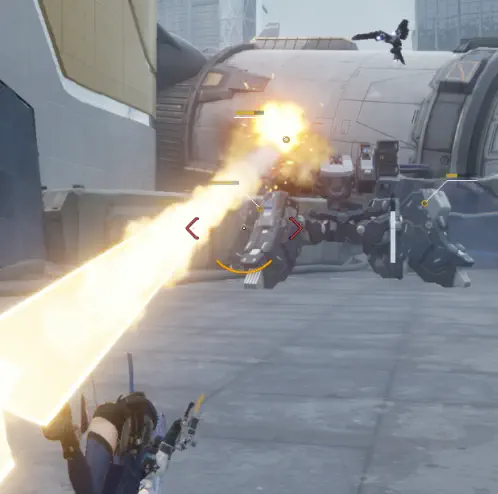
- Large foes like Titans have health bars on some of their body parts. Damaging these parts enough can cause them to break, stunning the enemy and taking out a large swathe of their health.
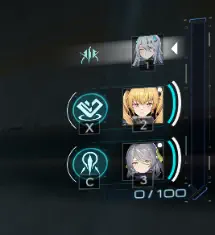
- You can freely switch between your three operatives. If their ultimate is ready, you can instantly use that ultimate and switch to that character.
- You can call in your allies’ support skills so long as they’re off cooldown and have enough S-Energy. Support skills are usually very powerful, so much so that you can build an operative purely as a support.
Optimal Positioning – Cover
Modern combat evolved into what it is due to the prominence of firearms, and you’ll need to take this into account in Snowbreak: Containment Zone. Nothing mucks an operation up worse than running straight down enemy lines and into an enemy enfilade!
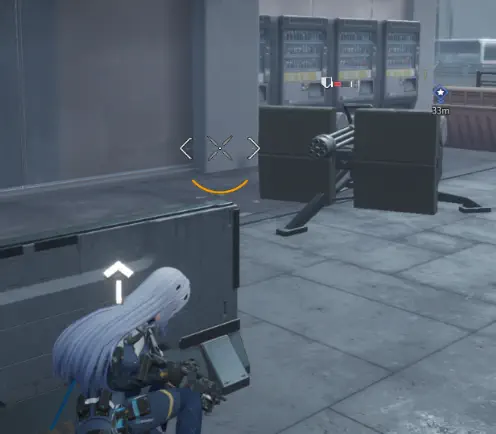
The most basic way to fight effectively in Snowbreak: Containment Zone is to utilize the numerous sources of cover in the game. Whether it’s a metal wall or a plastic traffic barricade, cover is very important as it vastly reduces the number of bullets that go into your operatives. While your operatives are very sturdy thanks to their Deiwos, it’s best to get into the habit of finding cover as early as possible since late-game enemies can and will chew you up.
However, cover doesn’t last forever. Almost anything that can be used as cover also has its own health bar, so keep an eye on that lest you find yourself bereft of protection at a critical moment. Some enemies, particularly melee ones, will also attempt to close the distance and force you out of cover, so watch out!
Optimal Positioning – High Ground
Another tactical advantage in shooter games is that of high ground. High ground not only affords you a larger field of view and a better position to snipe foes in cover due to your elevation but also funnels enemy attacks, making them easier to defend against especially if you’ve got cover on your side.
While high ground is rarely given to the player, make the most of it when it’s there as it will make your battles significantly easier.
Optimal Positioning – Enemy Positions
Just as you can take shelter from your enemy’s bullets and use high ground to make life easier, so too can they do the same to you.
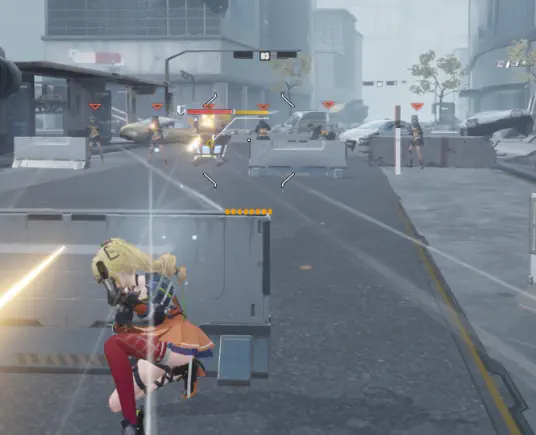
While most stages are linear, it’s always prudent to observe your environment and determine spots your opponents will try to attack from. See a bunch of sandbags or metal barricades? It’s very likely an ambush spot. Need to walk down a street with balconies on either side? You’ll be open to attack from multiple angles. A little foresight goes a long way in breaking fortifications, keeping your team alive, and completing the mission!
Situational Awareness
Taking cover and the high ground are good go-to strategies, but you also need to be able to adapt to combat situations on the fly.
Many stages have different hazards and stage elements in them that you’ll need to be aware of if you want to emerge victorious in combat. The most common ones you’ll see are the numerous exploding barrels lying around, because who cares about public safety in the apocalypse. Use these barrels to your advantage by blowing them up when enemies are crowded around them. At the same time, keep an open eye for these hazards as enemies can and will use these elements against you!
Maneuverability
There are two main maneuverability options in Snowbreak: Containment Zone. These are dashing and dodge rolling.
Dashing is simple – activate a dash and your operative moves faster for a while. It’s a simple tool, but infinitely versatile as you can use it to run to cover in a bad spot, close the distance for your short-ranged operatives, or even completely avoid powerful attacks with some fancy footwork.
Dodge rolls are for when everything goes to hell in Snowbreak: Containment Zone. These rolls are similar to those in the Soulsborne genre, meaning that during a roll, you are almost or fully invulnerable. Rolls also cover quite a good deal of distance, so you can use them to get out of a dangerous zone.
The better-timed a dodge roll is, the more effective it will be as its invincibility frames will overlap over more of an enemy’s attack animation. While you can memorize enemy attack patterns on your own, a good way to get started is to pay attention to the red glint that appears just before an attack starts – that’s your cue to get out of the way!
While both movement tools are very powerful, they’re limited by your stamina, which is indicated by the bar that appears beside your active character. You only have enough stamina to perform 3 dodge rolls in succession – after which you’ll be vulnerable and unable to dash, so use them wisely. Likewise, dashing too much can hamper your ability to dodge roll, though you’ll be happy to know that dashing out of combat uses no stamina. Use a mix of mobility tools and cover to keep your operatives alive and be ready to adapt to any combat situation.
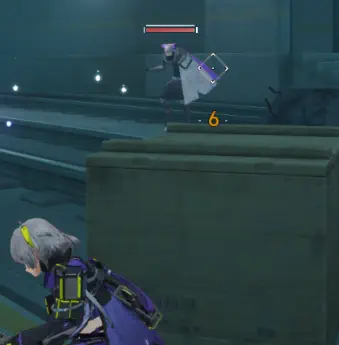
Weak Points and Critical Hits
The many foes in the containment zone share a single characteristic – they all have weak points that can be shot for critical damage. When you land a critical hit, the damage text will be bigger and “pop” more than usual. Focus your fire on these weak points to take your foes down faster and more efficiently.
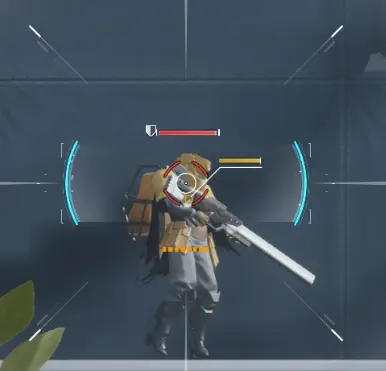
Different types of enemies have different weak points. Humanoid enemies, for example, are pretty much universally weak to headshots. Robots and Titans, on the other hand, will require more study.
Armor
Some enemies essentially require you to hit their weak points to do any damage at all to them. Said enemies are usually protected by powerful armor that makes them resistant to attacks.
Armor can take many forms. Sometimes it’s directional plating that reduces damage frontal damage, while for others, it’s breakable armor that flat-out reduces damage but breaks after a while. Pay attention to the tooltips that the game offers and remember how to counter each armor type.
Shields
On top of armor, some enemies can also have shields. These are denoted by a white bar above an enemy’s HP. While a shield is active, that enemy cannot take HP damage.
Shields can be taken down by normal gunfire, with ballistic damage usually being the most effective against it.
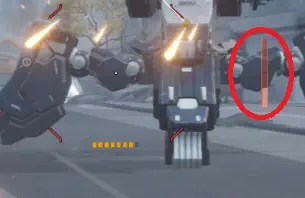
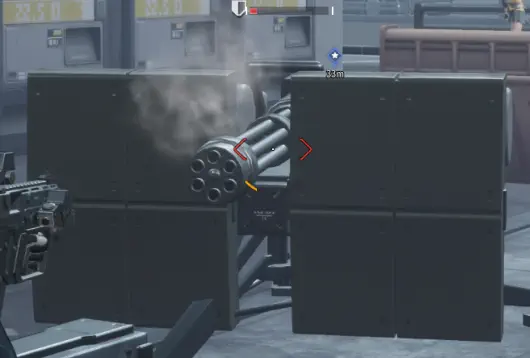
Ricochet
We have shields and frontal armor, but they can be subverted. Then there’s extremely heavy armor and ricochet…
Enemies with massive armor are denoted by a shield icon to the left of their health bar. This means that their plating is so tough that some of your bullets will ricochet, meaning that they’ll bounce harmlessly off and deal no damage!
Ricochets can be subverted by using higher-caliber bullets. In descending terms of armor piercing and subverting ricochet (meaning best to worst) the weapon types perform as follows:
- Sniper rifles -> shotguns -> pistols -> assault rifles -> submachine guns.
Always have a team member with heavy weapons at hand so you can easily take down armored foes, and don’t try to take down armored enemies with SMGs!
Break Points
On top of weak spots, some enemies (usually bosses or large foes) have separate health bars on their different components. Let’s call these break points.

When attacking a large foe, keep a close eye on separate health bars that appear in yellow. By depleting a part’s health, you can incapacitate a boss for a short while as well as deal a massive chunk of damage. Not bad, eh?
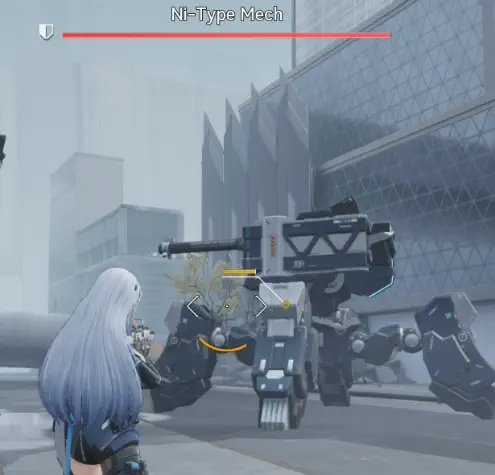
Each part of an enemy that you destroy hampers its ability to fight back, on top of the stun and damage. By shredding boss parts, you can deny them access to some of their moves, which makes the boss fight progressively easier. For example, the Ni-Mech at the end of chapter 1 can lose its main cannon and missile launcher if you hit them enough; doing so will force the mech to only use its guns and stomps to fight you.
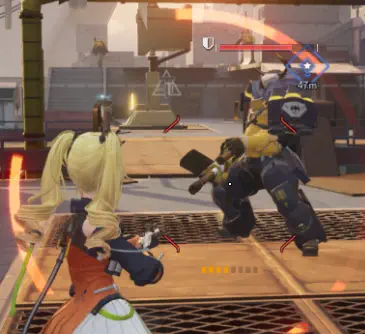
As One
None of your operatives have to go on missions alone. Each team is comprised of up to 3 members working in tandem that you can switch between during a mission. Thus, it’s important to build a team that complements their partners’ strengths and patches up their weaknesses.
Apart from different weapons and fighting styles, it’s also a good idea to have operatives with different damage types on your team. That way you don’t get walled by enemies with high resistance against your main damage type.
Even when operatives are in reserve, they’ll still accumulate U-Energy. When their ultimate is ready, you can trigger it even if they’re not your active character. This will both fire the ultimate and switch your active character to whoever used the ultimate. This move is more important than it seems as it can not only save your current character while performing a devastating counterattack but can also allow operatives to capitalize on their teammates’ setup skills!
Support Skills
Each operative also has a powerful support skill that allows them to contribute to the battle even if they aren’t on the field or if you don’t want to switch from your favorite.
Support skills are incredibly potent and versatile tools that differ from operative to operative. Some deal a lot of damage, others help you regain lost ground, while others hamper foes to give your lead hero the ideal conditions to shine. Because of the potency of support skills, building up an operative entirely for their support skill is perfectly viable. Your starter Lyfe – Wednesday is one such example, as her support skill inflicts a lengthy paralysis effect on top of decent damage, making her an excellent bunker buster!
You can’t just keep calling in support, though. Remember that Support Skills also consume S-Energy, so you’ll need to decide whether you need someone’s support skill or would rather switch in and use their Standard Skill. To help you make your decision, you can see an operative’s S-Energy and U-Energy as a white and blue bar (respectively) beside their portrait.
Gaming the Gacha System
The last basic lesson any new player needs to learn is how to navigate their chosen game’s gacha system. This includes understanding not only where to get specific characters or weapons but also how the game’s pity system works.
Quick Tips:
- BitGold is premium currency in its rawest form. It’s used to buy things in the shop like premium membership, skins, the paid battle pass, and so on. BitGold can also be converted to DigiCash to be used in gacha. You cannot convert DigiCash into BitGold.
- DigiCash is premium currency used to pull in gacha. It’s not used for anything else – you need BitGold for that.
- You get numerous chits, tickets, and permits from newbie rewards and events. Each banner uses a specific type of ticket.
- It’s good practice to not convert your DigiCash into tickets except via the banner page directly, and only when you’re pulling. That way you don’t accidentally buy the wrong type of ticket.
- Character banners have hard pity at 80 pulls, and weapon banners have hard pity at 60 pulls. You get 3-star weapons in any banner, but you must pull on weapon banners to get purple and orange-tier weapons.
- The Battle Assembly is a special newbie banner. You get a guaranteed orange-tier within 50 pulls, so it’s a good idea to spend your newbie rewards here.
- If the first orange-tier pull on a limited banner isn’t the featured character/weapon, the next orange-tier pull is guaranteed to be the featured character/weapon.
- Pity is restricted only to its own banner.
- Pity in limited banners does carry over to further limited banners.
- Pulling weapons in any banner gives you Reward Codes and Rationing Codes that can be exchanged at the shop. Getting weapons from weapon banners gives more codes.
BitGold Versus DigiCash
There are two premium currencies in Snowbreak: Containment Zone. These are BitGold and DigiCash, respectively. To help preserve your wallet, let’s clarify both of these currencies.

BitGold is the base formof premium currency. When you top-up your account with real-life money, your account will be credited with BitGold. BitGold can be converted to DigiCash that will let you pull in the gacha (note that DigiCash cannot be converted back into BitGold); however, BitGold can also be spent as-is on certain items, such as skins, special item packs, the Vanguard Pass, premium membership, and so on. If you are topping up to buy anything that is not gacha rolls, DO NOT CONVERT YOUR BITGOLD TO DIGICASH.
DigiCash, on the other hand, refers to those purple crystals you’ve been earning from doing missions and clearing stages. DigiCash has no other use other than as gacha currency.
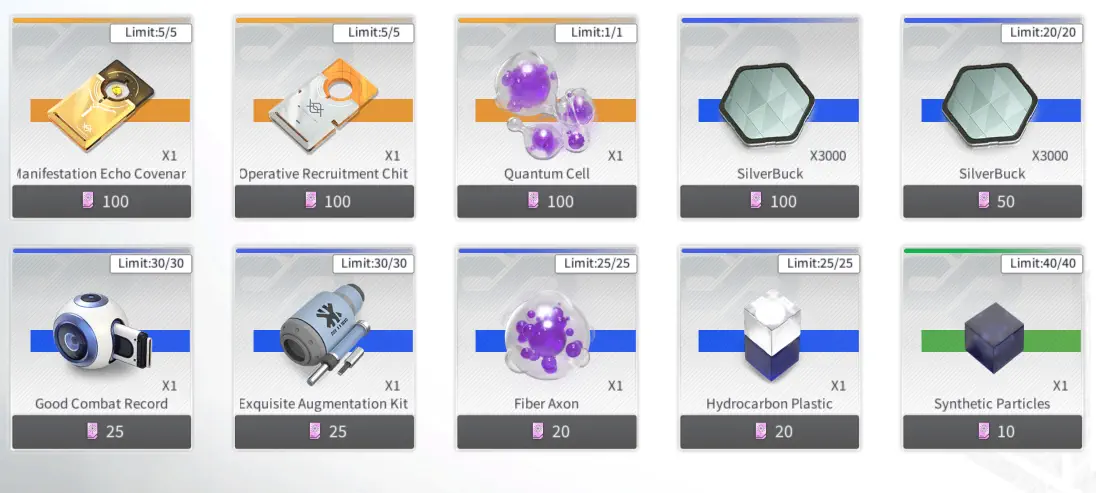
Chits, Permits, Tickets
Apart from BitGold and DigiCash, there are multiple ticket types in Snowbreak: Containment Zone. While it’s good practice to never turn in your DigiCash for tickets until you’re pulling on the banner, you get quite a bit of tickets from events and newbie missions.
The different tickets and what they can be used for are:
- Operative Recruitment Chits can only be used on Duty’s Command (standard character banner) and Battle Assembly (newbie character banner).
- Weapons Permits can only be used on Hearth of Midgard (standard weapon banner).
- Manifestation Echo Covenants can only be used on limited character banners.
- Weapon Modding Agreements can only be used on limited weapon banners.
Banners
Now, to the banners. Snowbreak: Containment Zone has two types of banners: limited and permanent.
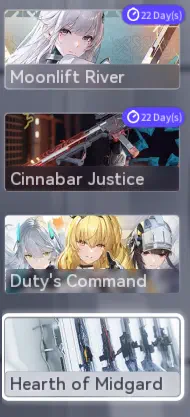
The permanent banners are Duty’s Command for charactersand Hearth of Midgard for weapons. These banners are always available for players to pull on, providing a reliable source of operatives and guns if you don’t care for the limited character or weapon. Note that blue-tier pulls on any banner are always weapons, and you can only get purple or orange-tier weapons via weapon banners.
Both of these banners have a pity system – 80 pulls on Duty’s Command guarantees an orange-tier operative, while Hearth of Midgard hits hard pity at 60 pulls. You’re also guaranteed at least a purple-tier pull every 10 pulls, so that’s nice.
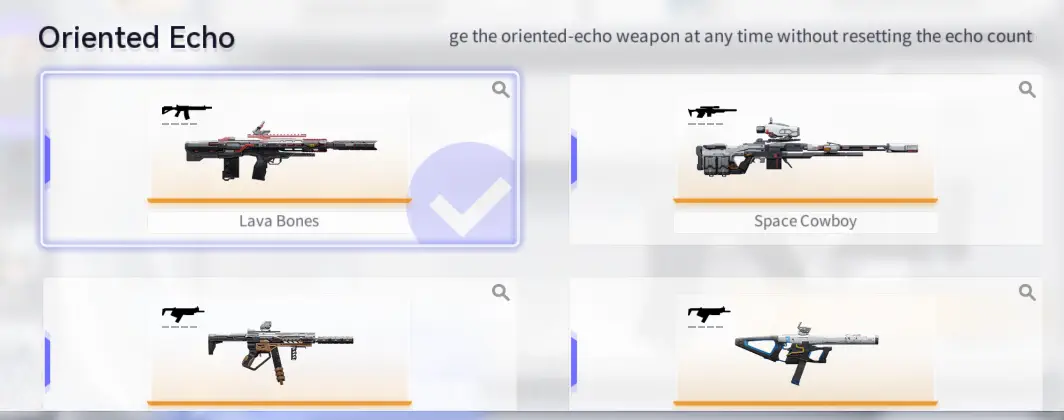
The Hearth of Midgard has an additional Oriented Echo system. You can select an orange-tier weapon available in the banner; when you pull an orange-tier weapon, there’s a 50% chance that it will be the weapon you chose. In addition, if it’s not the weapon you chose, the next orange-tier is guaranteed to be your selected weapon. Not a perfect system, but it works.

Limited character banners work much in the same way as the standard – they have a hard pity system at 80 pulls and have the “1 purple per 10 pull” guarantee. Where they differ is in the featured characters. If you pull an orange-tier or purple-tier character in a limited character banner, there’s a 50% chance that operative will be the featured character(s). In addition, if your orange-tier character isn’t the featured character, the next orange-tier character is guaranteed to be the featured SSR. The ultimate takeaway from all this? Save for 160 pulls if you really want a featured character.
The same mechanic extends to the limited weapon banner, although just like the standard weapon banner, you hit hard pity at 60. Orange-tier pulls have a 50% chance to be the featured weapon, but if you fail to get it, the next orange-tier is guaranteed to be the featured weapon.
Battle Assembly
The Battle Assembly is a special banner that’s only available to beginners.
This banner has some special conditions that make it excellent for new players. First off, it has a 20% discount, meaning you get 10 pulls for the price of 8 – though you can only pull in batches of 10. Secondly, you can only pull on this banner 50 times in total. Third, each 10 rolls guarantees at least one purple-tier operative, and you are guaranteed at least one orange-tier operative within those 50 rolls. Make full use of your operator chits and starting DigiCash and pray you get the orange-tier character you want – though all of them are pretty good.
Does Pity Carry Over?
Yes, but with some caveats.
Pity is bound to each banner. Pulling on the Duty’s Command banner does not count as pity for a limited character banner.
However, pulling on a limited banner does accumulate pity for future limited character banners, and the same thing applies to the limited weapon banner.
Note that Battle Assembly’s pity pool is exclusive to itself!
Consolation Prizes
Even if you don’t always get what you want from gacha – and trust me, you will rarely get exactly what you want – you don’t have to walk away empty-handed. Each weapon you pull in the gacha yields either Reward Code (orange) or Rationing Code (purple) that you can trade for some stuff at the code shop.
The number of codes you get depends on the banner. The Duty’s Command and Battle Assembly banners give 15 Rationing Codes per blue-tier item, while getting blue-tiers in any weapon banner gives 25 Rationing Codes. Purple-tier weapons (again, only from dedicated weapon banners) yield 5 Reward Codes, and if you’re lucky enough to get an orange-tier weapon, you get a whopping 25 Reward Codes!
Take It All Back!
The battle to take back civilization won’t be decided in a single decisive skirmish. It’s a long war with unlikely allies and vicious enemies on all sides. At times, it may feel like a hopeless struggle. But remember – each victory brings us one step closer to solving the mystery of the Titans, cleansing the Titagen snow, and reclaiming our world.
That concludes my beginner’s guide to Snowbreak: Containment Zone and I hope I was able to help you understand the game better and set the stage for your future adventures. If you have any suggestions on how to improve this guide or would like to share any of your personal tips and tricks, make yourself heard in the comment section below!
Wayne
Friday 26th of July 2024
Just wanted to say this guide was fire!! I'm brand new to gacha games and loading this up for the first time with all the different currencies and like a million things popping up on the screen one after another I was beyond overwhelmed lol. Getting to grips with it now though in large part thanks to your guide. Love the gameplay in this game and the waifus don't hurt either ;)
Cheers!