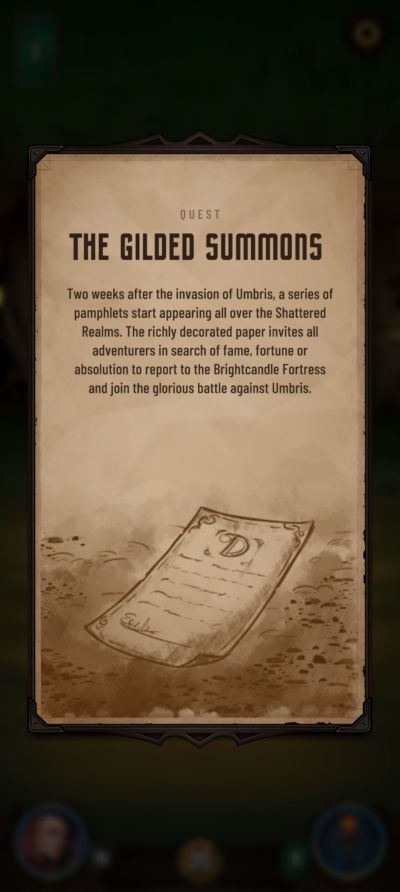
The demons of darkness have once again awoken. Evil rears its huge, ugly head, and again, heroes are summoned to answer the call of bravery, of nobility, of honor. How? Why, by playing card games with evil, of course!
Dawncaster is a roguelike deckbuilding RPG from Wanderlost Interactive, much in the vein of games like Slay the Spire, Roguebook, or Rogue Adventure. In Dawncaster, you take the role of a new hero answering the summons to fight against the forces of darkness.
Dawncaster is a singleplayer, paid game. Therefore, there are no pay-to-win microtransactions present in the game, nor are there leaderboards or PVP. If you like the base game enough, you can also avail of yourself of the DLCs, of which there are two.
The roguelike deckbuilding genre is a toughie, and there’s no way to guarantee certain victory every run. But, as they say, knowledge is power – and if you’re new to the genre, or to Dawncaster, here’s a rundown of things you might have wished you had known before starting the game!
Gameplay Basics
Before we get into the meat of the game, we’ll need to tackle some basics. Cards, character stats, and so on.
Gameplay Flow
The basic gameplay of Dawncaster is simple – pick one of three cards and resolve it.
That doesn’t sound very engaging, does it? But each card that you choose can bring you closer to victory or death. These cards come from the event deck, which has a certain number of monsters, random events, NPCs, and rest stops, and you can keep drawing from this deck until you’re done with the area or there are no more cards left. Cards from the event deck can contain monsters, shrines, campfires to rest at, random events, or NPCs.
Progression is simple, too. All you need to do in each area is defeat the chapter’s boss. Once that’s done, you’ll be asked if you want to immediately jump to the next chapter, or linger some more to clear up the rest of the event deck. For reference, there are 9 chapters in the game, including the ones where you just muck about in town.
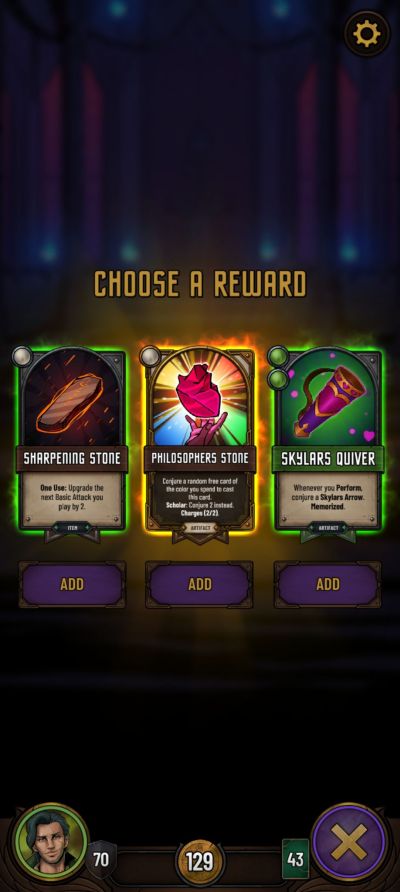
Combat (which we’ll talk about in depth later) is the most common event card there is. As this is an RPG, you’ll accumulate both experience points and gold for successfully vanquishing your foes. Oh, and you get a choice of 3 cards each time you win.
Stats and Energy
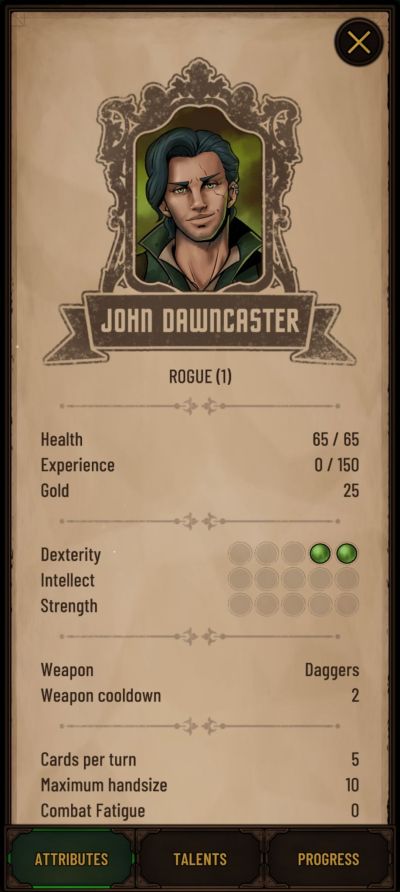
Each character has their own spread of two starting stats, which are Strength, Intellect, and Dexterity. You can view your stats via character sheet by tapping on your portrait at the lower left of the screen.
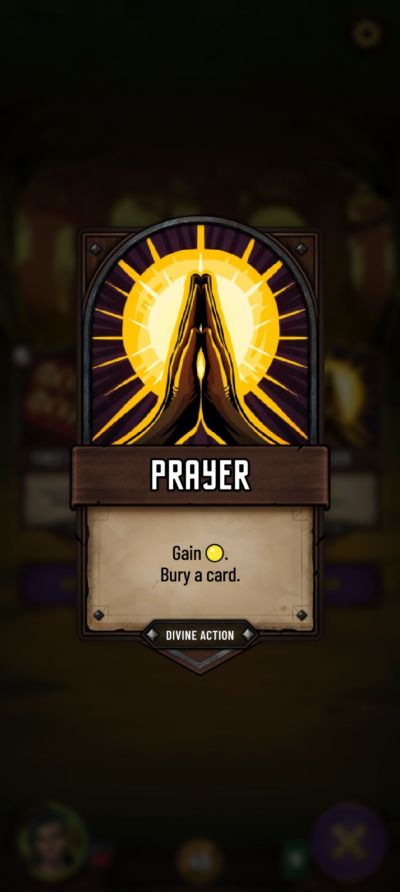
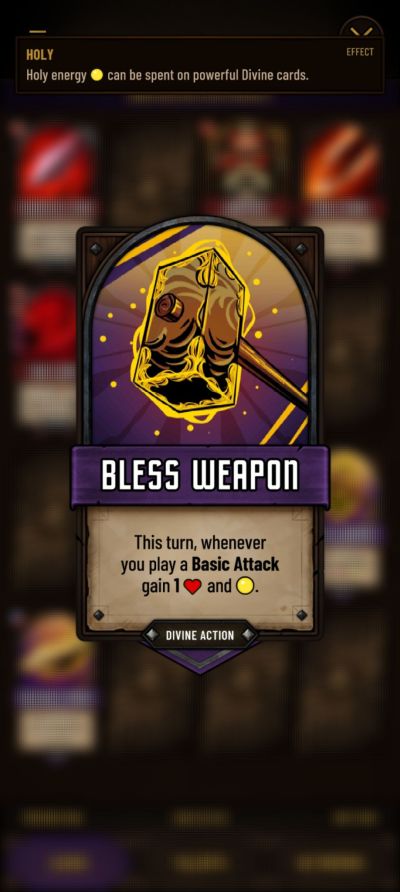
For each point in these stats that a character has, they gain one point of the appropriate energy at the start of the turn. Strength yields red energy, intellect gives blue, and dexterity gives green. There is a fourth type of energy, which is yellow divine energy. This type of energy isn’t dependent on your stats, and can only be acquired through special means.
One very important thing to note about energy in Dawncaster is that any unspent energy at the end of your turn carries over to the next turn. However, you have an energy cap of 8 energy at the end of the turn – any more will be wasted. Because of this system, it’s very important to not play unnecessary cards. The extra energy you can pass to the next turn may very well be the determining factor in whether you win or lose. There’s no time limit when taking your turn, so feel free to plan your moves!
Luck and Fatigue
Apart from these 3 important stats, there are a bunch of other stats in your character sheet.
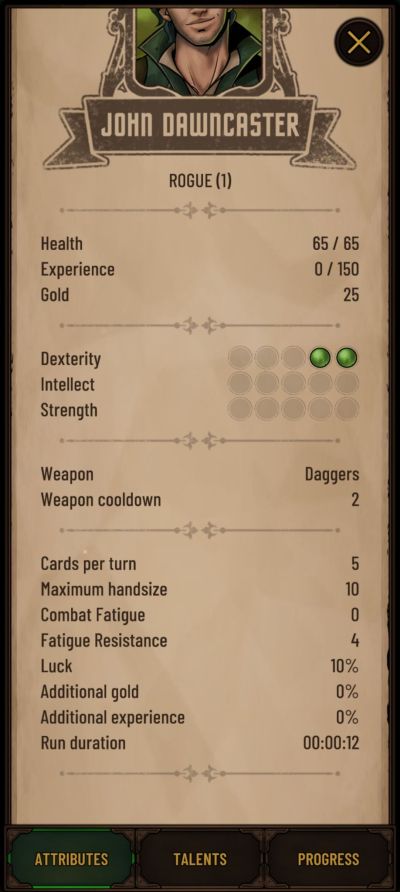
These stats show your miscellaneous numbers, like your maximum hand size. They’re not very important, with two exceptions: Luck, which is the chance of finding uncommon or rare cards, and Combat Fatigue and Fatigure Resistance, which are very important if you’re running small decks.
Each time you run out of cards in your deck, you automatically reshuffle all cards in your discard pile back into your deck and start anew. The number of times you can do this is actually limited by your Fatigue Resistance. If you’ve replenished your deck more times than your Fatigue Resistance, you’ll start taking damage every time you replenish your deck. It’s important to note that this damage only applies if you’re playing on Normal or higher difficulty.
Leveling Up
Dawncaster is a roguelike deck-building RPG. This means that you learn from your battles, and once you gain enough experience points, you level up!
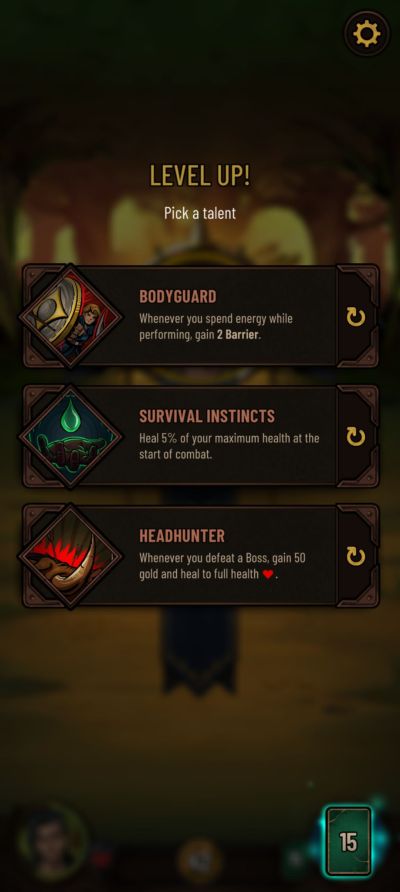
Level ups are very nice as they allow you to pick from one of three randomly-picked talents. These talents provide passive boosts to help you overcome your foes and build your deck. If you don’t like the talents on offer, you can reroll one of them, and you can do this up to two times.
Card Costs
If the fact that energy has colors didn’t clue you in yet, there are various costs associated with playing cards.
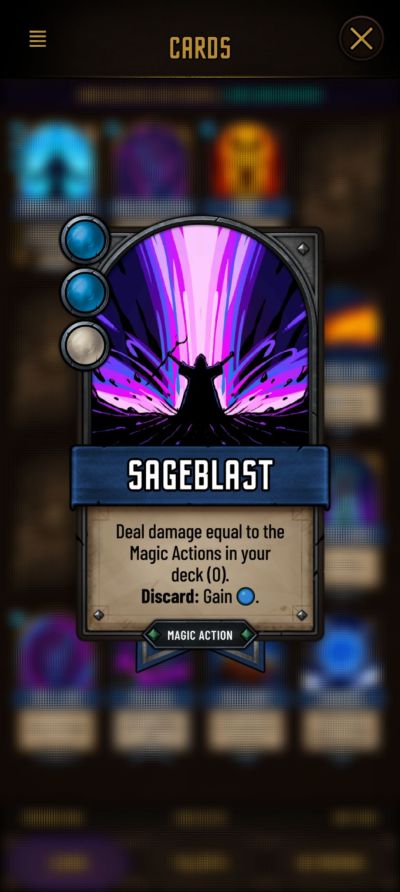
A card’s cost is listed in its upper left. The number of orbs a card has indicates how much energy it costs to play it, while the colors of those orbs show you what kind of energy you need to play it. Red orbs require strength, blue ones need intellect, and so on. If a card doesn’t have a cost in its upper left, it’s free to play!
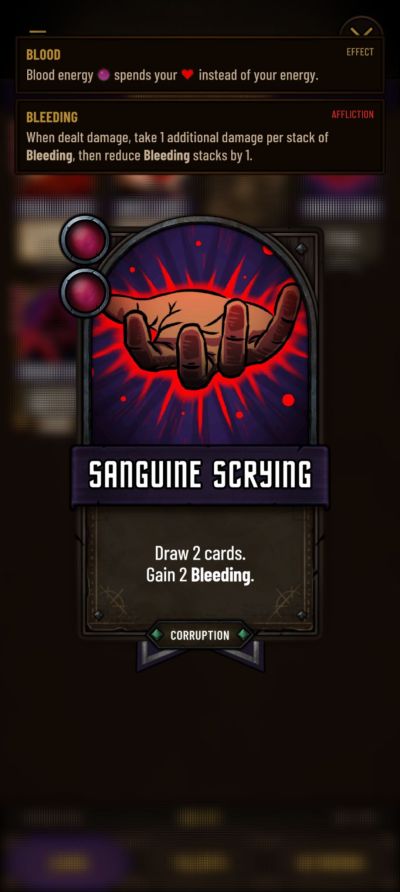
There are also white and dark red cost orbs. White orbs mean that you can pay any kind of energy, while dark red orbs don’t require energy – they have to be paid in blood, and they’ll do 1 damage to you per dark red orb on the card.

Finally, there are cards that have orbs with multiple colors. This means that the card can be paid by using either of those energy types. If you play such a card, you can drag it to the left or right of the screen to change what type of energy you want to pay.
Card Types
Cards have several classifications, which you can see at the bottom of the card itself.
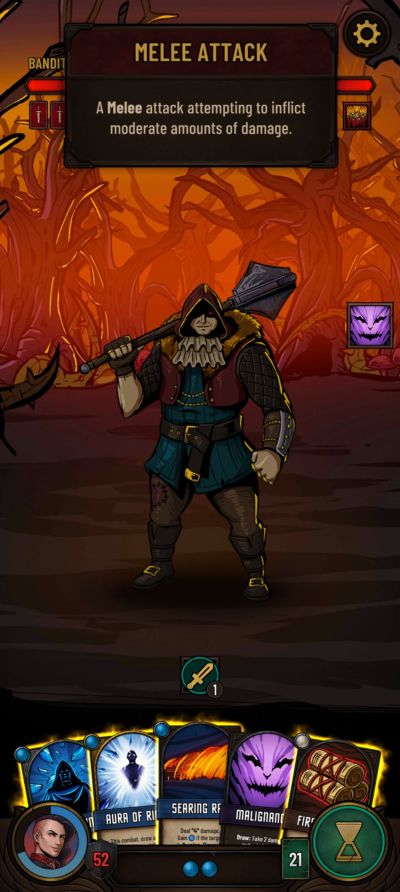
The most common types of cards are Actions. Actions are further subdivided into Melee, Ranged, or Magic Actions. There are also Actions that are non of these three types, so pay attention!

Enchantments are another card type. These cards usually carry a hefty cost, but when played, they give you a passive effect that lasts for the duration of combat!
Finally, there are Corruptions. There are both playable and unplayable corruptions. The playable ones, more often than not, offer power at a price. The unplayable ones are universally bad cards that eat up space in your deck and do bad things to you when you draw them.
Keywords
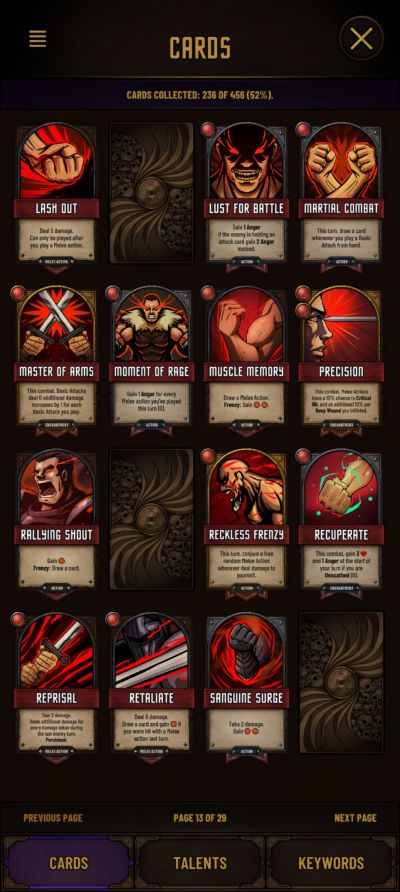
Of course Dawncaster has keywords. What card game doesn’t? As a side note, you can always tap on a card to read its reminder text. Alternately, you can also read up on keywords in the card collection menu.
For your reference, here’s a list of (most) Keywords in the game, as well as what they do.
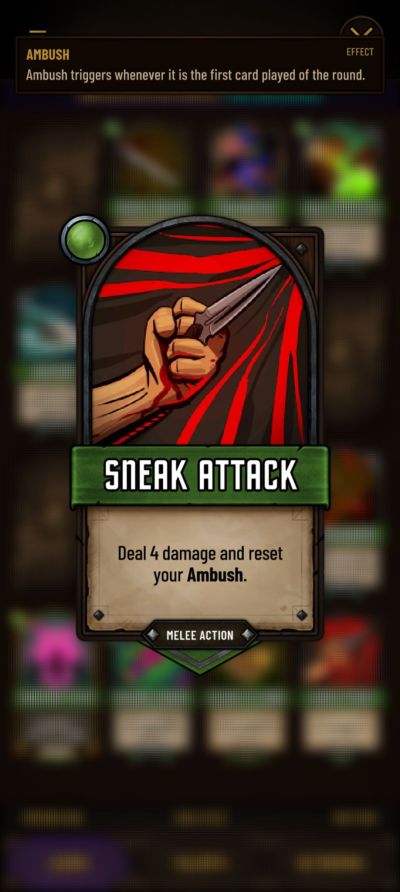
- Ambush: Ambush effects only activate if that’s the first card you played during your turn.
- Anger: Characters deal 1 extra damage per point of Anger they have.
- Armor: Characters take 1 less damage per point of Armor they have. Armor stacks vanish at the start of a character’s turn.
- Barrier: Characters take 1 less damage per point of Barrier they have. Barrier stacks do not vanish at the start of a character’s turn.
- Blessing: All buffs are Blessings. Enchantments are not Blessings.
- Bleeding: When attacked, a character takes 1 extra damage per stack of Bleeding they have, then reduce Bleeding stacks by 1.
- Brittle: When a character with Brittle is hit with a melee action, they take extra damage equal to the number of Brittle stacks they had, then they lose all Brittle Stacks.
- Burning: At the end of their turn, a character with Burning takes damage equal to the number of Burning stacks they have. Burning stacks don’t go away on their own.
- Bury: Buried cards are banished cards. Bury X banishes the top X cards from your deck.
- Cascade: A card’s Cascade effects activate if it’s played after a card that cost 1 more or 1 less energy than it.
- Charges: Each time a card with Charges is played, it loses one charge. When it has 0 charges, Bury it instead of discarding it.
- Charmed: If a character’s current health is less than the number of Charmed stacks they have, they automatically lose.
- Chain: All attacks deal bonus damage equal to the amount of Chain you currently have. If you take a non-offensive action, you lose all stacks of Chain.
- Conjure: Conjuring a card creates a temporary card that vanishes at the end of combat.
- Corrupted: A card’s Corrupted effects activate if you have at least 4 Corruptions in your deck, hand, or discard pile.
- Critical Hit: Critical hits deal double damage.
- Dazed: Each time a character with Dazed plays a card, they lose 1 stack of Dazed. At 0 stacks, the character becomes Stunned.
- Deep Wound: Enemies gain Bleed at the start of their turn based on the number of Deep Wound stacks they have. If they have 5 or more Deep Wound stacks, you automatically win.
- Delve: Delving presents you a choice of three cards.
- Echo: Activate the effects of this card again after it’s been played. Echo X essentially means getting X free copies of the card immediately after using its base version.
- Evasion: If a character would be hit with a melee attack, they take no damage and lose 1 stack of Evasion instead.
- Finale: A card’s Finale effects activate if it’s played while there are 2 or less cards in your hand, including itself.
- Flanking: A card’s Flanking effects activate if it’s played as the leftmost or rightmost card in your hand.
- Flow: A card’s Flow effects activate if you’ve already played 3 or more cards during that turn.
- Focus: Characters that have 5 or more stacks of Focus draw an extra card at the start of their turn.
- Foretell: Look at the top X cards of your deck and select one. The card you chose will be put on top of your deck, while the rest of the cards are placed at the bottom of the deck.
- Frenzy: A card’s Frenzy effects activate if you’ve taken damage during your turn.
- Frozen: Frozen characters deal 1 less damage per stack of Frozen they have. Each action they take reduces Frozen stacks by 1, and they lose all stacks at the end of their turn.
- Haste: The next X cards drawn cost 1 less energy. Each time this effect activates, lose 1 stack of Haste.
- Impervious: Characters with Impervious are immune to damage. Each time they would take damage, negate that damage, then remove 1 stack of Impervious.
- Interrupt: If an attack with Interrupt deals damage, the target loses all their energy.
- Jinx: Causes the next X actions taken by a character to have no effect. They still cost energy.
- Lifedrain: Character regains health equal to the damage inflicted by a card with Lifedrain.
- Memorized: Memorized cards are placed at the top of your deck when a battle starts.

- One Use: This card is removed from your deck permanently after being used.
- Perform: Do X performances. If a performance hasn’t been started, start a new one – you’ll be given a choice of a few performances, each with a number of required performance stacks. An effect activates once a performance is completed.
- Persistent: Persistent cards aren’t discarded at the end of your turn.
- Piercing: Piercing damage ignores any kind of damage mitigation or immunity.
- Pinned: When Pinned, you can only play the leftmost and rightmost cards in your hand.
- Poison: Characters with Poison take 1 damage any time they play a card, then they lose 1 stack of Poison. If a character with Poison would gain health, they gain 1 less health per stack of poison, then they lose an equivalent amount of Poison stacks.
- Regenerate: At the end of their turn, a character recovers health equal to the number of Regenerate stacks it has, then loses 1 stack.
- Reflect: When taking damage, return damage equal to the number of Reflect stacks you have, then reduce your Reflect stacks by that amount.
- Scholar: A card’s Scholar effect activates if you have 20 or more cards in your deck.
- Stun: Stunned characters cannot take any action.
- Unscathed: Unscathed means you haven’t taken any damage during your opponent’s turn. Doesn’t count the first turn.
- Unique: Unique cards can only be played once per combat.
- Valuable: You gain 50 extra points at the end of your run for each Valuable card in your deck.
Understand The Many Classes
There’s a lot of different classes in Dawncaster, and learning what each of them can do will help you pick a favorite class.
While it’s technically possible to play any card as any class with the right talents, it’s much easier to start as a character that inherently has an edge in playing stat-specific cards. Furthermore, each class has a very important option of a starting weapon and weapon power, which can define your build and serve as a powerful foundation for building a deck.
The Arcanist
The Arcanist is a master of magic who uses the arcane arts to rip enemies apart and protect themselves.
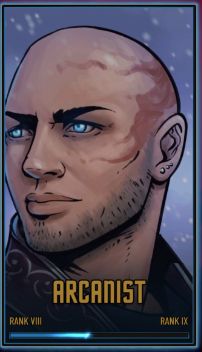
Arcanists start with 2 intellect, meaning they generate 2 blue energy on each of their turns. By default the Arcanist starts with the Forcewand weapon, which deals minor damage while increasing their Chain count. They also have a really nifty Weapon Power that can heal you for an amount equal to the Magic Actions in your deck – perfect for staying healthy in between fights.
The Hunter
The Hunter is a hardy survivalist who uses both might and guile to trump their foes.
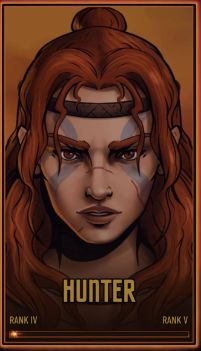
Hunters start with 1 Strength and 1 Dexterity, giving them a wider pool of cards to choose from at the cost of not being able to reliably play 2 energy cards – at least until they get more stats.
Hunters start with Hatchets – a nifty weapon that hits for 2 damage. The real beauty of hatchets comes from their Flanking effect, which triggers if they’re the left or rightmost card in your hand. When played as a Flanking cards, Hatchets hit twice!
Further compounding this is their default Weapon Power, which causes the enemy to start with bleeding stacks. Since the Hunter’s default loadout excels in multiple hits, they get a lot more mileage out of exploiting bleed.
The Knight
The Knight is a stalwart fighter who prefers to play defensively.
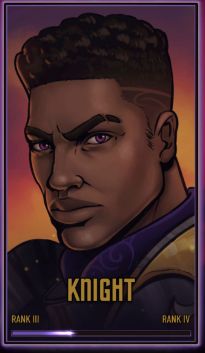
Like Hunters, Knights start with a hybrid of energy – in their case, it’s 1 Strength and 1 Intellect. This allows them to play strong melee attacks while dabbling in magic, and further levels allow them to specialize in either field.
Knights start with the Longsword weapon, which deals 2 damage and gives them 2 armor. Their basic Weapon Power allows them to enter battle prepared, gaining both focus stacks and armor at the beginning of combat.
The Rogue
The Rogue employs stealth and subterfuge to destroy their enemies quickly and effectively.
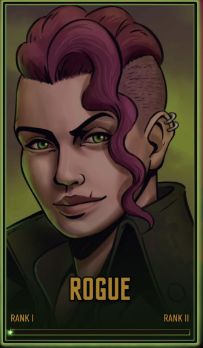
The Rogue starts with 2 Dexterity, giving them access to most of the green card pool off the bat. Their starting weapon is the Daggers, which by itself only deals 2 damage. The real beauty of the Daggers is if its Ambush effect is triggered: it deals base 5 damage AND scores a critical hit for a very impressive 10 damage!
The Rogue’s frontloaded approach to dealing damage is greatly augmented by their base Weapon Power, which has a low cooldown of 2 battles. This power both stuns an enemy at the start of combat and gives the Rogue a free potion!
The Seeker
The Seeker is a masterful archer who picks away at their foes from a distance.
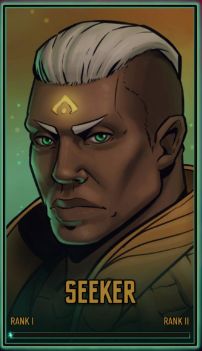
The Seeker begins with 1 Dexterity and 1 Intellect, which gives them access to both powerful offensive skills and useful magical debuffs while avoiding melee combat. Their default weapon, the Longbow, serves as both offense and defense, dealing 3 damage and giving them 1 Evasion if it’s played as an Ambush. Finally, their Weapon Power gives them 1 free arrow per level – to a maximum of 4 – at the start of combat, allowing them to enter battle with a bang.
The Warrior
The Warriors is a fearless combatant who takes a full-offense approach to battle.
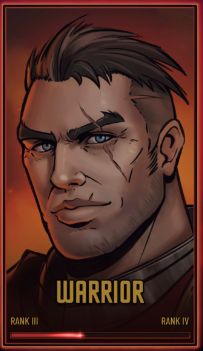
The Warrior starts with 2 Strength, making them fairly straightforward to play. What really sets the Warrior apart is their default weapon, the Warmace.
This tool is more expensive than other starting weapons – using 2 energy instead of 1 – but gives the Warrior a snowballing tool off the bat. When used, the Warmace deals 2 damage and inflicts brittle stacks equal to the amount of damage it dealt. This means that each normal attack softens up the foe while increasing the number of stacks it has. When the time is right, you can use a stronger and/or cheaper melee attack to deliver the coup de grace!
As the Warrior barely has any defensive tools, they have a Weapon Power to help keep them healthy. The Warrior’s default Weapon Power heals them for 1 HP per melee action in their deck.
The Scion
If you’ve ever played Path of Exile, the Scion works almost exactly like its namesake.
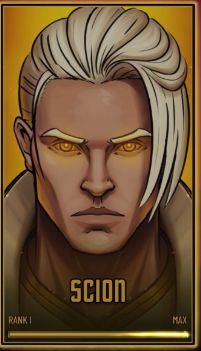
The Scion is a unique character in that they can select any starting weapon, card, and weapon power that you’ve unlocked for another class. This gives the Scion incredible freedom in creating builds. The downside here is that the Scion cannot ever gain mastery.
Wait, mastery?
Mastery
Yes, mastery.
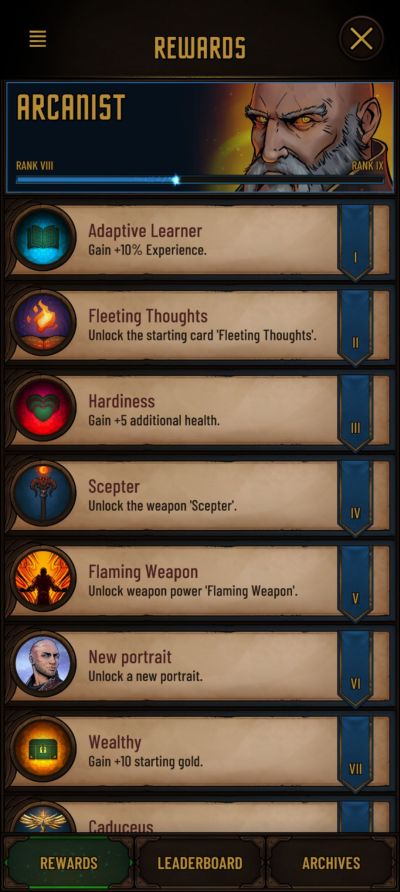
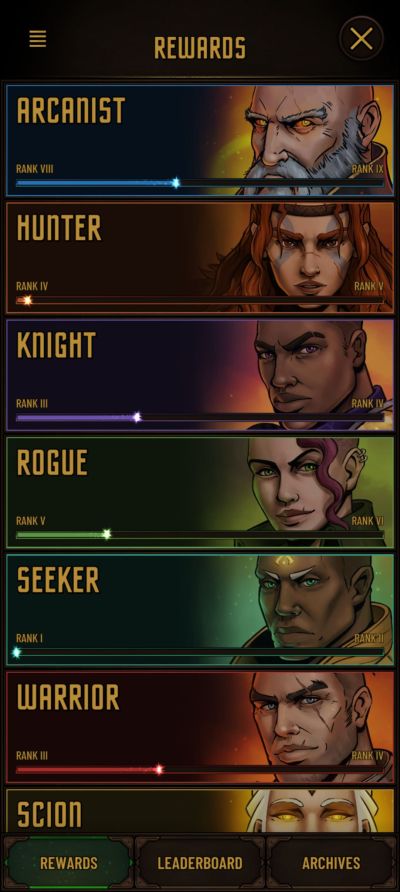
Each time you complete a run with a class (and yes, dying counts as completing a run), you gain experience points for that class, and each time a class levels up, you unlock something neat for it. Sometimes you just get cosmetics in the form of new portraits, which is nifty. But sometimes, you unlock passive boosts for that class, ranging from more health and starting money to new starting weapons and even new Weapon Powers!
Deckbuilding And You
Your deck is your cache of weaponry, spells, and tools that you’ll draw on in combat to vanquish your foes. There are no hard and fast rules when it comes to building decks in deckbuilder roguelikes, but there are a few things you should be aware of.
Starter Decks
The deck you start with is determined by your choices before beginning a run. It will always consist of a few basic weapon attacks (of the weapon you chose), two Blocks, a few Surges of whatever stats your character has, and one copy of the starter card that you chose.
Deck Size
There’s no upper limit to the number of cards you can put in your deck. As you gain cards from clearing battles and from shops and events, your card total can stack up very quickly!
I strongly advise careful consideration before putting a card in your deck. While a large deck may be nice to have, if you don’t have a way to add the cards you need to your hand, you run the risk of bricking yourself and dying because you never drew the cards you needed. Cards like Clarity (1 blue energy, search for a card in your deck, then Scholar: gain 1 blue energy) are pretty much a necessity for running fat decks.
On the other hand, a smaller deck is more consistent, but is much more valuable to disruption and enemies that add cards to your deck – and yes, there’s a sizeable amount of those. A thin deck also runs the very real risk of killing itself via Fatigue.
Weigh the pros and cons of adding each card into your deck before you make a decision. At the same time, most starter decks (except the Warrior and Rogue) have the punch necessary to really get them going. Don’t hesitate to take cards that you believe will help you in your current situation either.
If you don’t want to take a card from an event or battle, you can always skip by tapping the X button on the lower right of the screen. You can also check your deck at any time by tapping the card icon beside the lower right icon. Just be careful not to hit the end turn button when you’re in combat!
Campfires
Each area has a few campfires in it.
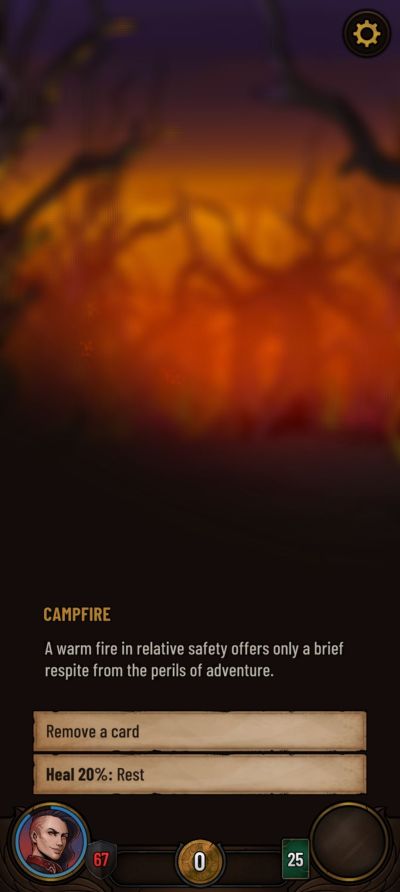
These campfires are very important as they give you two choices: either resting and recovering 20% of your maximum health, or removing a card. Both are powerful tools that you shouldn’t underestimate – especially if you’re dealing with enemies that like to put Corruptions in your deck, or if you put those in yourself.
Upgrading Cards
Cards that deal damage can also be upgraded.
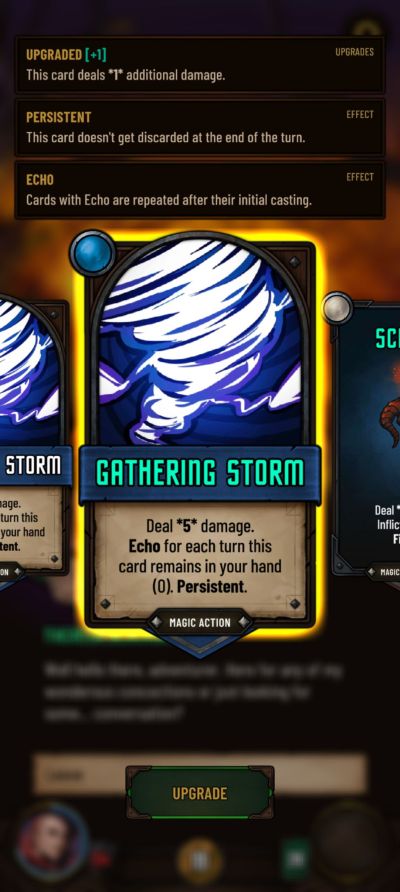
Whenever a card is upgraded, its damage is increased by one. Most cards will scale linearly with this, but some, such as Daggers, get a lot more mileage out of upgrades due to their secondary damage effects.
Note that there are also very rare cards that can be upgraded even if they don’t do damage. Those cards will have their upgrade effects listed in their card text.
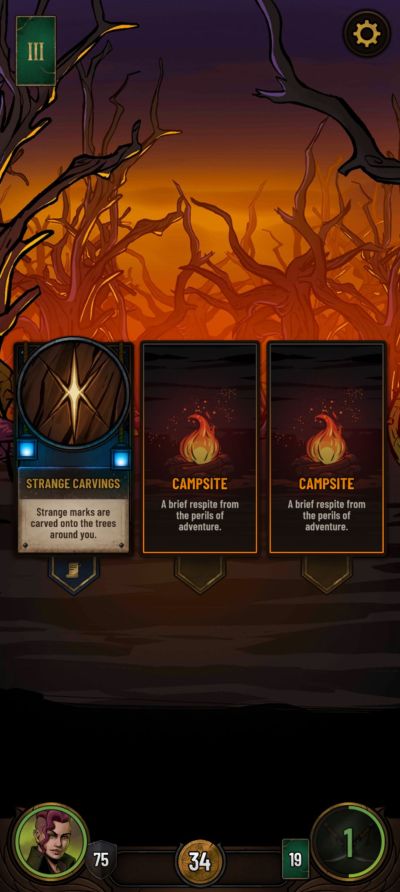
Shrines
You can encounter shrines as event cards. These monuments often provide helpful additions to your deck in the form of powerful upgrades.
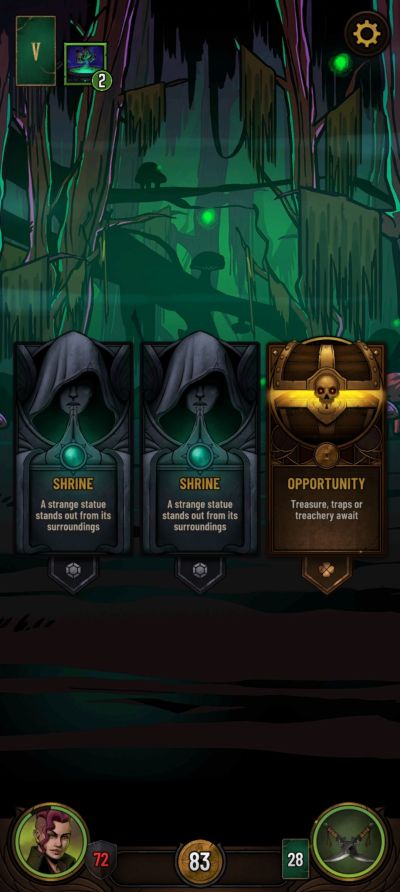
Shrines have a lot of effects, from sacrificing one card to upgrade all cards of that type, to adding keywords to your cards, or even messing up your deck beyond all salvation. You can inspect a shrine to get a detailed description of what it does. Just be careful though: once you decide to use a shrine, there are no takebacks!
Understanding Combat
Now that you’re armed with information with what your abilities are and what deckbuilding options you have, it’s time to take this to the actual field.
Turn Flow
When battle starts, you go first by default. You’ll draw 5 cards by default, gain energy equal to your stats and resolve other effects, and then you can play any of those cards from your hand. To end your turn, tap the hourglass icon on the lower right.
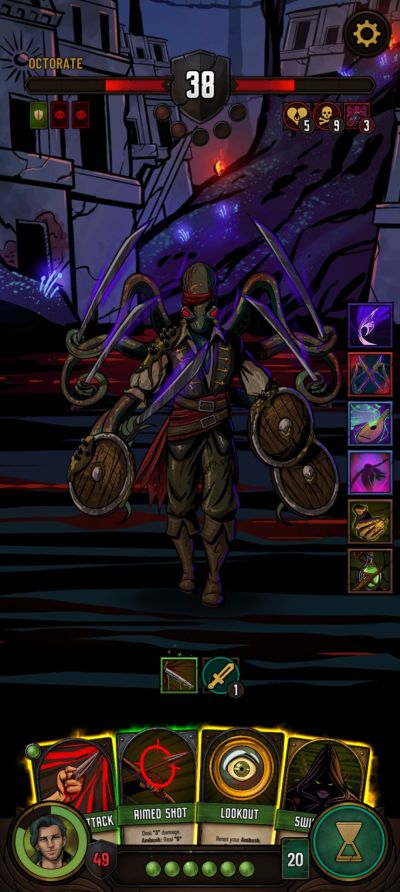
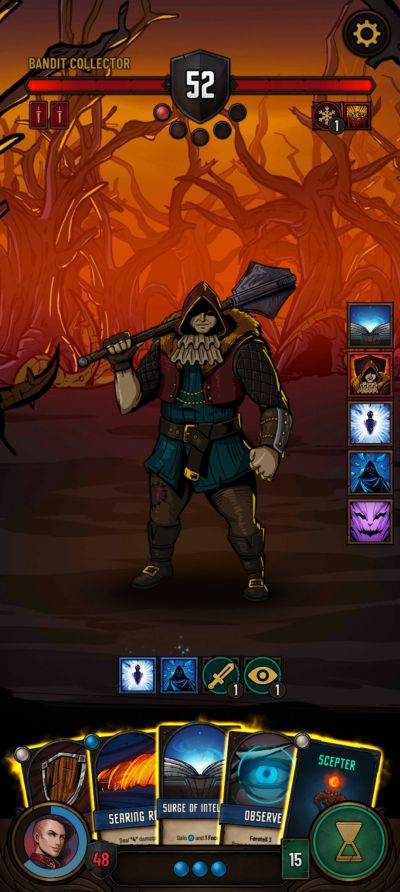
Your opponent’s stats will be at the top of the screen. The topmost, center number is their health, which you need to drop to 0 to win the fight. Below their health is their energy. Pay attention to which of their energy orbs have a dull glow – that’s how much energy they will gain when you end your turn. Each monster card also uses energy, and as a rule of thumb, a monster will play every card in its hand whenever possible. Do note that just like you, monsters will retain any energy they haven’t spent at the end of their turn. Monsters can also benefit from buffs and be weakened by debuffs. A monster’s status can be checked in the upper right of the screen.
Your opponent also has a deck of cards, as well as a hand. By default, monsters draw one card every turn. Like your deck, monster decks are made of attacks and actions that are made to defeat you. You’re not entirely helpless though – you can see the card backs of any cards your opponent has in their hand, which indicate what that card does.
A sword is a melee attack, a bow and arrow is a ranged attack, a black card with a skull is a very powerful attack, and so on. You can also tap hold on your opponent’s cards to get a preview of what those cards will do.
Each monster also has a deck of cards that’s specific to it. For instance, ravens in the first chapter only have 2 cards in their deck: Caw and Swoop. Swoop will show up as a melee attack, and Caw will show up as a debuff. The more you fight and the more you play, and the further you get, the more you’ll learn of what each enemy can do, and you’ll be able to respond better and even directly counterplay your opponents.
Finally, if battles are a bit too fast-paced for you, or if you’d like to reread what an opponent just did that reduced you to 1 health, you can tap on the monster itself to bring up card history, which shows the last 5 cards that both you and your opponent played. You can tap the monster again to hide card history.
Passive Abilities
Some monsters have passive abilities by default. You can view these by tap holding on the monster in question.
Auras
Auras are powerful enemy passives that are akin to your own enchantments. Unlike monster passives and your enchantments however, auras will benefit any monster that’s adjacent to its source. This means that you’ll need to make several tactical choices along the way – confront the aura bearer, or ignore it and hope you only get monsters in the spots it doesn’t cover?
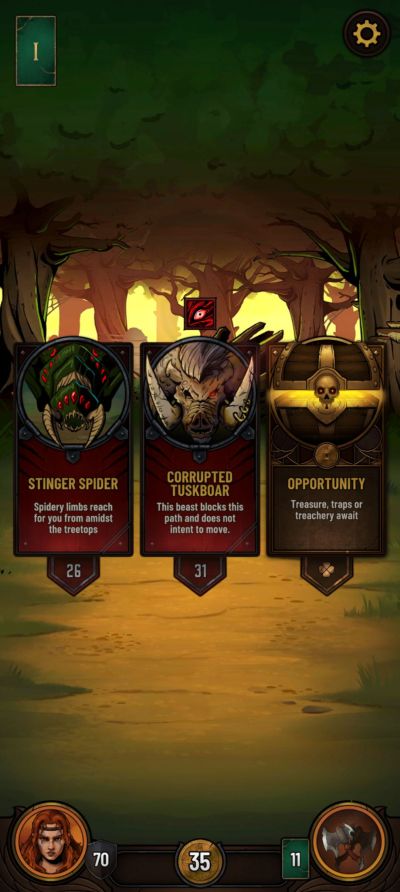
You can see monster auras over each monster card in the event selection screen.
Canto I
Chapter 1 is, quite surprisingly, not a very straightforward chapter. Sure, your only objective is to reach the end of the area, but if chapter 1 teaches you anything, it’s to choose your battles carefully. While enemies are easy and simple enough to be brute-forced through, it’s not efficient to pick fights with enemies that have abilities that counter your starter deck.
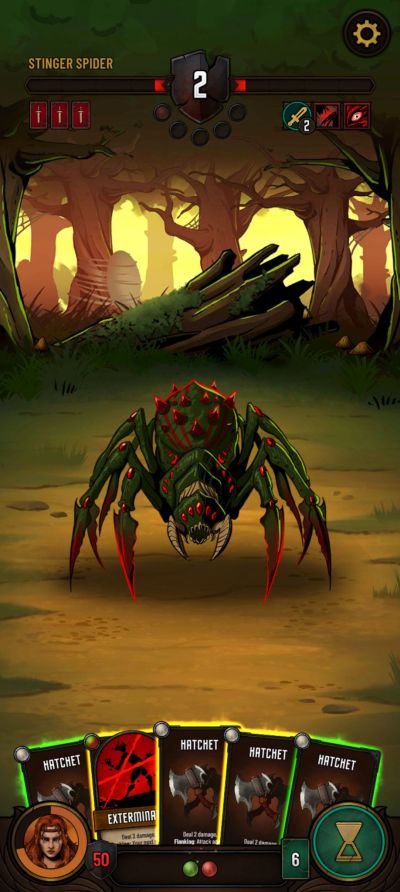
Stinger Spiders, for example, are particularly nasty due to their counter ability – each time you inflict damage to these monsters, you take 1 piercing damage. This is especially nasty for characters that rely on multi-hitting attacks, such as the Rogue and especially the Hunter. Deal as much damage to them per hit as you can to avoid taking too much counter damage.
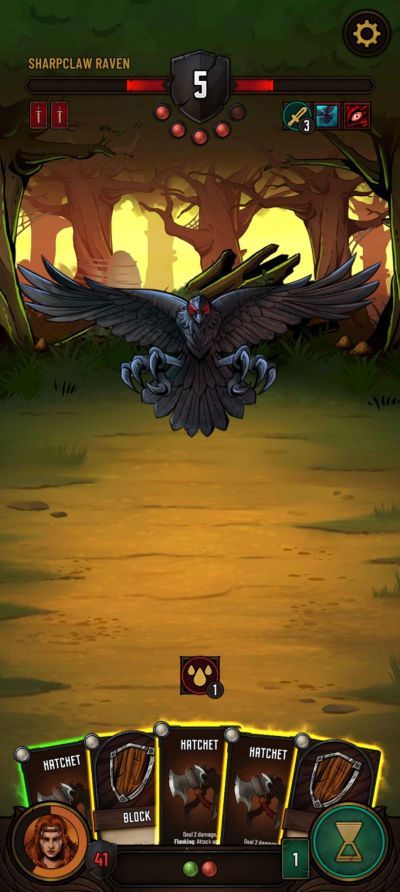
Even the unassuming Sharpclaw Raven is a pain in the butt to deal with, if you’re using a melee class. This feathered fiend may have the least health of all chapter 1 monsters, but its passive ability gives it 1 stack of Evasion any time it takes damage, meaning melee attacks are far less effective against it. On the other hand, if you’re using a ranged or magic class, these birds are easy pickings.
The other enemies in the area: poisonous spiders, boars, wolves, and bandit ambushers, are relatively straightforward fights; the only thing you need to be aware of is that boars can Growl to gain 1 Anger, wolves can buff themselves for 1 Evasion and extra damage on their next attack, and ambushers and Toxanids can poison you – and ambushers always strike first.
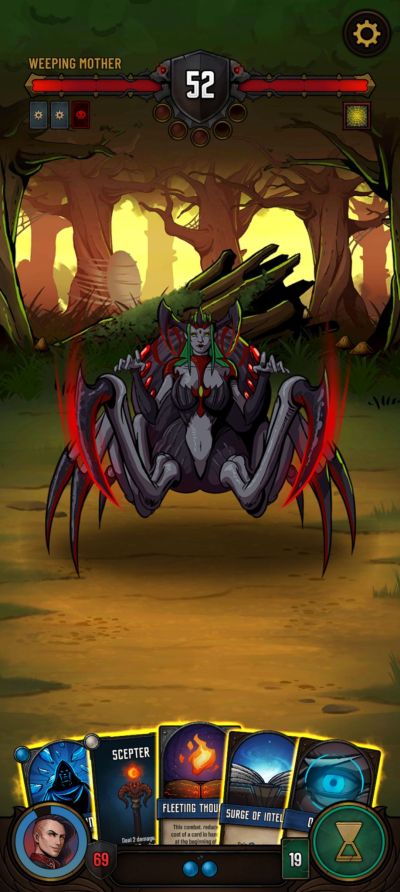
The boss of chapter 1 is the Weeping Mother. Compared to the other fights in the area, the boss is actually pretty straightforward. She doesn’t hit very hard, with her strongest attack being Broodslice, which costs 2 energy, hits for 4 damage, and interrupts. Because of her passive that inflicts Dazed on you during your turn, you’ll very rarely get into a situation where you have excess energy to spend – so go ahead and hit her with every card you’ve got.
The Weeping Mother’s other main shtick is to fill your discard pile with spiderlings. These spiderlings deal 1 damage and poison to you when you draw them, after which the card vanishes and you draw a replacement. They’re more of an annoyance than an actual threat. However, the Weeping Mother can also use Feasting to bury one of the spiderlings she’s infested your deck with to heal herself for 6 HP.
Canto II
The second chapter of the game is a breather level where you can rest and restock.

Before you begin the next leg of your quest, be sure to speak to the Consul to get more information about the game as well as an idea of where to go next.
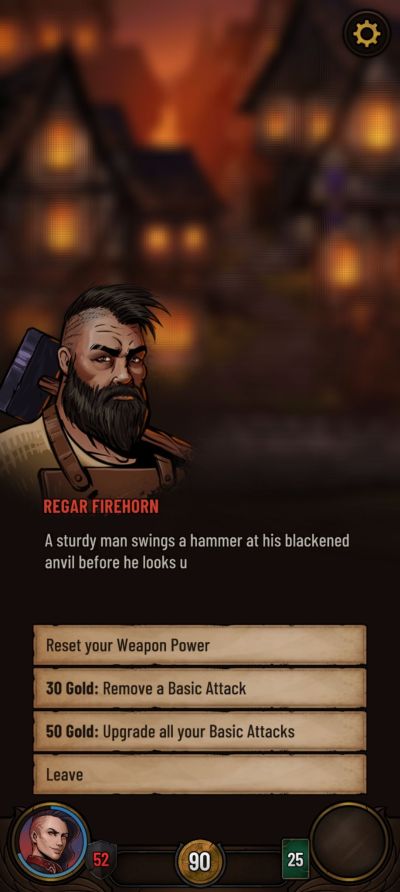
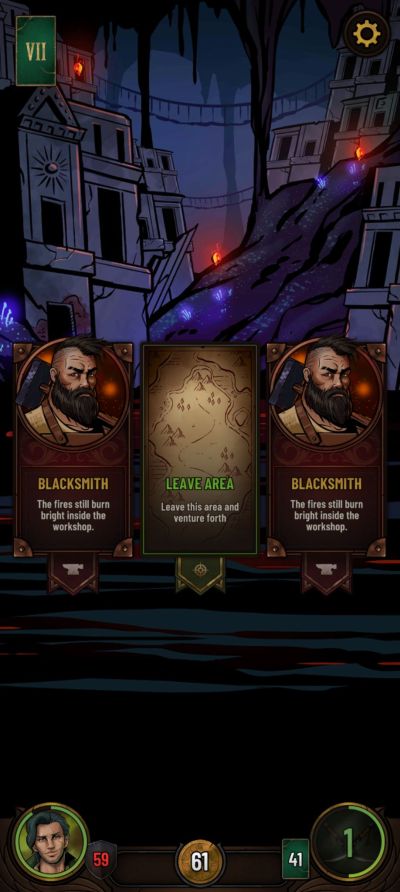
It’s also in this chapter that you’ll start gaining NPCs to interact with, namely the alchemist and the blacksmith. The alchemist sells you potions, one upgrade for a card, or a transmutation for a card. The blacksmith, on the other hand, can replenish your Weapon Power for free. If you don’t want that, you can pay him gold to remove one basic attack from your deck, or even more gold to upgrade all basic attacks in your deck. These NPCs can also show up in event decks of later chapters.
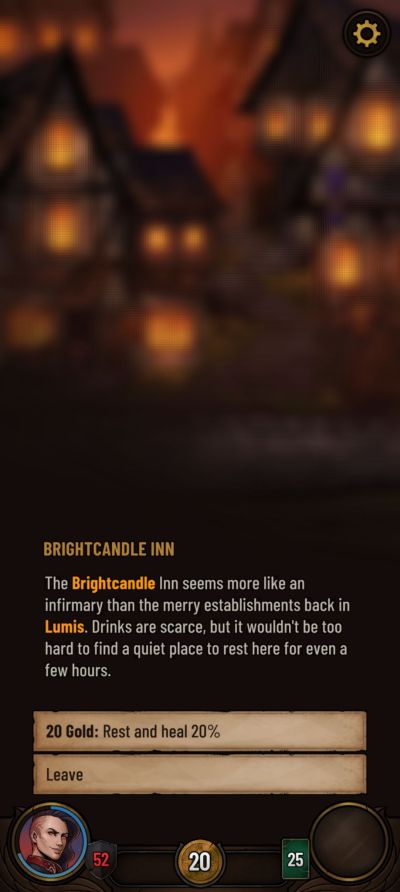
If the Weeping Mother beat you up and you had no more campfires to rest at before leaving chapter 1, you can rest at the inn. Of course, this isn’t free: you’ll need to pay 20 gold to heal 20% of your health.
Once you’re ready, leave the safety of the town’s walls to deal with the bandit problem.
Canto III
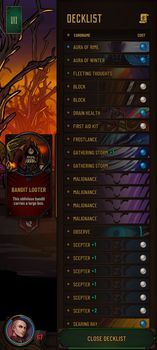
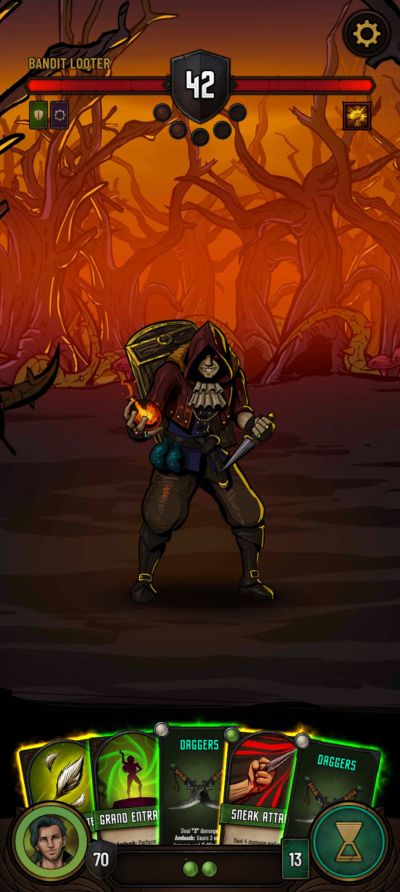
Compared to chapter 1, enemies in chapter 3 aren’t particularly noteworthy, with a few exceptions. The Bandit Looter has a self-heal coupled with an attack that inflicts Vulnerable, giving him some ramp up capability, as well as the ability to both steal your buffs and gold. The Bloodhound has a passive that strips one of your blessings at the start of its turn, which is a real pain in the butt for some builds, and often carries an aura that gives +1 Anger during its turn. Finally, we have the Bandit Cannoneer.
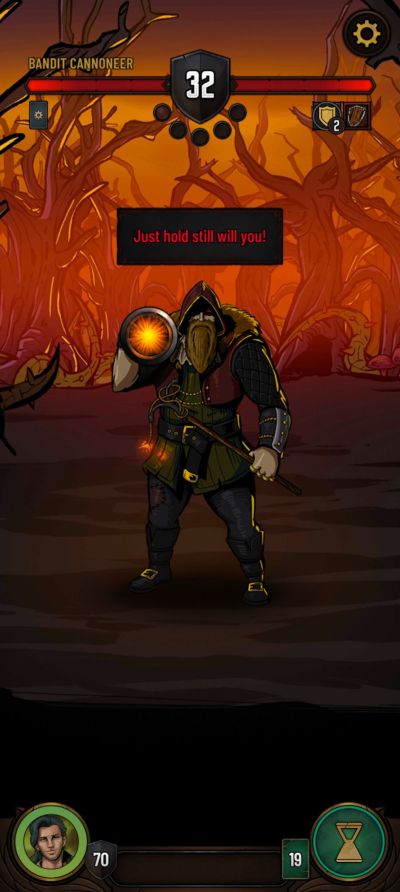
The Bandit Cannoneer is the most dangerous of the enemies in chapter 3. Despite having a measly 32 health compared to other enemies in the area, he can inflict a massive 20 damage to you in one go – if you let him set up.
Cannoneers work by playing three cards in order: Load, Light the Fuse, and Fire! Of these three, only Fire! does damage; the other two cards only add the next card in the sequence into the enemy’s hand. If you don’t have a way to reliably kill the Cannoneer within 2 turns, or mitigate his damage (Fire! is ranged, so Evasion won’t work), I highly suggest avoiding Cannoneers as much as possible.
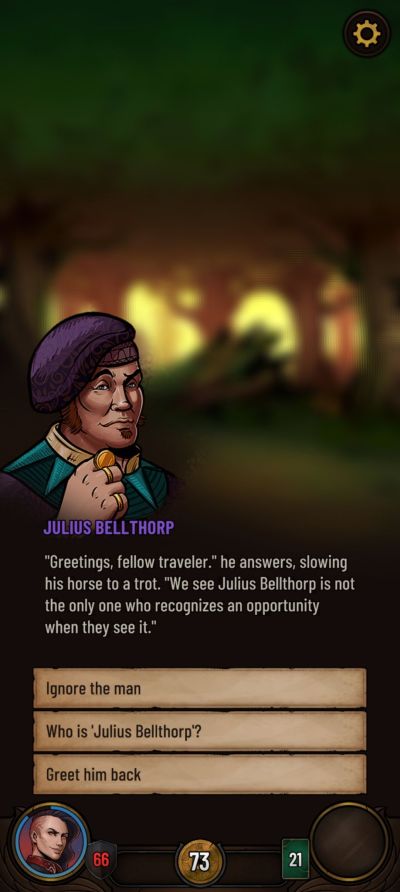
One of the most important things you need to do in chapter 3 is to rescue the merchant, Julian Bellthorp. You’ll gain access to the Talking Tree event after following the bandit’s marks once, and you’ll be given three choices at the tree: check Julian’s boots, leave him to his fate, or cut him loose. If you check his boots, you’ll gain 15 gold, but he’ll leave in a huff once you free him. If you do free him without shaking him down, his shop becomes immediately available to you then and there.
Note that just like the alchemist and the blacksmith, Julian will sometimes show up as an event card, and he’ll also show up in town for the next chapter.
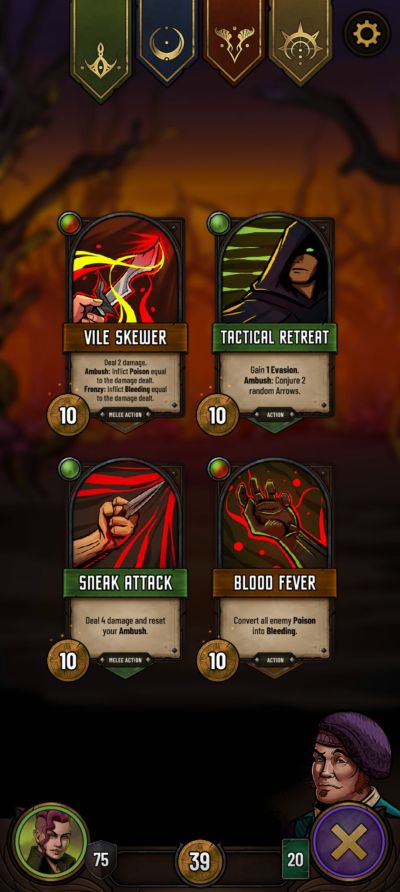
Which choice you make is up to you – if you’re low on funds and probably can’t buy anything anyway (for reference, the cheapest cards in his store cost 10 gold), it’s better to take the 15 gold from the merchant’s boots. If you do choose to shop, note that he has 4 shops, 1 for each kind of energy. Tap the banners at the top of the screen to switch to the different stores. In a surprising display of honesty, Julian will not let you buy divine cards from his 4th store unless you have the Divinity perk, which you need to access divine cards in the first place.
To reach the chapter’s boss, you’ll need to go through three bandit marks cards. Note that the last time you do this, you’ll be given two choices, namely to sneak through or charge in. Charging in will lead to a battle with a Bandit Looter, which you can use to your advantage if you feel you’re in a good enough position to last one more fight.
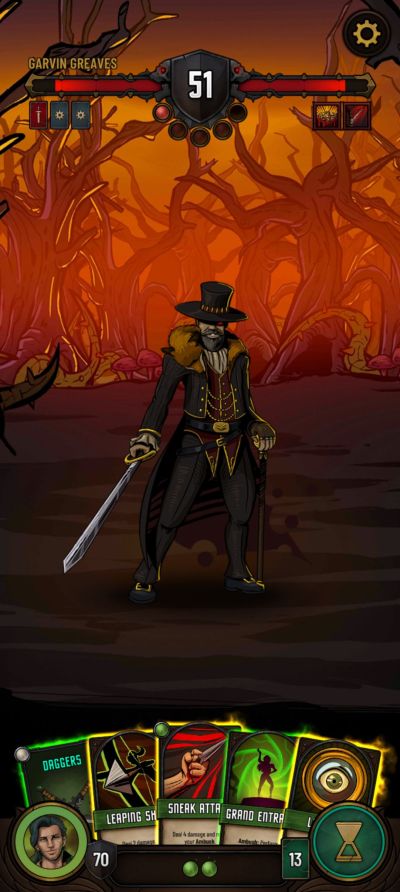
Chapter 3’s boss is Garvin Graves, the bandit leader. This can be an amazingly annoying, but not particularly lethal fight. He does have a lot of damage at his disposal via his ability to constantly inflict bleed on you, but because of his Blood Taxes passive, he doesn’t quite reach lethal levels of bleed.
The main thing to look out for is his Sanguine Strike, which deals a hefty 5 damage and inflicts damage equal to the bleeding it does. More often than not, the bleeding he inflicts on you won’t be used offensively, instead fueling his passive, which strips all your bleed stacks at the end of his turn and heals him for the amount of stacks removed.
Garvin Graves will also spam Outlaw Alchemy with annoying regularity. This card costs no energy and gives him a random potion, though he never seems to get specific potions such as regular healing ones.
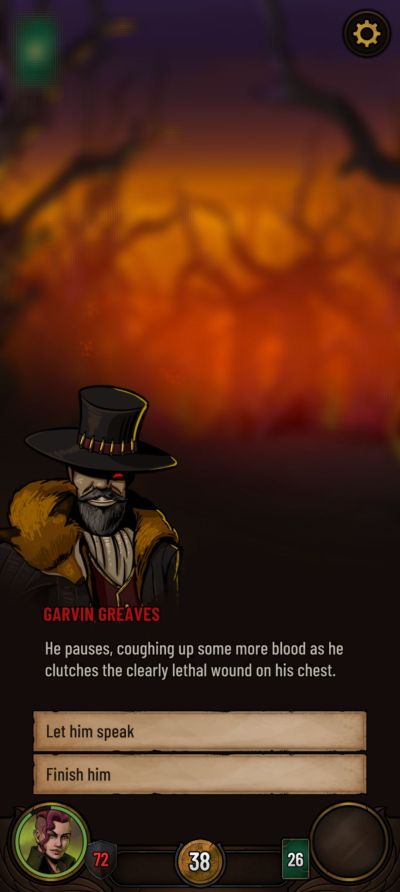
Overall, this fight isn’t particularly difficult, but it can get annoying as he’ll be spamming cards left and right.
The Adventure Awaits!
Saving the world is a daunting task to be sure, and you’ll need practice, patience, and more than a little luck to vanquish the forces of darkness and bring dawn back to the world.
That concludes my beginner’s guide to Dawncaster, and I wish you good fortune in your adventure to save the world. If I missed anything, or if you have anything to add, make yourself heard in the comments below!
NGC300
Wednesday 2nd of July 2025
Excellent intro to the game.
Victor
Thursday 5th of January 2023
Very good!!! Congrats on the article!
Dawncaster / Wanderlost
Wednesday 16th of November 2022
Thanks for this awesome in-depth write-up!
A great resource for anyone looking to get started with the game :)