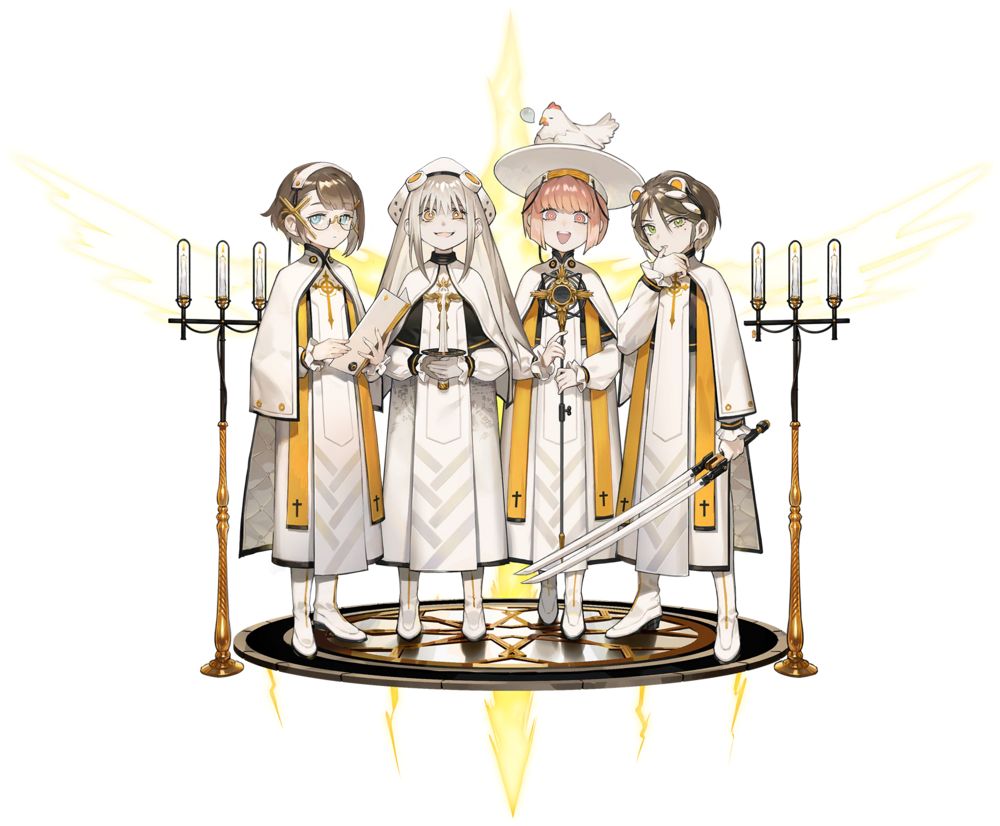
Alchemy Stars is a tactical turn-based gacha game created by Tourdog Studio and published by Tencent Games. In the game your entire team occupies a tile, and move along lines of colored tiles, attacking enemies that they walk past. Sounds simple until you get into stuff like the Chain Combo system which allows your teammates to use special abilities when they walk their tile color for a certain distance, many enemy types, strategic use of tile painting teammates, and many other things to keep track of.
Blessed with gorgeous artwork and the complete lack of a PVP component, the ancient battlecry “Waifu over meta!” is in full swing in Alchemy Stars, even compared to other gacha games like Azur Lane and Arknights. But it still pays to know who are the stronger characters, regardless of who your actual favorite character is. Big hint, you’re usually gonna find yourself building your squad around one of the tile-painting Converters, so they’re always high on these lists.
In this Alchemy Stars tier list, we will showcase the best 6-star and 5-star Aurorians that you should be targeting when it comes to building your team.
Alchemy Stars Best 6-Star Characters
Let’s start off with the 6-star Aurorians since, let’s face it, they’re the ones you’re gunning for in the long run, and one must always plan ahead for the long grind. Converters are typically high tier since you build a team around them, which means they’re usually the ones you need first.
Without a good converter to paint tiles with, everyone else on the team suffers no matter how good they are, and sub-element attacks are typically so weak that you always try to go for the main element anyway. The main difference between 6-star and 5-star is the abundance of non-Converter tile resetters, almost making them into weird pseudo-Converters.
S TIER CHARACTERS
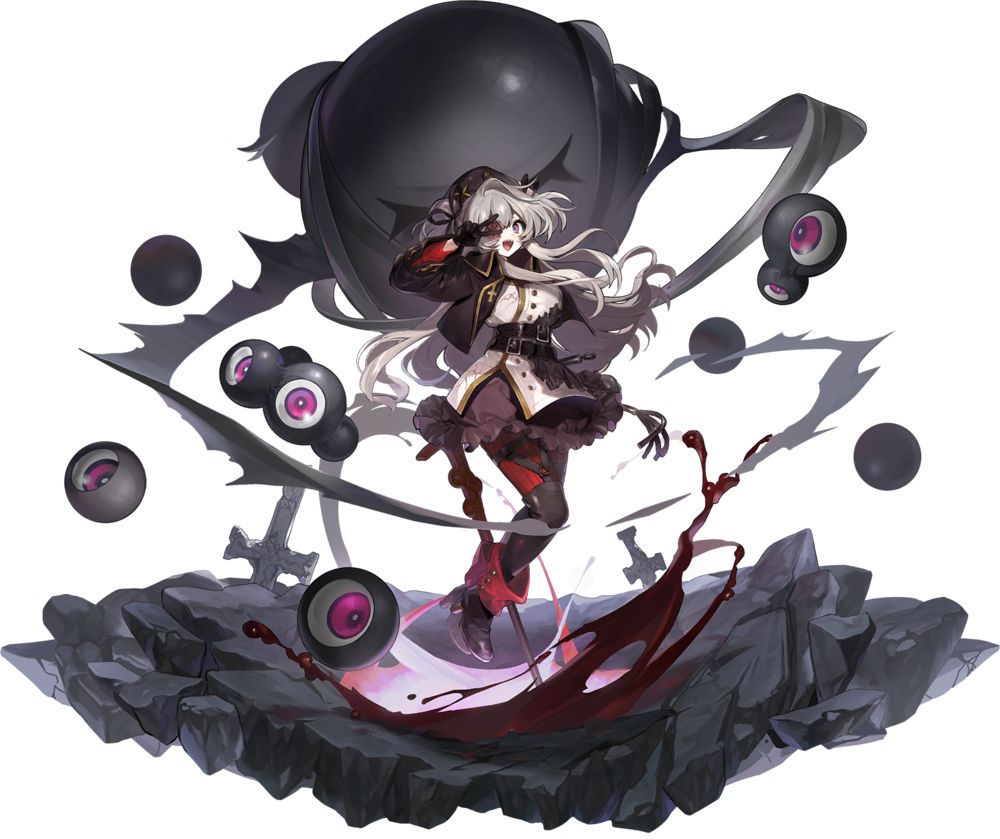
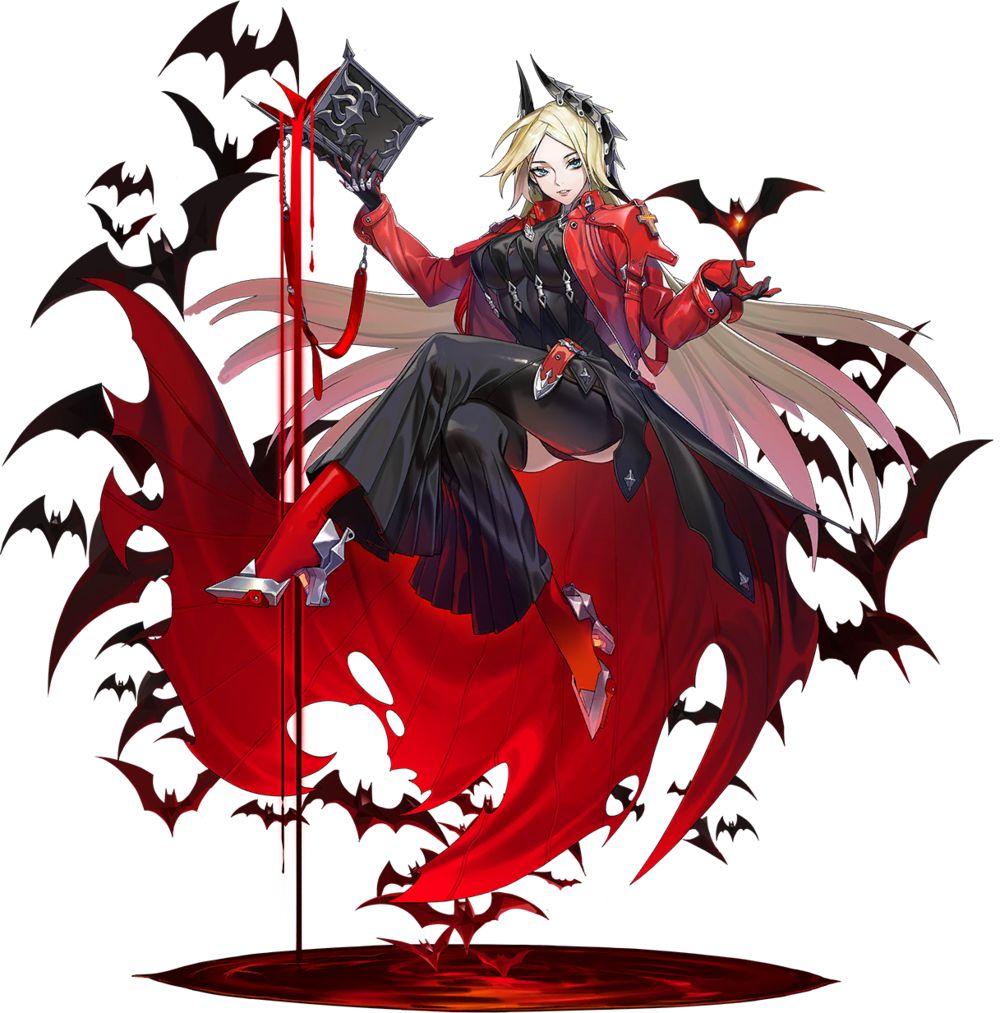
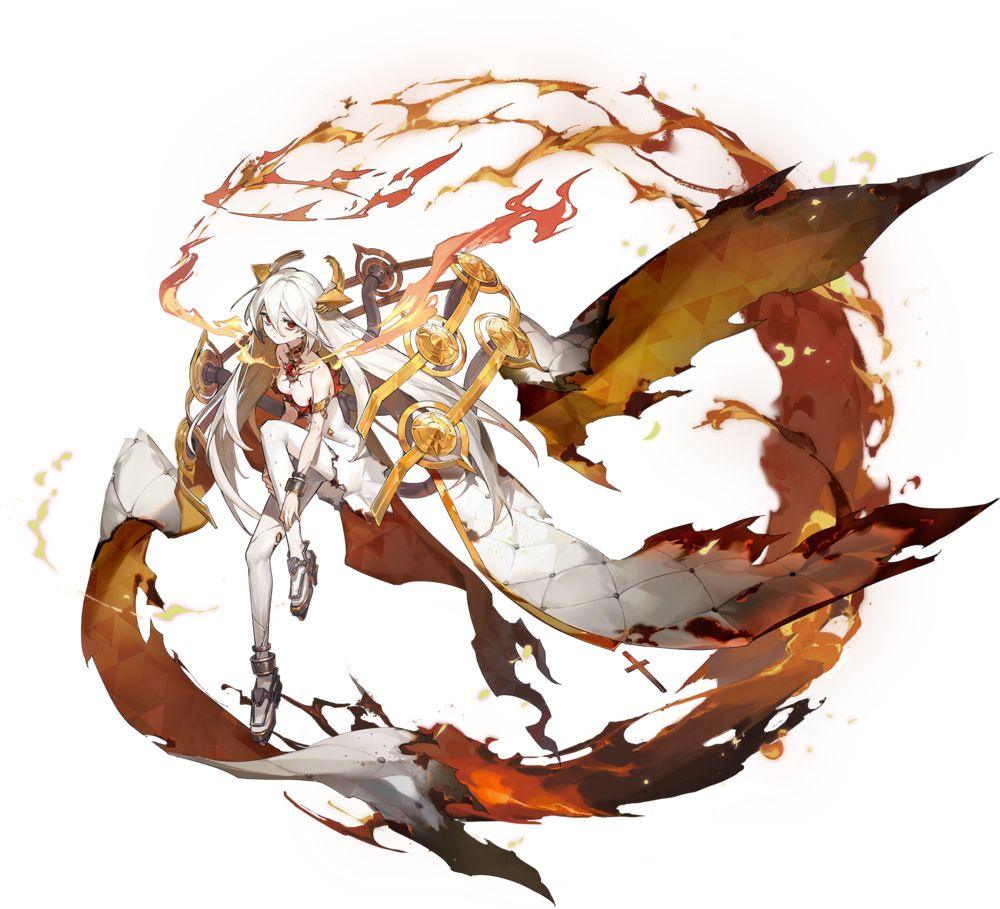
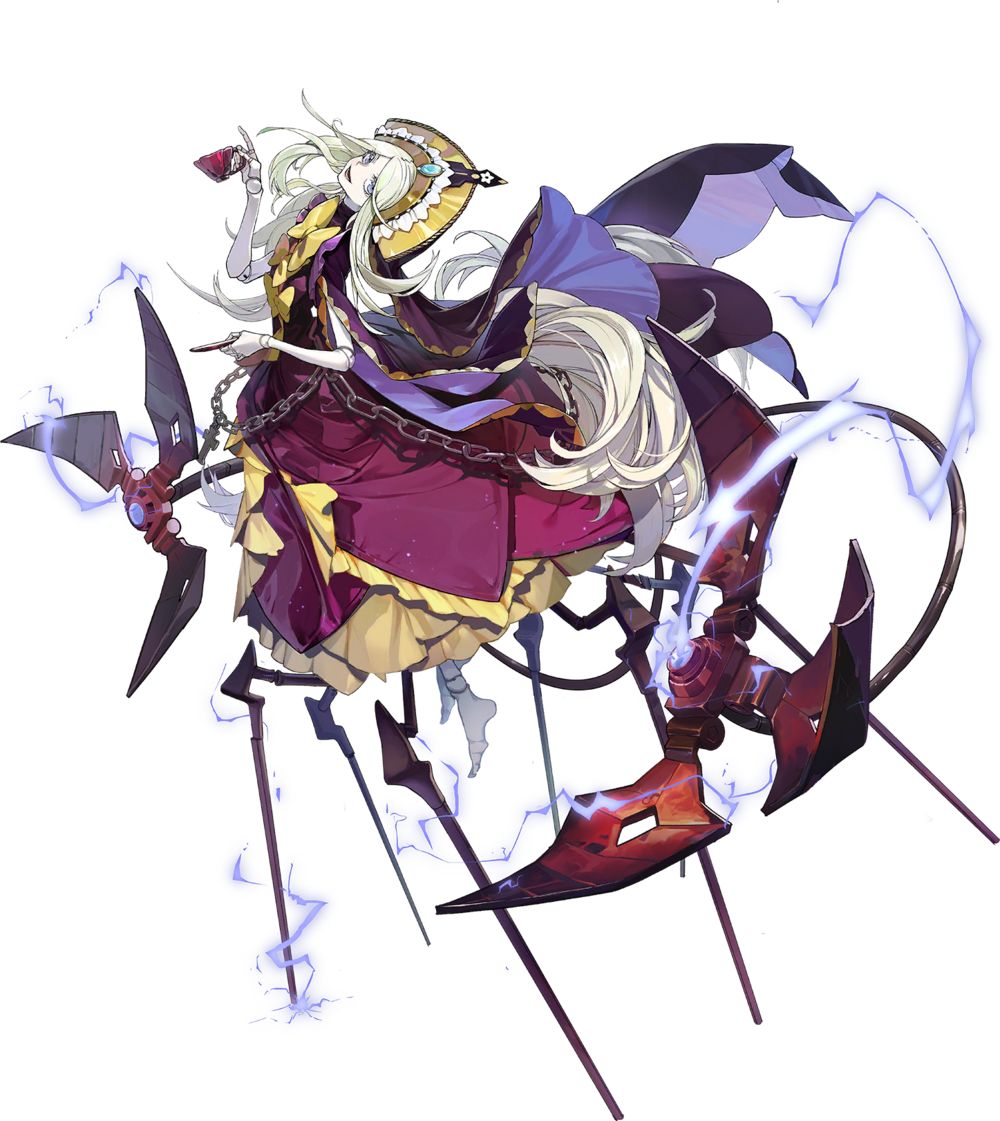
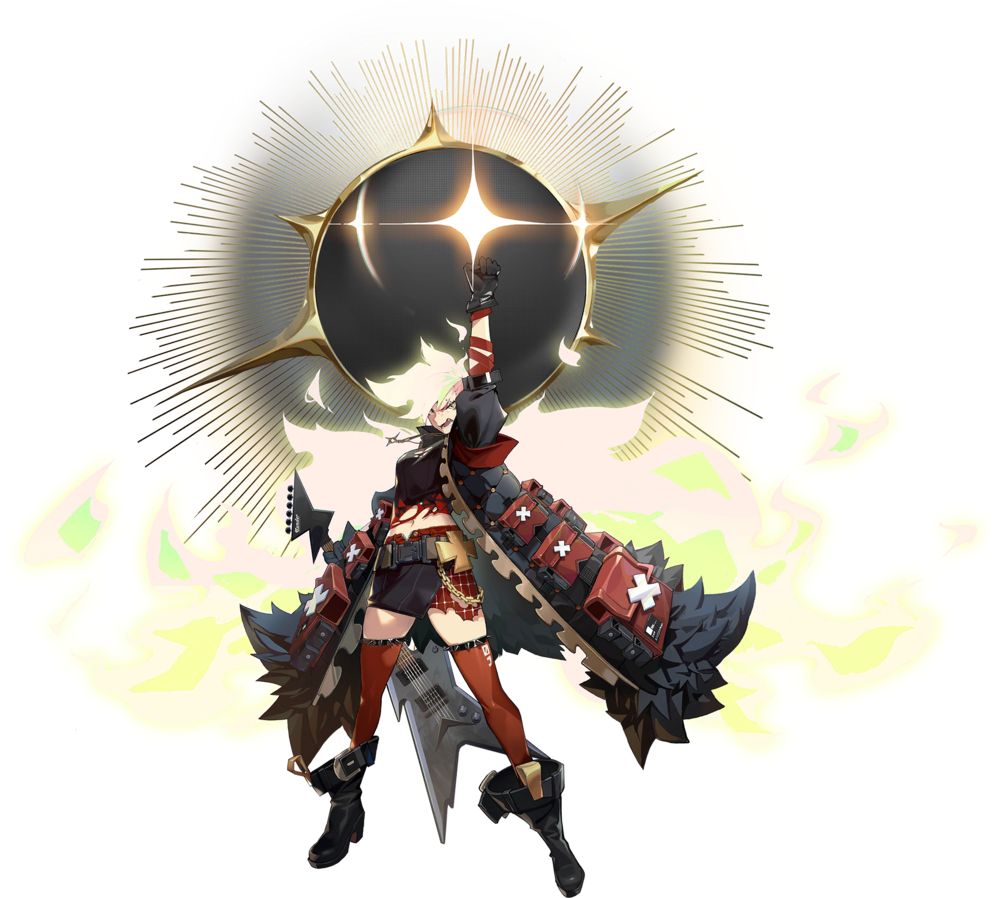
Sinsa
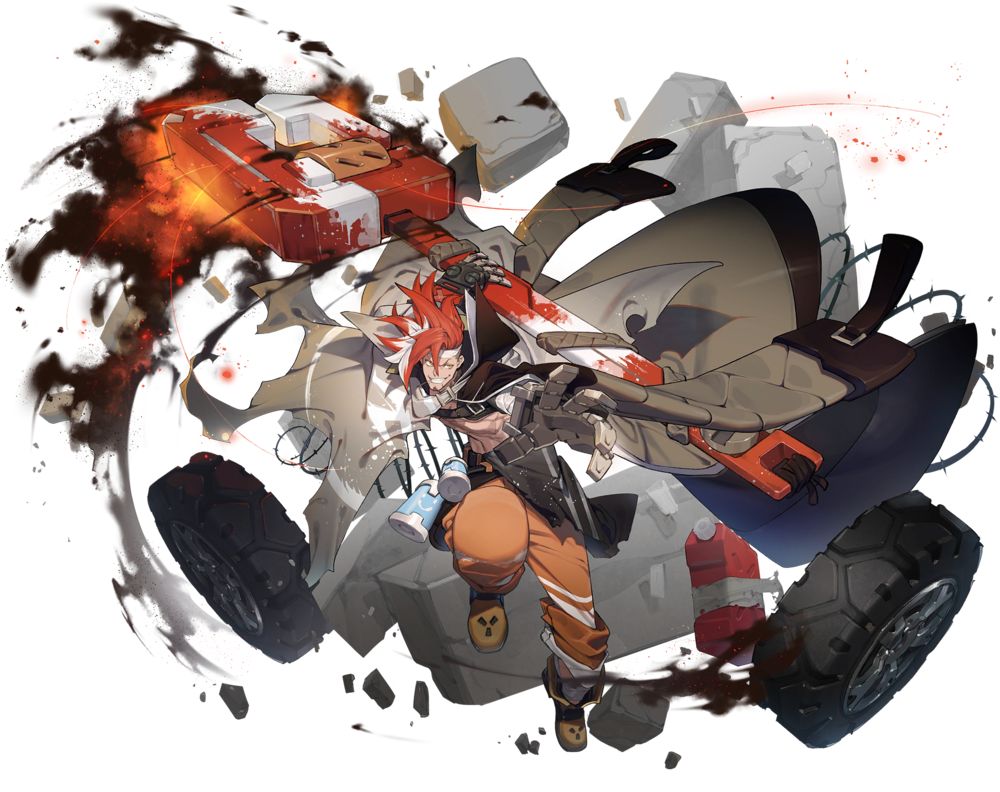
Red/Yellow, Detonator, Cone AOE Damage, AOE Damage
This wrench-toting wrecker comes with a weird Active Skill which allows him to blast a cone of damage in one cardinal direction reaching all the way to the edge of the map. The damage is around
180-200% damage depending on Breakthroughs, but increases further the closer he is to the target, dealing 2.5x damage to anyone stupid enough to get in his face.
With 2 Ascensions, this skill gets a casting range of two squares, which allows him to move toward the cast location, which a smart player can use to get to a better position. His Chain attack goes from a small 12 tile diamond to a map-spanning asterisk, dealing 160-165% damage. Once he gets his Rediesel Wrench, he can whack people diagonally with normal blows.
Diagonal strikes now stack Shatter up to a total of 5 times. Each stack comes with a defense Reduction, based on 5% of Sinsa’s defense. This lasts for a round. With 3 Ascensions, Actives and Chain Combos can shatter enemies too. Utterly dangerous to everything in front of him.
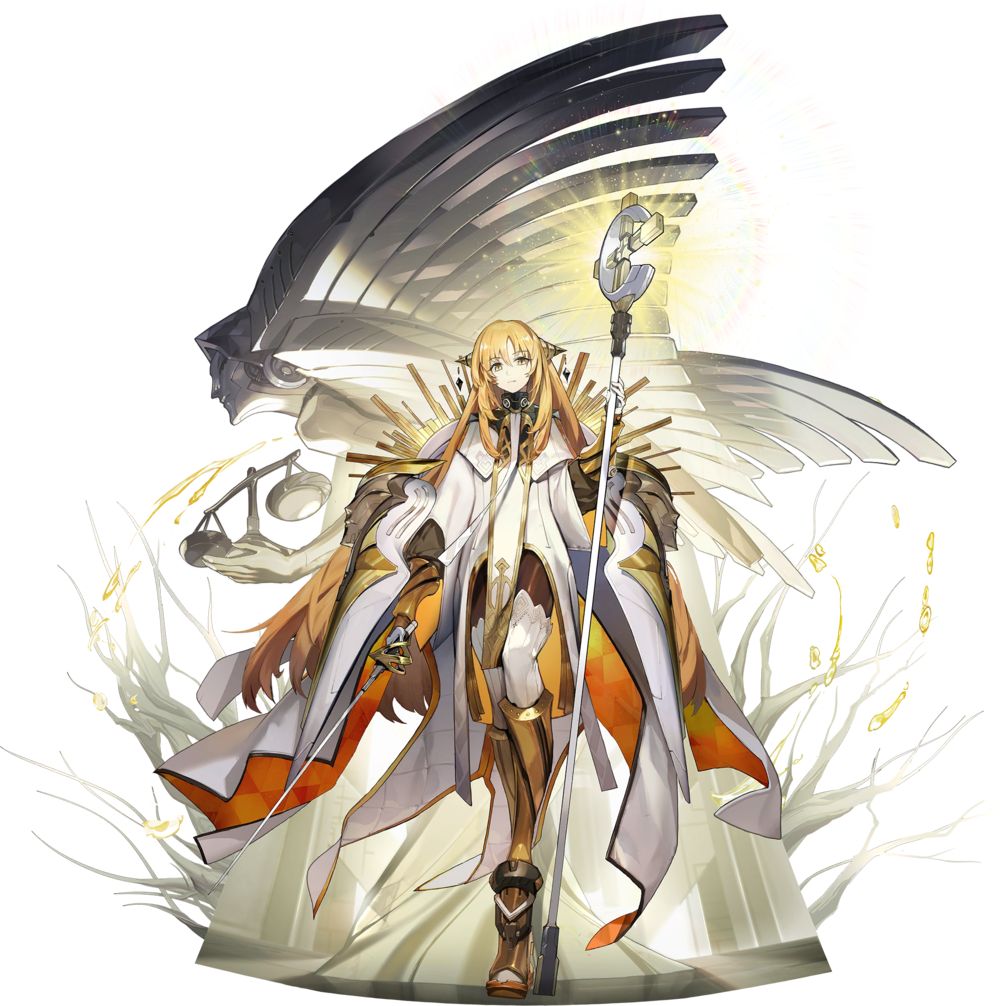
Raphael

Blue, Support, Healer, Tile Reset, Tile Painter, Column Damage
A simple (not to be confused with bad) healer with a good Active Skill. Raphael restores the team’s HP by 200% of her ATK, and resets every tile on the map (or within a 3 tile range if she isn’t ascended) that isn’t Blue.
At 3 Breakthroughs, she has a small chance to generate Blue tiles, with the maximum allowing her to do this pre-emptively. Her Chain Combo is the normal columnar attack most other column-hating characters have, starting at 1 tile to three tiles wide, and damage from 125-140% depending on how long her combo walk goes.
Once she gets her Pillar of Benediction, every Blue tile she paints recover’s the team’s HP by 1.5% of Raphael’s HP, and this bonus increases all the way to 100% depending on how badly dinged up her teammates are. Great with a full Blue team, and her healing ability gets stronger the more badly you need it. Just keep that 4 round cooldown in mind, and bring a proper Blue tile painter since her own tile painting is a bit unreliable.
Irridon
Yellow/Blue, Tile Painter, AOE Damage
A tile painter with a bit of spillage. Irridon can convert any two tiles on the map into Yellow Prism Tiles, which make 2 Yellow Tiles in the direction of their connection when walked on. After 3 Breakthroughs, these turn into enhanced Prism Tiles which also do double the normal connection damage of your usual tile, and you can drop it at the start of a match at Breakthrough 6. Her Chain Combo is the ever practical 2-12 tile cost AOE attack.
Once she gets her shiny Lucent Staff and Bestowed Blade, she gets a Gold Marsh Mark every time she walks through a Prism Tile. Each mark adds 5% to her Chain combo damage. At max Ascension, this also adds 3% to her normal attacks and makes her turn the starting tile into a Prism Tile when Aurora Time kicks in. Considering Prism Tiles can make impromptu paths based on how you walk, she’s very useful for lengthening Chains.
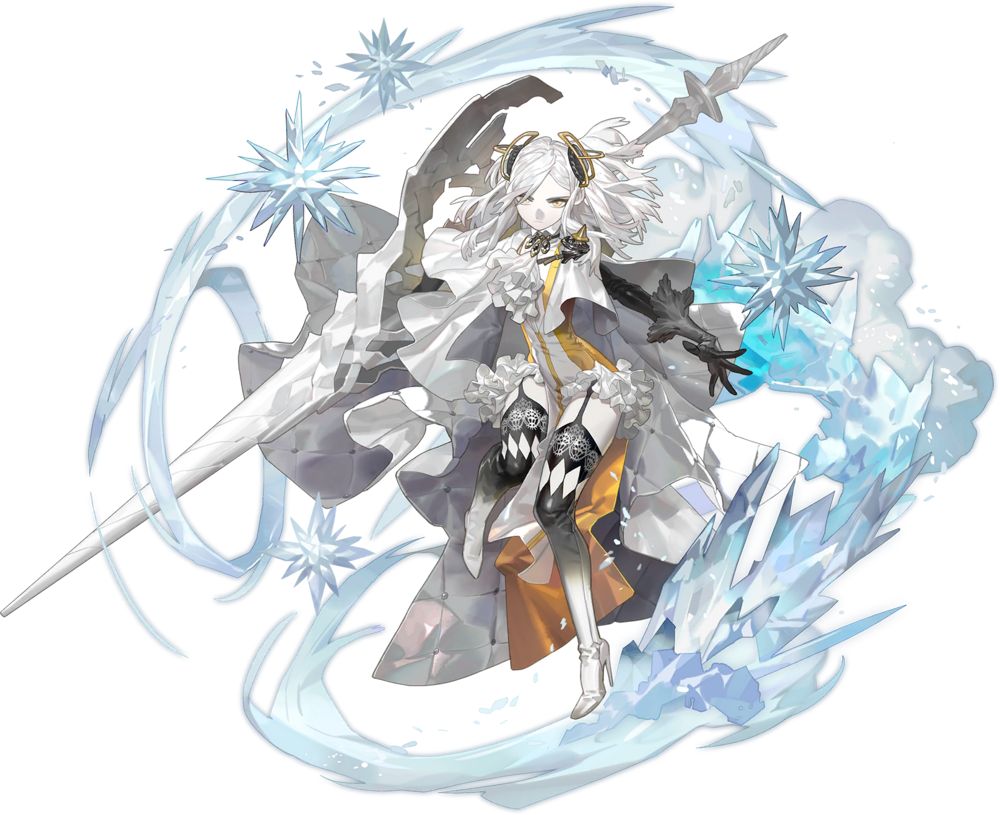
Michael
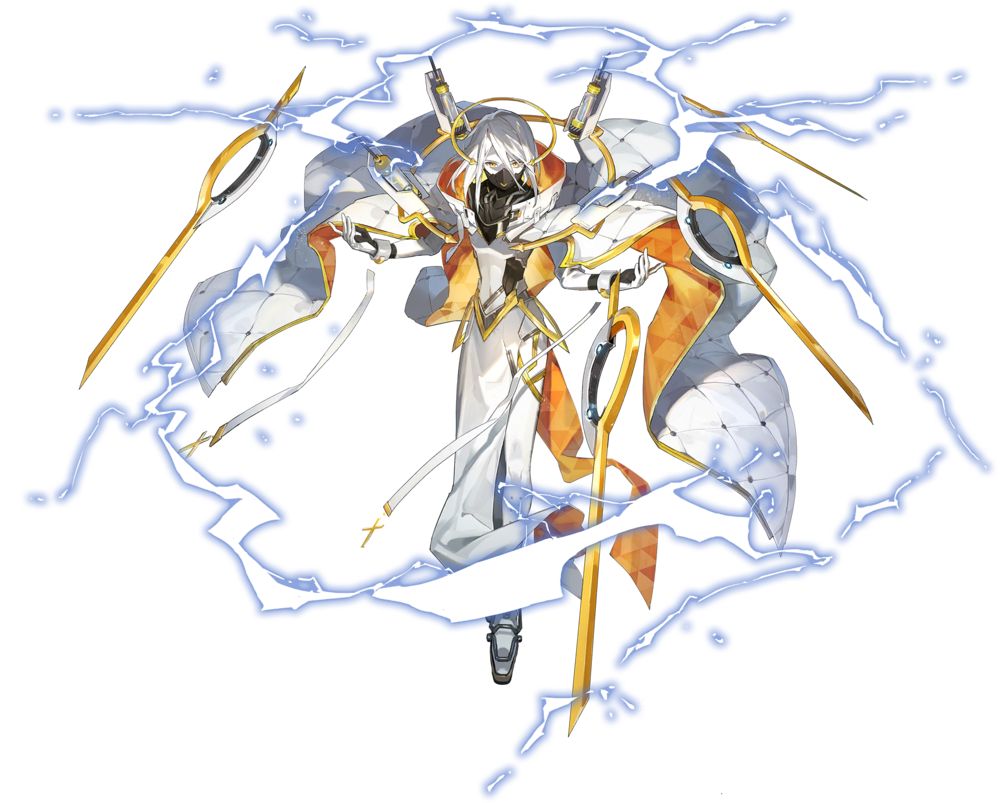
Yellow, “Teleportation”, Linear/Diagonal Damage, AOE Damage
A rather deadly lady who doesn’t so much teleport as she does crash through bad guys with total disregard for the game’s rules about walking on tiles. Her Active Skill can move her to any spot on the map. Everything between her and that spot, and everything next to that line too, eats 320% damage, plus 5% of their current HP in more damage.
At Breakthrough 6, this also counts as normal walking and she can cast her Chain Combo with it! Her Chain Combo is the good ol’ AOE for 160-170% damage with increasing AOE the further her combo takes her. Once she finds her Blade of Reticence, she gets a Silent Thunder Mark every turn. If she does a normal attack, one stack is consumed and she deals an extra 2.5% of the enemy’s current HP of damage to her target.
Frostfire
Fire, Sniper, Artillery, Late-Game Spam
The definition of a tactical game snowball. Frostfire’s Active Skill is charged by her Chain Combo. When using her Chain combo skill, she picks 3 nearby targets to slap for 180%, and every target she bonks gives her 1 Vis. It takes 10 Vis to use her Active Skill, which throws a 180% damage fiery space rock on a single tile, with 50% splash damage around it with a cross shape 4 tiles long.
At first this seems weak and slow to charge, but once you get her Ember Laurel, you can spam it harder and harder as the match goes on. It gives her 5 Vis at the start of every round and for every fool she kills with that meteor. If a match is nearing its end and there are a lot of injuRed enemies on screen, she can pick everyone off one by one with alarming speed.
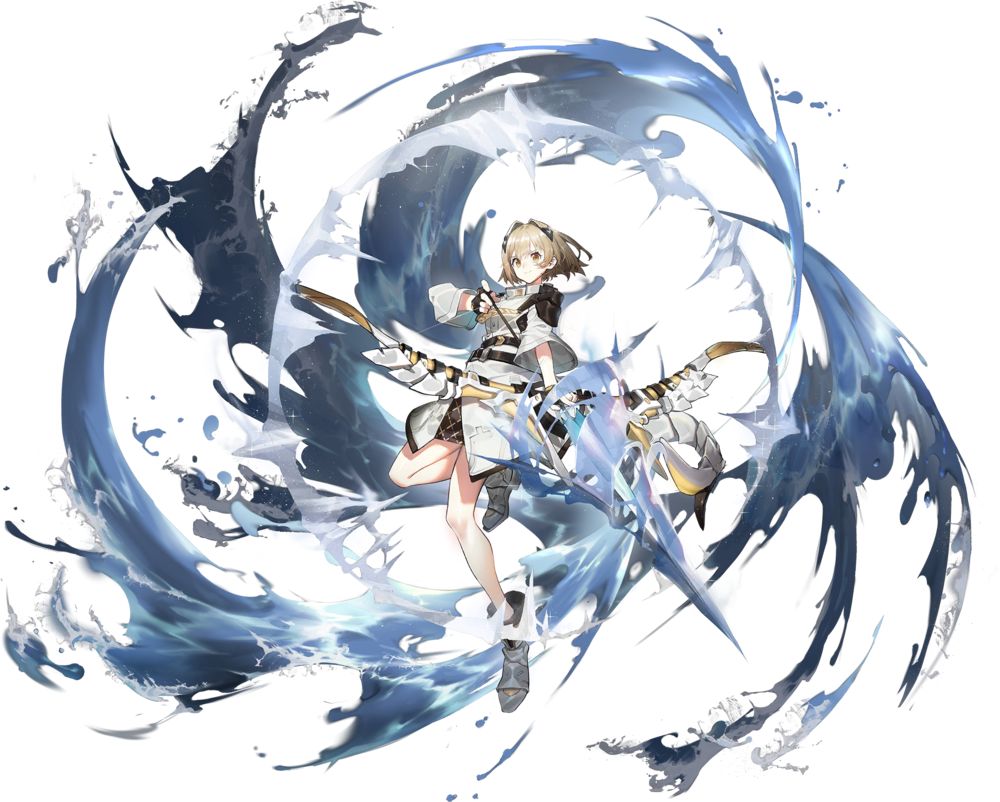
Eicy
Red/Blue, Converter, Tile Painter, Anti-Tank, Lifesteal
A girl with a fancy eyepatch to control her powers lest she explode anyone she looks at funny. Her Active Skill takes the nearest Blue or Green tiles and paints them Red, making her useful in a primarily Red team.
While this only paints 4-5 tiles (and one more if she sat on this skill for a round), the 2 turn cooldown means it doesn’t take her much time to drown any non-Yellow floor in Red paint. Her Chain combo picks two targets from 2-3 nearby clusters and deals 170-190% damage to them depending on how long her walk was.
Random targeting always stinks compared to pure AOE Chains, but at least it hits hard. Her equipment turns her into a healer and tankbuster, giving her the ability to turn Hollow every three rounds. In her Her Chain Combo starts ignoring defense, and stealing HP from the enemy. As meh as her other skills are, her spamtastic Active paintbrush puts her up here simply because she’s important to any high-star Red team.
Sharona
Blue/Red, Detonator, Cross AOE, Teleporter
An incRedibly dangerous teleporting bomb, Sharona’s Active Skill is to teleport to a position and splash every enemy within a 25 tile square on top of her for an utterly silly 300% damage. With Ascensions, she gets 2 stacks of Dragontooth Marks for doing this, and applies these to enemies if one of them gets killed by her splash teleport, for yet more damage. Her Chain Combo needs some aim but hurts a lot, starting with an 8 tile cross (2 tiles range), and ending with a cross that reaches the end of the map along with anyone next to her taking a hit.
As for damage, it goes from 160-170% depending on her combo walk. Her sword, the Katana: Azure Flame allows her to not only stack up Dragon Tooth Marks with normal attacks maxing out at 4, it also makes Dragontooth Marks power up her Chain Combo damage by 5% per mark. Hard-hitting, straightforward, and hilarious.
Gabriel
Green, AOE, Tile Painter, Tile Enhancer, Chain Spammer
Gabriel is a weird one, as she picks her tile painting target by color. She can select one whole element except Green, and every single tile of that color will get changed to another element, hopefully also Green or the same color as tiles near it to make a path. While random, getting a good roll here can really turn a fight around.
Once it is fully ascended, it will make an enhanced tile for every 10 tiles she paints, which ought to happen very quickly. Her Chain Combo is cheap, from 2-12 tiles and comes with a decent 25 square AOE when fully walked, with 165% damage.
Her Frostlight Orb allows her to make an enhanced tile for every 6 Green tiles she rolls over in a single round, and at max Ascension prioritizes Green tiles for enhancement. Even if by sheer miserable luck you don’t get the colors you want, she’ll at least enhance a ton of tiles so you can make do with what she gives you!
Charon
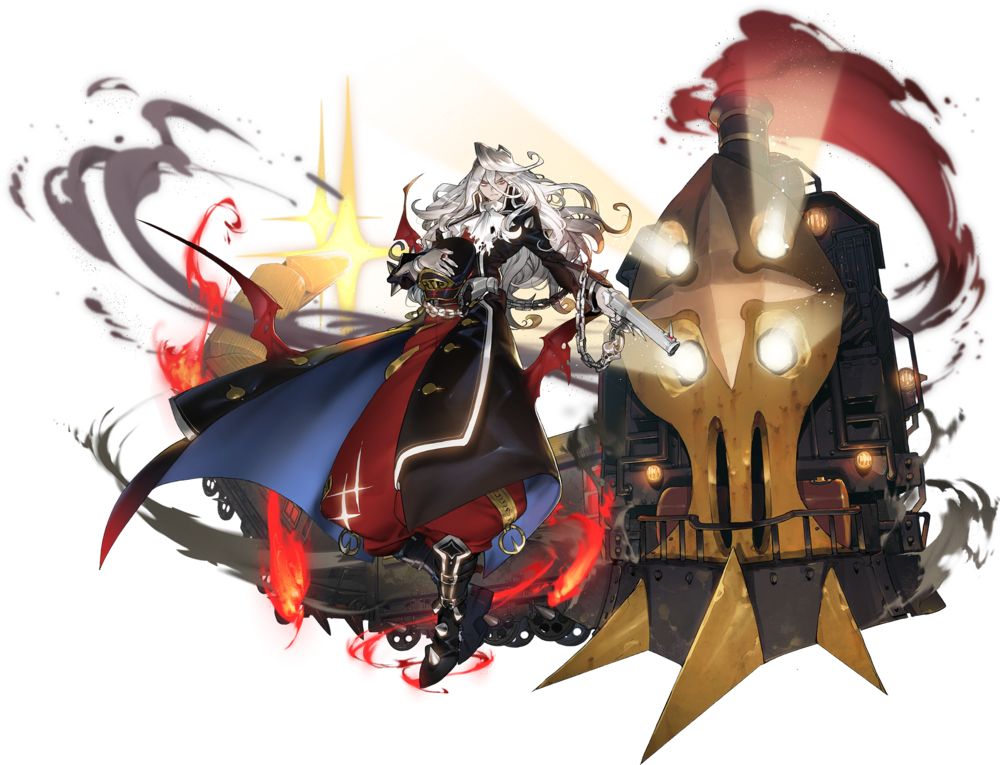
Red/Green, Detonator, Linear Damage, Tile Reset
A Red and Green train loving ham with nice hair. Active Skill throws a 300% damage railroad disaster at a line three tiles wide and knocks enemies back. The middle line suffers from 1.5x damage, and all non-Red tiles are reset along the AOE.
It eventually gets a chance to generate Red tiles. His Chain Combo, while a little lacking in AOE compaRed to some real screen wiping horrors, does a reliable 160-165% damage and triggers as soon as he walks two measely tiles. Their equipment adds a percentage of ATK as defense-ignoring damage, allowing him to clean up tanks. Overall, a really solid damage dealer you can always count on as long as the floor looks a little Red.
Carleen
Blue, Converter, Teleportation, Columnar Damage, Tile Painter
A teleporting Blue unit. Her ability is to teleport your squad to any 1 location within her range, and to deal damage to a column while turning said column Blue. With her gear, walking over Blue tiles makes her stronger, with each tile increasing her ATK by a small percentage for the round.
The fact she paints tiles and those tiles make her stronger quickly adds up to loads of damage, though keep her 4-3 turn cooldown in mind. Use her to get to (or make) a good attack position. If you ever find yourself stuck in a bad position, use her to, say, get yourself within range of a good color path, make a color path, or within range of an enemy you want dead.
Migard
Green/Red, Medium-range Teleport Spam, AOE Damage, Multi-Target Damage, Bullying
Migard has a quick-charging teleport with a 3 tile range, and if she teleports next to any enemies, they all take 250% damage. If she only hits one target with it, the damage is doubled. And on top of that, with maximum Breakthroughs and Ascensions, the final damage increases by 15% for each enemy killed and the skill cooldown is immediately ditched if killing a target. In a target-rich environment, this results in anime-style teleport spam.
You can use this either to delete a single target, or mess up a tight crowd. Her Chain combo starts at 4 tiles and ends at 13, and deals 165-180% damage to 3-4 targets with increasing range the further she walks A bit hard to pull off if the tile pattern’s a bit claustrophobic.
When she gets her Spinal Blade, she can bully near-dead (down to 30% HP) enemies, striking once more with 100% damage when using a Chain Combo or Active Skill. And as if to further guarantee an already near-sure kill, a target who survives this attack with less HP than Migard’s ATK stat just straight up dies anyway.
Gronru
Yellow/Green, Converter, Tile Painter, Column AOE, Disabler
A useful friend for any Yellow team, Gronru’s Active Skill turns 4-5 of the nearest Blue and Red Tiles to Yellow depending on Breakthrough level, adding another tile if the Active Skill is saved for a round, at least when broken through thrice. Her Chain Combo deals 130-140% damage to a maximum of three columns depending on how long she walks.
Once she gets her Steel Fist And Mecha Throne, her Chain Combo can pick one unlucky fool in her AOE and deal an extra 50% damage to them, and in later Ascensions can inflict paralysis and has a 50% chance to hit a second victim.
Nikinis
Green/Blue, Converter, Tile Painter, Row Damage
A tile-painter who works great in a Green team. At maximum Ascensions and Breakthroughs, her skill turns the 5 nearest Red or Yellow tiles into Green tiles, with a chance to generate a maximum of 2 enhanced tiles. If the skill was left sitting in the last round, an extra tile gets painted too.
Her Chain Combo starts rather weak, dealing 135% damage to only one row, but as she walks further this adds up to 3 rows, covering a respectable slab of the map for 145% damage. Her Northland and Lake Mirror grants her the Mirror Mark, which gives her an extra 100% Defense for the first hit she takes during a battle. When Ascended, this mark recharges everytime she uses an Active Skill. Bring her in a Green team to put some meat on their veggies.
A TIER CHARACTERS
Connolly
Blue/Green, Detonator, Map-Range Nuker
A shy Blue-Green girl who likes to toot with her clarinet, though you’d never be able to tell by her Red and black outfit. Her Active Skill is to deal 250-300% damage to the whole screen. Her Chain is a bit lackluster, dealing 155-165% damage to a random set of enemies around her, starting with 2 and maxing out at 4 targets depending on the length of her stroll. Her gear makes this Chain power up her Active Skill.
Chain combos allow her to gain stacks of Shiver Marks to a maximum of 5, which not only increases the damage of her Active Skill, but also inflicts Fright to as many targets as she has Shiver Marks when she drops that nuclear toot of hers.
Eve
Yellow/Red, Detonator, Single Target Damage, Long-Range, Spam-Encouragement
An utterly focused single target delete button. Eve’s main skill is to utterly demolish a single enemy by barraging the nearest target with a whopping 20 blows, each dealing 50% damage when maxxed out.
And if the victim dies in the middle of it, she spends the remaining hits on the next poor sucker in her crosshairs. Her Chain combos are particularly long-ranged starting out rather bleh with a plus-shaped attack, ending with an asterisk shaped attack capable of reaching the edge of the board once fully broken through.
Once she gets her Eye Of The Storm powefist, every tenth blow from any sort of attack your squad deals will also hit the nearest enemy for 100% damage. She works well with anyone who has low cooldowns or cheap Chains, though her Active Skill’s 4 turn cooldown and distance-based targeting makes her a bit hard to use. Even with her switching targets mid attack, you don’t want to waste her Active on something useless.
Hiiro
Green/Yellow, Converter, AOE Damage
A Green/Yellow character with a misleading love of the colors pink and Red, to the point her Active Skill is called Crimson Sakura. Crimson Sakura lets you pick out 2 tiles and paint them Green, which also beefs them up into enhanced tiles. This also causes a map-range cross AOE attack on each tile, damaging enemies in the area for 200-240%. You can use this either to make a better walking pattern, or simply to hit any enemies who happen to be in a nice, convenient line, preferably both.
Her Chain Combo is an average small AOE attack, from a 1 tile range to a 2 tile range, with damage going from 160-170%. Her sword, the Katana: Sakae, lets her enter a Duel stance at the start of each round. Her next normal attack splashes a 4 tile cross for 160% direct damage and 80% splash damage, so make sure the first thing she runs into is a tight crowd.
Once she gets Ascensions, she enters Duel stance everytime she walks over enhanced tiles, allowing her to splash more often, and her third Ascension powers her ATK up with it, and this can stack all the way to 20%.
Jona
Red/Yellow, Heavy Damage, Self-Buffer
A rather simple gunslinger, Jona buffs herself with her High Noon skill, powering up her normal attacks by 15% and her Chain combos by 30%, and Reducing the tiles she (and other Red Aurorians when ascended) needs to walk for her Chain combo by 2.
Her Chain combo deals 155-175% damage to 3-4 enemies with increasing range depending on how many tiles she walks over. Once she gets her Revolvers, her normal attacks start doing 50% splash damage to 4 tiles in a plus around whoever she shoots when she’s using High Noon, with an extra 20% damage to the initial target with 2 Ascensions.
B TIER CHARACTERS
Victoria
Red/Blue, Support, AOE Damage, Healer
A purveyor of forbidden knowledge and an aggressive healer to boot. She picks up to 3 unlucky targets within 3 tiles of her (or the whole map if at 6 Breakthroughs) and slaps them with 250% damage, with the damage ignoring defense if only 1 target is in range. She heals teammates for 25-35% of the damage she deals depending on her Breakthroughs.
Her skill is best done after she does a Chain combo, as the damage dealt increases for every Bleeding stack the enemy has, whgich the Chain combo inflicts. As for the Chain combo, it’s the usual small AOE type (from a 12 tile diamond to everything within 2 tiles of herself) with 160-180% damage, but with the ability to cause Bleeding stacks for 2 rounds. Her Black Tome lets her drink away 5% of the enemy’s HP for every Bleeding stack the enemy has, everytime she hits a Bleeding enemy with her Chain combo.
Regal
Blue, Detonator, Damage Dealer, AOE Damage
A self-buffing damage dealer, Regal can spend 10 Vis to power up both his normal and Chain combo attacks by 20%. This Active Skill also allows him to use normal attacks diagonally, letting him hit more bad guys After 3 Breakthroughs, every kill he performs while buffed gives him 2 Vis. His Chain Combo has smaller AOE than most AOE Chain Combos, but hits harder at 160-180% damage.
Once he gets his Dark Casket greatsword, he gets 10 Vis at the start of the battle, and if he ends the round without his buff, he gets 5 more Vis, with 1 added every 20% of his HP lost. At 6 Breakthroughs, every enemy next to him in a cross gives him 1 Vis each. He works best when fighting extremely aggressively, throwing yourself into crowds like a frothing madman.
Fleur
Blue/Yellow, Sniper, Deathmarker, Artillery
“Good-natuRed Rediesel Wrench technician” my butt! Fleur singles out a target with his Active Skill, which wrenches exactly one enemy for 200-240% damage based on Breakthroughs. This also marks them for bullying, as Fleur’s Chain Combo hits his Active’s victims twice. 2 Ascensions allows him to increase the damage by 35% if saved for at least a round before use.
His Chain Combo, apart from the bullying, is a fairly normal multi-target splash, which picks out 2 nearby enemies to eat a 145-180% damage attack, with 30-50% splash damage (based on Breakthroughs) for any silly goose next to them within a cross shape.
When he gets his Allen Wrench, he bullies people even harder, as his damage increases by 6% against people with less than 40-50% HP based on Ascensions, and with Ascension 3 this bonus gets doubled for enemies who only have less than 30% HP left. His lack of really wide area attacks as a six star puts him low, though you might be able to use him specifically for bossfights.
Sariel
Blue/Green, Converter, Random Tile Painter, Random Target Damage
A scatterbrained fighter, Sariel’s Chain Combo picks multiple random targets for a maximum of 4-5 attacks depending on how far she walks. If a target is hit more than once, the damage on the succeeding blows is drastically Reduced (Halved at best, cut down to ¼ at worst depending on how long the combo is) compaRed to the first blow.
Her Active Skill as a Converter is to paint the nearest 4-5 Red or Green tiles (depending on Breakthroughs) to Blue, and with Ascensions this can also generate up to 2 enhanced tiles. Once she gets her Murky Wheel, she can start stacking up Sariel Marks up to 8 stacks, increasing her defense by 12% every stack. She loses half her stacks at the end of a round, so keep stocking them up so she can take blows. A terrible Chain Combo, mixed with an okay painting skill puts her where she is.
Beryl
Red/Green, Screen-cleaning, Area Denial
Someone should tell Beryl that landmines are a war crime. Her ability is to damage everything on the screen at once for 250% hurting, and this only gets stronger the fewer enemies there are on the board. If she has her equipment, her rather average AOE Chain Combo will also toss crystal mines in a cluster when doing Chains.
These crystals ignore defense and do 40% of Beryl’s ATK as damage, very useful if you deliberately run into a position where enemies can attack you (and blow off their toes!) on their turn phase, especially since the mines generate right before they move.
C TIER CHARACTERS
Areia
Green/Blue, Detonator, Self-Buffer
A fairly hard-to use swordswoman, Areia’s Active Skill powers herself up with a 20-25% ATK buff for a round, based on Breakthroughs. Sounds good, until the next round, where she tires out and suffers from a painful 50% ATK and DEF Reduction for that round. With Ascensions, she becomes immune to ATK and DEF Reductions while her buff is Active, so it could help to make her push forward if debuffers are assaulting her anyway, since she’ll be debuffed every round she isn’t using the skill anyway.
She has a normal small AOE Chain Combo, going from a 9 tile square to 25 tile square range and dealing 160-170% damage. Once she gets her Spectral Moon Sword, her normal attacks now hit the tile behind her target too, dealing 100% damage. That 50% general Reduction is a massive pain in the butt.
Mythos
Green, Linear AOE, Single Target Damage
A linear damage dealer with not much in the way of upgrades, her Active Skill only has one level. Mythos can dump all her Vis (with a minimum of 10) to rip up a line of targets in any direction you choose. The more Vis gets spent, the more damage it causes, by 8% per Vis spent. To charge this up, you use her Chain Combo, which hits only one target but gains increasing Vis and damage the further she walks, to a maximum of 3 Vis.
The damage goes from 210-260% damage, but with each Vis saved a 10-tile walk adds 1% chance to do an extra 50% damage, with a minimum 30% chance. Her Interceptor Staff gets her 5 vis at the start of every round, and at 3 Breakthroughs gets her another 1 Vis for her first normal attack for the round with an extra 100% damage for that one blow. Not bad, not amazing considering her star level.
Requiem
Yellow, Detonator, Map Damage, AOE Damage
A Vis user whose Active Skill deals damage to the entire map for her entire Vis supply, with a minimum of 10. Every Vis past 10 grants this skill an extra 15% damage. With 6 Breakthroughs, this ignores 1% of the enemy’s defense. Requiem also has a better version of the typical small-AOE Chain Combo attack: the damage numbers are the usual 160-180%, but this time if she manages to hit anything with it, the enemy furthest away from her eats a lightning bolt that does the same damage.
Her lance Banner of Discipline gives her 5 Vis at the start of every round, and her normal attacks have a 30% chance to zap the enemy furthest away from her. At 3 Breakthroughs, she gets 2 Vis for every kill she snags with her Active Skill.
Uriel
Red, Converter, Column Burn, Buffer
Uriel is useful in an all Red team, but she can also help out other colors in case of bad tile compositions by resetting all the tiles in the map and hoping you get something good. She has a chance to generate Red tiles, and will paint at least one enemy tile Red. Her Chain Combo is the usual kind of column attack, being 1-3 columns thick and dealing 130-140% damage, but this time with an added Burn effect which can stack up to 5 times and lasts 2 rounds.
Once she gets her Ring of Fire though, it’s best to put her in an all Red team. Ring of Fire allows her not just to passively set fire to enemies on Red tiles, each stack of Burn Active in the field also increases her fellow Fire unit’s damage by 1. This makes her dangerous in a huge crowd with lots of bad guys to immolate.
Wrath
Yellow/Red, Sniper, Artillery
A fairly simple to use character, albeit not a particularly hard-hitting one. Her Chain Combo is to pick up to 3 enemies nearest to her and lob 4 tile cross splash damage attacks at them, causing 110-120% damage in the center and 30-50% damage with the splash, depending on Breakthroughs. With Ascension 2, the splash turns from a cross to a whole square when she uses her Active Skill, able to hit things diagonally too. Her Active Skill is the Overload buff, which causes her Chain combo to hit the nearest enemy twice for two rounds.
Once she gets her Red Baron and Ace gloves, she can start reserving Bullets, which allow her to increase the final damage of her Chain Combo by 30% when used. She can reserve bullets by starting the round, 2 bullets for using her Active Skill, and another bullet everytime a Fire or Thunder unit throws out their Actives. You can use this to turn her lackluster Chain attack into something more painful.
Alchemy Stars Best 5-Star Characters
While 6-star characters are always the final goal, one’s bread and butter will tend to be 5-star characters for a good chunk of the game. As usual, Converters are often high up on the list because more tiles of a color you want=more damage, Chains and free movement for everyone else on the team.
Especially the several map-range cross painters , who can stand proudly even among six star tile painters who often focus on enhancing tiles and tactical placement rather than sheer tile count, which some of the 5-star painters excel in. We can’t stress enough how important having a paint roller in your team is. S is also the widest thankfully for the player, as 5-star has quite a lot of tile painters in it.
S TIER CHARACTERS
Odi
Green, Support, Map-Range AOE and Debuff, Column Damage and Poison
A particularly indiscriminate debuff-slinger with an AOE Active Skill that starts out with a 49 tile AOE with 400% damage and Slow, with Ascension 2 slapping two stacks of Poison on top. 5 Breakthroughs later and the attack just covers the entire map. Even her Chain Combo deals poison, along with 120-140% damage to 1-3 rows.
Her Modified Cable lets her cram even more poison into enemies, particularly with her normal attacks at a bonkers 70% chance. Ascension 3 lets her attack diagonally, which means if you run around a target, they’ll get absolutely sick. Turns out, poison also melts bosses down thanks to its percentage-based damage, so you can bring her specifically for such fights. Except for those immune for obvious reasons.
Pact
Green/Red, Converter, Tile Painter
A bad friend to Red teammates in spite of her sub-element, though Greens love her. Her Active paints the nearest 4 Red tiles Green. At Breakthrough 5 this adds another tile and lets her paint one last tile if she sat on her skill for a round, going up to a total of 6 tiles. With Ascension 3, she can also put down a pair of enhanced tiles.
Her Chain Combo is rather wonky, with an X-shaped AOE starting at 8 tiles total and ending with reaching the edge of the map. It also deals 155-180% damage and slows everyone sitting on Green tiles for two rounds. When her Ever-Returning Ring eventually comes back to her, she starts eating 3% of a slow-marked enemy’s max HP after she kills them. At Ascension 2, there is also a chance a tile next to the enemy that just got eaten is enhanced.
Mia
Yellow/Red, Sniper, Map-range Bullying, Multi-Target Damage, Spammer
Crazy, crazy, crazy! Too bad keeping Mia at arm’s length is easier said than done, considering her Active Skill is a map-covering 200-250% damage (depending on Breakthrough) AOE attack that also hits harder the more badly injured her victims are, up to an extra 100%. This also charges frightfully fast at 2 rounds. Her Chain Combo on the other hand is a bit more boring, dealing 150% damage to 2-4 nearby enemies depending on how long her combo is.
Her Black Spider’s Heart allows her to gain a Soul stack everytime someone dies from her Active nuke, maxing out at 5 stacks. She can use those stacks to explode people for 100% damage. With Ascension 3, her normal attacks hit 3% harder, and her Chain combos for 5% extra, for each stack.
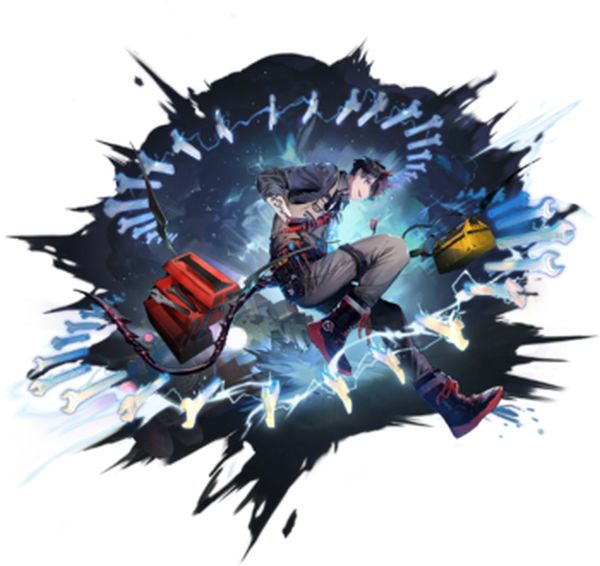
Maggie
Red, Converter, Chain Spammer
Mixing shy, timid and clumsy with explosions tends to mean an unhappy surprise for both the enemy and Maggie herself when they fight each other. Her Active is a map-spanning cross that not only causes 450% damage to enemies caught in the area, but also paints the tiles it hits Red. As for her Chain Combo, it’s a small 145-165% damage AOE starting with an 8 tile cross and ending in a 16 tile asterisk.
Her Leather Bomb Bag is a simple piece of kit, allowing her to increase her Chain Combo Damage by 5% after every 8-10 combos depending on Ascension level, and at Ascension 3, lets her trigger combos 1 tile sooner. Explosions are an easy solution to loads of difficult problems, and Maggie users know this.
Barbara
Red, Support, Nuker, Disabler
A tiny idol singer who plays the giant buzzsaw. For a support, her skills are extremely biased towards murdering loads and loads of enemies at once. Her slow-to-charge Active Skill hits the entire board for a whopping 550% damage (though do take into account her statline as a support), stuns everyone on a Red tile, and with Ascension 2 has a 35% chance to stun everyone on any other tile.
Pair her with a Red tile painter and laugh. Her Chain Combo is a normal medium AOE attack, with 145-160% damage reaching from a 12 tile diamond all the way to a 25 tile square. She starts being a support only after she gets her Modified Buzzsaw and Ascension 3, as she can now give everyone 5% extra damage against enemies sitting on Red tiles. Without the Ascension though, Barbara is the only one affected.
Barton
Blue/Yellow, Converter, Cross AOE Damage
War! What is it good for? To Barton, everything! This war-thirsty maniac’s Active Skill deals knockback and 450% damage to enemies within a cross AOE reaching the map edge, and every tile in that cross gets turned Blue too. This takes a slow 5 turns to charge, but Breakthroughs can Reduce that to 4 turns with a pre-charge.
His 155-160% damage Chain Combo starts out with a puny 9 tile square AOE, but a map-range cross gets added to it with a longer combo. Once he gets his Sherman SMG and Barton Knife, he can now inflict 80% damage diagonal normal attacks. With Ascensions, his attacks can deal extra damage to those hit by his diagonal normal strikes, which slap a Firepower Mark on them for two rounds.
Beverly
Yellow, Converter, Cross Damage, Tile Painter
A useful ally to all Yellow characters, and a good-for-nothing snooty rich snob to all Red characters. Her Active Skill takes the nearest 4-5 Red tiles and paints them Yellow. With Ascensions this also lets her generate up to 2 enhanced tiles, and with Breakthroughs allows her to pump out one more Yellow tile if she sits on this skill for a turn. Her Chain Combo starts out with damage to a row and ends with a map-spanning cross, the damage going up from 130-135%.
Her Thunder Spear lets her Chain combo explode any target it hits, dealing damage to any two (only one if not levelled) random enemies next to the victim. With Ascension 2, this explosion gets a range of 2 tiles, but still only hits two targets. The level of this skill affects damage Reduction per explosion, being completely negated at max level.
Faust
Red/Blue, Converter, Tile Painter, AOE Damage
An intellectual and charismatic man, and just like any sufficiently charismatic leader, probably should not be trusted. His Active Skill is exactly the same as Beverly’s, except instead of turning Red tiles to Yellow, it turns Yellow tiles to Red. He turns the nearest 4-5 Yellow tiles to Red, and at Ascension 3 can also add up to 2 enhanced tiles. At Breakthrough 2, sitting on this ability for a turn lets him paint another Yellow tile Red.
His Chain Combo deals 150-165% damage from a 12-tile diamond to a map-spanning asterisk. His Nameless White Suitcase lets him inflict Fright on enemies with a 12% chance per enemy each start of the round, and at Ascension 2, causes Frightened enemies to go pop in a 9 tile square when killed, dealing 10% max HP as splash damage.
Kleken
Blue, Converter, Tile Painter, Asterisk AOE
A relatively simple tile painter, at least before he gets his gear. Kleken’s Active turns 4-5 of the nearest Green tiles to Blue depending on Breakthrough count, and with Breakthrough 2 lets him paint another Green tile Blue if he sits on his ready skill for a turn. At Ascension 3, this can also generate a pair of enhanced tiles.
Their Chain Combo is a 155-165% damage AOE attack starting from an 8 tile cross to a map-range asterisk depending on combo length. He gets a bit more complex after getting his Illusory Tentacle, which allows his Chain Combo to inflict Fright for a round against any enemy at 80% or below HP right next to him in a 4 tile cross. With Ascension 2, killing a Frightened enemy also scares the heck out of their buddies, inflicting fight on them too in a small cross pattern. Few things are scarier than getting scammed into a wall of tentacles.
Corax
Blue/Green, Detonator, AOE, Heavy Damage, Teleporter
A rather icy assassin who once was a surgeon, it’s no wonder he knows where to hit people for a sure kill. His Active Skill allows him to teleport anywhere, and anything in a rectangle between him and the destination takes a hit. A smaller rectangle made by a shorter distance teleport means more damage, up to 600% with 3 Breakthroughs. You have the option to either hit lots of enemies at once, single out a nearby enemy for deletion, or just use it to get yourself in a better position and take the damage you cause as a happy bonus.
His Chain Combo has a small AOE, from a 9-tile square to a 17-tile asterisk, with 155-175% damage. His Arctic Scalpel turns his normal attacks into 2 strikes with 60% damage each, with a 20% chance to deal another 50% damage per blow. The more combos, the bigger bonus chance, going up from a pathetic .5% to a decent 50%.
Nemesis
Yellow, Converter, Tile Painter
Another one with a map-ranged cross tile painting Active Skill, this time turning tiles Yellow and dealing 450% damage and some knockback. Her Chain Combo is pretty much the same as Mia’s, dealing 150% damage to 2-4 enemies depending on her walk.
With her Blade of Judgement: Justice weapon, her attacks give her Judgement Marks that increase her defense by 10% each. Initialyy, they vanish at the end of the round, but after Ascension 3 she gets to keep half her stacks and they increase ATK by 3% to boot.
Sikare
Green/Red, Converter, Tile Painter, Multi-Target Attack
It seems a lot of 5-star converters like painting crosses. For Sikare, she paints hers Green with the usual 450% damage and knockback. Her Chain Combo is a bit meh, dealing 120% damage to 2-4 nearby enemies. You have to be a bit careful using her Faria the Black Box item, as it triggers the first time she attacks.
She deals an extra 100% damage and at Ascension 3, adds a defense ignoring 5% based on the target’s current HP. Try to make sure you hit something important with that. Other than that, use her for the big tile painting coverage.
A TIER CHARACTERS
Philyshy
Blue/Red, Support, Teleporter, Healer
While having very little to show for in terms of murder power, Philyshy is an extremely dedicated healer. Her Active Skill can teleport her to anywhere you want while healing the team for 250% of her own ATK. Teleporting into a crowd also gives additional healing, 10% for every bad guy within a 25 tile square of her.
At Ascension 2, she also gets a shield equal to a third of her HP and Breakthrough 5 increases the tile range to 49 tiles square and plops an extra 5% healing per nearby enemy. When she gets the rather bombastically named Darkchaser the Rapier, she immediately heals the team for 40% of her ATK plus 4% of their lost HP at the start of every round.
At Ascension 3, she gets angrier and angrier the more her teammates are dinged up, with her ATK going up by 1% for every 5% her teammates’ HP is missing. This absolute devotion to healing means you’re giving up damage power if you use her, but sometimes you just need a specialist.
Dawn
Green/Yellow, Sniper, Map-Range Attack, Multi-Target Attack, Healer
Another sniper whose Active Skill isn’t particularly snipy, though if you were blind like her and put into a fight you probably need some kind of attack that doesn’t need aiming anyway. She just straight up deals 200% damage to everyone on the map, though at Ascension 2 she hits twice if she hits only a maximum of two foes.
Her Chain Combo hits for 155-165% damage, and hits 2 to absolutely everyone within a 49 tile square. Her Chime Staff lets her mark targets with her Active, and once marked, hitting them with Dawn’s Active or Chain heals the team for 10% of the damage she caused, eating the mark. At Ascension 3, the attack increases by 25% instead if the whole team is at full HP. A whole load of indiscriminate AOE puts her up here.
Cuscuta
Green, Sniper, Multi-Target Heavy Damage, AOE Damage, Enemy Teleport
A multipurpose character capable of doing decent AOE and displacing specific threats. Her Active Skill lets you pick one enemy from anywhere (Or within three tiles of her without Breakthrough 5) and slam them with 450% damage. If the enemy only sits on one tile and isn’t immune to knockback, you can also choose where to push them to.
You can either push them within your murdering range to finish them off, or away from you if they’re too much of a threat to deal with at the moment. At Ascension 3, this skill also makes a marked target explode when killed for 40% DEF-ignoring splash based on Cuscuta’s ATK, within a 9 tile square, though you also need her gear to make it work. Her admittedly expensive Chain Combo has extremely wide range, dealing 130-150% damage, with longer walks increasing the target size from a measely 3 enemies to every poor idiot within a 49 tile square.
Her gear, the WitheRed Flower, allows her to throw Dismember Marks at any enemy she hits with her Chain combo, up to 5 marks. The 5% extra damage per mark is nice, since her natural Chain percentage is a bit low to make up for the big coverage. At Ascension 2, normal attacks have a 30% chance to mark enemies too.
Noah
Blue, Support, Shield, Row Damage, Healer
Noah does well with Blue tile-painters with an emphasis on tile count instead of tactical color placement, as her Active Skill gives 8-10% (based on Breakthroughs) of her HP as shields for every Blue tile currently on the field for 1 round. At Ascension 2, her defense also goes up for a round by 50%.
She has a very simple but wide-reaching Chain Combo, damaging 1-3 rows of bad guys for 130-145% damage. Her gear also turns her into a proper healer, with her Hope and Frozen Shards converting 30% of any remaining shields to HP when they vanish. With Ascension 3, any currently existing shields also make Noah’s defense go up by another 50%.
Schwartz
Yellow, Sniper, Map-range Damage, Asterisk AOE Damage
This old man lived this long for a reason. His Active Skill covers the entire map with a 300% damage attack, with an extra 10% damage based the HP the enemy has at the moment. At Breakthrough 2, this instantly kills anything that isn’t a boss and has less than 10% of their max HP. At Ascension 2, he also hits harder, with an extra 5% of his defense calculated as damage.
His Chain Combo is simple, hitting for 155-165% damage towards an AOE starting at an 8 tile cross to a map-range asterisk. When he pulls out his Sovereign’s Blade, his defense goes up by 6% for every character you deployed belonging to the nation of Lumopolis, or anyone Yellow for that matter. At Ascension 3, this also gives out 6% ATK.
Hydrad
Blue/Red, Support, Team Buffer, AOE Damage
A fairly straightforward buffer for Blue teams, Hydrad’s Active Skill allows Blue element teammates to trigger their Chain Combos twice on the round it is activated in. The second Chain combo uses 70-85% of Hydrad’s ATK as damage rather than the teammate’s own ATK stat based on Ascension. The Chain combo is a fairly normal medium AOE, doing 155-165% damage and going from a 9 tile square to a 25 tile square depending on combo length.
His Shadow Wolf Elixir gives him one Wolf Mark at the start of every round. This allows him to act like a cactus, slapping his first attacker for the round with a 100% damage def-ignoring counterblow. Normally, all marks are cleaRed at the end of the round, but with Ascension 2, this gets negated and he can store these marks.
Istvan
Red/Blue, Support, Asterisk AOE Damage
Istvan’s Active Skill is a lot like Hydrad’s but for Red teams, doing the same double Chain Combo buff for any Red characters on the team. Even the damage numbers are similar, with the second Chain Combo proc doing from 70-85% of Istvan’s ATK stat as damage rather than the teammate doing it.
Similarities end here, with his Chain Combo having a decent AOE starting from a 12 tile diamond to a map-range asterisk, with 150-165% damage. His Shepherd’s Staff also allows him to cause a 5% ATK debuff to enemies with his Chain Combo, albeit with a different AOE of a 9 tile to 25 tile square depending on Ascensions.
Louise
Green, Support, Buffer, AOE Damage
Little Blue Riding Hood has Green eyes and that’s good enough to set her to Green element. Her Active Skill lets all her Green element teammates trigger their Chain combos twice, with the damage of the second Chain combo being based on 70-85% of Louise’s ATK rather than the attacker’s own stats, based on Ascensions. Her Chain combo is a simple small-AOE attack with 150-170% damage in an area from 9 tiles square to a 16 tile asterisk.
Getting her Prophecy and Fairy Tale turns her into a healer too, allwing her to heal the team for 60% worth of her own max HP and increasing her DEF by 100% everytime you trigger Aurora Time. Upgrading to Ascension 2 Reduces the DEF buff by 50%, but makes it last 2 rounds. Keep her in a Green team for maximum catharsis.
B TIER CHARACTERS
Taki
Red/Green, Detonator, Artillery, Row Damage
A detonator who seems to act a bit more like a sniper in terms of ability. Their Active Skill throws fire at a tile, exploding in a cross and dealing 400% damage to the center, and 80% damage with the splash. At Breakthrough 2, it paints the tile Red and enhances it, and at Ascension 2 it Burns its victims.
The Chain Combo is a basic row attack, from 1-3 rows thick and dealing 130-145% damage. His Serrated Blade: Ender For All applies a Burn mark at whoever has the highest HP percentage left at the start of a round, and this lets Taki hit them for an extra 10% damage. With Ascension 3, every kill on a Burn marked target increases his ATK by 3%, maxing out at 15%.
Bonacie

Yellow/Blue, Support, Cross AOE Damage, Row Damage
Bonacie’s Active Skill lets her aim an attack in a certain direction and every single tile mook gets shoved in that direction, and the whole board eats 250% damage. She doublecasts this if there are only two enemies left to hit, at least at Ascension 3. Her Chain is a basic row attack, from 1-3 tiles thick and dealing 130-145% damage, and is expensive.
She only really starts being a proper support after getting her Celestial Band, which gets her a Divine mark on battle start or when using an Active. This increases her DEF by 120% for a single blow, then it vanishes when she takes a hit. At Ascension 2, this mark also gives Yellow teammates a 10% damage increase.
Benny and Curo
Red/Green, AOE Damage, Heavy Damage
A pair of buddies so tightly knit they count as a single character for the purposes of gameplay. Their Active Skill lets you mark a tile. Make sure you take the Chain Combo’s AOE into account when doing this, as walking for twice the amount of tiles needed for a Chain Combo lets the Chain Combo drop not just where you land, but also on the marked tile.
The Chain combo itself has smaller AOE than normal to go with its short walk distance requirement, starting with a 9 tile square and ending with a 17 tile asterisk, with damage going from 140-155%. Getting Benny her Firelash guns and Curo her Lightspeed sword allows their normal attacks to do a fat 60% extra damage to enemies sitting on Red tiles. Rather difficult to use, but can hit hard in the right circumstances.
Keating (And her buddies)
Yellow, Support, Taunt, Debuffer
These four are living proof that kids are a cruel bunch. Most of Keating and her friends’ attacks revolve around making fun of people. Their Active Skill is to put a clone of themselves on a tile and have them laugh at the enemy maliciously, drawing aggro in a 49 tile square around it. They get slowed for 2 rounds if they have 5 Laughter Marks on them.
At Breakthrough 5, it only takes 4 marks to slow the enemy, and 6 marks paralyze them outright for a round. You get Laughter Marks via their Chain Combo, which inflicts them on the targets. They pick up to 3 targets within a 49 tile square and hit them for 120-155% damage, and slap 1-3 Laughter marks on them up to a max of 8 per target.
With Ascension 2, the Laughter Marks also increase the damage of their Chain combo. Once they get the Scroll of Chanting, they allow other Yellow units to hit for 1 extra damage with their normal attacks for every mark on the target.
With 3 Ascensions, killing a target who has a mark slaps 1 extra mark on every enemy on the map. Pair these jokesters with a targeted AOE damage dealer (or anyone with a hard-hitting AOE Chain Combo) for a good laugh.
Vivian
Yellow/Blue, Sniper, AOE Damage, Multi-Target Damage, Buffer
A rather indiscriminate sniper whose Active Skill has no right being called Defensive Counterstrike. It’s a 320% damage AOE attack that starts off with a 49 tile square, but at Breakthrough 5 covers the whole map.
At Ascension 2, this also makes Yellow units’ Chain combos cheaper by a tile. She also paints one enemy tile Yellow, but there are far better options for tile painting. Her Chain Combo hits 3-5 enemies for 140-170% damage, and she picks within a 49 tile square.
For some reason she thinks she doesn’t need a lead apron for her Radium Rapier, though it does allow her to buff her Yellow teammates for 6% of her own ATK for a round whenever her Chains hit all enemies. Mixed with her expensive Chain, this makes it difficult to get the buff unless the enemy force is rather tiny.
At Ascension 3, she also applies this to Blue units and anyone from the Illumina Federation, and it lasts for 2 rounds.
C TIER CHARACTERS
Dayna
Yellow/Green, Detonator, Columnar AOE Damage, Tile Painter
A girl whose proficiency is in facilitating back-alley backstabbing and electrocution. Her quick-charging Active Skill carries a fairly tiny AOE, about on par with those of Chain Combos, starting with a 9 tile square and maxxing out at a 13 tile diamond depending on Ascensions. The damage is 250%, and at Breakthrough 2 paints an enemy tile Yellow.
Her Chain Combo is a columnar attack, dealing 130-145% damage to a column 1-3 tiles wide. Her Razor’s Edge knives allow her to support the team at Ascension 3, turning its self buff to a team buff that lets the whole team do an extra 5% damage to all enemies sitting on Yellow tiles. A support, tile painter and AOE damage dealer all at once, she’s flexible in many situations but you might be better off with a more specialized character. After all, that’s why you have 5 slots in your team.
Leona
Red, Sniper, Random Multi Target Attack, Asterisk AOE
A hard hitting damage dealer who doesn’t like people sitting next to Red tiles, though she needs to aim better. Her Active Skill hits random enemies 5 times for 90% damage per blow, and she hits them more for every Red tile next to them. Useful when paiRed with a Red tile painter, but that random targeting puts her down considering there are so many characters with proper AOE attacks.
Her Chain Combo is a simple affair with very small AOE, starting from a 9 tile square to a 16 tile asterisk, with damage from 150-170%. Even her gear is simple, the Nibelung’s Ring gives her normal attacks more pepper, adding a 75% chance to do a Red Dragon Attack for 50% of her normal attack’s damage. At Ascension 2, this also slaps a Burning stack on the victim for 2 rounds.
Regina
Red/Yellow, Detonator, Map-range Damage, Column Damage
A rocker who likes making a flashy show, but sometimes too much flash and not enough speed can cause headaches. Her Active Skill is a good ol’ map-spanning kaboom dealing 350% damage and knockback to absolutely everyone, though chargeup is very slow. She also only has two levels of Chain combo instead of the usual 3, dealing 105-110% damage to 1-3 columns. For something that starts at a 5 tile cost, this is just plain abysmal.
Once she gets her Electric Guitar, her Chain Combos deal up to another 100% damage, hitting harder against closer targets, though it doesn’t give any bonus at all past 3 tiles. At Ascension 2, the range of the bonus is slightly increased, as this turns into a 49 tile square. Sounds like a lot, but remember that she only gets a 3 column wide attack so at most this adds 6 extra tiles to her bonus range. Very weak without her gear, and even then she’s a bit hard to use.
Robyn
Green/Yellow, Detonator, Artillery, AOE Damage
Her Active Skill lets her reach out and touch anyone across the map, selecting an area to bombard with 250% damage to an area 9 tiles square to 13 tiles in a diamond depending on Ascension. At Breakthrough 2, it also enhances an enemy tile. Average cooldown and lackluster coverage, and there are better tile enhancers around.
She gets a fairly standard Chain Combo, dealing 150-175% damage to an area, starting with a 12 tile diamond and ending in a 25 tile square depending on combo length. Robyn’s Straight Pipe increases her damage by 5% against any bad guys sitting on Green tiles. At Ascension 2, this applies to everyone.
Vice
Blue/Yellow, Sniper, Multi-Target Attack
Ah Vice, the face of Alchemy Stars and the tutorial girl. An archer with a thing for pray and spray, you’re praying she’d spray something important most of the time. Her Active Skill hits a random set of enemies 5 times for 80% damage, and shoots them once more for every Blue tile next to the target. Her Chain Combo deals 140% damage to 2-4 nearby foes, simple enough.
Once she gets her Longbow: Focused Rain, she gets Locking Marks everytime she hits someone. Her damage goes up by 2% for every stack, but this is cleaRed at the end of the round so it’s usually her last blow that hits hardest. At Ascension 3, these stacks also increase her Chain Combo’s damage by 4%. If only she let us pick her targets.
And this ends our tier lists for 6 and 5-star Aurorians. We hope this helps you make picks for your team (definitely get a Converter and teammates that use their tile color). Don’t hesitate to leave a comment below!