Skip to Content

Age of Origins Beginner’s Guide (2024 Update): Tips, Tricks & Strategies to Slay Zombie Hordes and Survive Longer

The skies are dark, the clouds are overcast, and the zombies are hungry. Fires burn and black smoke rises heavily from the ruins of skyscrapers. Out of the corner of your eye, you see a throng of survivors. They’re wet and hungry, huddled around a dumpster fire for warmth.

Just another beautiful day in the apocalypse.
age of origins guide

Age of Origins is an empire builder game set in a zombie apocalypse. Not only are you in charge of reclaiming and building a city that can withstand the ferocious undead that have taken over the world, but you’ll also need to prove your mettle on the world stage by defeating other players and using their resources for your own ends. Age of Origins is available on both the Google Play Store and the App Store.

There’s a lot to unpack in Age of Origins, and new players can quickly feel overwhelmed by the wealth of options and activities they have. Much has also changed in the game’s flow now that it’s aged a bit – as can be seen in the title screen, the game’s celebrating its 5th anniversary – hence the creation and revision of this beginner’s guide that aims to clarify game basics and help you find solid footing before you head out and explore the meat of the game for yourself.

If you’ve already played other empire builders like Evony: The King’s Return, War and Order, or even Sea of Conquest, you should have no problem getting used to the systems of Age of Origins. If, however, you’re completely new to the mobile empire builder genre, I invite you to read on!
In this comprehensive Age of Origins beginner’s guide, we’ll be covering the following topics:

  • Base basics. We’ll talk about the many structures you can build in your city, what they do for you, and so on.
  • Economics. Upgrades, new units, and new buildings don’t pay for themselves, after all. This section will also include a list of where to find freebies in the game.
  • Combat. There’s both PVE and PVP aplenty in empire builders, and you’ll need to know the ins and outs of both if you want to succeed. We’ll discuss how combat plays out, as well as the various means of getting stronger that weren’t or were only lightly touched on in previous sections.
  • Alliances. Joining an alliance is pretty much mandatory for any empire builder, and Age of Origins is no exception. Let’s go over what you can do for your alliance, and what your alliance can do for you.

Leverage Your Beginner’s Protection

Before we begin, let’s talk about your beginner’s protection. If zombie media has taught us anything, it’s that tired old cliche of “humans are the real monsters”. Okay, so maybe that’s not fair, but that’s not the only thing that’s not fair – Age of Origins is a PVP game at heart, and other players will be looking to raid your city for resources. That’s where your beginner protection comes in super handy.

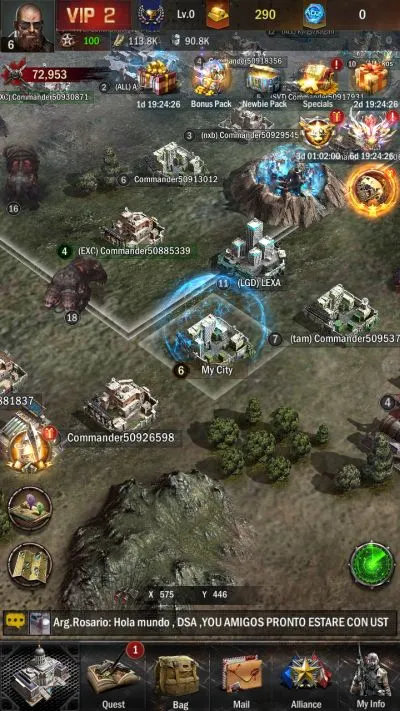
Shields show up as blue bubbles around cities.

Each new commander in Age of Origins is given a free 3-day protection that’s automatically applied to your city. While this shield is up, you cannot be attacked by other players. However, 3 days isn’t a lot of time, so be sure to acclimate yourself to the game’s basics, build a starter army, and join an alliance within those 72 precious hours. And if you think you’re safe from others only, think again – taking an offensive action during this time will void your shield!

City Basics

The city you’re in charge of is just one of hundreds of thousands – but it’s yours, and you should take care of it. Before you can rebuild and defend yourself, you should familiarize yourself with the options that your city gives you.

This section will be divided into two: the first for “essential buildings”, which can be upgraded and serve a purpose outside of meta utilities, while the second will be “mechanics buildings”, which provide utilities such as access to the gacha, daily quests, login rewards, cash shop, and so on. Note that this list isn’t 100% exhaustive – it’s just to help you get into the early game groove. By the time you can unlock more advanced buildings, you’ll know enough of the basics to understand what they can do and how they can help you.

Quick Tips:

  • You only have one builder in Age of Origins. You can get temporary builders by using the Golden Hammer item from your inventory; you’ll get one early which will give you a second builder for 24 hours.
  • Your Main Hall’s level serves as your “tech level”. Upgrading is vital to unlocking features and upgrading every other building.
  • Main Hall upgrade timers become exorbitantly gigantic later in the game due to the Main Hall’s importance. It’s a good idea to save speed-ups for your Main Hall upgrades.
  • Depots store your resources. The higher your Depot’s level, the more “safe” resources you have – these resources cannot be plundered by other players.
  • Camps and Factories train and build units, respectively. The higher their levels, the more advanced the units you can train, and the more units you can train at once.
  • The Academy allows you to research technology that grants passive boosts. Always be researching something.
  • The Garage is where your units hang around. You can see your army composition here as well as save unit setups for quick fleet deployment. The higher your Garage level, the bigger the fleets you can deploy.
  • The Garage also has a separate tech tree where you can improve the stats of your fleet.
  • The Hospital heals your wounded units. The higher the Hospital’s level, the more wounded it can house and the faster it heals them.
  • The Embassy affects your ability to receive aid from your allies (in an Alliance, not metaphorically). Higher Embassy levels allow you to house more allied units which will help during defense as well as give you more opportunities to receive assistance from your alliance
  • The Dispatch Center affects the size of the rallies (consolidated armies) you can field. Unless you’re an alliance leader or are spearheading attacks for your allies, you can skip upgrading this.
  • The Recon Center serves as your intel HQ. The higher its level, the more detailed the reports you’ll get on your city and hostile players, such as who’s attacking you, how big is their fleet, etc.
  • Walls provide defense to your city in the form of a health bar. The higher the Walls’ level, the more health. Wall level is also often a direct prerequisite to Main Hall upgrades.
  •  You can place resource generators and utilities in unique plots. Don’t forget to upgrade these ASAP as early levels are free and every little trickle of resource income helps!
  • You’ll unlock new types of generators and utilities as well as more plots to put them in as you level up.
  • The City Hall grants you access to certain features such as the daily quests, your referral code, monthly cards, and some tips if you care to read them.
  • The Merchant Docks let you trade on the black market once you hit level 9. It also allows you to redeem your daily login rewards if you missed them when first opening the game.
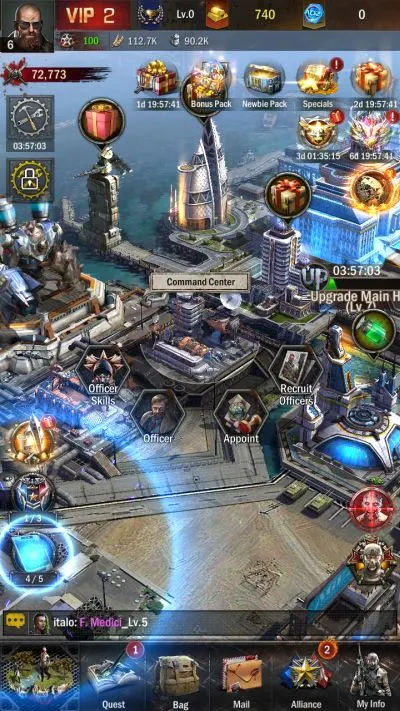
  • The Command Center is where you both roll for new heroes and assign heroes to positions in your city.
  • Normal recruitment generates free attempts quite quickly, but don’t expect to get anything good. Elite recruitment has better odds for rarer officers and their fragments. Note that both banners can also yield non-hero items, such as resource packs!
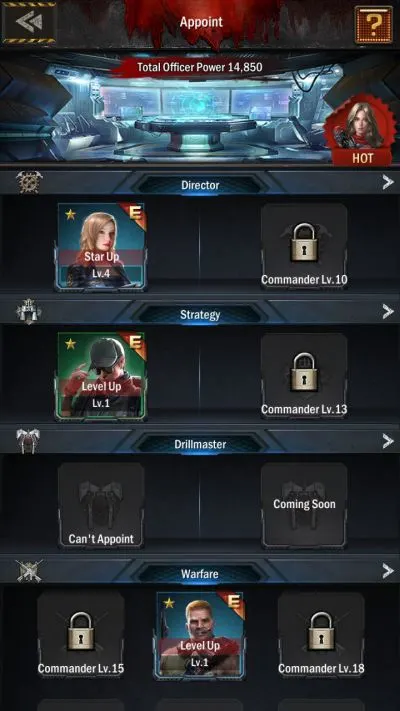
  • Heroes are divided into four classes: Director, Strategy, Drillmaster, and Warfare. This affects what position they can be assigned to. While in a position, a hero provides passive bonuses to your city. The stronger the hero, the bigger of a bonus they’ll grant.
  • You unlock more appointment positions as you level up.
  • The Biochemical Laboratory lets you dispatch special infected on resource-collecting missions. You’ll need to treat them and socialize with them to help them keep the virus under control. These missions can be rerolled up to 3 times for free each day if you’re looking for specific resources.
  • The Titan Bay (not the official term) is where you keep a powerful mutant as a super unit, as well as where you strengthen and develop your titan of choice. There’s a male mid-ranged titan and a female long-ranged titan.
  • In general, it’s better to focus on the female titan in the early game as her long range gives her better longevity and more opportunities to deal damage.

Builders

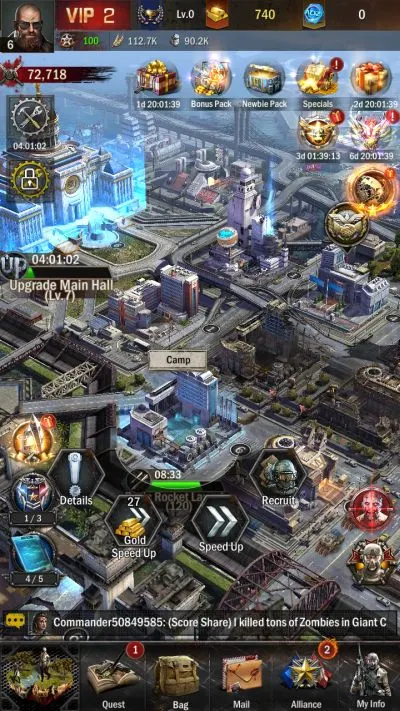
Before we start rebuilding your city, let’s talk about the concept of builders. In empire building games, the number of simultaneous constructions or building upgrades you can do is limited by how many builders you have. These can be seen in your city menu:

Here you can see that my first builder is busy with an upgrade, and I don’t have a second builder.

Now, you can get a second builder in several ways. The most straightforward way to unlock your second construction slot is by shelling out real cash on the Eternal Queue pack, which gives you an Eternal Golden Hammer. However, you can also use a regular Golden Hammer to unlock the second builder slot for a limited time. Keep playing through your tutorial quests, and you’ll quickly get a 1-day Golden Hammer – which I urge you to use, as 3 days isn’t a lot of time to get up to speed!

Now, let’s start with the essential buildings.

Main Hall

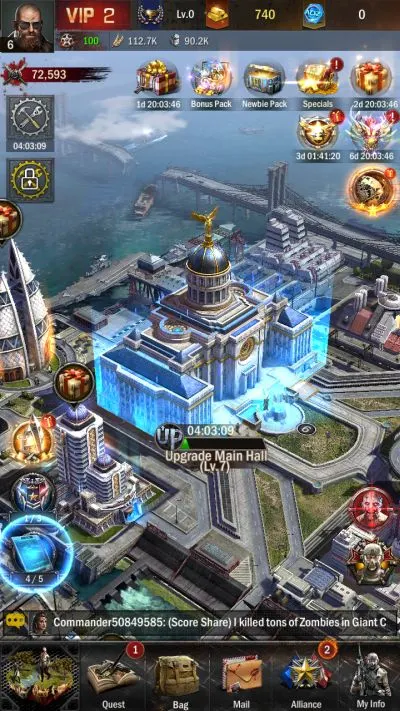
Your Main Hall is the center of your budding city.

A beacon of order in all this madness.

Upgrading your Main Hall is vital as its level gates the rest of your technology. Essentially, it’s your “tech level”. Because of the importance of Main Hall upgrades, these cost the most in both resources and time. It’s a good idea to save speed-ups for upgrading your Main Hall, as in empire builders, central building upgrade timers of days, weeks, or in the most extreme cases, months are not unheard of!

Depot

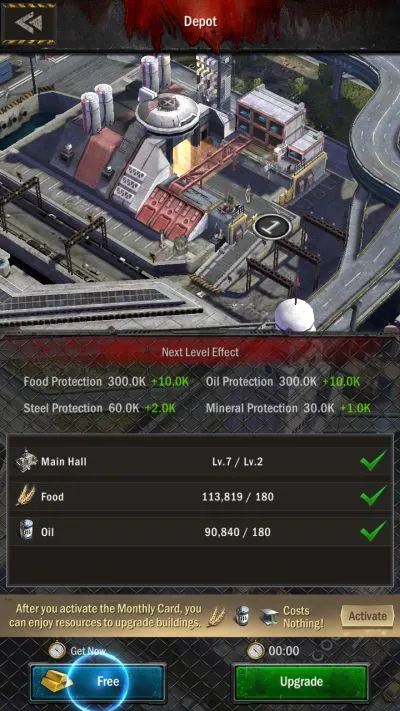
The Depot is where your resources are stored.

Can also be used as an emergency wall against Zerglings zombies.

Depot upgrades don’t increase your resource cap – and there is no resource cap in the game, to begin with. What Depots do is increase your threshold of “safe” resources, which can never be plundered by other players. The higher your Depot’s level, the more “safe” resources you have, allowing you to rebuild with greater speed and ease.

Barracks

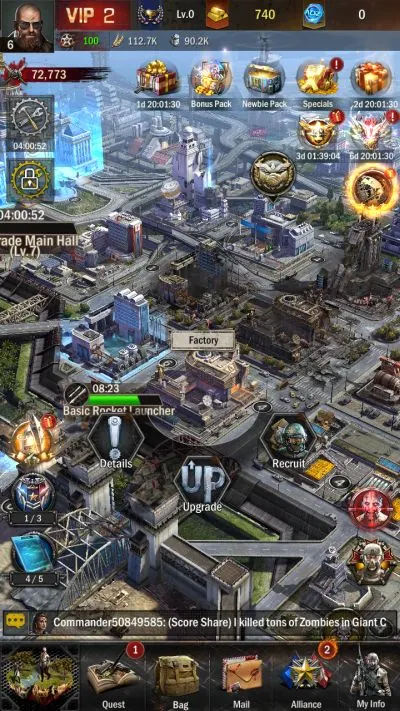
“Barracks” aren’t an official building; I’m using them to refer to both your Camps and your Factories.

Camp in red, factory in green.

Both Camps and Factories allow you to train units to fight both the undead and other players. The Camp trains infantry, while the Factory builds vehicles. The higher the level of your Camp or Factory, the more units it can train at once, and the higher the tier of the units it can train.

Basic Shredders are unlocked by having a Factory at level 4.

As you level up, you’ll gain the ability to repair a second Camp and Factory, allowing you to train or build more units simultaneously.

We’ll talk more about the units you can train later.

Academy

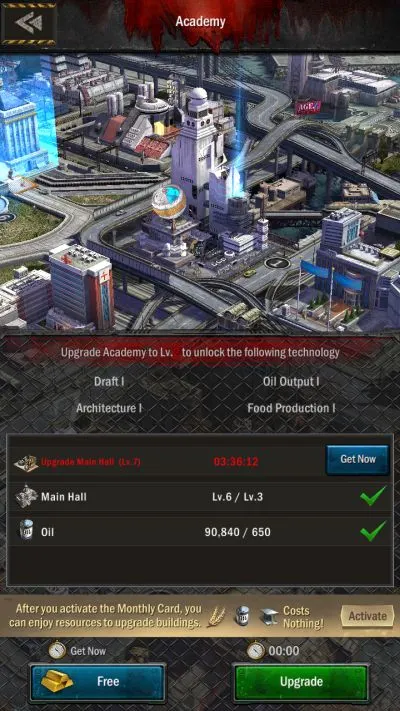
The Academy is your technological center. Here, you’ll be able to research passive boosts for your city, whether that comes in the form of military might or economic prowess.

howie_scream.mp3

Each technology requires time and resources to complete. Certain technologies may also require the Academy itself to be at a certain level. Note that while upgrading the Academy unlocks certain research paths, the Academy’s level has no direct influence on speed.

Always be researching something!

Garage

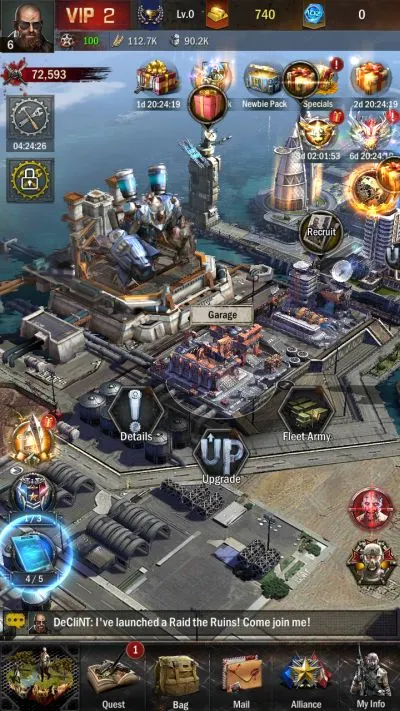
The Garage is where your units hang around while waiting for deployment. Deployed units are assembled in armies called fleets. The higher your Garage’s level, the bigger the fleets you can deploy.

Vroom vroom.

By tapping on the Garage, you can get a quick overview of your army’s stats, its total strength, and how many of each unit you have available. You can also create army presets here for easy army composition management, as well as deployment.

Your Garage also gives you access to a special tech tree dedicated entirely to improving the performance of your fleets.

These buffs apply separately from the Academy and your leader buffs, so be sure to pour some resources into this – you will always need fleets, even if you’re playing peacefully!

Hospital

Whenever combat occurs, casualties can either be wounded or killed. Killed units are pretty much gone forever (and you’ll need to train new cannon fodder to replace them), but wounded units end up at the Hospital.

Do they do cosmetic surgery in the apocalypse, I wonder?

The higher your Hospital’s level, the more wounded units it can heal at once, and the faster they’ll recover.

Embassy

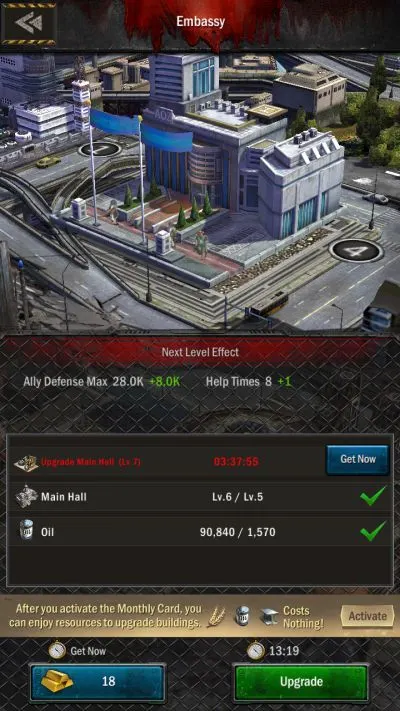
The Embassy is your diplomatic headquarters. Improving it directly increases the ability of your allies to help you.

Only together can we rebuild.

Leveling up the Embassy increases the maximum number of allied troops that can be garrisoned in your city – who will help with defense if the city is attacked – as well as the number of times you can receive help with your timed projects. More on that in the Alliance section.

Dispatch Center

The Dispatch Center allows you to coordinate attacks better via the use of rallies.

Tuned in.

Rallies are essentially collections of friendly armies, which you’ll see more of once you join and actively engage in an alliance. By amassing everyone’s fleets into a single rally, alliances can more easily overpower tough foes in both PVE and PVP.

Upgrading your Dispatch Center increases the number of units your rallies can hold. This is typically not important unless you’re heading an alliance or are an active, powerful member of one.

Recon Center

The Recon Center is located far to the northeast of your Main Hall. It’s the white tower near the water. As its name suggests, the Recon Center is responsible for reconnaissance and information.

Eye in the sky.

The higher the level of your Recon Center, the more information you’ll get on movement on the world map – such as who’s attacking you, how many units are in their fleet, where they’re coming from, when they’re arriving, and so on. Each Recon Center provides a new level of intel, so it’s important to upgrade this especially if you’re in a conflict-heavy zone.

The Recon Center also stores alerts if your city or units were attacked while you were offline.

Walls

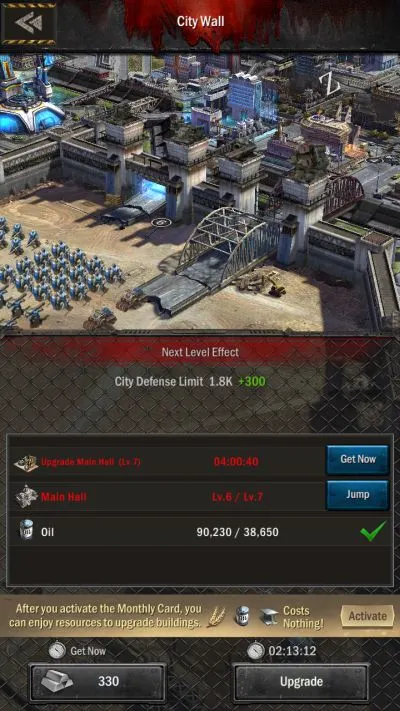
Your City Walls serve as your final line of defense. Should you be attacked, it’s up to your Walls and garrison to fend off the attackers.

“It is from their foes, not friends, that cities learn the lesson of building high walls.”

The higher the level of your Walls, the more protection it provides in the form of a bigger defense HP bar. Note that Walls also often serve as a direct prerequisite for upgrading your Main Hall level. Lesson: always upgrade your walls.

Resource Generators and Utilities

You may have noticed your newbie resources running thin as you construct and upgrade buildings. Don’t worry – there are buildings dedicated entirely to producing the core resources that’ll keep your city running. We’ll call these types of buildings resource generators.

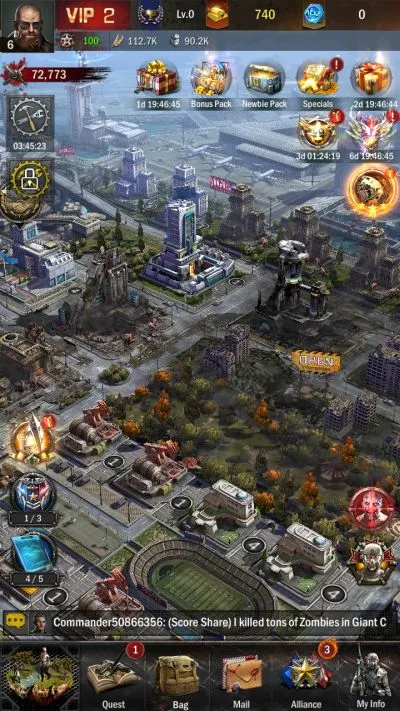
All the plots for resource generators can be found beside your walls, near the stadium.

The resource generators available to you are:

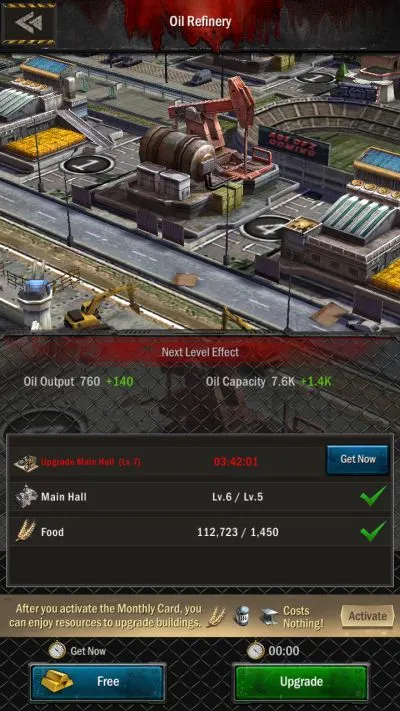
  • Oil Refineries produce oil.
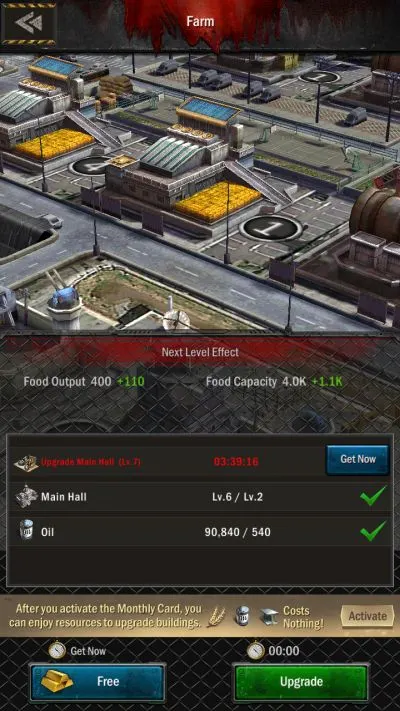
  • Farms produce food.

Both oil and food are important for virtually everything in the game, so it’s always a good idea to not only build as many Oil Refineries and Farms as possible but also upgrade them whenever you can, as a resource generator’s level improves the speed and efficiency at which it creates resources. Just as a reminder, you can upgrade most buildings for free (and instantly) in their earliest levels!

Apart from these, two utility buildings can also be built in the same plots as resource generators:

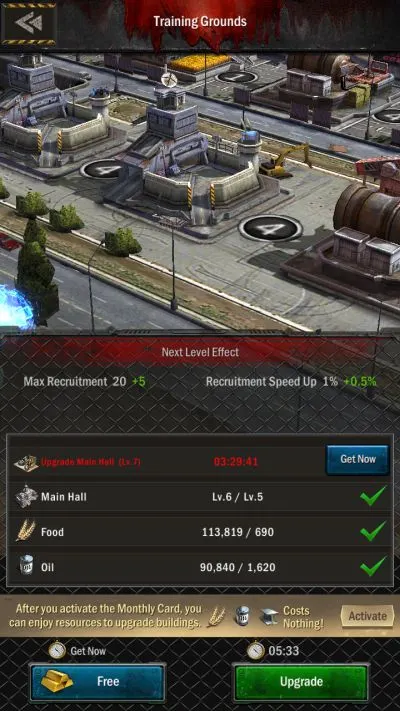
  • Training Grounds make training units more efficient by providing a bonus to how many units can be trained at once as well as a speed boost to how quickly they’re trained.
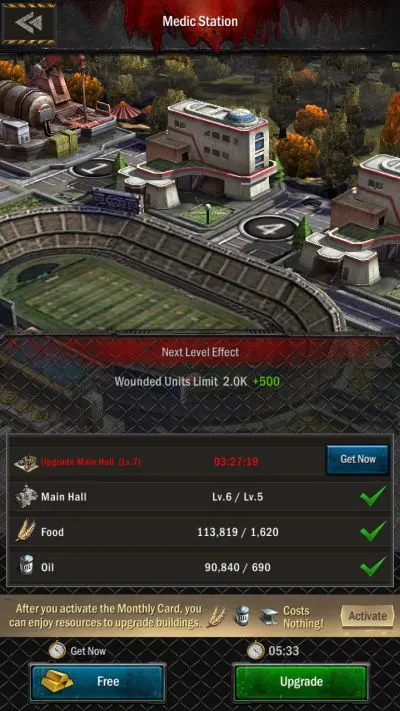
  • Medic Stations provide a place for your wounded to rest before they’re treated at the hospital, thus allowing you to salvage more soldiers from a difficult battle or defeat.

As you progress through the game, you’ll unlock more resource generators for the new resources you discover. You’ll also be able to clear ruined buildings for more lots.

And now for the “mechanics buildings”.

City Hall

Beside your Main Hall is your City Hall, because bureaucratic consolidation in the apocalypse is apparently a terrible idea.

…why.

The City Hall cannot be upgraded, but you can tap on it to access your daily quests and referral code, purchase (and redeem) monthly cards, and read up on some gameplay tips.

Merchant Docks

The Merchant Docks are located to the upper right of your Main Hall.

Why are we not rebuilding civilization on the sea again?

You can tap on the Merchant Docks to get your daily login rewards if you missed them. At Main Hall level 9, you can also trade for items here via the black market.

Command Center

The Command Center is the central hub for anything related to officers (heroes).

Who will champion your people?

First, let’s talk about recruitment. There are two recruitment types in Age of Origins: regular and elite. Regular (blue) recruitment is cheaper and can be done for free a limited number of times per day, but don’t expect anyone great. Elite recruitment (purple), on the other hand, is more likely to get you better officers, but you’ll need to spend for the more expensive Elite Recruitment Orders to roll in this gacha. Note that both banners also contain items that aren’t heroes or their fragments!

Next is appointment. Your officers aren’t just war-hungry fighters. Some are great administrators, researchers, and leaders. It takes more than brute strength to rebuild society, after all. This is reflected in an officer’s class.

Seen here.

There are four classes in Age of Origins: Director, Strategy, Drillmaster, and Warfare. At the Command Center, you can assign up to two heroes of a respective class to oversee that aspect of your base. This means that those heroes will provide a passive bonus to certain aspects of the game, based on their skill levels. Stronger heroes make for stronger appointees.

Small bonuses are still bonuses.

As you level up, you’ll unlock more appointment slots. Be sure to assign officers to these slots!

Biochemical Laboratory

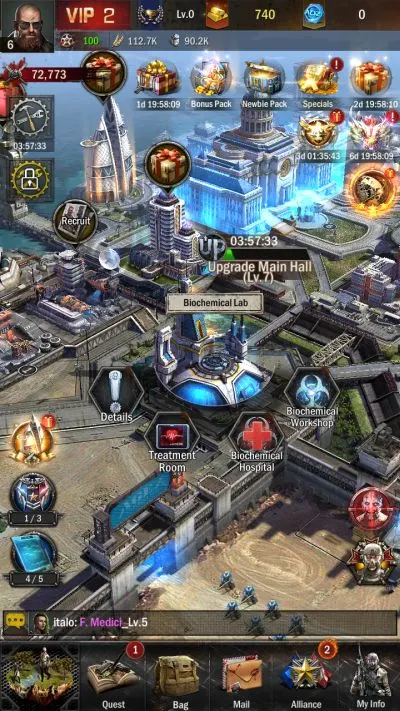
The Biochemical Laboratory is a futuristic-looking building where your scientists keep sentient infected for further study, and maybe – just maybe – a cure.

What happens in the lab stays in the lab, got it?

The biolabs allow you to experiment on, talk to, and maybe get intimate (no judgment. Okay, maybe a little judgment) with augmented humans – meaning previous zombies. As treatment and experimentation progress, you’ll be able to communicate with your special infected and dispatch them on special exploration missions once their infection is under control.

These exploration missions will see your special infected venture deep into zombie-infested territory, and thanks to their heightened abilities, they can survive where uninfected humans can’t. By dispatching special infected on missions, they’ll bring back caches of valuable resources, with longer missions offering better rewards.

If you don’t like the expeditions on offer, you can reroll them up to 3 times for free each day.

Titan Bay

The Titan Bay, for lack of a better term, is where you house your titan, a super powerful mutated unit under your control.

Now, where’s that rocket launcher…

There are two titans that you can awaken and develop – a male mid-range titan and a female long-range titan. In general, investing in the female titan in the early to mid game is better as her range makes engagements more economical.

Economics 101

All the construction and upgrade work on your base won’t come cheap, so let’s talk about how to find and secure more resources.

Quick Tips:

  • Always claim your resources from your resource generators. You can shake your mobile device to claim everything at once or manually pop the bubbles on top of each generator.
  • Upgrade your depot to have more “safe” resources.
  • “Solid” resources in item form (such as resource packs) are safe and cannot be plundered. It’s often a wise choice to hold off on using solid resources until you’re sure you can spend all of the resources at once, i.e., before a big upgrade.
  • You can fight mobs on the world map to get resources and other loot. Fighting mobs costs mobility, which regenerates over time.
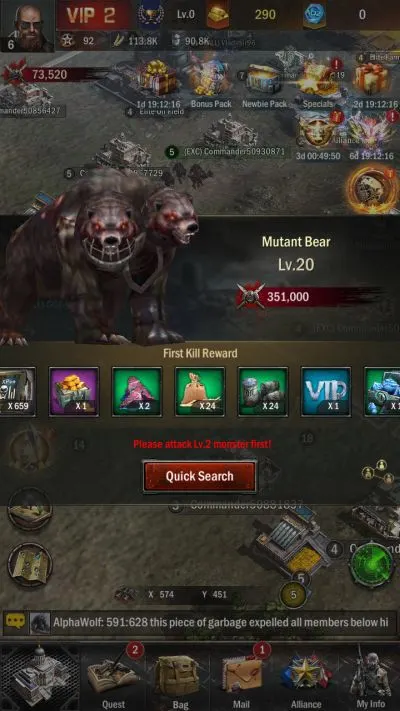
  • You must challenge mobs in ascending order; you can’t fight level 10 mobs without beating a level 9 mob, you can’t fight a level 9 mob without first beating a level 8 one, and so on.
  • You get a first-kill bonus for defeating a mob of a certain level for the first time.
  • You can take over resource nodes on the world map to harvest resources. The important stats for this are load (which determines how many units of a resource each individual unit can carry) and speed (because you should ideally move quickly when harvesting and transporting resources).
  • Use the Search function on the overworld to quickly locate mobs and gathering nodes you need.
  • Always do your dailies.Completing your dailies gives you Elite Recruitment Tickets, which directly correlates to becoming stronger.
  • Lastly, I’ve included a list of freebies in the game and where to get them.

Claim Your Resources

The most basic way to generate resources is (no surprise) resource generators.

Vanilla, but reliable.

Don’t forget to claim your resources whenever you hop on Age of Origins – a simple screen shake lets you collect all your stuff at once unless you like popping the individual bubbles. Keep in mind, too, that your resource generators can only hold so many resources at once and anything above that cap is wasted!

Upgrade Your Depot

Since your resource generators will constantly be making new stuff, it falls upon you to ensure that said stuff is safe, and that’s where upgrading your Depot comes in.

Mine!

Remember: the higher your Depot’s level, the more “safe” resources you’ll have left which cannot be plundered or lost.

Solid Versus Liquid Resources

Two terms I use in empire builders are solid and liquid resources. Solid resources refer to resources sitting in item packs and are safe as they cannot be touched by anyone but you. Liquid resources refer to resources that show up in your panel and can be plundered, barring Depot protection of course.

Ironically, your bag is the single safest space in the wasteland.

As a new player, you’ll be bombarded with solid resources and it’s relatively trivial to earn more of them. However, don’t pop them willy-nilly. It’s always good to operate at a deficit, or within your Depot’s protection limits as using resources this way guarantees that only you will be able to use those resources. In particular, I tend to save resource packs until a big, expensive upgrade – and I’ll only pop as many as I need to get said project underway.

Beat Up Mobs

Harvesting resources from within your walls is all well and good, but sometimes you need more resources and you need them now. That’s where exploring the overworld comes in. The first thing we’ll talk about in the overworld is picking fights with NPCs for resources.

I’m afraid to ask what food drops from zombies means.

To fight a mob, tap it on the world map and deploy a fleet. This will take you to a screen where you can choose which units will join that fleet. By default, it’ll pick everyone, but remember that you can manually set fleets in your garage.

Try to exceed the mob’s combat power for a quick victory. You can see the combat power of your fleet in the upper part of the screen during deployment.

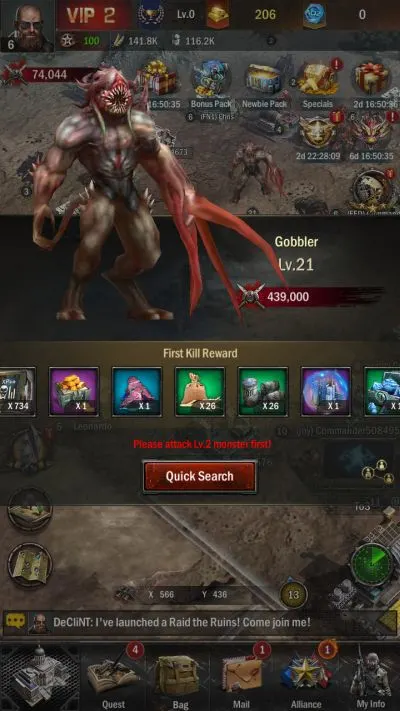
Once your soldiers are set, they’ll march on the enemy – this takes time depending on how far the foe is. Combat will auto-resolve, and if your soldiers win, they’ll march back to your base and you’ll get your prizes in the mail. Your spoils will be in the Battle Reward section of the mail, and you’ll also get a first-time kill bonus if that’s the first monster of that level you’ve defeated.

Easy money.

There are a few limitations to this system. First off, while higher-level monsters yield more rewards, you need to prove your mettle by beating foes of ascending level. This means you need to beat a level 2 monster before you can fight a level 3 one, and so on. And no, you can’t skip levels even if your fleet vastly outclasses the enemy’s combat power. Them’s the rules.

The second and more important consideration is mobility. Mobility is a resource (think stamina) that’s consumed every time you deploy a fleet to fight monsters. While mobility regenerates over time, it effectively caps your ability to harvest resources from foes. Scarcity drives value after all, right?

Take Resource Nodes

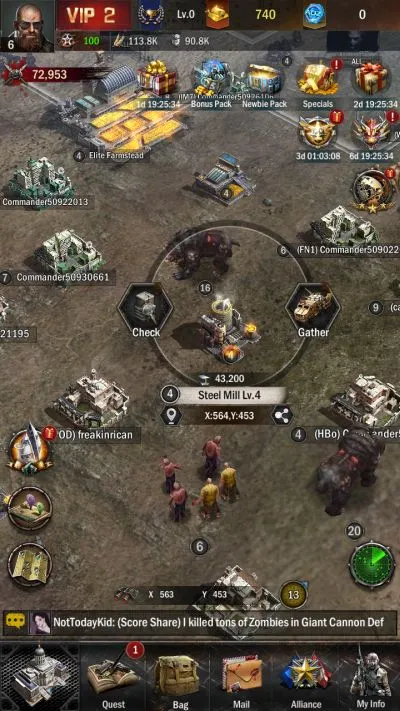
While searching for monsters on the overworld, you may have also found structures like farms or oil refineries. Good news – you can occupy these resource nodes and harvest them to supplement your income.

Goodies just waiting for someone to seize them.

To occupy a node, tap it on the world map and dispatch a fleet. Your fleet will then travel to that node and begin harvesting resources once they get there. Unlike combat, you don’t need attack power to harvest at a node – but you will need a higher load and ideally speed stat.

Load refers to how many of a resource each individual count of that unit can carry; for example, the Basic Sniper in the image above has a load of 4, meaning that each Basic Sniper can carry back 4 units of whatever resource we send them to gather. Naturally, vehicles from the Factory have a higher load stat. Speed, on the other hand, refers to the unit’s movement speed. The faster, the better.

While you can freely gather from resource nodes, other players can too. Be warned when harvesting resources in high-conflict areas as your units can be forcibly dislodged from a gathering node, and even injured or killed in the ensuing scuffle!

Use Search Mode

To more effectively find zombies to beat up or resource nodes to work, you can use the search function in the overworld.

This green radar button.

The search function will look for whatever resource node or enemy you specify. Use this to quickly locate prime targets and grind out your resources faster!

Do Your Dailies

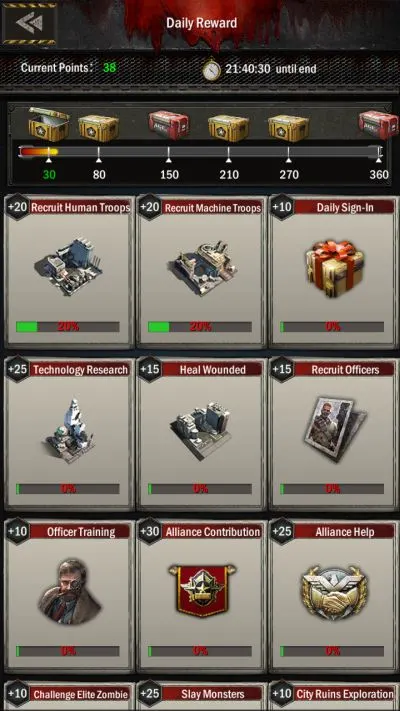
Daily quests net you a nice sum of resources for stuff that you would likely have done anyway. Getting paid extra is always nice. To access your daily quests, you can tap on your City Hall or tap on this button.

This one.

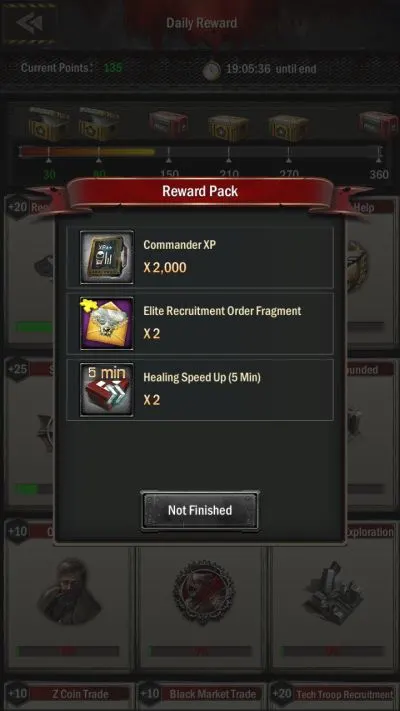
That will bring you to the daily quest screen. Here, you’ll see the tasks you need to complete as well as how many activity points each task is worth. At the top of the screen is the activity bar, which fills up as you accumulate points. Once you reach certain point thresholds, the chests on the bar will unlock and you can claim them for some big resource boosts. More importantly, completely filling up the bar (which takes 360 points) nets you the last chest, which gives you Elite Recruitment Order fragments – collect 10 of those and you’ll get one Elite Recruitment Order. It’s not much, but it’s something.

Freebies

Who doesn’t like free stuff? As a general rule, anything with a red dot on it – numbered or not – has free stuff up for grabs. You’ll want to grab all of these things (some of them you have to work for, so they’re not entirely free) to accelerate your progress.

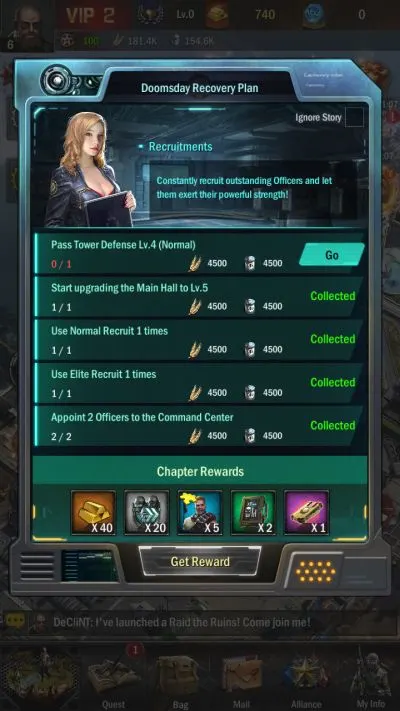
  • The Doomsday Recovery Plan is the closest that Age of Origins gets to a story mode. It’s a great way to ease yourself into the game while giving you various important bonuses and resource packages that you can use to accelerate your progress. Access it here:
Baby steps to rebuilding society.
  • The quests button on the lower menu not only brings up the daily quests but also the growth quests. These offer one-time rewards that are perfect for helping new players get off their feet.
Use these rewards to get your facilities up to speed.
  • Age of Origins normally has a few battle passes running at once. You get prizes even on the free track, so be sure to claim your free stuff. Battle passes are normally on the second row of top menu buttons, like so:
Is hiding buttons here too much to ask for?
  • While we’re on the topic of the shop buttons in the upper part of the main menu, tap on Specials to redeem your free daily, weekly, and monthly packs.
Not much, but free is free.
  • Events are a fantastic way to score free loot in any live service game. Access events by tapping on this button:
Don’t be overwhelmed – there are often a lot of events running at once.
  • Nation (server) rankings give everyone on the server prizes once a player achieves certain difficult milestones. Tap on the gift box above your Main Hall to go to the rankings screen, then tap Claim in the upper right corner to get your freebies. Don’t forget that there are both Nation and Global rankings, with free prizes for both!
Gaze in awe at their power. Or just get your free stuff and go.

Establishing Battlefield Control

Now let’s talk about combat. Fighting is an unfortunate, but unavoidable part of living in the apocalypse, and knowing how to defend yourself is vital to your survival.

Quick Tips:

  • Fleets refer to your armies. Upgrade your Garage and check its technology (tap on the Garage itself) to check the requirements to unlock more fleets.
  • When armies fight on the world map, combat resolves without any input from either player.
  • Combat is roughly simulated by arranging units from each participant in rows, depending on their attack range. After all units have been prepared, each army attack-moves towards each other.
  • This is where stats come in. Each unit type tends to specialize in one field, with higher-tier units having better stats and a more distinct role.
  • Units also have skills to help them on the battlefield.
  • Heroes can be equipped with skills to further boost your army’s performance.
  • Make use of passive bonuses from the Academy and your leader skills (not your heroes’ skills!) to enhance your army even further!

Fleets

Movement on the world map in any empire builder is done via armies – or in the case of Age of Origins, fleets. Your fleets can be seen in your Garage.

On standby.

In the beginning, you’ll only be able to dispatch one fleet at a time, meaning you can only fight one thing or gather from a single node at once. However, by upgrading your Garage and paying the required resources, you’ll gain the ability to dispatch even more fleets at once, giving you more tactical options on the world map.

To do this, tap on the Garage, and then tap the Garage button that appears – it’s the 4th one on the dial. This will open the tech tree. Next, tap on the fleet number you want to unlock at the top of the screen:

You’ll be able to unlock up to 4 fleets just by upgrading your Garage. A 5th fleet is available to VIP users at VIP level 7.

Battles 101

You might be surprised to discover that battles are resolved off-screen, despite combat being the meat of the game. Battle is conducted without player input – aside from the attack order, of course – and thus, much of a battle is decided in the planning phase.

Battle resolution isn’t arbitrary though. Combat is roughly simulated by lining up both combatants’ units based on their range, and then giving them an attack-move order toward the middle of the battlefield.

Unit Stats, Skills, and Tiers

Whoever wins in combat is usually decided by whoever has better units and a better unit lineup. To help us gain that edge in combat, let’s take an in-depth look at each of our units.

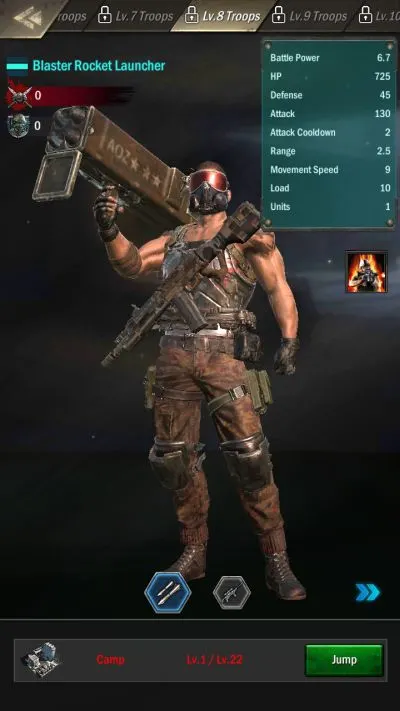
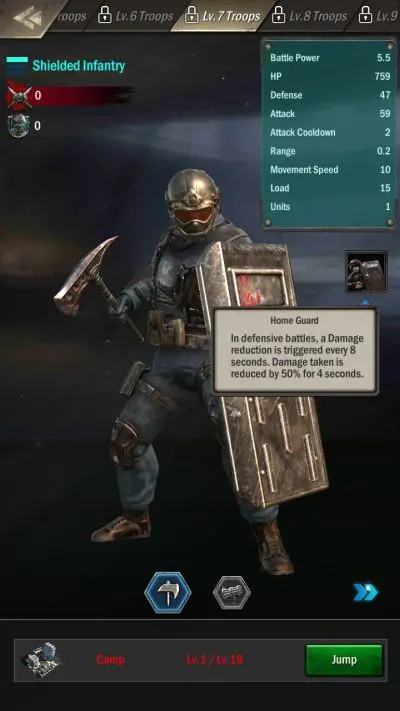
Let’s use the Basic Infantry, the most vanilla unit in the game, for our study. As you can see in the upper right, each unit has stats. The stats each unit has are as follows:

  • Battle power is how much combat power each individual unit of this type adds to its army.
  • HP is how much damage a unit can take before it’s destroyed. Destroyed units are either wounded or killed.
  • Defense is how protected a unit is from attacks.
  • Attack is how much damage a unit does.
  • Attack cooldown is how long before a unit can attack again – the lower this number is, the better.
  • Range is how far a unit can engage an enemy. Higher is better.
  • Movement speed is how fast this unit moves in combat.
  • Load is how many resources each individual instance of this unit can carry. We discussed this earlier.
  • Units refers to how many units make up a single unit. Confusing, right? Think of it this way: a unit that has 2 Units stat means that each instance of that unit is actually 2 guys. This only really comes into play for vehicles.

Remember what I said about combat resolution, where battle resolves by everyone attack moving toward each other? That’s where the stats come in. Range is unique among stats in that it affects where in a fleet a unit will be positioned. You can gauge this by looking at a unit’s range stat, but there’s also a handy icon that’ll immediately tip you off:

The topmost bar means the unit will be in the front of the fleet’s formation, the middle in the center of the formation, and the lowest bar the rear of the formation. You can view how many units there are in each position of a fleet by examining your garage.

Apart from stats, each unit also has a unique skill that can help them in battle. You can tap on a skill’s icon to read more about it.

Hardly the determining factor, but it helps.

Lastly, each unit has a tier. Higher-tier units are more expensive but have vastly better stats and skills. To access these units, you’ll need to upgrade your Camps and Factories!

Officers and Skills

By this point, you’ve already (hopefully) assigned some officers at your command center. However, these officers can greatly help your combat prowess using various skills.

Not much, but every little bit helps!

Unlike other games, skills in Age of Origins are equipped to heroes. This means that you can mix and match skills to complement your playstyle. However, only Director, Strategy, and Warfare heroes can have skills assigned to them, and you need to increase their star rating to get more skill equip slots. Note that Drillmasters have their own skills and thus can’t be given new skills to equip.

To increase a hero’s star rating, you’ll need to fuse that hero with their fragments. The best way to get these is by rolling in the gacha or by doing some early story quests. Each fusion fills up one of the next star’s 5 slots, and once the star is filled up, you get a new rank.

Heroes don’t have conventional stats. Instead, they gain mastery points as they level up and gain stars.

Nice.

Mastery dictates how effective a skill is. On a skill’s info panel, you’ll be able to see exactly how the game computes bonuses; in most cases, a skill will grant a bonus per 100 Mastery of the officer it’s equipped to. As you level up a skill, you’ll be able to raise its scaling, giving better returns. The long and short of this is to try to have one Director, Strategy, and Warfare hero with a high star rating and level (Mastery) so you can maximize your skills.

You can acquire new skills by playing through the game. Occasionally, you’ll get skill fragments. Once you have 10 fragments, you can fuse them into a new skill via the Officer Skill menu in the Command Center.

At last – understanding!

Once you’ve acquired a skill, you can equip it to an officer via the Officer Skill menu, though be sure that you have officers who can still equip skills. You can also choose to level up a skill (the option only appears if the skill is currently equipped) or breakdown a skill into skill experience books. Don’t breakdown skills – it’s a terrible waste of resources and you can find other ways to earn skill experience.

Leader Bonuses

Lastly, you, as the supreme commander of your city, have your very own skill tree. To access your personal skills, tap on your portrait on the upper left, then tap Commander Skill. That will bring up this panel:

You earn skill points by just playing through the game, though you’ll earn most of your skill points by questing. Be sure to invest in your commander skills – some of these are very powerful active skills, such as the instant teleport that can save your fleets!

Mercenary Survivor

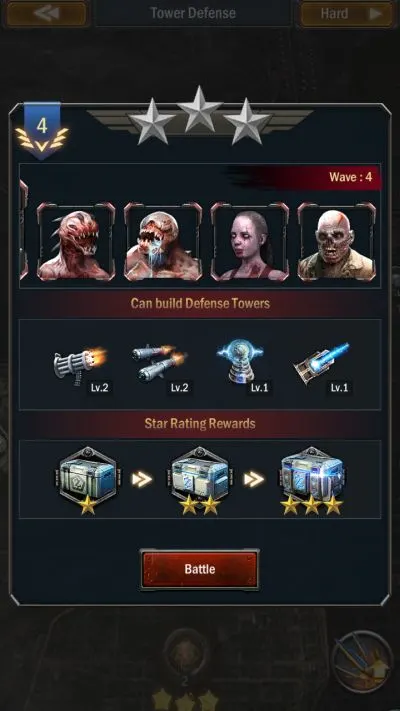
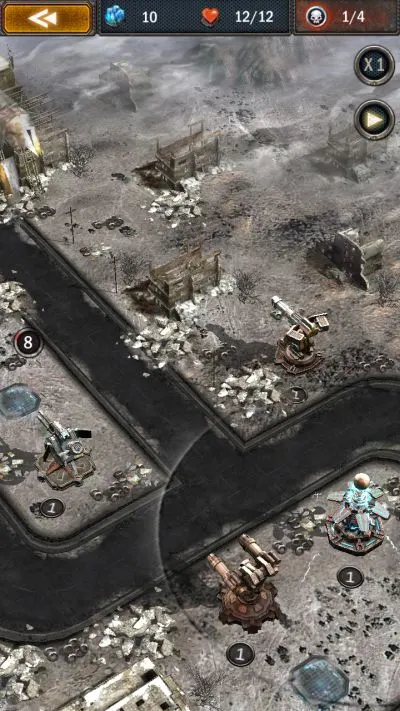
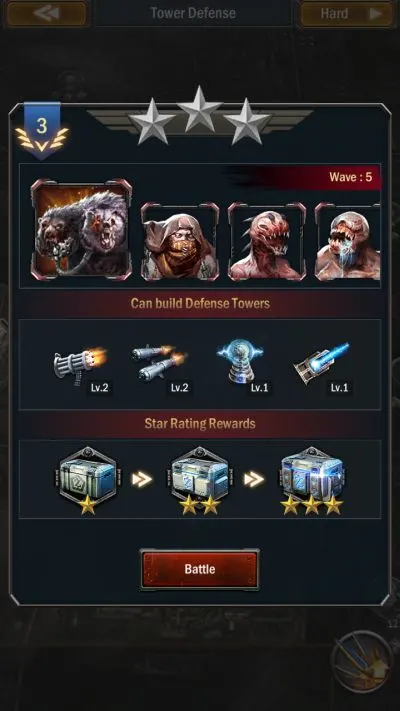
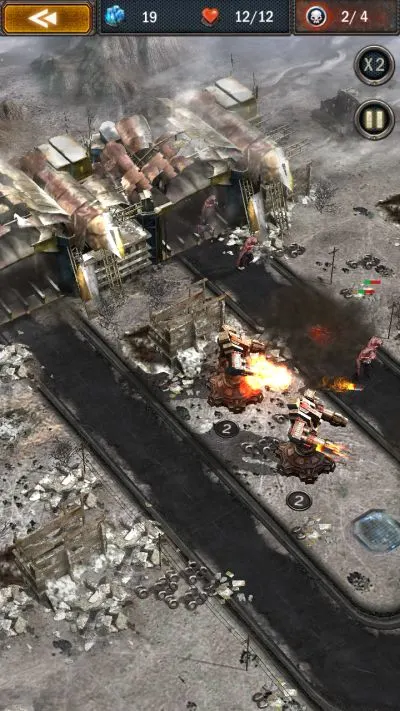
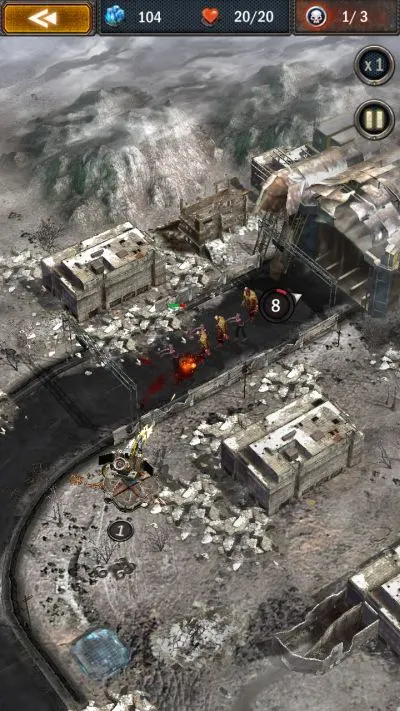
Age of Origins used to heavily feature a tower defense game, which new players would have to play to make progress. While that’s still in the game (and you can still play it for some bonus resources), you need to be at a higher level to access it. Instead, we now have Mercenary Survivor mode, an arcade horde shooter very similar to Vampire Survivors. Let’s quickly run through how to succeed in this mode.

  • Age of Origins also features a PVE game similar to Vampire Survivors, called Mercenary Survivor.
  • Your units will autofire on nearby enemies in this mode.
  • It’s important to keep moving in this mode. If you stop moving, you’ll be quickly overwhelmed and die.
  • Collect experience orbs that enemies drop to level up. At each level, you can either buy a new ability or enhance one that you already have.
  • Only certain heroes are playable in Mercenary Survivor mode (Layla, Big Dog, and purple Warfare officers). You’ll still need to unlock them via the gacha. Each hero has their own set of skills.
  • Don’t forget to tap on stages you’ve already cleared to claim your rewards!

Game Basics

If you’ve never played Vampire Survivors before, I strongly recommend picking it up – it’s cheap and it’s a ton of mindless fun. Age of Origins’ Mercenary Survivor mode is a watered-down version of Vampire Survivors, but the core gameplay elements are still there.

Tap on the Rescue Radar to play Mercenary Survivor.

In Mercenary Survivor, you must survive long enough to complete your objective, as detailed in the upper right of the screen. This objective is usually to kill all enemies or survive for a certain amount of time. Thankfully, your characters aren’t unarmed. They’ll automatically fire on any enemies within range, and you can drag the control pad to move them around.

Kill the zombies, don’t let them kill you. Easy, right?

Mobility is key to surviving any Vampire Survivors-like game, and this is no exception. Move around to avoid and kite enemies and try to avoid getting trapped, and use the minimap on the upper right (white dots are enemies) to stay safe. Be careful not to let enemies touch the green circle around your team as that’s your hurtbox!

You guys think we’ll find some roast chicken on the ground here?

While your officer will be alone at the beginning, you’ll eventually unlock the ability to bring more members along in your team, giving you extra firepower and skill options. Note that HP is shared between team members, and you can’t split up!

Experience, Levels, and New Skills

Killing mobs in Mercenary Survivors mode causes them to drop colored orbs. Move near or over those orbs to pick them up and gain experience.

It’s incredibly satisfying to pick up a whole bunch of experience orbs at once.

Once you’ve amassed enough experience, you’ll level up. You’ll be given a choice of three skills – either new or existing ones – depending on your team composition. A skill can only be leveled up so many times, though it’s rare that you’ll be able to level up a skill completely. And no, experience and skills aren’t carried over between levels. Where would the fun be in that?

Decisions, decisions…

Choose skills that complement your playstyle (I like attack speed) and assemble a team with skills that make your Mercenary Survivor runs easier!

Amassing More Heroes

Getting new heroes for Mercenary Survivor is simple – just roll in the gacha.

If you thought you could escape the RNG, you thought wrong.

Only Layla, Big Dog, and purple rarity Warfare heroes are usable in this mode. Thankfully, you get both Layla and Big Dog for free. To preview the heroes playable in Mercenary Survivors mode, tap on the “Officer” button while in the game mode lobby. You can also see their skills here; rarer heroes tend to have more skills.

Potential

You can buy permanent upgrades for your team in Mercenary Survivor via the potential menu.

May your future runs be easier. Lord knows you’ll need these upgrades.

Each page of the potential screen contains several passives that you can invest in with canisters that you get from clearing Mercenary Survivor stages or through the Doomsday Recovery Plan. Nodes can be leveled multiple times, and each page has a big central node that requires you to level up all other nodes around it to the maximum level. Central nodes often contain game-changing upgrades, such as new features, so be sure to invest in your potential whenever you can!

Rewards

While Mercenary Survivor is a fun minigame, it’s not the focus of Age of Origins.

Back to work.

Be sure to claim your rewards by tapping on each stage you’ve cleared; a gift box means that you’ve got resources waiting to be claimed.

Join an Alliance

Where one commander will quickly fall, a coalition of commanders can stand. By joining an alliance, you’ll vastly improve your odds of not just surviving but thriving in Age of Origins. Apes together strong.

Quick Tips:

  • Alliances are a great way to quickly bolster your power in Age of Origins. Join. An. Alliance. Seriously.
  • Each alliance controls a territory around itself; alliance mates usually cluster around each other in their territory, which makes attacking an alliance’s main base a dicey proposition.
  • Alliance members can help each other out on any timed project. Each assistance attempt shaves some time off that timer and costs nothing for the benefactor. The higher your Embassy level, the more times you can receive assistance in a single project.
  • Alliance members have access to a unique technology tree that works similarly to the one in the Academy. Research here takes a long time and requires resources, so communicate with your senior guild members and alliance mates to find out which project they want people to focus on.
  • You can only donate to alliance tech a limited number of times per day unless you choose to donate gold, which can be done an unlimited number of times per day.
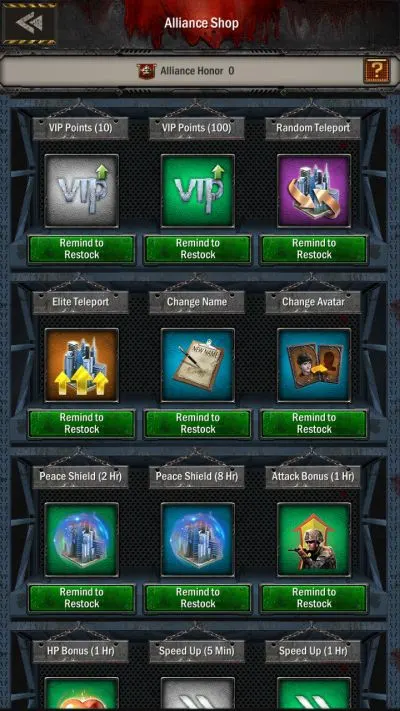
  • Donating to alliance technology nets you Alliance Honor, which can be spent on some neat items at the alliance shop. This shop offers some nifty items, one of which is the Peace Shield, which allows you to put up a protective barrier much like your beginner’s protection!

Joining An Alliance

Age of Origins has a guild system, called an alliance. Joining an alliance is pretty much a necessity if you want to achieve any modicum of success in an empire builder; without an alliance, you’re easy prey for virtually everybody. You’ll also get 200 gold the first time you join an alliance, which should be an extra incentive for you.

I look forward to a long and fruitful partnership.

If there’s one takeaway you should have from this article, it’s this: Join. An. Alliance.

Alliance Territory

One of the first items you’ll get when joining an alliance is a Territory Teleport, which will teleport you to the alliance hall (if one has been established) or beside the leader’s city (if there isn’t an alliance hall). Do this ASAP – alliances are much more formidable when they’re clustered together.

Alliance Assistance

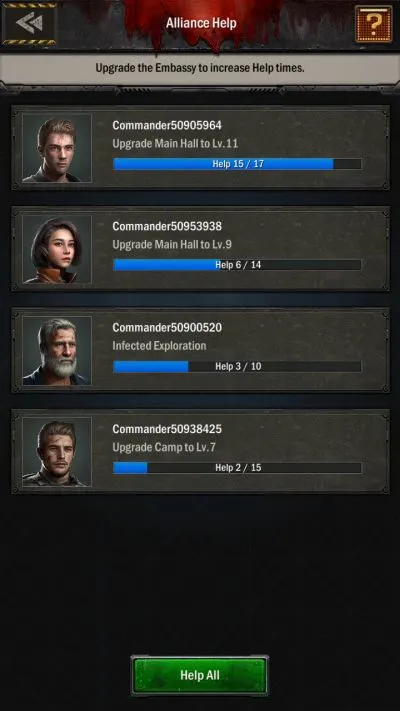
One of the best perks of being in an alliance is the ability to both give and receive help on any timed project. You name it, your friends can help you with it – healing units, training units, building or upgrading buildings, or even research projects. The best part? It costs nothing to help an alliance member.

Lend a hand, would you?

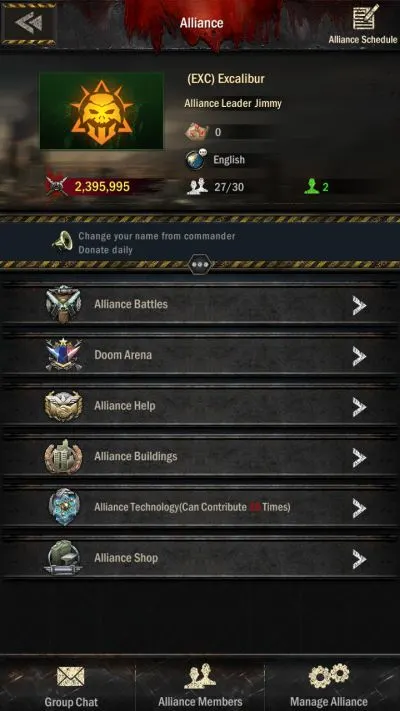
Go to your Alliance, then Alliance Help to see if anyone could use some help with a project. Alternatively, check the red numbers beside the alliance button to see how many projects you can help with.

Your Embassy level affects the number of times you can receive assistance on a single project.

Alliance Buildings

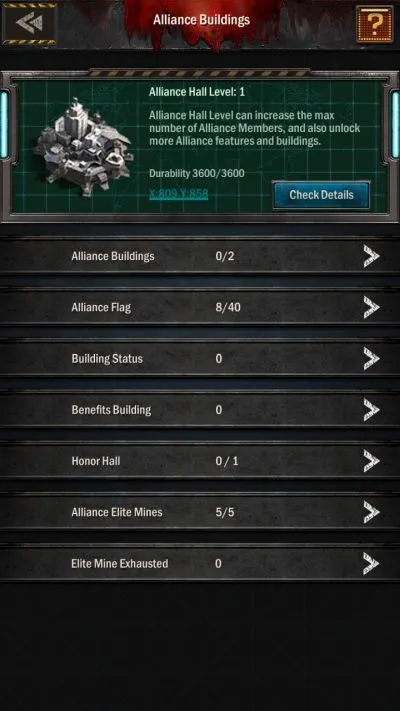
Alliances must have infrastructure to expand and exercise their power. Before anything else though, you’ll need to build an alliance hall, which costs 1200. Construction rights are typically only given to the alliance leader and any officers.

Some day.

As a member, you can help towards this goal by being a good member – help out your allies, contribute to science, and join team fights whenever you can.

Alliance Technology

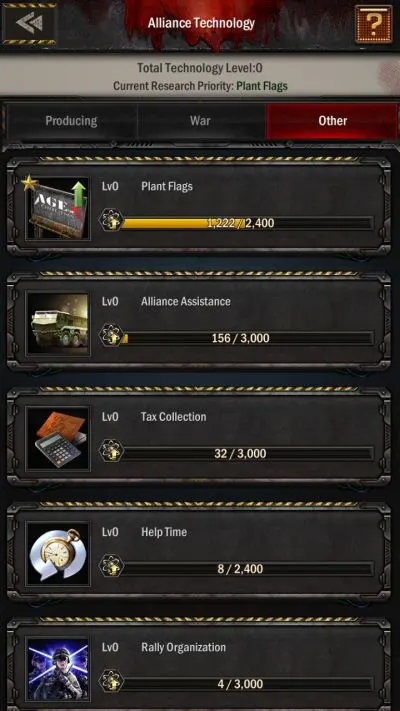
Alliances have access to a separate tech tree, which provides minor but powerful alliance-wide buffs to every member.

Apes smart together.

Unlike Academy research, alliance technology takes a very long time to research and also requires a ton of resources. Fortunately, every member can chip in by donating resources to a project. You can donate raw resources up to 15 times per day to help ease a project along. You can also choose to donate gold, which can be done an unlimited number of times per day, but there are generally better things to spend your gold on.

Because of the high time and resource cost of alliance technologies, it’s important to coordinate your efforts with the rest of your alliance. Ask the leader or a high-ranking member member which project to focus on, if they haven’t yet designated one.

Alliance Shop

Helping your alliance isn’t a one-way street. As you contribute to your alliance’s growth (mainly via donating resources to alliance tech projects), you’ll be paid in Alliance Honor, which can be spent at the Alliance Shop.

It’s yours, my friend. As long as you have enough rubies.

The alliance shop stocks a variety of useful items, such as buffs, speed-ups, teleportation items, and the all-important peace shield. However, it needs to be stocked by senior members, so you might want to ask if the items are being reserved for a particular member or not.

Hope Never Dies

The road to rebuilding humanity into a single, unified fighting force against the undead is tough and stony, and there will be many obstacles on your way. But humanity thrives under the deadliest of circumstances, and together, we can build a future free from the undead threat – it just needs practice and patience.

One brick at a time.

That wraps up our beginner’s guide for Age of Origins. If you have any suggestions on how to further improve this guide for new players or feel like sharing some of your own tips and tricks, don’t hesitate to drop us a line in the comment section!

Kenny Eugene Holmes

Tuesday 24th of September 2024

How do you change the number of elite wheat and oil mines to elite mineral and steel mines?

Todd

Thursday 15th of February 2024

How do I utilize titans?

Guillaume

Thursday 26th of October 2023

how to earn alliance points?

hadi

Thursday 21st of September 2023

how to use 5 officers in challanage mode i tried finding but no clue

Karel

Sunday 30th of July 2023

How come when I attack other users that my troops are killed (high number) and my opponents remain at 0! What update is that to get that as low as possible for me?

Best regards