Frozen City is a base-building idle game by Century Games Pte. Ltd., that is set on an Earth now frozen over. Civilization has more or less collapsed, survivors struggle to live, and you control one group of survivors who decide to start rebuilding. Starting with a simple town and gradually working your way up to larger areas, you will get more survivors to help reestablish order in this new world.
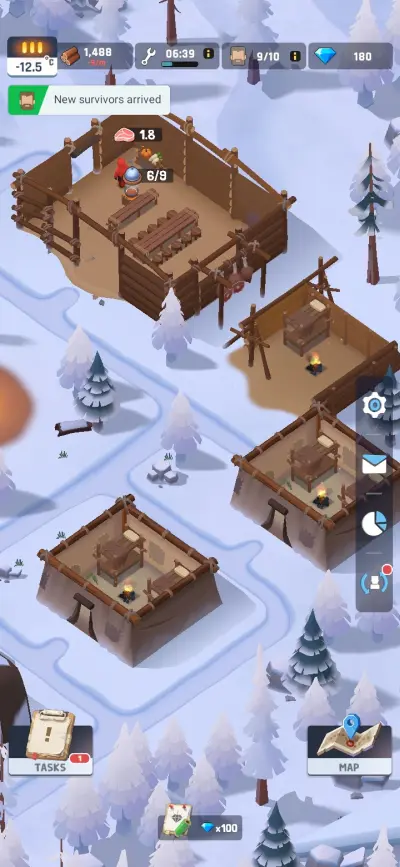
Frozen City has you juggling vital resources with production, as you expand your current city to include more survivors and produce more sophisticated resources. Along the way, you enlist the help of Heroes, who aid with City management and brave the unknown to get more experience. As you complete cities, they become self-sustaining and help with expansion by providing any excess products to help with early expansion in future cities.

Aside from that, the game also has events taking place before the world froze over, changing things a bit and rewarding you with extra resources for your Heroes. Before we get to that, let us start with the basics. Stay with us and read on to learn what Frozen City has in store!
1. A Spark of Hope
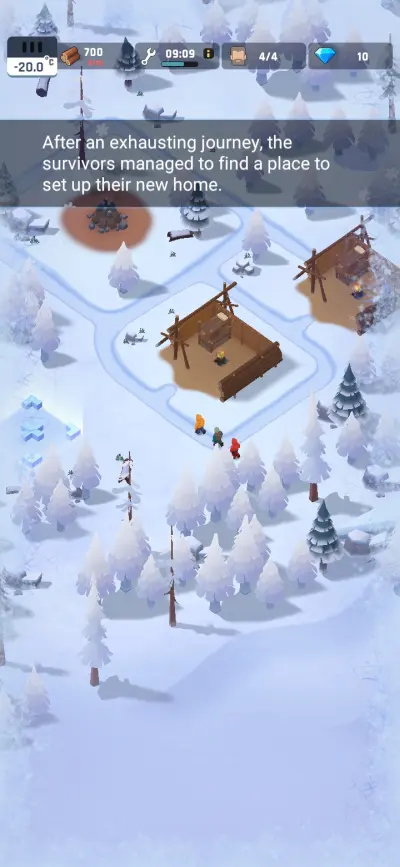
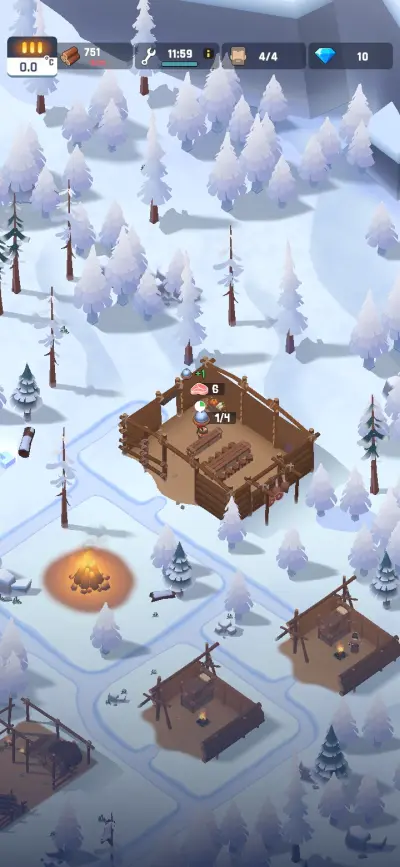
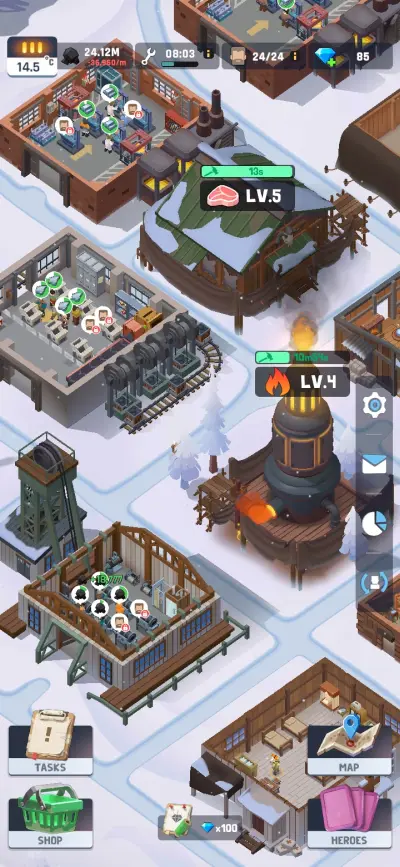
Frozen City opens with a group of four survivors finding a clearing with some abandoned buildings, and just in time too, as they are exhausted and need a place to rest their weary bones. Since you are battling the elements just to survive, the heart of every settlement you visit in Frozen City is the Fire, or Furnace as it is called later on.
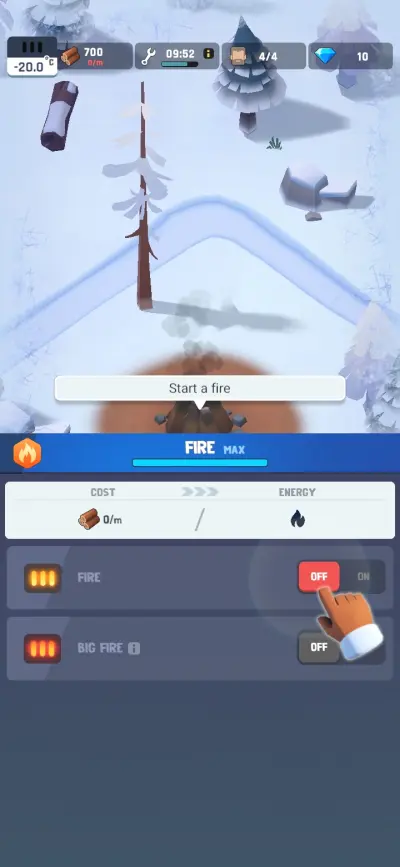
It consumes a given amount of fuel every minute and keeps your survivors warm from the battering winds. You might notice two options when interacting with the Furnace: the first option simply toggles the Furnace on or off, and you ideally want to keep it on for as long as possible. The second option doubles the rate of fuel consumption in exchange for increasing the amount of heat generated, which is vital in two situations.
The most common use is in response to nightfall, where the temperature naturally gets lower as the sun sets and can be disastrous for a city early on as your Furnace is not properly upgraded. The second situation is unlocked as you progress through the game, as later cities will periodically get battered by snowstorms that reduce the temperature considerably for their duration, and can stack with the natural temperature drop when night falls.
Balancing fuel consumption with the current temperature is a critical factor in Frozen City, as the only other way to improve the amount of heat generated is by upgrading the Furnace in question. This upgrade increases fuel consumption in the process. The game will warn you if you only have enough fuel for 10 minutes or less, giving you some time to gather more fuel or conserve what you have left until your survivors can get more. In some cases, the Furnace generates so much heat it can weather nightly snowstorms without needing the fuel boost.
As the Furnace is also the heart of your city, upgrading it also unlocks new buildings for expansion as well as new upgrade levels for preexisting buildings. As a rule of thumb, survivors can tolerate around -10 degrees Celsius, or about 14 degrees Fahrenheit (you can change what unit of temperature you prefer via the options menu). The game typically warns you of dangerous temperatures by overlaying a border of frost around the screen. If the temperature drops any lower than the values above, you might need to turn up the heat before your survivors get ill from the subzero temperatures and potentially die.
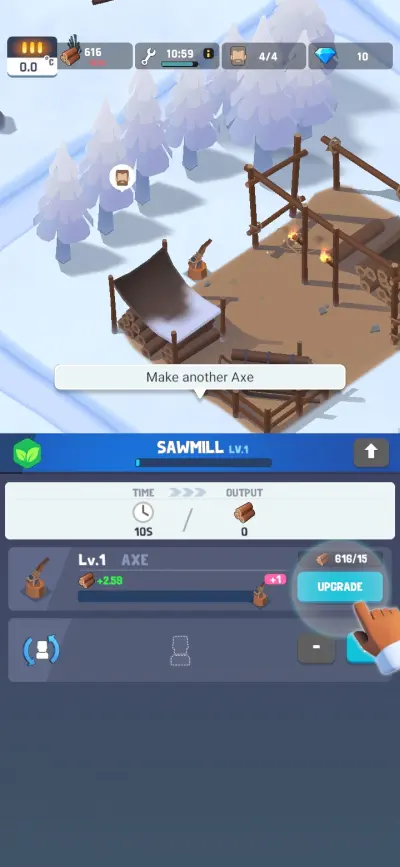
A large bonfire is nice to have, but your gaggle of survivors needs more than a source of heat if they want to rebuild. Luckily, there are a couple of houses your survivors can use for shelter, and just enough resources to build some amenities. The first thing you will need is a reliable source of fuel for your Furnace. Your survivors recommend you build a sawmill to start gathering some more wood.
Constructing and upgrading buildings in Frozen City takes both time and resources, with early buildings taking seconds to construct and later building upgrades easily taking an hour or more to complete. The flow of time in Frozen City is significantly increased, with two in-game minutes passing for every second in real life. Thus, a 24-hour “day” in Frozen City lasts 12 minutes.
Your survivors will continue to collect and refine resources while you are away, but the game will only hold up to two hours’ worth of production. You can increase this cap to four hours via a monthly fee, which provides additional bonuses we will discuss as we go along. Two hours is sufficient for most players.
All survivors follow a schedule that determines what they do to keep themselves and the city running. Typically, the average day consists of working from 6 AM to noontime, a lunch period from noon to 3 PM, continuing work from 3 PM to 9 PM, then dinner from 9 PM to midnight, and eventually heading to bed. Survivors follow these schedules very strictly, which can lead to problems if you open the game at the wrong time.
For instance, visiting your city late into lunchtime means that there are still some survivors moving to the kitchen and being too far away before they have to continue work. You can look at the current schedule by tapping the information button next to the in-game clock. The schedule shown here is from an earlier city that has different time allocations, but more or less follows the basic pattern.

When a resource-producing building is finished being built or upgraded, you have to assign idle survivors to any available workstations to produce or refine resources. You can upgrade your workstations with resources in one of two ways:
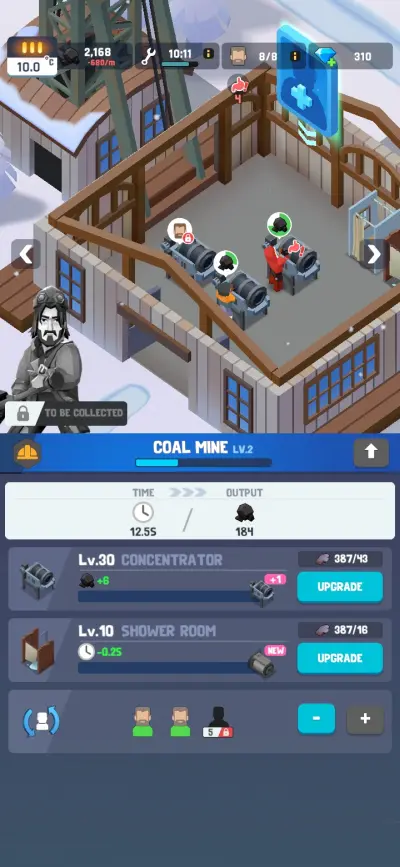
- The first option increases the yield of the resource produced, either by constructing new benches for people to work on or by multiplying the output. These upgrades alternate every 10 upgrade levels, or five for the starting city. Each level also adds a small, flat increase to the resources produced. You can only upgrade the yield so many times before the entire building itself has to be upgraded to reach new levels, and even that has a cap.
- The second option decreases the time it takes to complete producing a single batch of resources, shaving off fractions of a second for every upgrade level. Depending on the building, this upgrade option might have no upper limit, or at least a maximum level much higher than yield. However, the decrease in production time becomes smaller and smaller as the upgrade costs keep mounting.
Below those two options is a display showing how many survivors are assigned to this building, any empty slots that can be filled up, and any slots that require a Hero of a certain level to unlock. Heroes act as overseers that multiply the number of resources produced and unlock additional benches for survivors to work on once they reach certain levels.
Heroes will be discussed later on, but the starting city thankfully does not need them: all the workbenches there are unlocked for your survivors to use. However, you can only build and/or upgrade up to two buildings at a time with the monthly fee increasing that cap up to four. We will list down some of the types of production buildings and what they produce or use as resources in turn:
- Mines gather resources deep from the earth, typically ore or coal. Coal usually becomes the fuel of choice once the Furnace gets its first upgrade, while ore on its own is useless until it has been cast into ingots.
- Collection Stations will task assigned survivors to salvage materials such as glass or scrap metal from nearby junk piles.
- Foundries convert ore or scrap metal into ingots or shape ingots into useful things like wires, nails, or cylinders. Regardless of the end product, all foundries consume coal to keep their furnaces lit, adding wrinkles to your heat management during work hours.
- Workshops combine raw resources into more complex products. Some of these buildings are directly called Workshops, while others might be called different things. In one early city, for example, one Workshop is called a Machinery Factory, but regardless of the name, the function is the same.
2. Post-Apocalyptic City Management 101
Of course, your initial band of survivors needs shelter and food, which are represented by Food and Rest needs respectively. Rest is restored at Dorms, which can house up to four survivors and can be upgraded to provide more rest when it is time for sleep. Food is restored at the Kitchen, which processes raw food into meals for your survivors to eat between work hours and before going to bed. Raw food is provided in one of two ways:
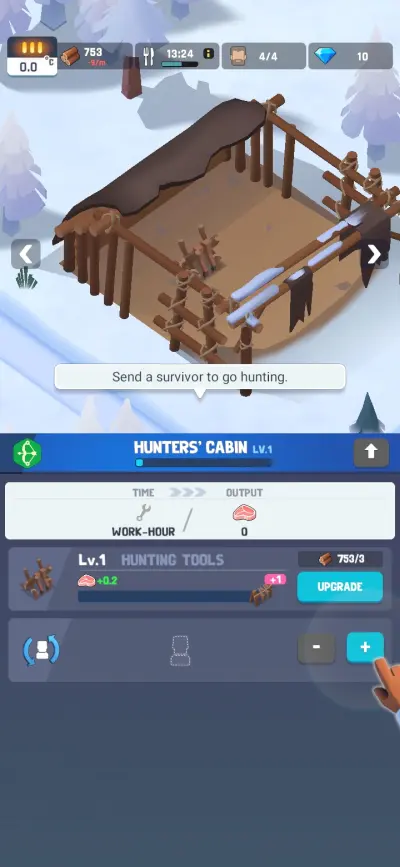
- The first method is through the Hunter’s Cabin, where assigned hunters will head to a nearby area to gather meat and bring it to the Kitchen. Hunters will only gather meat once each work period, so assigning more hunters results in more food being delivered. Rather than decreasing the time it takes to hunt for food, the second option also increases yield by adding more tools.
- The second method is through the Greenhouse, which works like a normal production building and instantly transfers crops to the Kitchen instead of having to deliver them manually. Greenhouses can also serve as production buildings depending on the city, and if there is a Greenhouse and a Hunter’s Cabin in the same city, the Kitchen will use the Cabin as a food source.
Regardless of what method your current city uses to obtain food, any assigned chefs will cook food when there are enough raw ingredients, stopping only if they run out of ingredients or if they have cooked enough food to feed every survivor during eating hours. The amount of food required to produce one meal increases as you complete cities.
Upgrading the stoves, or “burners” as the game calls them, both adds new stoves to work with and decreases the amount of time needed to complete a meal. This amount of time cannot go below one second, unlike regular production buildings. The second upgrade option adds more dining tables, a necessity as you take in more survivors, and adds more creature comforts to the dining area, allowing it to restore a small amount of Rest while the survivors are eating their meals.
Managing the needs of your survivors is important, as deaths due to illness or starvation can result in unrest. Starvation can only be reliably countered by keeping your survivors fed, but illness is typically the result of a survivor being too cold for too long. If a survivor does fall ill, they will either move to their assigned bed or an available hospital bed, where they will rest to recover.
You can improve their odds of getting better by turning up the heat. Hospitals offer the best chance for improvement. Two heroes are associated with the Hospital and will treat any sick survivors so that they get better sooner. Upgrades to the hospital facilities also add more hospital beds and increase the odds of a survivor pulling through: up to a 100% chance of recovery if the hospital is fully upgraded. If the survivor is not treated in time, they will die.
If they were assigned to a bench, you will have to manually assign someone to take over. The monthly subscription mentioned previously automatically assigns survivors to any empty benches, be it through building upgrades or dying survivors, taking some management off your hands.

Meanwhile, Rest depletion behaves differently: as it can only be reliably restored through sleeping in their dorms, managing the upgrades of the dorms has a greater effect in keeping the Rest need up. If it drops too low, tired survivors will work at reduced speed, a trait shared with starving survivors. If the Rest need is not satisfied, any tired survivors will just abandon the city instead of dying of exhaustion. Either way, all these events can lead to a build-up of discontent.
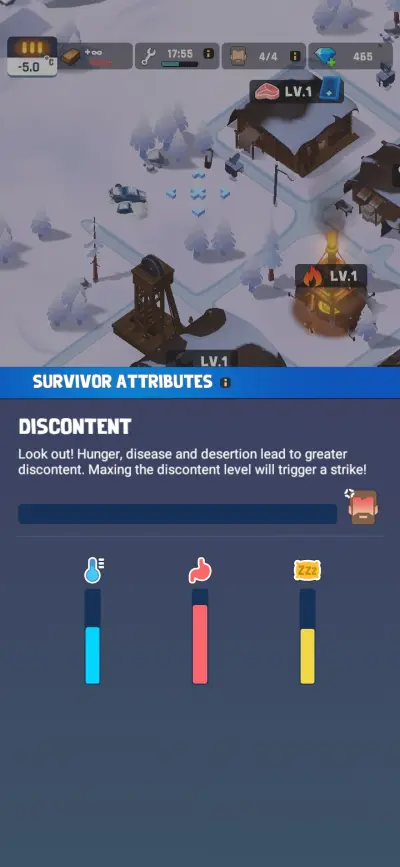
Discontent does not come into play until later. When it does, it can be gauged by tapping the survivor icon to the right of the in-game clock to display Survivor Attributes. Below the Discontent meter are meters gauging the general warmth, hunger, and Rest of your survivors. Note that the gauges depict the entire population and not individual people who might be very tired or very hungry. If discontent gets high enough, your survivors will organize a strike and will refuse to work.
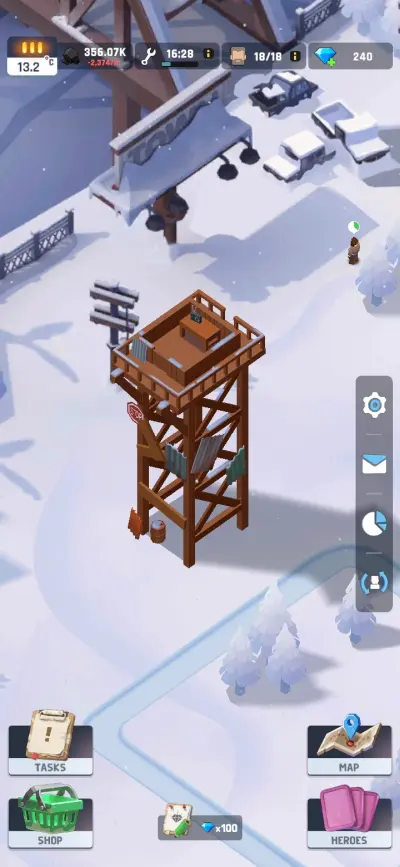
To counter a strike, you can construct a guard tower that can keep protestors from complaining. There are Heroes associated with the guard towers and leveling them up will open more negotiation options with the protestors. Outside of quelling discontent, guard tower upgrades will also increase the walking speed of your survivors, helping them reach their destinations sooner.
To the right of the screen are four buttons, two of which give you an outline of the production and population of your current city:
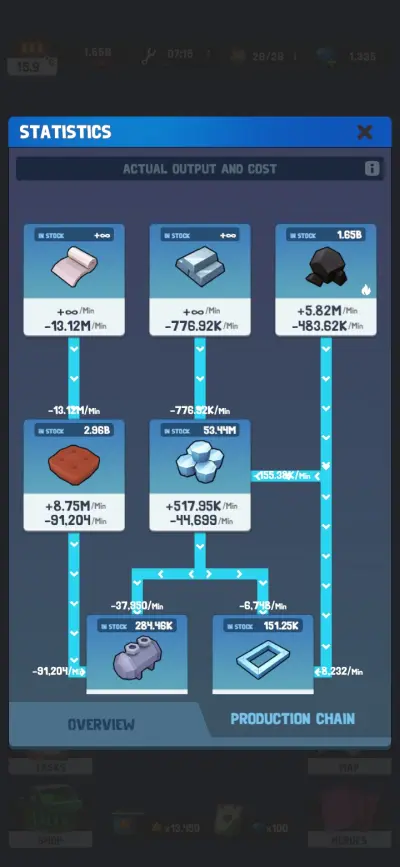
- The Pie Chart button lets you view the resource statistics of your current city and its production chain in separate tabs. The Overview tab displays the current status of your primary resource stores, raw food, meals, and coal, and the production rate of all secondary resources. The Production Chain tab shows how your produced resources are being used, also listing how much of a given resource is in stock.
If any of those values are red, that means production is unsustainable and you are losing a given resource faster than you can replenish it. In the case of coal or any fuel equivalent for that matter, the Overview tab will warn you even if all your survivors are asleep and are thus not at the coal mines. The warning from the Furnace itself is a better gauge in that case.
- The Survivors button shows the working status of all your survivors, as well as options to put certain buildings on extended shifts. The Survivors tab groups survivors into those at work, those who cannot do their jobs due to a lack of resources, and those who are not assigned to any work at all. Below is a section that lets you quickly assign or remove survivors from any workbenches throughout the city.
The Extended Shifts button lets you denote which buildings continue to operate well past sleeping hours. Extended Shifts are nice if you are trying to beat a potential resource shortage, but the lack of sleep ensures that any survivors working there will gradually get tired. Coupled with the upper limit of stockpiled resources while you are away, this option is best used while you are awake.

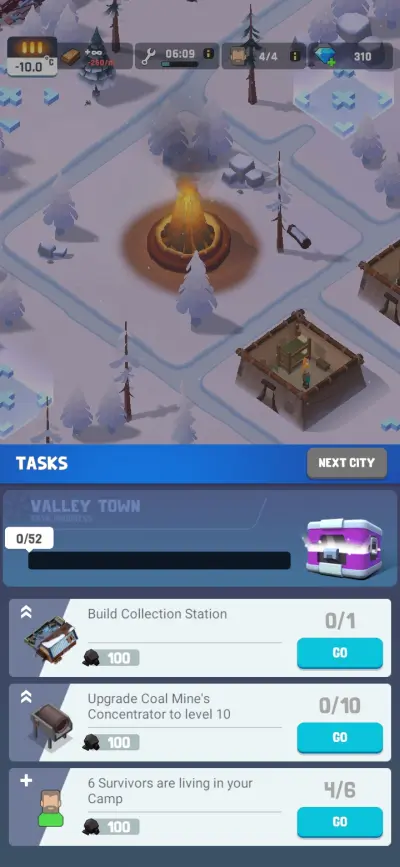
Finally, some Tasks act as a to-do list for the current city. These tasks can range from building certain buildings, upgrading those buildings, collecting enough of a given resource, having a certain number of survivors present, or feeding them a certain number of meals. There are three tasks available to perform at any given time and completing a task rewards you.
Rewards range from an hour’s worth of a given resource to 10 gems, the premium currency of Frozen City. Completing all Tasks in a given city awards you a Rare Chest and lets you progress to the next city in line. Previous cities can be visited for any touch-ups but are for the most part self-sustaining.
Each city you complete gives you an infinite amount of a certain resource, which can be used by later production buildings and helps with early city expansion. You can take a look at your progress by tapping the Map icon near the lower right corner of the screen and zooming out.
3. Heroes to All

As we have mentioned earlier, Heroes help oversee production buildings and other facilities. Heroes are unlocked in the second city, where you meet your first hero, a miner named James. Heroes are obtained by opening crates, which are found in the store or occasionally awarded from Tasks. Heroes come in Rare or Epic tiers, and while chests might prioritize Heroes you have not unlocked yet, in practice it is truly random. There are four chests you can obtain, two of which can only be purchased with Gems:

- Wooden Chests are obtained only through Tasks, and only drop a single Rare Hero card along with some Wishing Stars for leveling them up. There are also the occasional Blazing Stars which are used to increase their level cap.
- Common Chests can be claimed for free every eight hours at the store, with the option of getting an additional chest by watching an ad, and occasionally by completing Tasks. These are guaranteed to award Blazing Stars on top of more Wishing Stars and a Rare Hero card. Common Chests have a chance of awarding an Epic Hero card.
- Rare Chests cost 350 gems to purchase and are guaranteed to drop an Epic Hero card, on top of more Wishing Stars and Blazing Stars. It also awards two random Rare Hero cards. As mentioned before, you also get a Rare Chest for completing all Tasks in a given city.
- Golden Chests cost 800 gems to purchase and give two random Epic Hero cards and five random Rare Hero cards, along with giving the most Wishing Stars and Blazing Stars of all the crate types.
All Heroes will claim their related buildings as their home, with no need to feed them or build dorms for them.
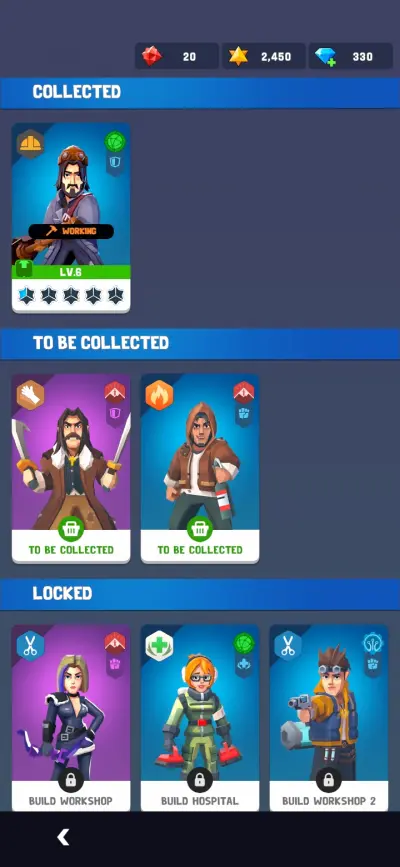
You can view your collected Heroes along with their stats via the Heroes tab at the lower right corner of the screen. There, you can allocate any Wishing Stars you have collected to Heroes who have yet to reach their level cap, with the game indicating which Heroes are eligible for level-ups or cap increases. More Heroes are unlocked as you progress throughout different cities, and you can even preview Heroes you have yet to unlock. It is worth noting that not every Hero you encounter will focus on production.
Aside from Heroes who work at the Guard Towers or Hospitals, Heroes stationed in the Kitchens will be able to prepare more filling meals as you reach certain levels. There are a couple of Heroes who work near the Furnace, and their levels contribute to a discount on fuel usage. You might notice a couple of info boxes explaining a chosen Hero’s skill and what survivors they bring along. This is because the most efficient way of collecting Wishing Stars is by going on expeditions throughout the frozen environment.

You can go on missions by selecting the Map icon and choosing the currently available mission in line. There, you pit up to five Heroes and their reinforcements against the wildlife, gaining Wishing Stars if you beat the enemy. As a whole, Heroes come in three professions: Gangster, Soldier, and Tech. You get an extra power boost by lining up a certain number of Heroes of the same profession. The biggest bonus comes from fielding an entire team of Heroes of the same profession, but this is not always viable. Once all your selected Heroes are ready to go, select the Fight button below.
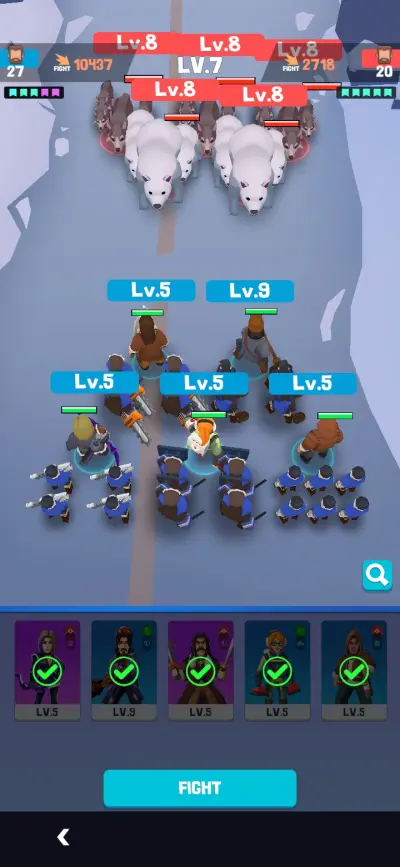
When the fighting commences, both sides will start duking it out, and you can use your Hero abilities after a brief “warm-up.” Abilities range from dealing damage outright, stunning selected targets, or healing the most damaged members of the team. Either way, Abilities go on a brief cooldown after use.
If you manage to win the mission, you can either press on to the next mission or retreat to the safety of the city instead, in case the fights are getting too difficult. You do not have to worry about getting stuck on a difficult mission, as every mission you beat contributes to a passive collection of Wishing Stars, allowing you to bide your time and collect enough Wishing Stars to rank up your best Heroes to beat the current mission.

Later on, you unlock the option of going on an Adventure with three Heroes who embark on the adventure alone with little input from you. There are 20 stages to the Adventure and each stage also consumes a separate energy bar that periodically regenerates during the Adventure. Stages vary between encounters with enemy groups, or abandoned cars and other things to salvage.
Either way, completing a stage awards you with resources relevant to your current city, along with Wishing Stars, Blazing Stars, and even some Gems. Completing a stage also lets you pick one of three reinforcements to tackle the later stages. These reinforcements can range from your Heroes to special survivors that provide buffs during fights, and even some of the wild animals you can encounter in missions and Adventures.

Every Adventure stage completed adds up to a special crate. After 50 cumulative stages have been beaten, you can open the crate to select a guaranteed card of a Hero you already own, after which the crate closes up and waits for the next 50 stages. The Adventure itself ends once all 20 stages are beaten, your entire party is wiped out, or you run out of energy. You can only embark on the Adventure once a day.
4. Times Gone By
Frozen City has its events, which involve your survivors reminiscing about the times before the harsh weather rolled in. Events last three days at most and can be accessed via the Event icon just below your Gem count. The event we encountered during our playthrough took place in a very flooded city, where seafood was plentiful, and the weather was more pleasant than it is now. We will discuss the general idea of how events work first, then explain how this particular event differed.

Because events are short, Hero management is streamlined to make up for the lack of time. All production buildings produce the event equivalent of Wishing Stars, which typically have different names to fit the event theme. Depending on how the event handles Hero level caps, players might not have to worry about collecting Blazing Stars and duplicate cards, as Heroes might start with their level caps fully unlocked. If they do, they are typically acquired through tasks along with opening Chests. In some cases, all Heroes are unlocked at the start and simply await their relevant buildings to be constructed.
All events have a battle pass with milestones to achieve, with each milestone offering rewards such as free chests, gems, and Hero cards. Milestones are reached by producing a certain resource up to certain thresholds, and all milestone awards are given to the player as soon as the event finishes. On top of this, completing the second milestone in the battle pass will put you on the leaderboards, where you compete with other players in the event for additional rewards. The top three players will get a sizeable number of gems or Blazing Stars, along with a handful of crates.

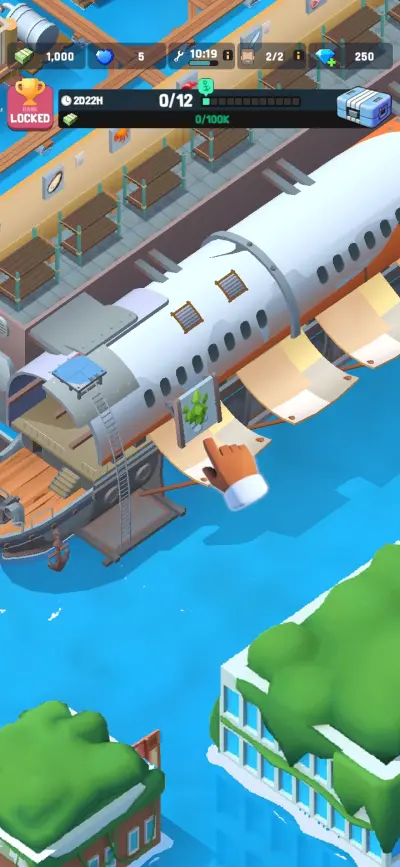
In the event we participated in, which was set when cities were submerged by global flooding, the temperature was more pleasant, so the temperature was not an issue for our survivors. As civilization had not fully collapsed yet, money still had its uses, and we earned money by farming seafood and selling it to passing ships.
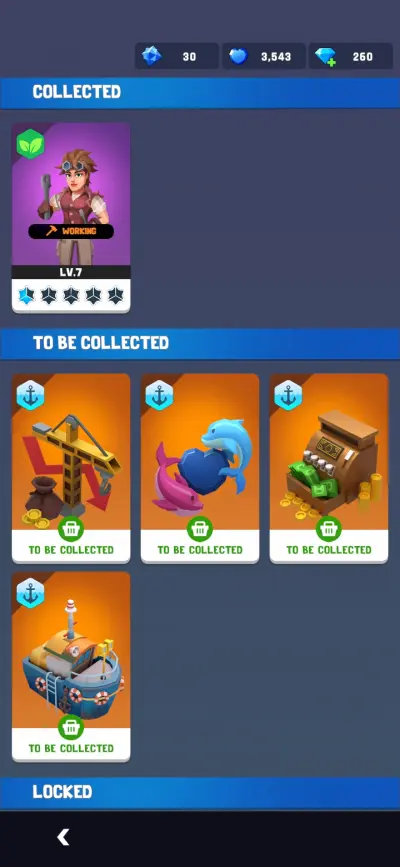
All farmed seafood is transferred to a warehouse at the lower right corner of the map, and you can spend money to open new docks, purchase additional ships, and upgrade preexisting docks so that they can load more seafood onto on oncoming ships.
Note that you need to purchase at least one ship to earn money, so do not go using your initial stack of cash on upgrades just yet. Docks are tied to a certain resource produced during the event, and you can freely open or close docks as needed to encourage incoming ships to buy more valuable goods instead.
This is also important because the lowest tier “seafood,” seaweed, is used as a raw ingredient for cooking meals. Other than that, the submerged city behaves much like the regular cities of the main game, complete with its own Production Chain.
Some Heroes from that event were not Heroes at all, but are instead Skills that provide bonuses to the event-only City for the duration of the event. These bonuses range from reducing construction and upgrade costs to making our products more valuable, and even increasing the cargo capacity of our ships. Duplicate “cards” exist for these Skills, and they could be freely upgraded as long as we had enough duplicates.
5. Life in the Frozen Wastes
Now that we have shown you what Frozen City has, we can start sharing tips on surviving the harshest winters this game can throw your cities.

- Your most important resources are food and fuel. If you are running low on any of these for whatever reason, begin assigning survivors to their relevant buildings instead of producing other resources. Low food and fuel mean starving and cold survivors; it can take a while for new survivors to come and take their place if they die due to discontent.
- If you plan on taking advantage of extended shifts, remember that you can only collect up to two hours’ worth, or four hours’ worth in case of the monthly fee, of resources. Extended shifts are best used while you are awake and when you can regularly check on your city production. As for shutting down those shifts, consider turning them off when the overall Rest of the survivors is around 50% as depicted in the Survivor Attributes screen. Give them some time to build up their energy, then order extended shifts again. This is especially useful during events if you want to get to the top of the leaderboards.
- When it comes to managing your Heroes, we recommend focusing on Heroes that are currently working in your city. Most Heroes need to be at level 30 to unlock an additional workbench, so getting any Heroes in reserve up to that level is good enough. Since Hero cards and Blazing Stars are hard to come by, prioritize leveling up the following Heroes for early survival:

- James and Arthur are Heroes who both work in the Mines, and this usually means at least one of them will be present in whatever city you are in as coal becomes the “standard” fuel.
- Aiden is the sole Hero of the Hunter’s Cabin, while Andrew is the first Hero you unlock that works at the Greenhouses. If there is no place reserved for the Hunting Cabin, you can expect Andrew to be producing food at the Greenhouse. At least one of them is going to show up in a new city for the same reasons as James and Arthur.
- As you progress through cities, you will get an infinite source of early fuel for your Furnace until you level it up and convert it to coal use. Until then, feel free to boost the heat to weather early snowstorms and cold nights. Of course, do not forget to turn that setting off once your Furnace starts using coal.
- When it comes to fuel management, if the game warns you that you are running low on coal at nighttime, you don’t have to immediately activate extended shifts. The warning only appears when the fuel left is only good for 10 minutes or less, and most sleeping hours are about six hours long in the game or at least three minutes in real life. As long as you have enough fuel to beat those three minutes, you can relax knowing that any fuel-producing survivors will start producing fuel first thing in the morning.
- Be careful how and when you expand your city. If you plan on building a dorm, or at least upgrading it so that it can support more people, consider completing those orders at least 1.5 in-game hours before the next meal. This should give your chefs enough time to prepare food for the recruits. If the dorms are expanded during mealtime, you might end up a couple of meals short.
- During missions to gather more Wishing Stars, one formation we recommend is to place three heroes of the same profession with two heroes from another profession. This provides a reasonable 15% boost to all their stats along with 15% extra reinforcements. For reference, the same boost is provided by using four heroes of the same profession and having all five heroes with the same profession only adds up to a 20% boost.

And that concludes our guide to Frozen City. We hope that our advice lets you rebuild from the icy lands the game calls home. If you have discovered additional tips or tricks for the game, don’t hesitate to share them with us in the comments below! Have fun, and game on!