Arduran greets you once again, hero! For players both new and old, we’ve come up with our own Magnum Quest tier list, based on our own analysis and experience in playing the game. Like all tier lists, this one is subjective and isn’t a be-all, end-all chart. Rather, this is a way to help you decide if a hero is worth pulling for or investing in.
For hero skills, we’ve added them as numerical lists, with each number corresponding to the skill’s level. As we’re only covering gold-tier heroes (which are the heroes you should be building), all heroes here have 4 skills.
We’re using tiers – S, A, B, C, D – to rank heroes. A hero’s rank depends on how strong they are, how easy they are to use, and how they fit into team compositions. We’ve also divided them based on their in-game class – so their tier is always based on how they perform compared to other heroes that can do the same job.
Magnum Quest Warrior Tier List

S-Tier
Ares
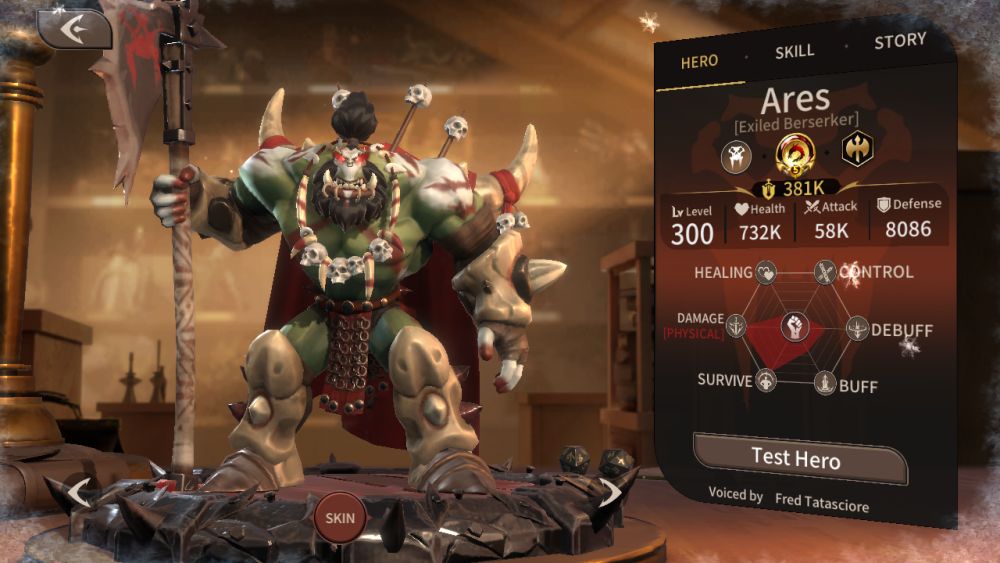
Faction: Wild
Skills:
(Ultimate) Tornado Slash:
- Ares roars, dealing 175% damage to enemies around him, then spins forward, dealing the same damage in a line.
- Magic damage immunity during Tornado Slash.
- 40% of inflicted damage is restored as HP.
Sweep Attack:
- Ares deals 140% damage to enemies in front of him. Hit enemies are affected by bleed, taking 60% of Ares’ attack damage per second for 4 seconds.
- Initial damage is increased to 160%.
- Enemies hit also have a -25% physical defense debuff for 4 seconds.
- Initial damage is increased to 180%, bleed now deals 75% damage, and physical defense debuff is now -35%.
Bloodlust:
- Ares gains attack andhaste when dealing damage, capped at 60% for attack and 15 points of haste.
- Caps are raised to 75% attack and 22.5 haste.
- Caps are raised to 90% attack and 30 haste.
Endless Fury:
- When taking fatal damage, Ares becomes invulnerable to damage and all control spells for 4 seconds. Only triggers once per battle.
- Duration extended to 7 seconds.
- Duration extended to 8 seconds.
He’s big, he’s disruptive, he hits like a truck. Ares is S-tier on most Magnum Quest tier lists, including ours, for a good reason. Ares does a truly monstrous amount of area damage and his self-buffs of both attack and haste (attack speed) coupled with his AOE ultimate and secondary skill mean that he’s a top-priority target. Ares is already notoriously hard to take down, but his Endless Fury passive gives him an opportunity to turn the tables around.
Feng

Faction: Fortress
Skills:
(Ultimate) Tao Supremacy:
- Feng starts a combo attack with each part dealing 300% damage. Feng is immune to control spells during this spell’s animation.
- Damage per stage increased to 360%.
- Feng gains a shield with HP equal to 30% of the total damage done after the skill ends.
Tao Intensity:
- Deals 120% damage to enemies in a straight line.
- Damage increased to 140%.
- Damage increased to 160% and inflicts a 2 second knockdown.
- Damage increased to 180%.
Tao Epiphany:
- Feng hits the enemy with the lowest HP twice, for 140% then 180% damage.
- Damage increased to 160% and 210%.
- If this skill kills its target, its cooldown is immediately reset.
Tao Devotion:
- Passively increases all damage Feng does by 8%.
- Bonus increased to 16%.
- Bonusincreased to 24%.
If there was a prize for hard carry in this game, it would probably go to Feng. Feng is weak at the beginning, but really starts ramping up once he unlocks his skills and gets better gear. Feng really only does one thing – deal damage – but he is very, very good at his job. He even channels some of his damage into a self-shield that gives him added survivability, though of course, you’ll still want a dedicated healer.
A-Tier
Katos
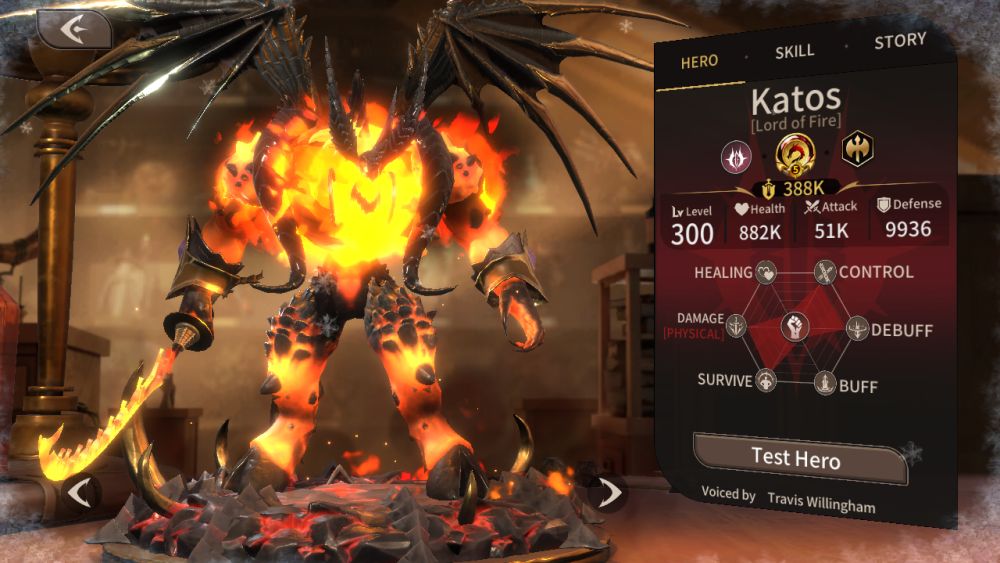
Faction: Abyss
Skills:
(Ultimate) Roar of Horror:
- Katos silences and burns all enemies for 6 seconds. They cannot use skills and take 60% of Katos’ attack as damage per second.
- Burn damage increased to 75% attack. Duration increase to 8 seconds.
- When silence wears off, it deals 150% attack damage to enemies and removes 160 energy from each of them.
Shield of Fire:
- Katos generates a shield to protect him. The shield can absorb up to 500% of his attack, and cannot be dispelled.
- Shield damage absorption increased to 550% attack.
- Shield also deals 50% attack damage to enemies near Katos every second.
- Shield damage absorption increased to 600% attack, damage increased to 75% attack per second.
Unholy Assault:
- Katos deals 100% attack + 8% of his own max health as damage to one enemy, and inflicts burn on them. Burndeals 75% attack damage per second for 6 second and cannot be dispelled.
- This skill’s burnalso inflicts -50% defense.
- Health scaling increased from 8% to 12% of Katos’ max health.
Searing Whip of Hell:
- Katos can no longer be revived if he falls in battle. If there are enemy heroes with less than 30% of their max health, Katos instantly kills the one with the lowest HP percentage among them. Bosses are excluded from this skill’s targeting.
- If there is no legal target for the instant death effect, the enemy with the lowest health percentage takes 30% of its max HP as damage; this damage cannot exceed 30% of Katos’ max HP.
- Instant kill threshold increased to 50% max HP or less. On failure, damage is increased to 50% of hero’s max HP, up to 50% of Katos’ max HP.
Bearing more than a passive resemblance to a certain whip-wielding, flaming demon, Katos is a warrior that excels at disruption. His ultimate skill makes life harder for your enemies with is burn, and his self-shield is decent. What stands out the most is his ultimate – Katos won’t go down alone. This poses a unique problem to enemies: keep Katos alive and let him run disruption, or take the chance, burst him down and hope that Katos doesn’t take down a key hero.
Revna
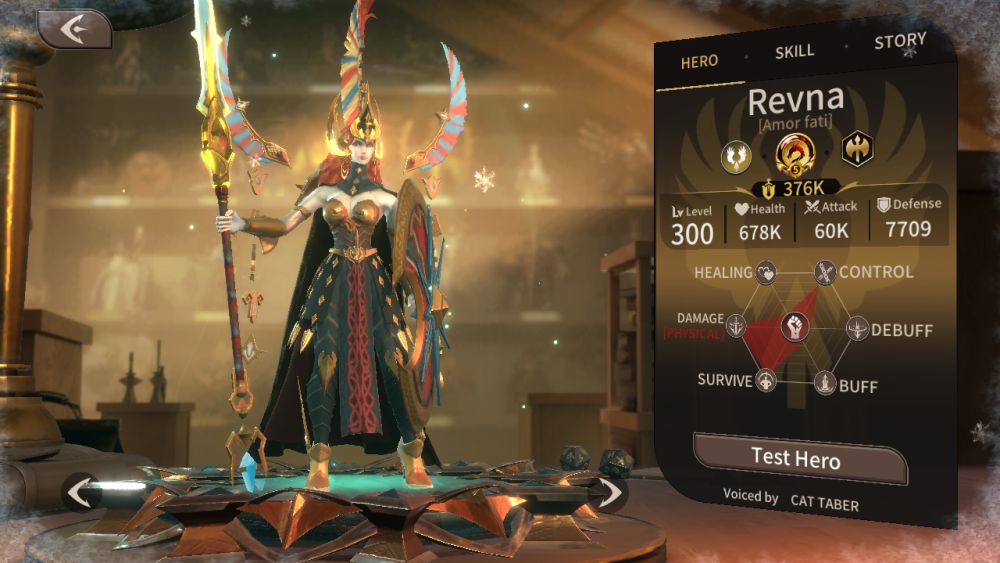
Faction: Divinity
Skills:
(Ultimate) Divinity Awakens:
- At the beginning of combat, Revna smashes the center of the enemy’s playing field, dealing 200% damage and inflicting a 2 second knockdown. During combat, Revna enters the Awakened state for 10 seconds. This instantly puts her other skills off cooldown, gives her a 50% attack buff, AOE splash on her normal attacks, as well as a chance to dispel enemy buffs on any attack.
- When Revna activates this skill, she heals for 50% of her max HP. Every other activation heals 10% less HP, to a minimum of 10% of Revna’s max HP.
- Awakened attack buff increased to 70%.
Breaching Assault:
- Deals 150% thrice to the enemy in front. The last hit inflicts a 2 second knockdown. Revna is immune to control spells during this skill’s animation. If Awakened, this skill gains an AOE and ignores 50% defense.
- Damage increased to 160% per swing.
- Damage increased to 170% per swing.
- Awakened defense bypass increased to 70%.
Shield of the Divine:
- Revna blocks all damage for 3 seconds, then deals 200% damage in an area with a 2 second knockdown. If Awakened, Revna also taunts during the block period.
- Block returns 70% damage to the attacker.
- Area damage increased to 220%.
Divine Majesty:
- Each nearby enemy gives Revna -15% damage taken. If Awakened, they also grant her +15% damage inflicted.
- Scaling increased to -20% damage taken and 20% damage inflicted.
- Scaling increased to -25% damage taken and 25% damage inflicted.
Revna is the queen of self-sustain. While classified as a Warrior, it’s better to think of her as a highly offensive Guard. Her on-combat skill is great for initiating battle, and coupled with her self-buffs, damage mitigation, and self-heals, she’s pretty hard to take down.
B-Tier
Julien
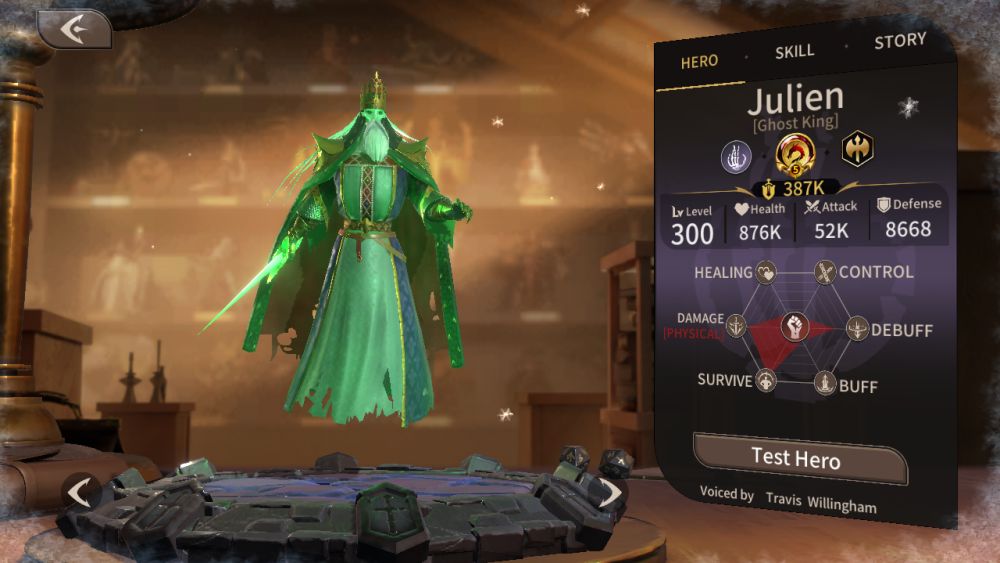
Faction: Shadow
Skills:
(Ultimate) Charge of Death:
- Julien summons ghosts that smash into enemy ranks, dealing 300% damage. This move has 80% life steal.
- Enemies hit gain the vulnerate status effect, taking 20% increased damage for 8 seconds.
- Double attack and charge damage increased to 140%, final attack increased to 260%, and skill inflicts -20% physical defense on targets hit for 8 seconds.
Life Snatch:
- Hits enemies in front of Julien for 120% damage. This attack also deals up to 5% of the target’s remaining HP as damage, but capped at 5% of Julien’s own max HP. The second part of this attack has life steal.
- Base damage increased from 120% to 160%.
- Base damage increased to 200%. Life steal attack caps at 10% of enemy’s remaining HP, up to 10% of Julien’s own HP.
- Base damage increased to 240%.
Curse of the Underworld:
- Inflicts vulnerate on the enemy with the lowest HP, making it take 20% increased damage for 8 seconds. After this debuff wears off, Julien heals for 30% of his lost HP.
- Targets that die with this debuff grant Julien 20% of their attack and defense.
- Vulnerate increases damage taken by 30%.
Ethereal Form:
- Decreases incoming physical damage by 30%. When Julien receives fatal damage, he instead heals for 50% of his max HP, and enters the Vengeance state. While in Vengeance, Julien is immune to physical damage but takes 30% more magical damage. When either the timer expires or his HP runs out in Vengeance, Julien dies.
- Julien gains 30% attack and 30 haste in Vengeance. In addition, attacks in this mode permanently reduce the target’s defense by 3% per hit.
- Vengeance duration increased to 20 seconds. Incoming magic damage penalty reduced to -15% from -30%.
Julien’s an interesting character on paper, with an arsenal of health manipulation moves. In practice, he’s average and leaves a lot to be desired. Julien has a solid move kit, but lacks that special something to put him on par with the better characters. While it may sound amusing, a character that has to die for their full potential to be unleashed is very dicey.
C-Tier
Bill

Faction: Fortress
Skills:
(Ultimate) Ferocious Charge:
- Bill attacks twice in front of him for 120% damage and catapult. He then charges forward for another 120% damage and knockdown, and a 200% damage attack to at the end of the charge. Bill is immune to control spells during the charge.
- Double attack and charge damage increased to 130%, final attack increased to 230% and has +30 critical hit.
- Double attack and charge damage increased to 140%, final attack increased to 260%, and skill inflicts -20% physical defense on targets hit for 8 seconds.
Giant Sword Swing:
- Bill’s normal attack becomes a double attack that does 130% damage and hits in an AOE. Increases Bill’s normal attack interval.
- Attacks now deal 140% damage per swing.
- Second attack has +30 critical hit.
- Attacks now deal 150% damage per swing.
Bloody Swipe:
- Bill deals 140% frontal AOE damage and inflicts bleed, which does 50% of Bill’s damage per second every 4 seconds.
- Swing damage increased to 160%.
- Swing damage increased to 180%. Bleed damage increased to 75% per second.
Heavy Armor:
- Bill becomes immune to knockdown and all control spells that would move him around.
- Passively reduces incoming physical damage by 50%.
- Passively reduces incoming magical damage by 20%.
If there’s one thing Bill is great at, it’s consistency – namely, being consistently disappointing. Bill himself has low multiplier on all his moves, and even worse, constantly displaces enemies which makes it harder for your other melee heroes to get anything done. Even the damage-over-time effects that Bill inflicts are meh, with so many heroes being able to do it better. Warriors are supposed to kill things, but Bill can’t seem to decide if he’d rather be a damage dealer or a tank.
Ilya
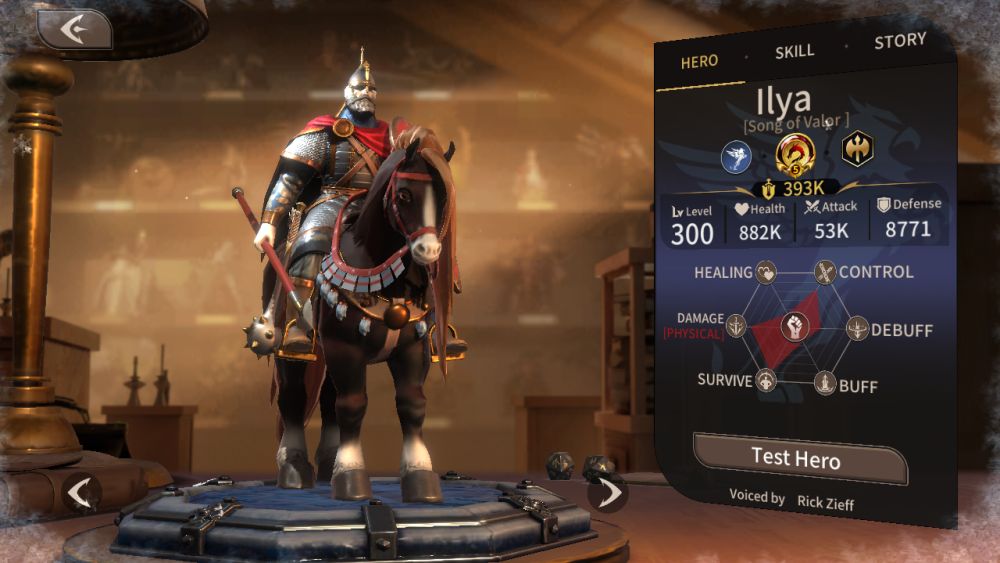
Faction: Fortress
Skills:
(Ultimate) Valorous Charge:
- Ilya charges at the enemy with the highest attack stat. Enemies caught in the charge take 200% damage and are hit with catapult. The primary target takes double this damage.
- Charge damage increased to 220%.
- Enemies catapulted by Ilya have -20% damage for 7 seconds.
Breaching Blow:
- Deals 200% damage to the enemy in front of Ilya, and repels it backwards. Ilya is immune to damage and control spells during this skill’s animation.
- Damage increased to 220%.
- Breaching Blow also grants a shield that can take up to 20% of Ilya’s max health as damage before collapsing. Lasts 5 seconds.
- Damage increased to 240%.
Mounted Archery:
- Ilya performs a varied attack, based on his distance to his target: either he will shoot an arrow that does 180% damage and lowers accuracy by 100 for 6 seconds, or smash them with a mace for 220% damage and stuns for 2 seconds.
- Arrow damage increased to 200%, mace damage increased to 240%.
- Regardless of which attack is performed, the target is also hit with a -20% attack debuff for 7 seconds.
First Blood
- At the start of a battle, Ilya immediately charges at the closest enemy unit to him for 150% damage and catapult. If this would cause Ilya to end in the enemy’s half of the board, Ilya gains valor and tough skin, which increase damage done and decrease damage taken by 30%, respectively.
- Damage increased to 170%.
- Valor and tough skin effects raised to 40%.
Ilya looks great, but he’s another displacement warrior hero that knocks enemies away with his ultimate. He’d perform much better if he didn’t make enemies careen every which way when he charged, but that’s it, unfortunately. His other skills are okay – First Blood is pretty nifty, but Ilya brings an element of recklessness and unpredictability with his charges that leave him in enemy territory.
Manton

Faction: Wild
Skills:
(Ultimate) Javelin of Ferocity:
- Manton stomps for 150% AOE damage, then hurls his javelin at the farthest enemy. This javelin deals 220% to all enemies caught in its path and repels them.
- Stomp damage increased to 170%, javelin damage is now 250%.
- Stomp damage increased to 190%, javelin damage is now 280% and inflicts -50% defense to hit targets for 8 seconds.
Tribe’s Fury:
- For 8 seconds, Manton’s normal attack becomes a double attack for 70% damage per hit.
- Damage increased to 80% per hit.
- Damage increased to 90% + 5% of Manton’s lost health per hit.
- Damage increased to 100% + 5% of Manton’s lost health per hit. Duration increased to 12 seconds.
Whirlwind Kick:
- Manton deals 200% damage to a target and catapults it.
- Damage increased to 220%.
- Damage increased to 240%. Manton gains a 20% attack buff for 8 seconds.
Heritage of Nomads:
- As Manton loses HP, his stats increase. This is capped at +90% attack, +90 critical hit, and +90 critical hit damage.
- Attack bonus is now capped at 135%, critical hit damage is now capped at +135.
- If Manton is reduced to 10% health or less, he becomes immune to control spells and gains 10 haste until the end of the battle.
I really want to like Manton because I dig his design, but…eh. Granted, he’s not quite as bad as other displacement heroes since he inflicts repel with his ultimate, so they don’t fly around as much. But the rest of his kit is more suited to a Guard than a Warrior. The game incentivizes Manton losing hp – a whopping 90% of it – for a piddling 10 haste and CC immunity.
If I wanted haste, I’d bring Harry. While the stat boost from losing HP is nice, it leaves Manton on the back foot (or hoof, in this case) for most of the battle and lowers his damage potential in exchange for keeping him alive. He’s not a bad unit, but he’s very tricky to work with, and all in all, I’d prefer somebody with a lot more consistency.
Magnum Quest Guard Tier List

S-Tier
Harry

Faction: Wild
Skills:
(Ultimate) Master of War:
- Harry beats his drums, dealing 80% damage to all surrounding enemies. The two closest allies to Harry gain bonus attack equal to 30% of Harry’s attack, as well as 40 haste for 10 seconds.
- Attack buff now scales to 40% of Harry’s attack. Haste buff increased to 50.
- All allies now receive the inspire effect regardless of distance to Harry.
Gut Punch:
- Little One throws a punch that deals 120% damage and inflicts knockdown to one target. The target also takes 10% increased damage for 12 seconds.
- Damage increased to 140%.
- Incoming damage debuff increased to 20%.
- If the target dies while the debuff is still active, the hero that lands the killing blow gains +40 critical hit and critical hit damage for 10 seconds.
Healing Noise:
- Little One stomps the ground for 10 seconds. The quaking earth deals 60% attack damage per stomp and lowers haste by 30 for affected foes. Harry heals HP equal to 30% of the total damage taken by all enemies.
- Stomps now do 80% damage.
- Harry now heals for 40% of the total damage.
Devil’s Teamwork:
- For each ally that’s still active (excluding Harry himself), Harry gains a +10% defense increase and a -10% damage taken bufff.
- Scaling increased to 12% defense buff and -12% damage taken.
- Scaling increased to 15% defense buff and -15% damage taken.
Harry and Little One, his ogre, are a very proactive tank hero that have some self-sustain. Most importantly, Harry gives his allies a slew of potent buffs – particularly haste – which gives attack speed. It’s very rare to find haste, moreso an unconditional haste buff with Harry’s level 3 ultimate. Harry also offers great debuffs and has a lot of survivability on his own. If you have Harry, use him.
Lycidas
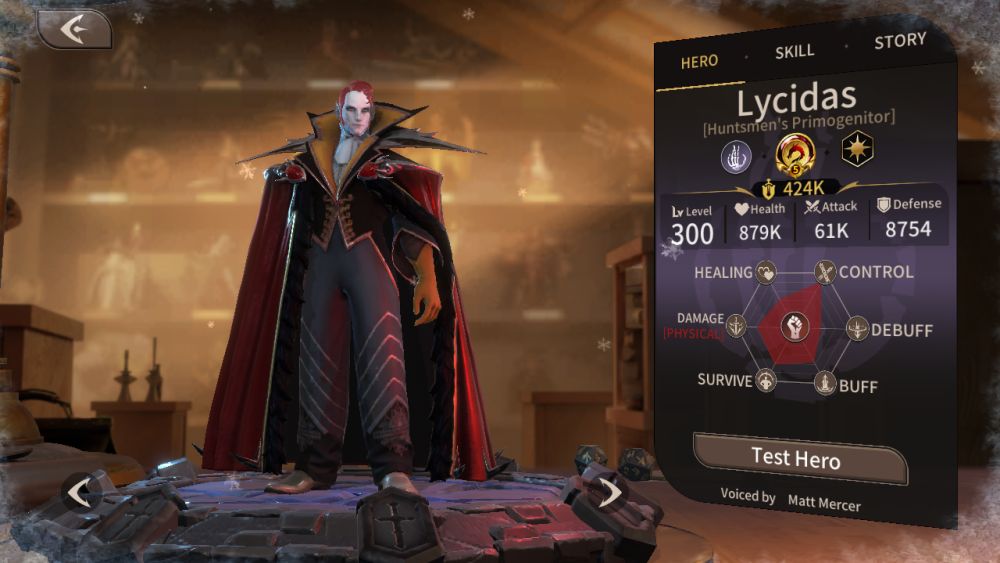
Faction: Shadow
Skills:
(Ultimate) Blood Altar:
- Lycidas summons a blood altar in the densest enemy area. The altar deals 20% of Lycidas’ attack per second for 3 seconds and marks them with the ground debuff. Damage inflicted by the altar is converted to energy for Lycidas, and eventually bursts, dealing damage equal to the sum of stolen HP.
- Altar damage increased to 25% per second.
- Enemies that have the ground debuff are silenced.
Phantom of Bat:
- At the beginning of battle, Lycidas teleports a random front row ally (excluding himself) into a random spot in the enemy’s backrow and dealing 120% damage when they emerge. That hero receives the Blood Contract buff, splitting damage taken between itself and Lycidas. In battle, Lycidas teleports a random enemy to the densest enemy area, dealing 120% damage where it appears and inflicting -30 accuracy for 10 seconds.
- Teleport endpoint damage increased to 130%.
- Teleported enemies are also stunned for 1 second.
- Teleport endpoint damage increased to 140%.
Heart Extraction:
- Lycidas steals HP from an enemy unit equal to 200% of that unit’s attack, and inflicts weaken, lowering damage output by 10% for 5 seconds. All stolen HP is given to the ally with the Blood Contract buff. If there are no allies with said buff, the HP is given to the ally with the lowest health instead, and that hero received Blood Contract.
- Stolen HP increased to 220% of target’s attack.
- Weaken effect increased to -20% damage.
House of Sanguine:
- Lycidas has 50% life steal on all damage he causes. Incoming physical damage reduced by 20%. Allies with Blood Contract likewise receive the same buffs.
- Life steal increased to 60%.
- Physical damage reduction increased to 30%.
Lycidas is a potent guard by himself with a lot of self-sustain with his life steal gimmicks. Heart Extraction is unique as it scales off the target unit’s attack rather than Lycidas’. But what really takes the cake is Lycidas’ ridiculous teleport skill coupled with his Blood Contract buff. Two words: surprise Ares. Not only surprise Ares, but Ares with life steal and damage reduction. Hilarious when used on an enemy, not so fun when used on you. I don’t think I need to say much else.
A-Tier
Arthur

Faction: Fortress
Role: Guard
Skills:
(Ultimate) Divine Intervention:
- Adds a temporary shield that can absorb up to 500% of Arthur’s attack before collapsing. This shield affects all allies, including Arthur himself. Shield lasts for 8 seconds.
- The shield also heals for 100% of Arthur’s attack per second, and duration is increased to 10 seconds.
- Shield absorption increased to 550% of Arthur’s attack.
Holy Aura:
- Arthur activates a 6 second aura that affects him and nearby allies. This aura increases Arthur’s defense by 20%, and by 10% for his allies.
- Self-defense buff is increased to 30%, while allies now receive a 15% defense buff.
- Aura now affects all allies regardless of distance. Duration increased to 8 seconds.
- Self-defense buff is increased to 40%, while allies now receive a 20% defense buff.
Holy Light:
- Heals the ally with the lowest current health for 220% of Arthur’s attack.
- Holy Light also gives that ally 120 energy.
- Heal amount increased to 260% of Arthur’s attack.
Sacred Boundry:
- Arthur raises his shield, reducing incoming physical damage by 70% and he becomes immune to control spells. This lasts 5 seconds. During this time, Arthur can only use his ultimate skill.
- Shield now reduces physical damage by 100%.
- Arthur gains 50 energy per second while this is active.
While Arthur’s offensive stats are lacking, his preemptive approach to tanking greatly enhances his utility. By providing shields to his allies, Arthur vastly improves the durability of his team. He also has heals and further defense buffs as a fallback mechanism.
Fare

Faction: Forest
Skills:
(Ultimate) Divine Shield
- Fare fires a shockwave from his shield. This blast of energy deals 160% damage and inflicts both knockback and stun. Fare is immune to control spells while casting this skill.
- Damage increased to 220%.
- Fare gains tough skin after the wave ends, reducing incoming damage by 30% for 8 seconds.
Unstoppable Blade:
- Fare deals 170% damage to enemies in front of him.
- Damage increased to 185%.
- Enemies hit have -25% defense for 4 seconds.
- Damage increased to 210%. Defense debuff increased to -40%.
Fatal Attraction:
- Fare pulls nearby enemies towards him.
- Pulled enemies are taunted, forcing them to attack Fare. They also have a -60% attack debuff for 7 seconds.
- While this skill is active, Shield Training’s chance to block is doubled.
Shield Training:
- Fare has a 15% chance to block incoming damage.
- Fare counters for 150% damage when he successfully blocks an attack.
- Block chance increased to 20%.
Fare is a very conventional tank: he has damage reduction, stun, knockback, and a taunt. He’s not particularly flashy or powerful, but what Fare does, he does exceedingly well. Fare offers consistent performance that’s a nice change from gimmicky heroes.
On the other hand, he doesn’t have any self-healing moves, so be sure your enemies are either defeated before Fare is taken down, or bring a healer. His shockwave can also disperse enemies, rendering his taunt useless, so be sure to set his autoskill to off for better consistency.
B-Tier
Rickers
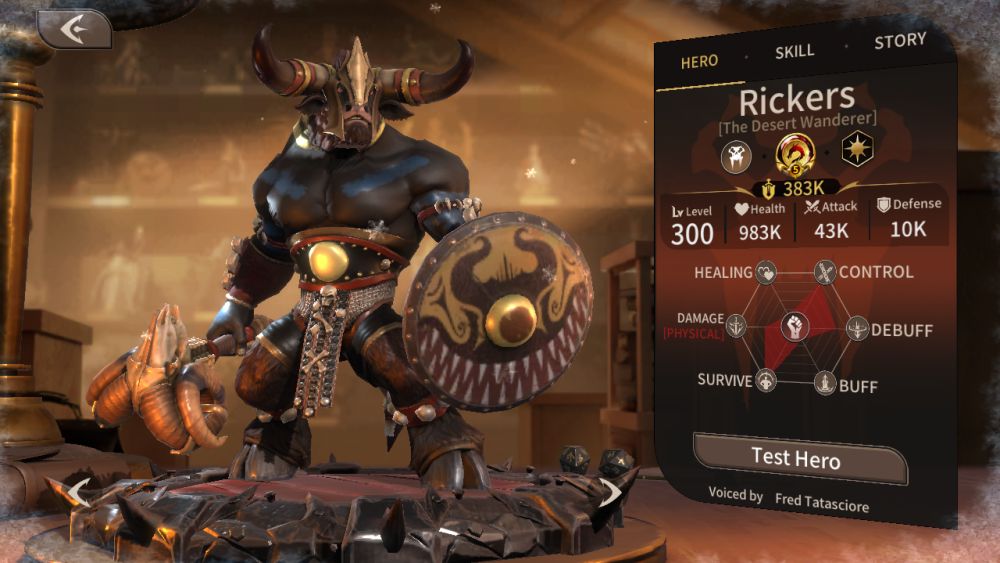
Faction: Wild
Skills:
(Ultimate) Primal Stampede:
- Stomps the earth to deal 110% attack in an AOE around Rickers and stunning enemies hit for 2 seconds.
- Also inflicts -50 haste for 8 seconds on targets hit.
- Damage increased to 120% attack, stun duration increased to 3 seconds.
Furious Combo Strike:
- Hits enemies in front of Rickers for 2 hits of 65% damage, then a third strike for 130% damage. The last hit also inflicts a 1 second stun.
- 2-combo hits now deal 70% damage and the last hit now deals 140% damage.
- Stun duration increased to 1.5 seconds and also reduces haste by 25 for 6 seconds.
- 2-combo hits now deal 75% damage and the last hit now deals 150% damage.
War Cry:
- Rickers gains 20% max HP for 12 seconds and is healed for the same amount. While he has this buff, Rickers’ normal attacks have a 15% stun chance for 0.5 seconds.
- Max HP bonus increased to 30%.
- Stun proc chance increased to 30%.
Tribal Defense:
- Upon reaching 70% or less HP, Rickers becomes immune to all damage for 2 seconds. Afterwards, he gains tough skin for 10 seconds, reducing incoming damage by 30%. Only triggers once per battle.
- Tough skin damage reduction increased to 60%.
- This skill will activate again upon reaching 30% or less HP.
This mighty minotaur tanks for his allies by controlling enemies with his wide selection of stuns. He may not do the best damage, but boy, Rickers is great at annoying enemies and disrupting their plays. Unfortunately, since bosses are immune to control effects, poor Rickers doesn’t cut it as a boss tank, and his very few sources of damage mitigation can’t compare to other tanks.
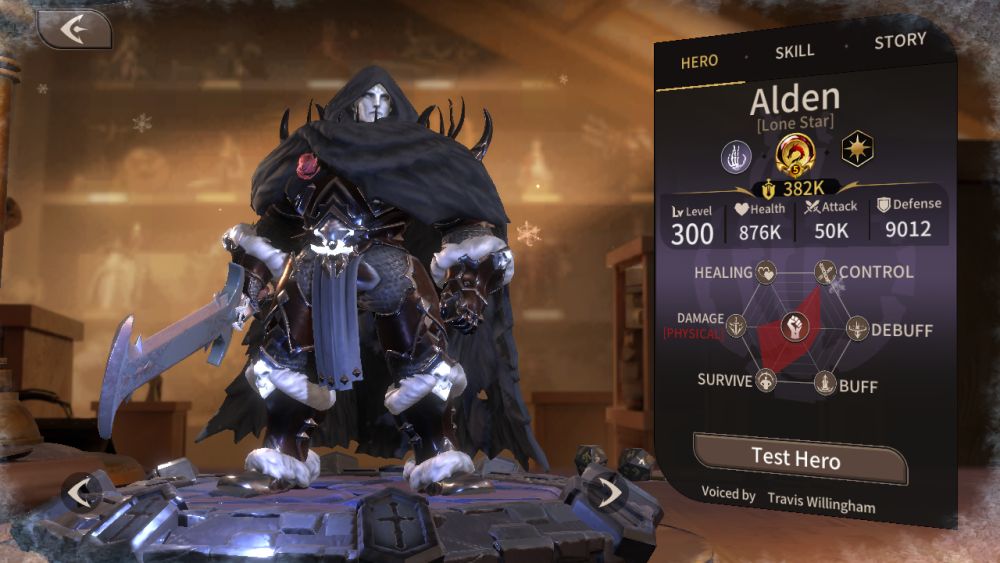
Alden
Faction: Shadow
Skills:
(Ultimate) Frozen Land:
- Deals 150% damage to nearby enemies and freezes them, rendering them unable to move or act for 4 seconds.
- Frozen enemies are also hit with energy block, disabling any energy gain for 8 seconds.
- Damage increased to 180%, freeze duration increased to 5 seconds.
Shield of Evil:
- Gives Alden tough skin for 10 seconds, reducing incoming damage by 20%.
- Tough skin damage reduction increased to 25%.
- When Shield of Evil reduces damage, Alden deals bonus damage on his next normal attack equal to the reduced damage.
- Tough skin damage reduction increased to 30%, duration increased to 14 seconds.
Necromancer:
- Resurrects a random fallen ally with 75% of their stats. Resurrected heroes cannot use skills.
- Resurrected heroes return with 100% of their stats and can use their non-ultimate skills.
- Alden can now target fallen enemy heroes, who will fight for Alden’s team when resurrected.
Resurrection:
- The first time he receives a fatal blow, Alden gains a shield equal to 150% of his max HP and heals for 15% of his max HP every second for 4 seconds. Alden cannot attack while Resurrection is still active.
- Also creates a 120% damage blast when this skill triggers. This blast also freezes enemies for 3 seconds.
- Shield scales to 250% of Alden’s max HP, recovery rate increased to 25% of Alden’s max HP.
Alden has the unique ability to bolster your ranks with your fallen enemies. With Alden on your team, death is a minor inconvenience for your allies as Alden can bring them back time and time again. Alden also has some control and disable utility through his freeze applications. On the other hand, this makes him a niche pick against bosses, who are immune to Alden’s cold grasp.
C-Tier
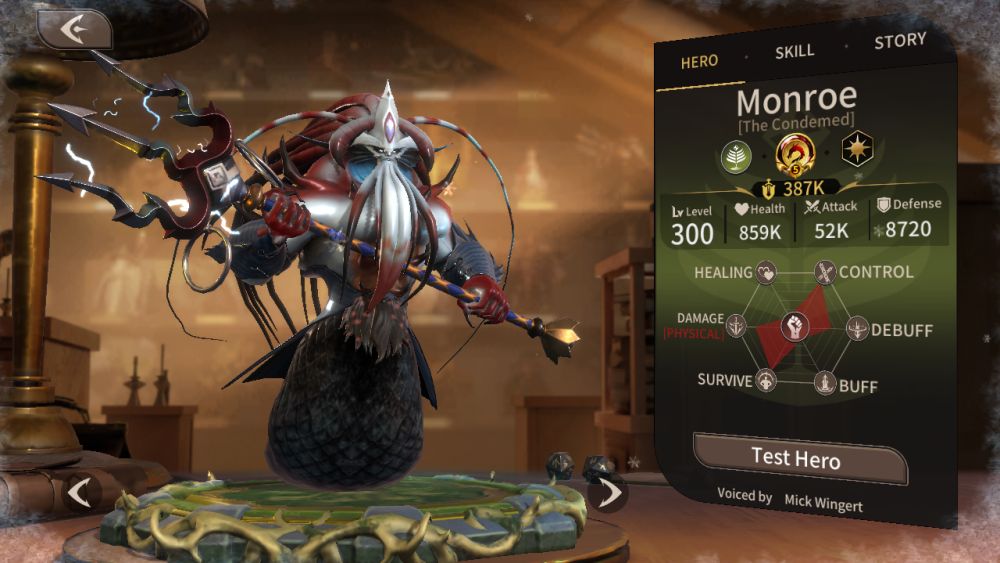
Monroe
Faction: Forest
Skills:
(Ultimate) Tidal Surge:
- Summons 5 water jets that blast enemies at random for 180% damage and knockdown.
- Each subsequent jet does 20% more damage than the last. Jets will now prioritize enemies that haven’t been hit by a jet.
- Water jets also inflict -30 haste for 10 seconds. Does not stack with itself.
Aegir’s Rage:
- Deals 150% damage to one enemy and reduces its physical defense by 30% for 6 seconds.
- Damage increased to 170%.
- Damage increased to 190%. Also reduces target’s haste by 30 for 6 seconds.
- Damage increased to 210%.
Clashing Waves:
- Deals 120% damage in an AOE around Monroe and stuns them for 3 seconds.
- Damage increased to 140%.
- For each enemy that’s been hit by Clashing Waves, Monroe blocks one incoming attack.
Shield of Tide:
- Whenever Monroe receives 3 normal attacks, he automatically blocks the next attack.
- Number of hits required reduced to 2.
- Number of hits required reduced to 1.
Monroe isn’t a bad hero per se, it’s that he can’t seem to commit to any specific strategy and is thus a very niche pick. He does have some crowd control via his water jet knockdown and area stun. You could argue that Monroe fares better against bosses than Rickers or Alden, but then again, you could just use a better tank like Arthur or Harry. His Shield of Tide looks impressive on paper, but in practice he’s going to be eating more skills than normal attacks.
On the other hand, his water jets can do very impressive damage to a single target – but would you rather have Monroe, or a dedicated damage dealer? Monroe has a mix of everything, but rather than making him stronger, it turns him into more of a generalist with no solid battle plan.
Magnum Quest Hunter Tier List
S-Tier
Fie

Faction: Forest
Skills:
(Ultimate) Gale Strafe:
- Deals 220% damage to enemies in front of Fie and repels them.
- Damage increased to 240%.
- Damage increased to 260%.
Wind Guardian:
- Fie gains 2 haste after every normal attack, and can gain up to 10 stacks.
- Haste per attack increased to 3.
- At full stacks, Fie also gains 30% attack.
- Haste per stack increased to 4.
Rapid Fire:
- Attacks an enemy thrice for 90% damage per shot. Getting hit with this skill does not grant its target any energy.
- Damage increased to 150% per shot.
- The third attack also inflicts a -20% defense debuff for 6 seconds.
Scurry:
- Allies gain 30 haste for 8 seconds when battle begins.
- Haste buff increased to 45.
- Also gives 60 energy to allies at the start of a battle.
Fie is notable for his very high attack stat. While his kit is basic, it’s really all he needs. His haste self-buff slowly but surely turns him into a machine gun, while his passive skill lets Fie’s team score early kills and move into an advantageous position. Fie’s job is to execute brutal ranged takedowns on all enemies, and his simple, yet effective loadout makes him excel.
A-Tier
Aurik

Faction: Fortress
Skills:
(Ultimate) Explosive Rounds:
- Deals 240% attack in an AOE around the primary target.
- Targets hit also lose 45 haste and burn for 80% per second for 5 seconds.
- Initial damage increased to 270%, burn damage increased to 100%.
Toast:
- Aurik quaffs a mug of liquor, gaining 30 haste and a 25% attack buff for 8 seconds.
- Haste buff increased to 45 and attack buff increased to 30%.
- Aurik also gains +30 critical hit for the duration of the effect.
- Critical hit buff increased to +45.
Smoke Screen:
- Enemies in an area lose 60 accuracy for 6 seconds.
- In addition, they lose 35 energy per second.
- Accuracy debuff increased to -70, duration set to 8 seconds.
Headshot:
- Normal attacks have a 30% chance to deal 140% damage and mini stun a target, interrupting their actions.
- Damage bonus increased to 160%.
- Headshot chance increased to 45%.
Aurik’s mini stuns are very disruptive and – with a bit of luck – can completely ruin an enemy’s game plan. Since these are dependent on his normal attack, you’ll want to buff Aurik’s haste so that he has more opportunities to proc Headshot. The rest of his kit isn’t too shabby either – he does decent AOE damage and has debuffs to boot.
B-Tier
Veara

Faction: Shadow
Skills:
(Ultimate) Clashing Dark Energy:
- Summons Misty at the start of combat to assist Veara. Misty has 70% of Veara’s stats.
- Deals 400% damage to nearby enemies. If Misty is alive, strips enemy shields before inflicting damage.
- Misty stat scaling increased to 90% of Veara’s stats. Damage increased to 480%. On skill use, Misty also reduces all enemies’ physical defense by 40% for 8 seconds.
- As long as Veara is alive, Misty is resurrected 15 seconds after it dies. Damage increased to 560%. On skill use, Misty also reduces all enemies’ physical defense by 60% for 8 seconds.
Energized Slash:
- Deals 180% damage to one target.
- Damage increased to 200%.
- Damage increased to 220% + 30 % of the target’ lost HP, up to a maximum of 1000% of Veara’s attack.
- Base damage increased to 240%.
Strike of Mist:
- Veara deals 220% damage to the enemy with the least HP. 60% chance for Misty to join in and add a 3 second stun.
- Damage increased to 280%, Misty extra attack chance increased to 90%.
- If Misty’s extra attack triggers, both Veara and Misty gain valor and tough skin for 8 seconds, increasing outgoing damage and reducing incoming damage by 30%.
Intwined Souls:
- While Misty is alive, Veara and Misty recover 5% max HP every 5 seconds.
- If Misty dies, Veara gains 45% attack, 45 critical hit, and 40 haste for 12 seconds.
- If Veara dies while Misty is alive, Misty sacrifices itself to revive Veara with 100% of her HP. Misty can no longer be summoned for the rest of the battle.
Veara is technically two characters like Harry, but unlike Harry and Little One, Veara and Misty can both fight. Veara also has a neat execution-style attack that scales off the target’s lost HP, making her a good pick for boss battles, and a skill that specifically targets enemies with low health, helping Veara fill the role of assassin. She’s a whirling dervish of blades whose purpose is to deal damage – a role that she fills well.
C-Tier
Guss

Faction: Fortress
Skills:
(Ultimate) Slime Barrage:
- Fire 8 shots of slime that deal 120% damage to random enemies.
- Guss is immune to control spells during the first 3 attacks.
- Damage increased to 140%.
Slime Spray:
- Deals 120% damage to 1 target.
- Damage increased to 135%.
- This skill now has 15% life steal.
- Damage increased to 150%.
Overdose:
- Guss whips his mount, gaining 40 haste for 10 seconds, then loses 30 haste for the next 6 seconds.
- Haste buff increased to 55.
- Haste buff duration increased to 12 seconds, haste debuff duration decreased to 4 seconds.
Corrosive Mucus:
- Guss’ attacks inflict weaken on his targets, reducing their damage by 10% for 5 seconds.
- Weaken damage reduction increased to 15%.
- Weaken damage reduction increased to 20%.
Guss is a…thing riding some kind of larva. Visually, he doesn’t look that great. Sadly for Guss, this also translates to his battle ability. Guss is nowhere near passable enough to be B-tier, and just barely avoids being D-tier thanks to his constant weaken debuff.
D-Tier
Zander

Faction: Wild
Skills:
(Ultimate) Blade Fan:
- Deals 120% damage in a fan–shaped AOE in front of Zander.
- Damage increased to 140%.
- Damage increased to 160%.
Piercing Dagger:
- Normal attacks pierce through enemies in a straight line. Each time an attack pierces, it does 5% less damage.
- No damage reduction from piercing.
- +5% damage increase after piercing.
- +10% damage increase after piercing.
Venom:
- Zander throws a bottle of poison that deals 80% initial damage to one target, and inflicts poison in an AOE around the primary target. The poison deals 40% damage per second for 5 seconds.
- Initial damage increased to 100%. Poison damage increased to 45%.
- Initial damage increased to 120%. Poison damage increased to 50%.
Stealth:
- Zander gains 40 haste and gains Stealth for 6 seconds. While he has Stealth, he cannot be targeted by enemies. Zander still takes damage from AOE attacks he’s caught in.
- Haste buff increased to 50.
- Duration increased to 8 seconds.
Zander has the dubious honor of being so bad that the Hunter tier list had to be extended down to D-tier. His skill multipliers are incredibly low and there are many other heroes that can do his job better. Scratch that, literally anyone can do Zander’s job better than him. While his Stealth skill is nice, it’s wasted on his low damage skills. To call him a jack of all trades is an insult, as that would imply some level of proficiency at what he does.
Magnum Quest Rogue Tier List

S-Tier
Flann

Faction: Fortress
Skills:
(Ultimate) Witch’s Hunt:
- Deals 280% damage in a fan-shaped AOE in front of Flann. Does 4x as much damage to enemies below 30% HP. If using auto mode, Flann will not use this skill on enemies above 30% HP.
- Enemies hit are dispelled of all their buffs.
- If there is an enemy with less than 30% health, Flann teleports in front of them before activating this skill. If the enemy dies, Flann regains all the energy used for that activation.
Enchanted Ring-Blade:
- Deals 180% damage to enemies in a path and places a Death Mark on them. Death Marked enemies take 12% more damage from Flann’s attacks per stack. Death Mark stacks up to 2 times and lasts for 10 seconds.
- Damage increased to 200%.
- Damage increased to 220%.
- Death Mark bonus damage increased to 18%.
Hunter’s Instinct:
- Flann gains 40 dodge for 12 seconds. Enemies that miss Flann during this time gain a stack of Disruption Mark, losing 12% damage for 10 seconds per stack (max 3 stacks). Flann can inflict one Disruption Mark per second.
- Dodge bonus increased to 80.
- Disruption Mark outgoing damage debuff increased to -18%.
Hunter’s Enchanted Marks:
- All Death Marks passively increase Flann’s damage by 12%. All Disruption Marks passively reduce damage taken by Flann by 12%. These effects cap at a 60% bonus.
- Any time a foe is hit with one of Flann’s marks, she recovers 5% of her max HP.
- Death mark passive damage boost increased to 18%, Disruption Mark damage reduction increased to 18%. Cap raised to 90%.
Flann is a close-range assassin who deals magic damage. Her ability to critically hit low health enemy heroes while continuously buffing her own attack and having a self-sustain mechanism easily puts her above other rogues. Just point at what you want dead, and Flann will erase them.
A-Tier
Gila

Faction: Wild
Skills:
(Ultimate) Death Swirl:
- Gila deals 3 hits of 150% damage to the enemy with the lowest HP. These attacks have 30% life steal. Gila is immune to control spells during this skill.
- If Death Swirl kills its target, all remaining allies gain an attack buff equal to the target’s, divided evenly among them.
- Damage per hit increased to 170%.
Dance of Chaos:
- Deals 3 hits of 70% damage to enemies in front of Gila and repels them, pushing them slightly backwards. Gila is immune to control spells during this skill.
- Damage per hit increased to 80%.
- Adds a 4th, final hit to the combo that hits for 120% in an AOE in front of Gila.
- Damage for 3 hit combo increased to 90%, final hit damage increased to 150%.
Foul Mouth:
- Spits poison at all enemies in a fan-shaped AOE. This poison lowers haste by 35 and deals 80% damage per second for 8 seconds.
- This skill also inflicts vulnerate, increasing incoming damage by 15%.
- Duration increased to 12 seconds.
Venom Eruption:
- Normal attacks and Dance of Chaos leave marks on Gila’s enemies. At 8 stacks, they explode, losing 12% of their current HP but not more than 500% of Gila’s attack.
- Explosion now deals AOE damage.
- Number of stacks required reduced to 6.
Gila is another assassin who excels at picking off low health enemies and supporting her allies on the battlefield. Her poison spray not only deals decent damage, but also inflicts haste down (looking at you, Zander). Gila also has some AOE abilities in her exploding marks, which is complimented by multi-hitting attacks. If you’re looking for an assassin who excels in a team, Gila’s got you covered.
B-Tier
Carlotta

Faction: Shadow
Skills:
(Ultimate) Prance:
- Carlotta teleports around the battlefield, hitting random enemies for 220% damage per hit.
- Number of attacks increases.
- Damage increased to 260%.
Shunpo:
- Teleports to and strikes the farthest enemy from Carlotta for 130% damage.
- Damage increased to 150%.
- Also grants a shield with HP equal to 200% of Carlotta’s attack.
- Damage increased to 170%.
Blade Ring:
- Deals 110% damage to nearby enemies.
- Blade Ring has 60% life steal.
- Damage increased to 120%.
Traceless:
- Carlotta gains stealth for 10 seconds when her health dips below 40%. In stealth, Carlotta cannot be targeted but she can still be hit by AOE attacks. This only triggers once per battle.
- During stealth, Carlotta has +30% attack.
- Stealth duration increased to 18 seconds.
Carlotta excels at destroying the enemy backrow with her Shunpo skill, ensuring that no one is truly safe from this harlequin’s daggers. She’s a very agile fighter that continuously dances around the battlefield, making it hard to lock her down and ensuring she’s free to cause chaos. On the other hand, she doesn’t have the skills to secure kills, unlike Flann’s execution attacks.
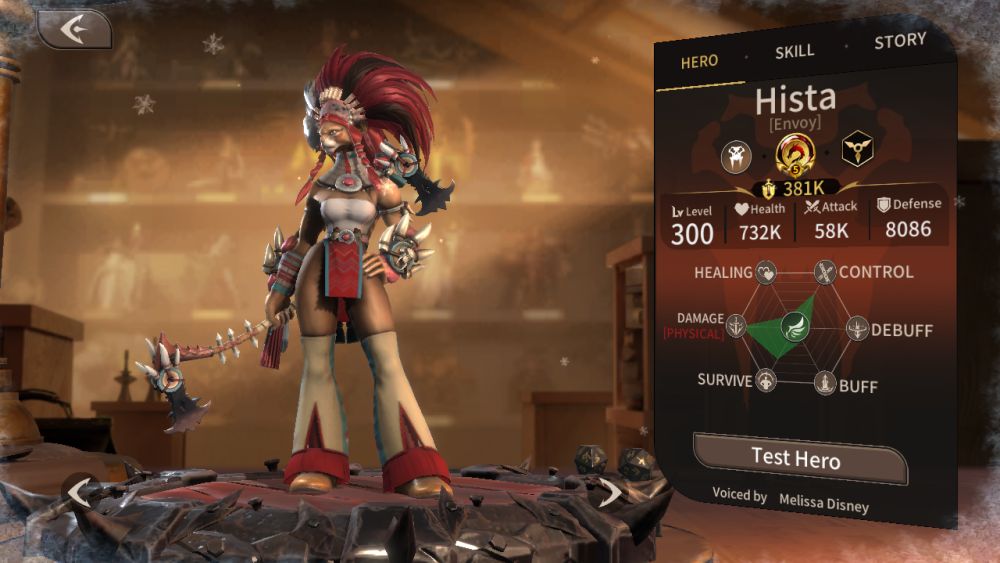
Hista
Faction: Wild
Skills:
(Ultimate) Lion’s Wrath:
- For 8 seconds, Hista has +30 haste, +25 critical hit, +20% attack, and immunity to control spells.
- Attacks made while in this state have a 25% chance to bleed, dealing 50% damage per second over 5 seconds.
- Bonuses increased to +40 haste, +30 critical hit, and +25% attack. Duration increased to 12 seconds.
Lion’s Leap:
- Deals 180% damage to the enemy that has inflicted the most damage in battle and stuns them for 4 seconds.
- Damage increased to 200%.
- If target is successfully stunned, Hista gains 30% attack for 8 seconds.
- Damage increased to 220%.
Dual Axe Swipe:
- Hista creates two rotating axes around herself that deal 90% damage to enemies they hit. These also inflict bleed for 25% damage per second for 4 seconds.
- Damage increased to 100%.
- Damage increased to 110%.
Bloody Chase:
- Hista deals 20% more damage to targets that have bleeding.
- Damage bonus increased to 30%.
- Also has +30 critical hit against bleeding targets.
Hista excels at taking down single targets with her focus on bleed effects. This makes her great against single boss battles, but leaves her performance lacking when faced with multiple enemies.
Cyan
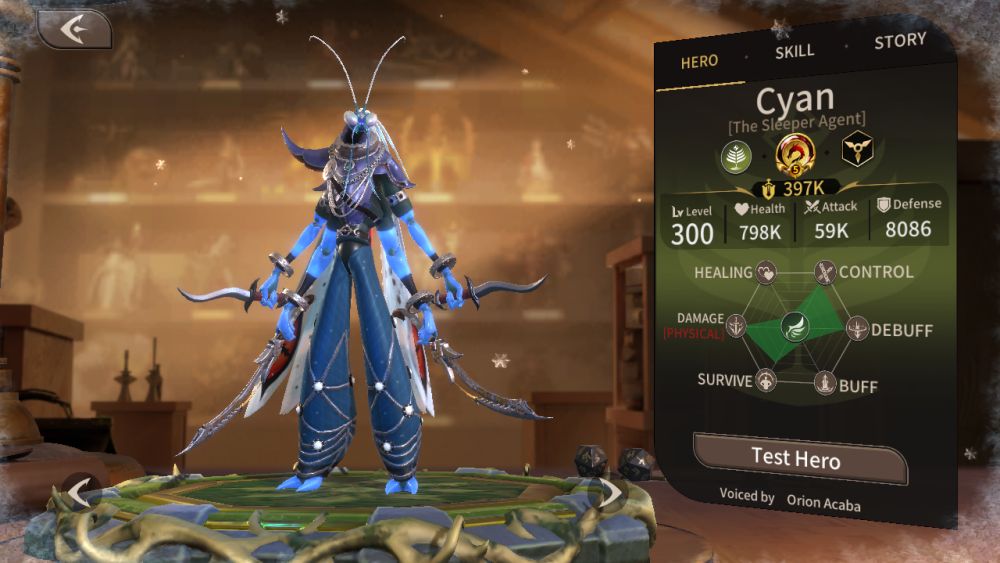
Faction: Forest
Skills:
(Ultimate) Mantis Abduction:
- Cyan abducts a target, removing both of them from play for 3 seconds. The abducted enemy takes 120% * the number of bleed stacks on it every second while abducted. If the abducted enemy is killed before the 3 seconds are up, Cyan emerges beside the enemy with the lowest HP, reducing accuracy by 30 and attack by 10% in an AOE. If the abducted target survives, both it and Cyan reappear in a random location on the left of the board.
- If the abducted target survives, it cannot be healed for 6 seconds.
- Cyan’s next attack after reappearing is a guaranteed critical hit and adds 3 stacks of bleed.
Mantis Sabre:
- Cyan’s normal attacks inflict bleed for 20% damage per second for 10 seconds. Enemies can hold up to 5 stacks of Cyan’s bleed. If they have 3 or more stacks, they lose 20% attack, take 10% more damage, and lose 20 energy per second for 10 seconds.
- Bleed damage increased to 30% damage per second.
- 50% of energy lost via Cyan’s bleed is given to Cyan.
- 100% of energy lost via Cyan’s bleed is given to Cyan.
Rabid Assault:
- 25% chance that Cyan’s normal attacks become a double attack that ignore 50% of the target’s defense and mini stunning them.
- Upgraded attacks are now a triple attack.
- Extra attacks do not generate energy for the target.
Stab of Gale:
- Cyan appears behind the enemy in the same team position as him, dealing 150% damage to it and inflicting a 2 second stun. For the next 12 seconds, Cyan has a 25% chance to block incoming attacks.
- Blocking an attack increases Cyan’s next attack’s damage by 20%.
- Block chance increased to 35%.
Cyan is another hero whose gameplay revolves around bleed – making him a perfect partner for Hista. While Hista’s bleeds deal decent damage on their own, Cyan uses his bleeds to weaken enemies before swooping in for the kill with his ultimate. As they’re still both classified as bleeds, these two heroes complement each other perfectly.
By himself, Cyan is also a potent assassin and disabler who can banish a key enemy hero (at the cost of himself) and stun another enemy off the bat. Cyan works best with heroes who can give him haste so that he can both stack bleeds and trigger his own passive skills faster.
C-Tier
Fabian
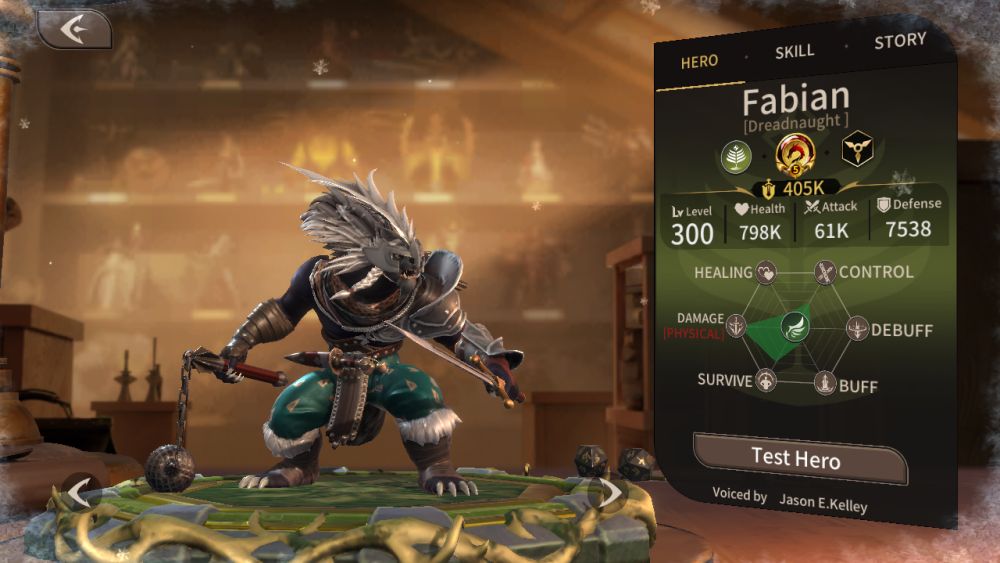
Faction: Forest
Skills:
(Ultimate) Honey Badger Punch:
- Fabian launches a triple attack that deals 120% damage per hit and ignore defense.
- Each strike adds a stack of Ferocity that lasts 5 seconds. Per stack of Ferocity, each hit of Fabian’s triple attack deals 10% more damage.
- This skill’s Ferocity damage buff increased to 12%.
Hypermania:
- Fabian’s normal attacks grant him 1 stack of Ferocity. Each stack of Ferocity increases attack by 1%. Fabian can hold up to 30 stacks. At 10 stacks, Fabian’s normals attacks become a 2-hit combo for 75% damage per hit.
- At 20 Ferocity stacks, Fabian’s normal attacks ignore defense.
- Ferocity attack buff per stack increased to 2%.
- Ferocity stack life increased to 8 seconds per stack. At 30 stacks, Fabian becomes immune to control spells.
Sleek Fur:
- Passively gives Fabian 20 dodge. When activated, Fabian’s dodge is doubled for 10 seconds and he gains 1 stack of Ferocity for each attack he dodges.
- Increases passive dodge gain to 30.
- Now gains 2 Ferocity stacks from dodging while this buff is active.
Opportunist:
- Fabian enter stealth at the beginning of combat, then strikes the closest enemy for 200% damage and a 2 second stun. During stealth, Fabian cannot be targeted but can still be affected by AOE attacks.
- Fabian also gains 2 stacks of Ferocity at the start of battle.
- Damage increased to 250%.
Rogues usually have some sort of stacking mechanic. Flann has her marks, which she applies liberally throughout the whole battle; Hista and Cyan have bleeds, which facilitate the rest of their skills. Fabian, on the other hand, has Ferocity, which is a self-buff rather than an enemy debuff.
On paper, Fabian’s Honey Badger Punch can deal enormous damage – IF he can gather enough steam to get it going in the first place, and even that’s not viable since each stack only lasts 5 seconds. While his damage can be quite good, Fabian is outclassed by other rogues who have more potent disables and finishing moves.
Magnum Quest Mage Tier List

S-Tier
Sur

Faction: Divinity
Skills:
(Ultimate) Dragon’s Awakening:
- Switches Sur to Awakened Form. In this mode, she gains a 50% attack buff and immunity to all control spells, and her normal attacks do 20% more damage and inflict splash damage. This form drains 160 energy per second.
- Attack buff increased to 70%. Additionally gains 10 haste while Awakened.
- Sur will now target 2 enemies simultaneously while Awakened. Reduces energy drain to 150 per second.
Scorched Earth:
- At the beginning of combat, Asgard lays down a wave of flame that burns enemies for 150% damage per second for 6 seconds. Allies hit by the wave gain the cure status, regenerating 100% of Sur’s attack as HP per second for 6 seconds. During combat, Asgard breathes fire that deals 240% attack damage to enemies and 120% of Sur’s attack as healing to allies.
- Fire breath damage increased to 280%, healing increased to 140% of Sur’s attack.
- If Sur is Awakened, increases the healing of this skill by 300% of her attack.
- Fire breath damage increased to 320%, healing increased to 160% of Sur’s attack.
Reign of the Past:
- Sur passively gains 6% attack every 5 seconds. Each stack of this buff lasts 12 seconds, and Sur can have up to 8 stacks. If Sur is Awakened, allies also receive this effect.
- Sur regenerates 100 energy every 5 seconds while Awakened.
- Attack buff increased to 10%.
Unyielding Wings:
- In normal mode, Sur has tough skin, reducing incoming damage by 40%. If Awakened, she gains valor, increasing her own damage by 30%.
- In normal mode, Sur has a 20% chance to gain 100 energy when attacked. If Awakened, she has a 15% chance to gain 100 energy when attacking.
- In normal mode, tough skin damage reduction is increased to 60% and energy generation chance is increased to 30%. In Awakened form, valor buff is increased to 40% and energy generation chance increased to 20%.
While Sur is a nuker at first glance, her kit also allows her to serve as a healer and buffer. This lady can lay down a trail of flame to incinerate her foes just as easily as she can support her allies. Key to using Sur is her unique Awakened form, which requires careful management of when and where to use her ultimate. Once you’ve got that down though, Sur will easily fit into most teams.
Ecra

Faction: Fortress
Skills:
(Ultimate) The Ruling Crown:
- Deals 160% damage to all enemies and burns them for 25% attack per second for 6 seconds.
- Initial damage increased to 180%, burn damage increased to 50%.
- Enemies hit gain the heal block debuff for 8 seconds. During this time, they are unable to heal.
Bouncing Fireball:
- Ecra shoots a bouncing fireball that deals 180% damage and bounces 3 times.
- Damage increased to 200% per bounce.
- Damage increased to 220% per bounce.
- Fireball can now bounce 4 times.
The Protégé:
- One enemy takes all damage Ecra would take for 8 seconds. Any energy generated by this damage is still credited to Ecra.
- Duration increased to 12 seconds.
- Ecra steals 20% attack and 50% of all healing the target receives.
Seductive Gaze:
- After activating any skill, Ecra’s next normal attack hits 2 enemies and burns them for 75% damage per second for 6 seconds.
- Burn damage increased to 100%.
- Number of targets increased to 3.
Ecra is a pure nuker who also brings unique mechanics to the field. While her ultimate doesn’t do too much damage, it inflicts the deadly heal block debuff. She can also force an enemy to take all damage she would, which not only increases her own durability but also makes enemies hurt more. Add her potent Bouncing Fireball AOE and her numerous ways of inflicting burn and you’ve got an incredible damage dealer on your hands.
Emilia

Faction: Forest
Skills:
(Ultimate) Hurricane Blast:
- Summon 2 blasts of wind that deal 120% damage and repel targets they hit. Prioritizes the enemy’s front row.
- An extra blast is summoned. This blast deals 180% in an AOE, repels, and prioritizes the enemy’s back row.
- Front row damage increased to 140%, back row damage increased to 220%.
Cyclone Blade:
- Throws a blade at a random target. The blade does 140% damage to enemies in the way, and 160% damage in an AOE around the primary target.
- Blade path damage increased to 150%, final attack increased to 180%.
- Now throws 2 blades at random targets. Blades now inflict knockdown to enemies caught in their path.
- Blade path damage increased to 160%, final attack increased to 200%.
Goose Trick:
- Turns an enemy into a harmless goose and lures it in for 4 seconds.
- Hexed enemy also gains vulnerate, increasing incoming damage by 20%.
- After turning back to normal, the hexed enemy loses 30% attack for 6 seconds.
Enchantment of Wind:
- Emilia gains 25 haste.
- Emilia gains an aura that grants allies 20 haste.
- Self haste buff increased to 40, aura buff increased to 30 haste.
Like Harry, Emilia sees widespread use because of her haste buff. She just has to show up, and her allies automatically become better at fighting. The duck hex is also incredibly useful not only for its disable but also for disrupting enemy formations. Emilia’s attacks are so-so, but they’re more of icing on the cake.
A-Tier
Issy

Faction: Wild
Skills:
(Ultimate) Growth Hormone:
- Issy’s normal attack summons an insect swarm on hit. All swarms last 12 seconds and deal 50% damage every 3 seconds.
- Deals 140% damage to all enemies and adds one swarm to each of them. Activates all swarms and increases their passive damage to 75%.
- Damage increased to 160%. Being attacked by a swarm decreases an enemy’s attack by 2%. Max 5 swarms per enemy.
- Damage increased to 180%. Being attacked by a swarm decreases an enemy’s energy by 20.
Harassing Swarms:
- Deals 160% damage to a random target and adds 1 swarm to it.
- Damage increased to 180%.
- Damage increased to 200%, summoned swarm lasts for 15 seconds.
- Damage increased to 220%.
Swarm Proliferation:
- Deals 180% damage to one swarmed enemy. Adds 1 swarm in an AOE around the affected enemy.
- Damage increased to 210%.
- Search radius for adding swarms is greatly increased.
Vile Swarms:
- If a swarm lands a critical hit, the target is stunned for 1 second. This can only be triggered once every 7 seconds.
- Swarm critical hits add 1 swarm to the target. This can only be triggered once every 7 seconds.
- Stun duration increased to 1.5 seconds.
Issy uses her normal attack to build up swarms of nasty insects on her enemies, then supercharging them with her ultimate. This makes for unconventional yet surprisingly reliable pseudo-AOE damage-over-time. The more time she’s allowed to control her swarms, the stronger Issy gets.
Derla

Faction: Shadow
Skills:
(Ultimate) Foul Boneyard:
- Deals 70% damage per second for 12 seconds to all enemy heroes. Heals Derla for 50% of damage inflicted after the damage is finished.
- Damage per second increased to 80%. End life steal increased to 100% of damage inflicted.
- Damage per second increased to 90%. As long as Foul Boneyard is active, Derla has 25% life steal.
Skeleton Armor:
- Derla gains a 25% buff for 6 seconds.
- While this skill is active, nearby enemies lose 40 haste.
- Defense buff increased to 35%, duration increased to 8 seconds.
- Defense buff increased to 45%, haste debuff increased to 55.
Death Finger:
- Deals 90% damage to a random target and stuns them for 3 seconds.
- Also deals 65% and a 2 second stun in an AOE around the primary target.
- Primary target damage increased to 120%, AOE damage increased to 85%.
Immortal Undead:
- Derla gains 5% attack and defense for each dead enemy unit.
- Bonus scaling increased to 7.5%.
- Bonus scaling increased to 10%.
Derla’s ultimate skill is an incredible nuke – steady damage over time with a decent multiplier that has inherent life steal AND gives Derla life steal on her other attacks for the duration. Derla’s already strong, but her passive lets her gather steam better and helps your team push harder the more enemies you down. Sometimes the simple things are best, and Derla’s a perfect example of that.
B-Tier
Winden

Faction: Fortress
Skills:
(Ultimate) Eagle of Dawn:
- Winden charges up and fires a spell that deals 400% damage to enemies in front of him. Enemies hit by this spell also take extra damage equal to 120% of Winden’s attack the first time they’re attacked.
- Damage increased to 500%.
- Enemies that are hit by the extra damage also lose 150 energy.
Glint:
- Deals 180% damage to in a circular AOE centered on a random enemy.
- Damage increased to 200%.
- Enemies hit also lose 40 accuracy for 3 seconds.
- Damage increaed to 220%.
Magical Blessing:
- Winden gains 20 critical hit and 40 critical damage for 12 seconds.
- The ally with the highest attack also gains these buffs.
- Critical hit bonus increased to 30, critical damage bonus increased to 60.
Magical Resonance:
- All allied intelligence (mages and priests) gain a 10% attack buff.
- Attack buff increased to 15%.
- Attack buff increased to 20%.
While Winden isn’t spectacular, you can get a copy of him for free by logging in for 7 days. This lets him carry the player’s group through the early levels and rush to unlock important content. Other than that, he’s pretty standard. His ultimate skill has a high 400% multiplier and helps with its extra damage proc. When you get a better mage, feel free to replace Winden – but until then, he will serve adequately.
Sorsha

Faction: Fortress
Skills:
(Ultimate) Hard to Bear:
- Enemies that have been affected by a control spell also gain a stack of Honey Curse.
- Sorsha recalls all Honey Curses, dealing 150% damage to each enemy that has a stack of the curse. Afterwards, Sorsha deals 240% damage in an AOE to the enemy in the same formation slot. This skill does 40% more damage for each Honey Curse on the field before it was triggered.
- Honey Curse recall damage increased to 160%, final attack damage increased to 280%.
- Enemies can now have up to 2 Honey Curses at once. This skill now does 50% more damage for each Honey Curse before the skill was activated.
Sneak Attack:
- Sorsha deals 180% damage to the enemy in the same formation slot as herself. This also inflicts a 1 second stun.
- Damage increased to 200%.
- Damage increased to 220%, stun duration increased to 1.5 seconds.
- Damage increased to 240%.
Fatigue Curse:
- Curses the enemy in the same formation slot as Sorsha. The cursed enemy takes 75% damage per second for 6 seconds, and is hit with weaken, which reduces damage by 15%.
- Weaken damage debuff increased to -20%, damage per second increased to 100%.
- Fatigue Curse also places 2 Honey Curses on its target.
Bear Hug:
- When killed, Sorsha summons Honey to fight in her stead. Honey has 80% of Sorsha’s stats and can only use normal attacks. When Honey dies, Sorsha is resurrected with 50% of her HP. This only triggers once per battle.
- Honey now has 100% of Sorsha’s stats. Sorsha returns to the battlefield with 80% HP.
- For each time that a Honey Curse has been activated, Honey’s stats increase by 1%.
The psychic head of the Assassins Guild is strange in that her potential is entirely dependent on the rest of her team. Sorsha relies on enemies hit with control spells, with each debuff marking them for her ultimate that explodes for fantastic damage.
On the other hand, no control spells mean low damage, and while Sorsha can inflict her own debuffs, her full potential is realized in a team that’s constant with the crowd control. Like Cyan, Sorsha makes use of the mirrored position mechanic, meaning that she can be used to disrupt common enemy formations with stuns and damage debuffs. By herself, she’s nothing special, so plan accordingly if you’re going to use Sorsha.
Magnum Quest Priest Tier List

S-Tier
Cinia

Faction: Fortress
Skills:
(Ultimate) Royal Ceremony:
- Cinia distributes all of her remaining energy to her allies after 4 seconds. Cinia is immune to control spells during the animation of this skill.
- Each point of energy an ally receives from this skill is multiplied by 1.5.
- Energy cost decreased to 800.
Bling Bling:
- Deals 150% attack in an AOE and inflicts vulnerate, increasing incoming damage by 15% for 8 seconds.
- Damage increased to 175%.
- Damage increased to 200%, vulnerate incoming damage debuff increased to 20%.
- Damage increased to 225%.
Royal Bestowal:
- The one ally with the highest attack gains 20% of Cinia’s attack for 8 seconds.
- Buff affects two allies with the highest attack.
- Scaling increased to 25% of Cinia’s attack, duration increased to 10 seconds.
Royal Blessing:
- Backrow allies gain a one-time damage blocking effect at the start of battle, 200 energy, and puts up a 15 second shield. The shield gives allies within it tough skin, reducing incoming damage by 30%.
- Tough skin damage reduction increased to 40%.
- Shield lasts 25 seconds.
Cinia isn’t a healer, she’s a battery. She’s there to help your energy-hungry heroes activate their skills faster and more often. Her backrow protection is nice, too. Shame I find her face so creepy.
A-Tier
Lilian

Faction: Fortress
Skills:
(Ultimate) Holy Touch:
- Heals the ally furthest ahead by 1000% of Lilian’s attack. Any overheal is converted into an 8 second shield.
- The healed ally also gains a 20% of Lilian’s attack as a damage buff for 8 seconds.
- Heal increased to 1500% of Lilian’s attack.
Prayer of Exorcism:
- Deals 200% damage in an AOE to a random enemy. Farthest ally ahead gains a 6 second shield with HP equal to all the damage Lilian dealt.
- Damage increased to 250%.
- Shield also gives -20% damage taken.
- Also casts a shield on the ally with the lowest HP. If the same target receives both shields, it receives the damage reduction and HP of both shields.
Blessings of the Divine:
- When the ally furthest ahead is hit with any form of debuff, Lilian dispels those debuffs and makes that ally immune to debuffs and control spells for 5 seconds.
- For the next 5 seconds after this skill activates, enemies attacking the blessed ally lose 80 accuracy for 5 seconds.
- Status immunity duration increased to 8 seconds.
Gift of the Divine:
- Allies targeted by Lilian’s skills regenerate 20 energy per second for 3 seconds.
- Energy regeneration increased to 25.
- Energy regeneration increased to 30.
Lilian is a potent healer but can be niche due to her selective targeting. Nonetheless, her sole beneficiary receives a lot of buffs – a gigantic amount of healing that becomes a shield, attack buffs, and status immunity. Lilian should be used with caution and should’t be thrown into just any team composition.
Aeluin

Faction: Forest
Skills:
(Ultimate) Nature’s Light
- Restores HP for all allies equal to 30% of Aeluin’s max HP over 4 seconds.
- Healing effect increased by 30% for allies below 20% health.
- Also increases defense of allies by 15% while they’re being healed.
Bewitch:
- Deals 90% damage to a random target and inflicts bewitch. Bewitched enemies attack their allies with normal attacks.
- Damage increased to 110%.
- Bewitched enemies can use other skills except their ultimate.
- Bewitched enemies have a 30% attack buff.
Nature’s Shelter:
- Adds Shelter to all allies for 8 seconds. Sheltered allies recover HP equal to 45% of Aeluin’s attack when attacked. This recovery only triggers once per second.
- Duration increased to 10 seconds.
- Healing increased to 65% of Aeluin’s attack.
Natural Regeneration:
- 10% chance to double any incoming heal from Aeluin.
- If a unit is overhealed, 50% of the overheal value becomes a shield.
- Proc chance increased to 15%.
Aeluin is a pretty standard healer that you get from the beginner tasks. Unlike Lilian, Aeluin is a better fit for generalist parties due to her party-wide healing skills. Keep in mind that Aeluin’s ultimate skill scales off her max HP and not her attack.
Ione

Faction: Forest
Skills:
(Ultimate) Jungle’s Fury:
- Deals 60% attack damage to all enemies for 6 seconds, then entangles all enemies for 1 second with 110% damage. Entangled enemies cannot move or attack.
- Ione is immune to control spells while using this skill. She also gains tough skin for the duration, reducing incoming damage by 25%.
- Initial damage increased to 70% per second, entangle damage increased to 130%.
The Lurking Seeds:
- Plants a seed in an enemy unit. Upon activating Jungle’s Fury, the seed bursts forth, dealing 120% damage and entangling that enemy for 3 seconds. Seeds have a lifespan of 10 seconds.
- Damage increased to 140%.
- Targets 2 enemies for the seed planting effect.
- Damage increased to 160%.
Jungle’s Protection:
- Gives the ally with the least HP a shield that blocks 4 attacks. The shield also deals 120% damage to enemies that attack it, and entangles them for 2 seconds.
- Number of blocks increased to 6.
- Now targets the 2 allies with the least HP.
Vines to the Rescue:
- Once per battle, when an ally receives fatal damage, they are enveloped by vines and recover 5% of their max HP per second for 6 seconds.
- Heal scaling increased to 8% of target’s max HP.
- This skill can activate twice per battle.
While Ione looks like a standard disabler, her main use is her Vines to the Rescue skill, which is great when combined with damage-focused melee heroes. That you can get Ione for free also helps a lot in her case, and she’ll serve as a good offensive support for the whole game.
B-Tier
Naomi

Faction: Wild
Skills:
(Ultimate) Dragon Fall:
- Deals 150% damage in an AOE and removes all buffs from enemies hit.
- Allies caught in the blast are cleared of all debuffs.
- Damage increased to 180%.
Wolf Bone Curse:
- Deals 180% damage to a target and silences it for 3 seconds, rendering it unable to use any skills.
- Damage increased to 200%.
- Skill also hits 2 extra targets for 120% damage and a 2 second silence.
- Primary target damage increased to 220%, extra target damage increased to 130%.
Power of Totem:
- Summons a healing totem that heals for 55% of Naomi’s attack per second for 6 seconds.
- This skill’s healing is 30% more effective on allies with less than 20% HP.
- Heal scaling increased to 65% of Naomi’s attack.
Spiritual Leader:
- Wild heroes gain 10% of Naomi’s attack and 20% of Naomi’s defense as long as she’s alive.
- Attack bonus increased to 15% of Naomi’s attack, defense bonus increased to 30% of Naomi’s defense.
- Attack bonus increased to 20% of Naomi’s attack, defense bonus increased to 40% of Naomi’s defense. Affects all allies but is 50% weaker on non-Wild heroes.
Naomi has a powerful dispel effect that strips enemies of buffs and purges debuffs from allies. She also fares much better in a squad composed of Wild heroes. She doesn’t have a very reliable heal unlike other priests, nor as many buffs, so she’s best as a capstone to complement a Wild team.
Osishe

Faction: Forest
Skills:
(Ultimate) Tide Chorus:
- Adds sedate and vulnerate to all enemies. For 4 seconds, enemies are put to sleep and receive 25% more damage.
- Sedate (sleep) effect increased to 5 seconds.
- Vulnerate damage amplification increased to 30%.
Tidal March:
- The ally with the highest attack gains 20 haste for 5 seconds.
- Haste buff increased to +25, duration increased to 6 seconds.
- Now affects the two allies with the highest attack.
- Haste buff increased to +30, duration increased to 7 seconds.
Variations:
- Inflicts confine on the enemy with the highest attack for 4 seconds. Confined units cannot attack nor be attacked.
- Adds weaken at the end of the confine effect, decreasing the target’s damage by 35% for 4 seconds.
- Confine duration increased to 5 seconds.
Ethereal Lied:
- When attacked, Osishe blinks backwards and leaves a mirage behind, which stuns enemies in an AOE for 2 seconds. This has an 18 second cooldown.
- Every time Osishe takes damage, Ethereal Lied’s cooldown is decreased by 1 second.
- When the mirage pops, Osishe heals for 20% of her max HP.
Osishe is like Rickers – she’s got powerful control, possibly even surpassing him – but is absolutely useless on bosses. She’s great for clearing mobs, but keep her away from boss battles where she’ll have a hard time contributing anything.
Merialeth

Faction: Shadow
Skills:
(Ultimate) Puppet on Strings:
- Hits the enemy with the most energy with Bewitch. Bewitched enemies attack their allies for 6 seconds, cannot use their ultimate skill, and lose all energy upon being released. While controlling an enemy, Merialeth is immune to control spells but cannot attack.
- Bewitched enemy instantly gains full energy and immediately triggers its ultimate.
- Bewitched enemy has a 30% attack buff.
Vicious Entrapment:
- Lays down a trap at the feet of the enemy with the most energy. Enemies standing on the trap take 50% damage and lose 5% of their current energy for 3 seconds.
- Damage increased to 75%, energy burn increased to 10%.
- After the trap disappears, it deals 100% damage to enemies and inflicts silence for 4 seconds, blocking skill use.
- Trap size increased.
Soul Syphon:
- Controls a random enemy unit for 4 seconds while stealing 5% of its remaining HP per second. Merialeth is immune to control spells while controlling an enemy, but cannot attack.
- Also steals 5% of remaining energy per second.
- Now targets 2 enemies.
Spider Queen’s Intervention:
- If an attack causes Merialeth to drop below 75% HP, the enemy that triggered this effect loses 15% attack and energy for 8 seconds. This can only trigger once per battle.
- Triggers another time if Merialeth’s HP drops below 50%.
- All enemy heroes are hit with the debuff.
Much like fellow Shadow hero Sorsha, Merialeth’s strength is dependent on something else – in this case, the enemy team’s composition. Merialeth’s ultimate not only controls their hero that’s nearest to firing their ultimate, but also uses that ultimate against your enemies AND strips it of all energy after it’s released. While it’s a gimmicky strategy, it’s very effective on strong enemies, and almost entirely useless on weak ones, firmly putting Merialeth in a niche position.
That concludes our Magnum Quest tier list, and hopefully our list helped you pick out heroes to raise and invest in (anyone but Zander, please). Ultimately, it’s your choice which heroes you want to pick and use, and since Magnum Quest is more PVE-centric than PVP, you can get away with quite a lot of stuff. If you have any suggestions or tips of your own, let us know in the comment section below!