How many games do you play while waiting for stuff in other games? Waiting for build queues, units to train, resources to be harvested, etcetera, etcetera? If you already do that, I’ve got good news for you: there’s a game that revolves entirely around being your side game.
Idleon bills itself as a fully idle MMO. In this game, you’re tasked with restoring your power and glory after falling from grace from an endgame world. To that end, you’ll beat up monsters, craft gear, collect rare loot, and team up with others. Oh, and you’ll also AFK a lot.
The game has been out on PC for a while. It was available on Steam since April of 2021, but it’s also available on the Google Play Store, and more recently, the App Store. As an added bonus, if you’re playing the game from an iOS device, you can talk to the phone in the first town to get a special bonus!
IdleOn comes with its own in-game guide, as well as its own wiki, both of which are excellent resources. But for those who want a more hands-on approach to what you can do in the first areas of the game, this IdleOn beginner’s guide is for you!
Game Basics
IdleOn is an MMO, so you can expect the standard MMO fare: classes, stats, life skills, crafting, rare drops, and so on. How IdleOn sets itself apart is its full idle system; it’s not called “the MMO you play while playing other games” without good reason!
Stats and Classes
There are three main stats in the game: Strength, Agility, and Wisdom, as well as a fourth stat, Luck. Each of these ties in greatly with the game’s base classes: the Warrior, the Archer, and the Mage. There’s also a secret 4th class, which requires a lot of resources and peanuts. It’s highly recommended you do not go for this class until you’re much further ahead in the game.
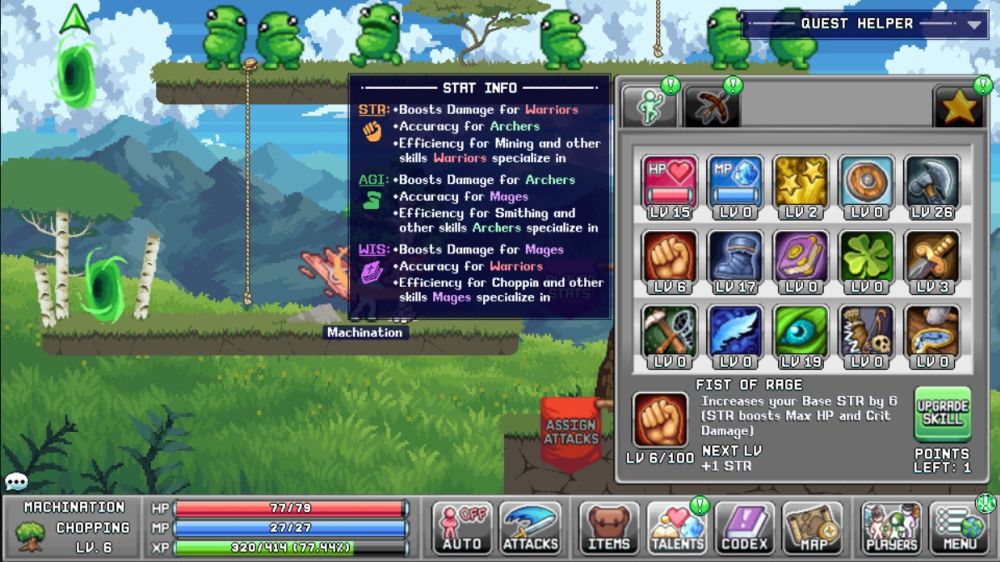
Strength is important for Warriors as it increases their damage. It’s also an important secondary stat for Archers, as it affects their accuracy. By itself, raising Strength boosts your max HP and the amount of damage your critical hits do, as well as your Mining efficiency.
Agility is the main stat of Archers, and influences the damage they do. Mages will also want some Agility as this affects their accuracy. Agility by itself raises movement speed and critical hit chance. Agility also boosts Smithing.
Wisdom is the Mage’s main stat, and affects the damage they do. Warriors will also want to invest in Wisdom, as this helps them hit targets more consistently. Increasing your Wisdom also raises your max MP and causes you to deal bonus damage to bosses. Wisdom also has the side effect of raising your Choppin efficiency.
Luck is the Beginner’s main stat, and affects their damage output AND accuracy. Luck also increases drop rates, exp gain, and other RNG. Unless you’re going to go for the game’s secret classes, it’s not advised to sink points into Luck at the start.
Because of this, each class will inevitably split its stats across two branches: Warriors will go for Strength – Wisdom, Archers will have Strength – Agility, and Mages will have Agility – Wisdom. Do not underestimate the importance of accuracy in IdleOn as mobs ramp up in stats very quickly.
Star Signs
When you create a new character, you’ll also be asked to select one of four star signs. Each sign imparts a small yet significant bonus to your character, so you’ll want to pick a star sign that’s suited for each class.
By completing a secret in Blunder Hills (hint: a lot of slimes), you’ll be able to not only change your star sign, but unlock new ones as well.
Talents
Your stats in IdleOn will come largely from your Talents, which is what skills are called in IdleOn.
Most takents impart bonuses to many aspects of your character. From the get go, you already have access to an HP booster, MP booster, ATK and DEF booster, and multiple Stat boosters. As you progress in the game, you’ll unlock even more talent trees for you to spend your hard-earned skill points on. And any time you gain a level, whether that’s for your class (from killing mobs) or from crafting, you’ll gain talent points to spend.
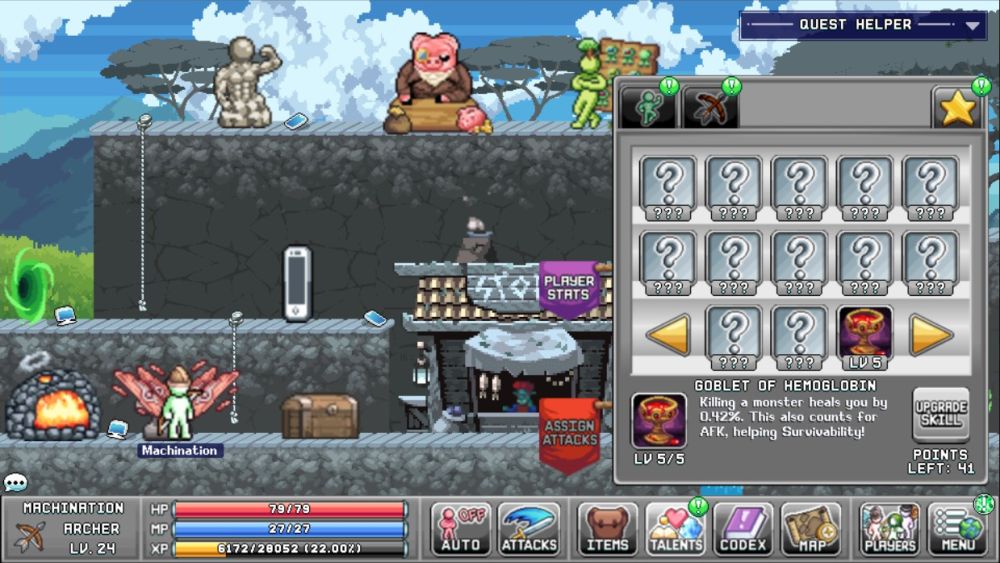
There are also special Star Talents in the game, which need to be unlocked by via other methods. Star Talents require special Star Talent points to level up, which you get by (you guessed it) investing in the Star Player talent in the basic skill tree.
Do note that because of how many character slots you’re given (and are expected to make), it’s a good idea to specialize each character. Having dedicated fighters, harvesters, and crafters can make your life a whole lot easier rather than having a whole bunch of characters who have middling performance in all aspects.
Skills are classified as both active and passive, though you won’t get your first active skill until you change class. Active skills can be slotted into the Attacks tab for quick access. If you’re planning to AFK farm with your skills, don’t forget to go to Options and turn on “Use Attacks during Auto”.
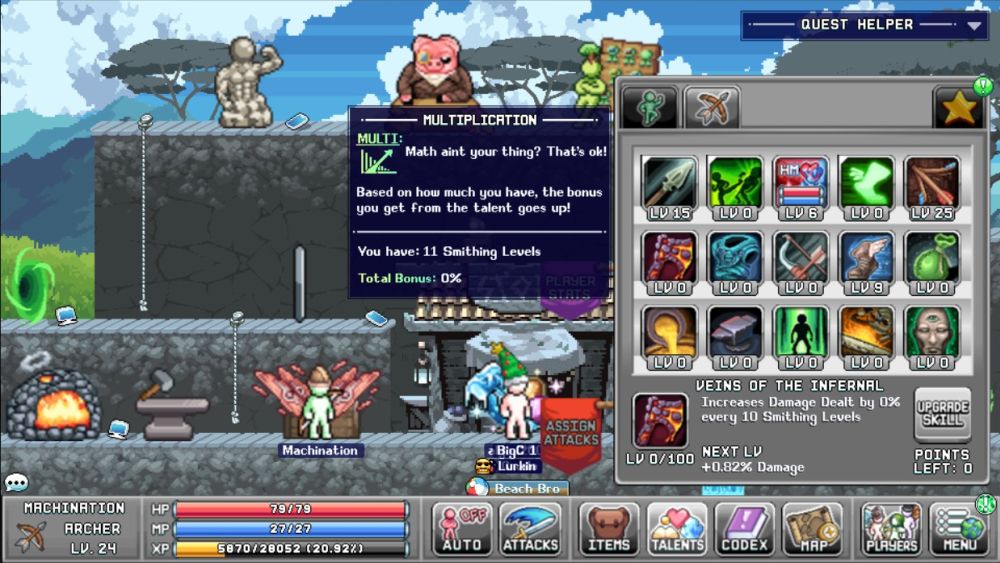
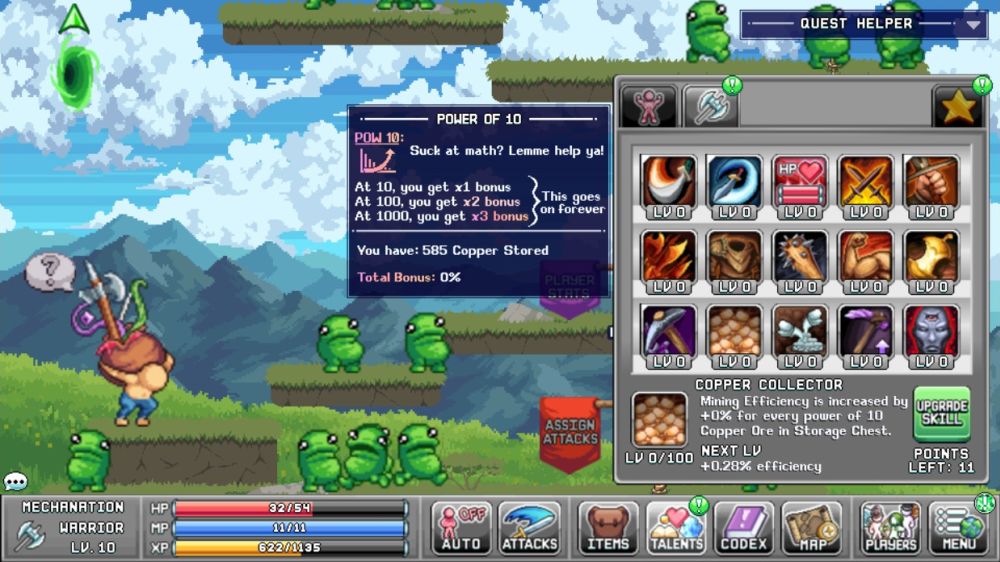
Some skills use unique mathematical formulas, such as using powers of 10. If you run into such as skill, there’s a neat reminder text popup to help you calculate and chart the course of growth, which can help you make your decisions on what skills to invest in.
Crafting and Gathering
Most of the gear you’ll be using in IdleOn must be crafted, so it’s important to get used to the system as soon as possible.
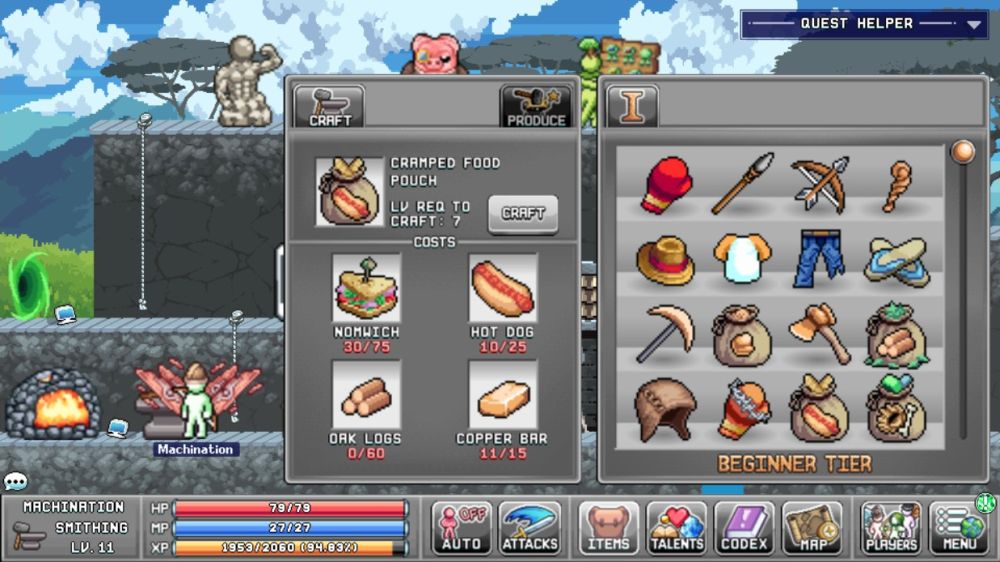
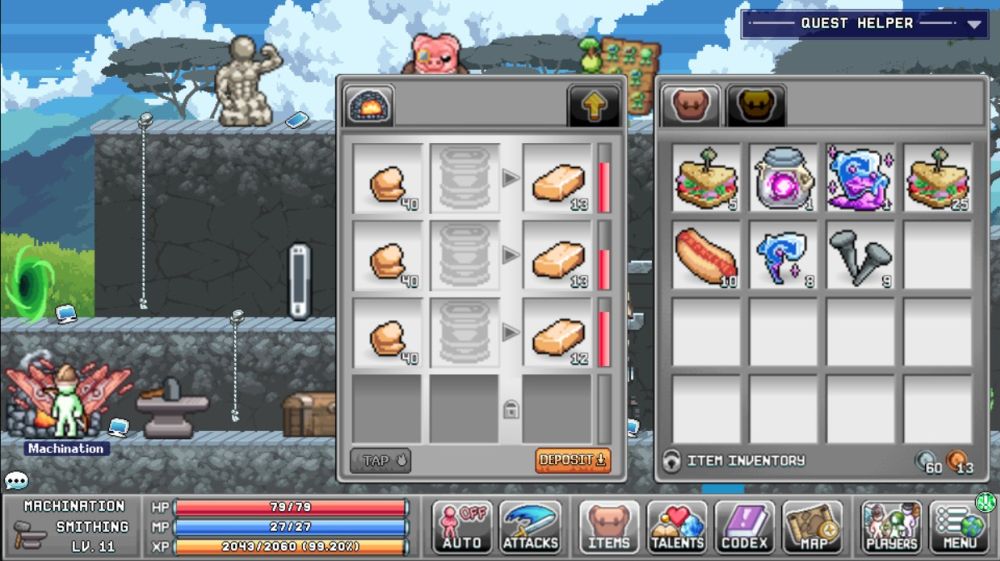
Crafting takes place at an anvil. To craft, just tap the anvil in town, then select what item you’d like to make. Be sure you have the appropriate crafting materials and smithing level before getting to work! And lastly, note that there is no player-to-player trading feature nor market in IdleOn, so don’t be shy about selling your stuff to NPCs.
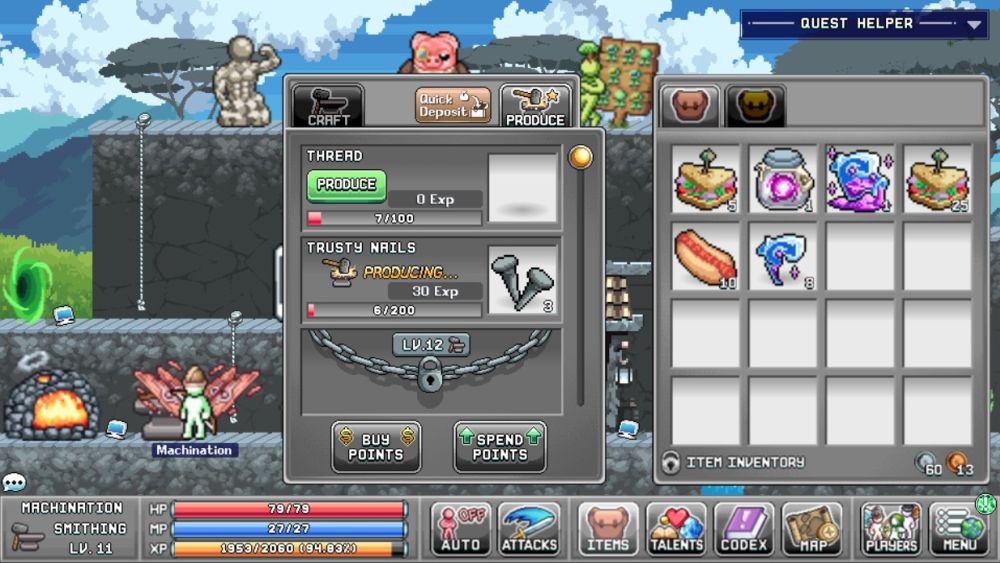
The anvil is also used to manufacture (read: spawn in) basic materials that are required for crafting, such as Thread and Trusty Nails. Manufacturing these items costs nothing but time, and gives you smithing experience when you redeem them, so be sure to always be producing these.
To access this crafting menu, tap the Produce button on the upper right of the anvil’s menu. Crafting raw materials also improves that anvil’s capabilities via upgrade points, which can be used to increase the amount of experience points you get when claiming items, the speed at which it produces items, and the maximum amount of items the anvil can hold. To use these upgrades, tap the Spend Points button below the interface.
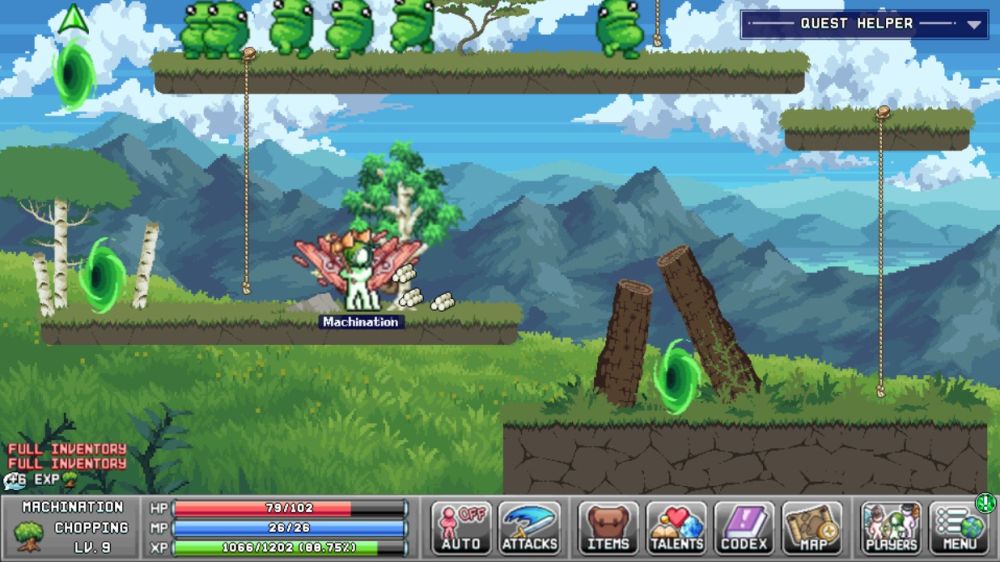
Gathering is intimately tied with crafting. While you can summon threads and nails from out of thin air, you’ll need to manually harvest monster gibs, wood, and metal ore for making your instruments of epic gaming.
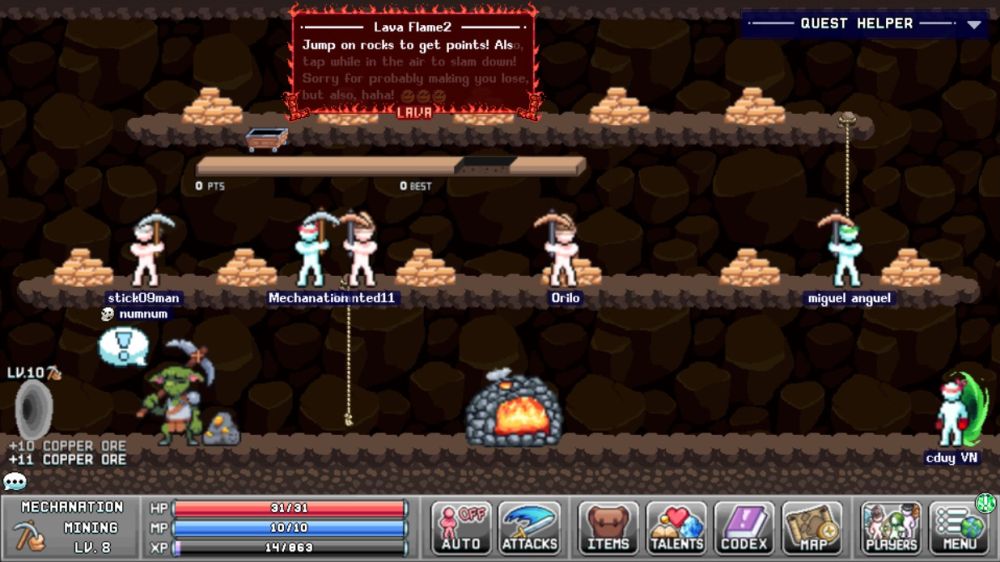
Gathering from these resource nodes is easy: just tap them to start. You’ll also be given a chance to play a minigame up to 5 times per day to greatly increase your yields, though these aren’t strictly necessary. And no, resource nodes never run out, so mine away as you desire. You will, however, want to increase your Mining or Choppin efficiency so that your characters can gather quicker and have a better chance of gaining resources per hit. The easiest way to do this is by crafting better gathering tools at the anvil. Notice a pattern here?
Among the game’s base early game resources, ore deserves special mention as it must be further processed by feeding it into a furnace. Furnaces are available in the mines and in town, and can be boosted by feeding them oil (which you can also buy at the shop). Furnaces can also be improved by buying upgrades; tap the up arrow on the furnace’s interface and throw money at the upgrade you want – I highly recommend unlocking at least one more slot for ore. Note that there are two pages of upgrades!
Equipment
There are several equipment slots in IdleOn, and at first glance, you may be intimidated.
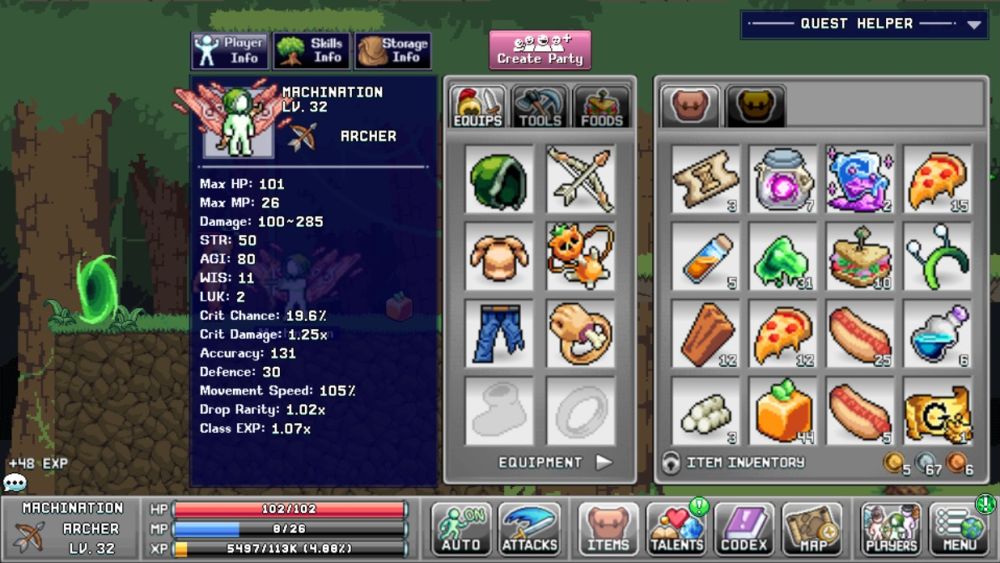
Don’t be – the game slowly introduces new equipment type down the line, so you’ll never be at a loss as to what to do. But in case you want to get a heads up, here’s the different equipment slots.
- The first equipment tab is for your main gear. You’ve got room for a helmet, body armor, pants, and shoes on this tab, as well as for a weapon, a pendant, and two rings.
- The second equipment tab, or the Specials tab, is for everything else. You can put Premium Headgear here, as well as a trophy, wings, two keychains, premium rings, and two things which I’m assuming are scarves. Tap the right-pointing arrow at the bottom of the equipment screen to access this menu.
- There are also equipment tabs for gathering tools. You can equip one tool of each type here. The tools tab is located at the top part of the equipment screen.
- Beside the tools tab is the foods tab. You can equip up to two food items here (and yes, potions are food) which will automatically be used when their conditions are triggered. You cannot equip two of the same food item.
Equipment can also be upgraded via upgrade stones. Stones can be bought in limited stocks from town shops, but can also show up as rare drops.
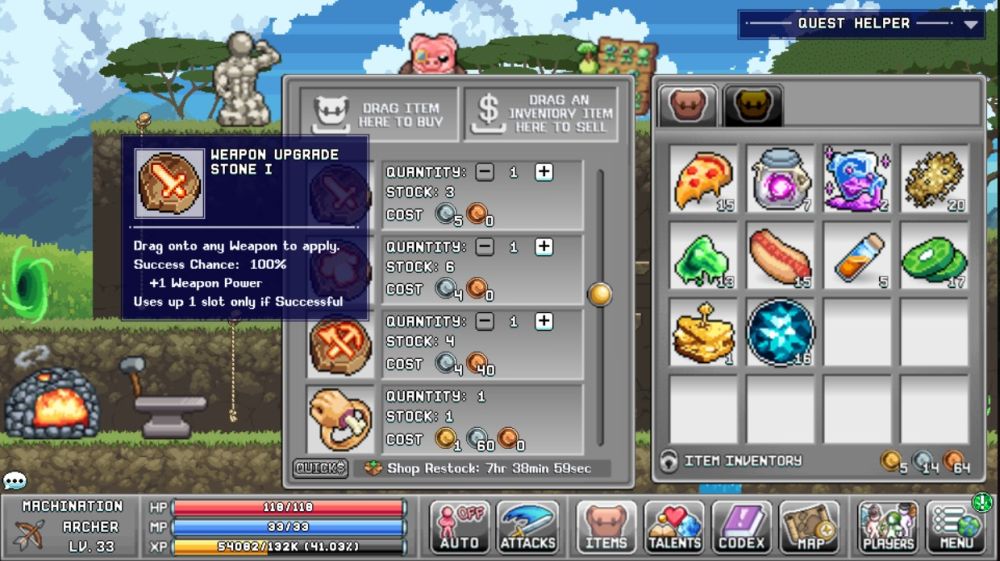
To upgrade equipment, simply drag an upgrade stone over it. Note that each stone has a different bonus and a different success rate. Successful upgrades will also take up one of an equipment’s upgrade slots, so plan carefully before upgrading your prized gear. Or have backups ready.
Combat
Combat in IdleOn is simple: tap on the monster you want to fight, and your character will fight it by using their auto attack whenever it’s off cooldown.
Monsters can “fight” back by dealing collision damage to you. While this wouldn’t be a problem in a lot of games, monster strength ramps up quickly in IdleOn. Make sure to grab armor upgrades whenever you can!
Idling
Almost everything in IdleOn can be done idly – it’s in the name, after all! All you really need to do is initiate the action: for example, if you’d like to idly gather wood from a tree, just tap the tree and presto, you’re good. In the case of combat, you’ll need to tap the Auto button on the lower panel.
If you’re planning to semi-idle (as in leaving the game window open rather than logging out), you will need to pick up loot manually by swiping on the screen. And note that while loot has a very long time out timer, it will vanish instantly if you switch maps via any method.
Any action that you set will be continued even if you’re not actively playing the game. Need 500 logs but it’s taking too long? Feel free to start it, then log out and collect your loot later. Want to hunt a rare drop? Set your character to fight before you go to bed.
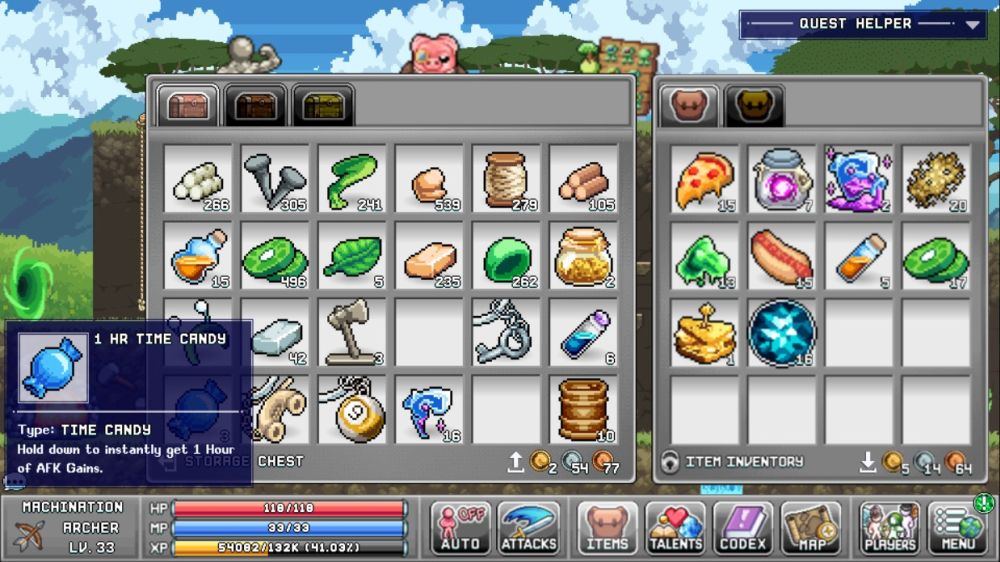
You’ll occasionally find Time Candy along your travels. Time Candy allows you to instantly collect AFK gains; the duration depends on the kind of candy. These can be used to accelerate your progress, but try and use these in moderation, won’t you?
AFK Info
Before you commit to an AFK activity in IdleOn, it’s always a good idea to go to the menu and tap AFK Info. This will bring up this screen:
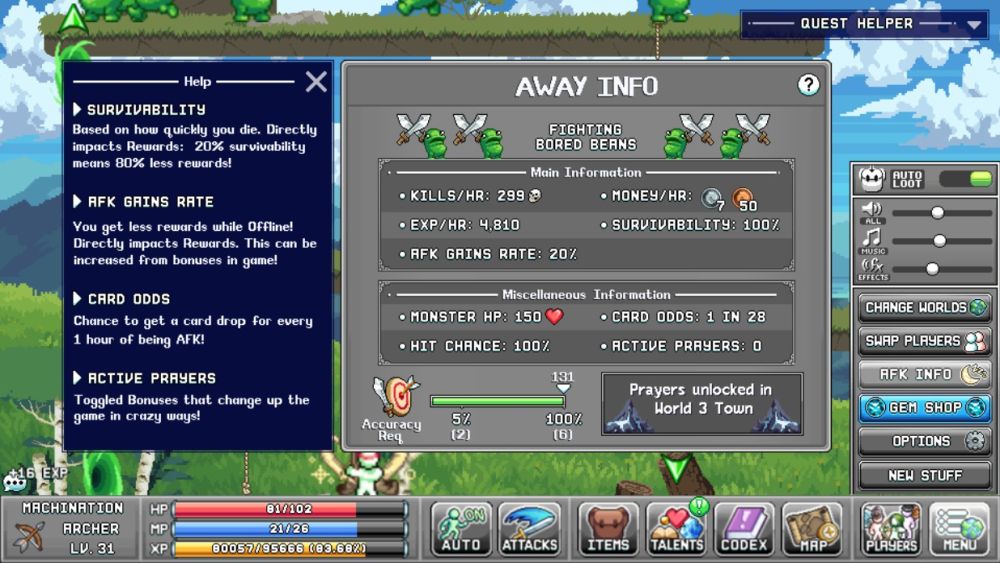
Understanding this screen is key to making the most out of your AFK grinding. After all, coming back to find that you’ve barely earned 10% after a full night of idling isn’t very nice. So here’s how to read this panel.
- Kills/Hr: The number of mobs of this kind of monster you’re projected to kill per hour of AFK time.
- EXP/Hr: How much EXP you’re projected to earn per hour, based on how many kills you can manage. The faster you kill and the faster the monsters respawn, the higher this will be.
- Money/Hr: How much money you’re projected to earn per hour. The faster you kill, the higher this will be.
- Survivability: How likely you are to survive protracted AFK sessions against this certain mob. A low survivability means you don’t have the health, defense, or regeneration to survive combat against that mob. On the other side, a 100% survivability rate means that you can AFK here all day every day and not see a scratch.
- AFK gains rate: This number represents your total gains while offline. By default, this is 20%, meaning that while idling, you’d only be earning 20% of the benefits you’d get by doing the grinding yourself. This stat means that unless your AFK gains rate is high, or if you’re conserving electricity on your phone or computer (go, you!), it’s always a better idea to leave the game playing in the background rather than closing it entirely.
There’s also miscellaneous information in the lower panel: the health of the mobs you’re fighting, your accuracy rate (100% accuracy means faster, more consistent kills), card drop rate (which is rolled once per hour of AFK grinding), and prayers – which don’t come into play until Town 3.
Take note that you can also view this AFK info panel when gathering resources.
Make More Characters!
Now, imagine if you could double, triple, even quintuple all those activities at once. Well, that’s what IdleOn is all about.
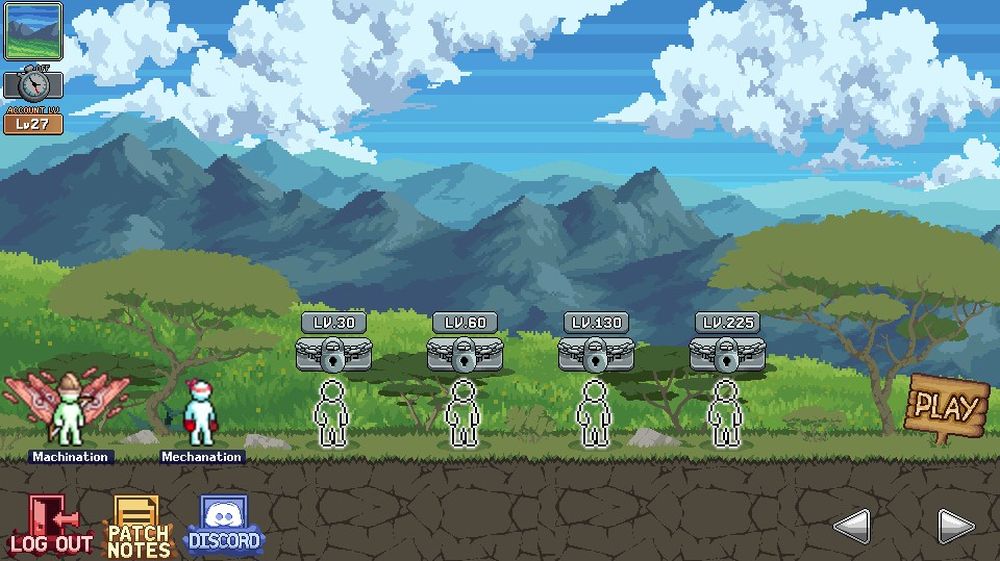
As you unlock the game, you’ll gain the ability to make more characters, which will allow you to explore new class paths and experience the game anew. But the best part? Each of your characters can be assigned to an idle task, simultaneously. This means that if you have two characters, you can have one of them mining copper ore at the mines while the other one grinds monsters for money. With enough characters, you can set up your own independent supply chain for crafting materials, monster drops, and gold!
You also gain access to a shared storage in town and on certain maps, where you can deposit items and money from any of your characters. Note that the storage chest has a much higher carrying capacity per slot than your bag – your characters may have to haul copper ores at 25 pieces per stack, but your storage can easily hold hundreds in just one slot.
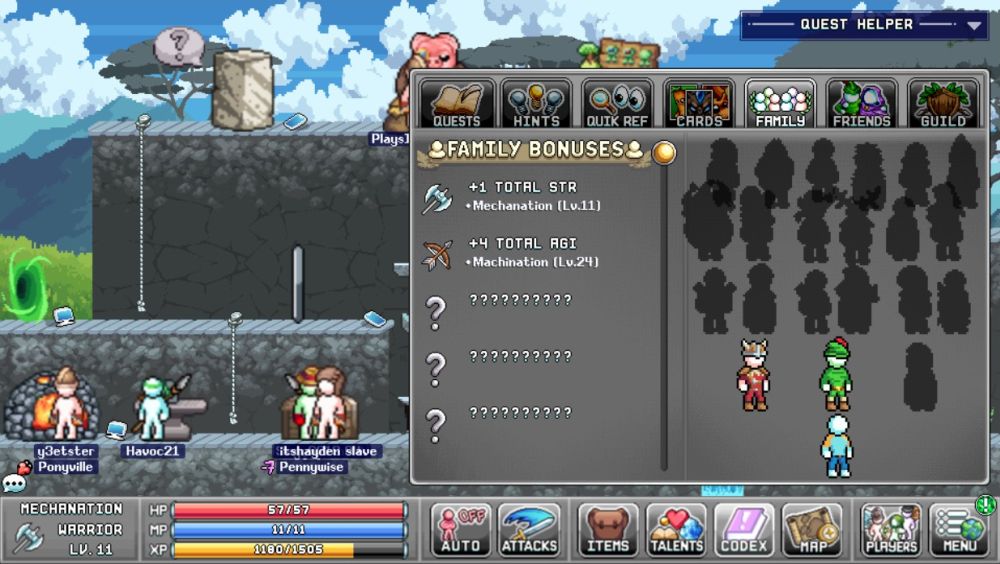
You also gain family bonuses based on the levels and classes of your other characters, which, at the beginning of the game, provide a flat bonus to the base stats of all your characters. As you unlock and promote more characters to subclasses, you’ll be able to get more diversified family bonuses to help you patch up any weaknesses that your characters have.
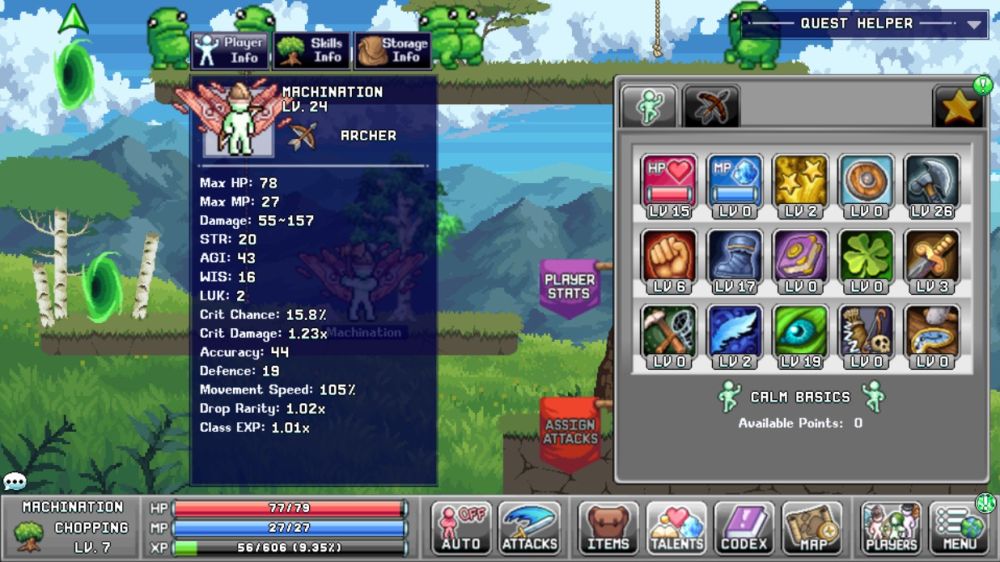
Note that you’ll first need to hit certain account levels to create new characters. Your account level is the sum of the main levels (read: class levels) of all your characters; my level 30 Archer, level 15 Warrior, and level 23 Beginner add up to an account level of 68.
Maximizing Your Time at Blunder Hills
There’s a lot of stuff to do even at the very first area, which also means there’s a lot of ways to get stronger. Here’s some of the activity highlights in Blunder Hills.
Collect Cards
Each monster has rare drops, but one of the most useful rare drops that everything has – yes, even the ore piles, trees, and furnace in town – is a card.
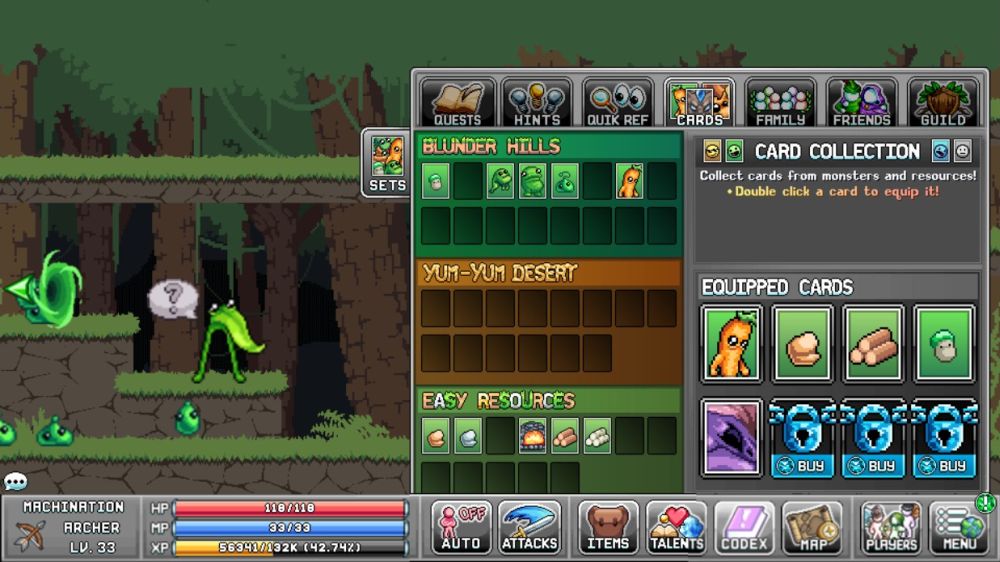
Cards each give passive bonuses, some of which are very valuable in the early parts of the game. The best part about cards is that they can be upgraded by collecting enough of the same type of card.
You’ll need to equip cards for them to have an effect. By default, you can slot up to 4 cards, and can pay gems to unlock more slots. You can also save card loadouts, so that you don’t need to manually switch between cards for specific situations.
Stamps
Mr. Pigibank the piggy banker (at the top of the town) will give you access to the Stamps menu once you get your first stamp from the wood chopping pig in Froggy Fields.
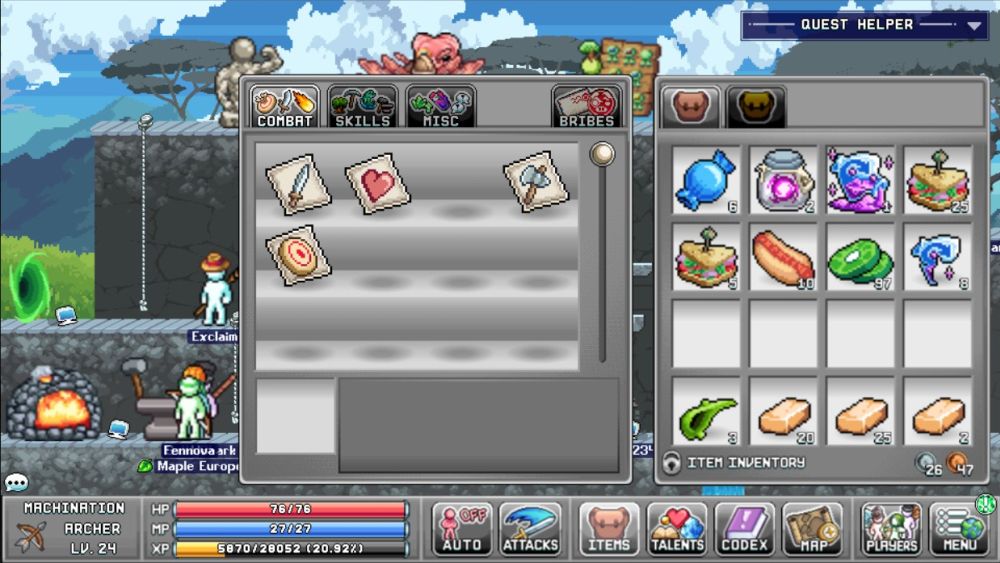
Stamps provide passive bonuses to virtually everything in game – provided you have the right stamp, of course. When you find a new stamp, bring it to the piggy banker to activate its passive bonuses. If you don’t have any stamps yet, you can buy a Target Stamp, a Shield Stamp, and a pretty expensive Mana Stamp from the store in town. Note that stamps apply their bonus to every character on your account.
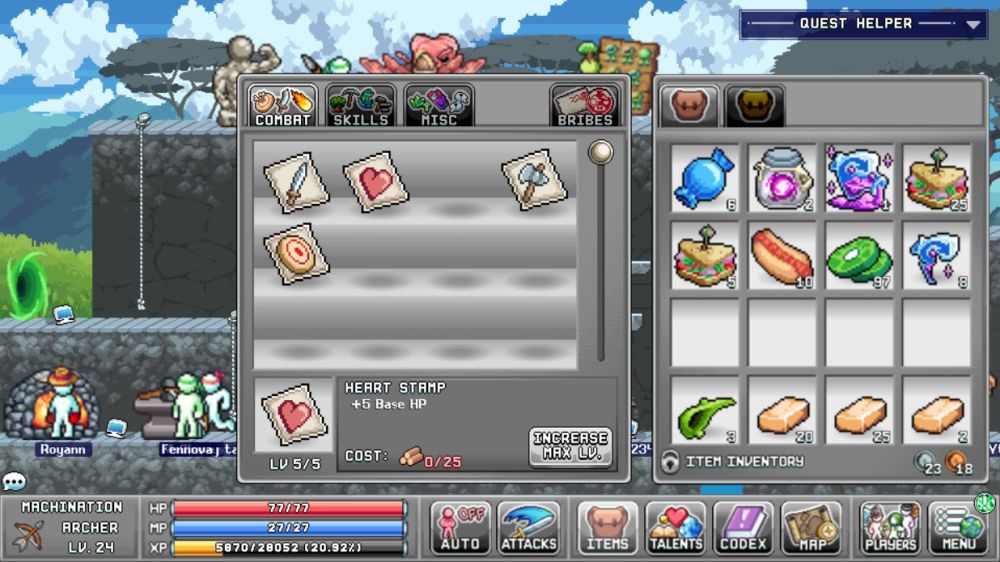
Once a stamp has been registered, it can be upgraded by paying money; the higher the upgrade level you’re on, the more expensive this gets, and the bigger the bonuses. Stamps also need to be advanced every 5 levels or so, and this is done by turning in items instead of money.
Bribes
While you’re at Mr. Pigibank, have a look at his bribes tab.
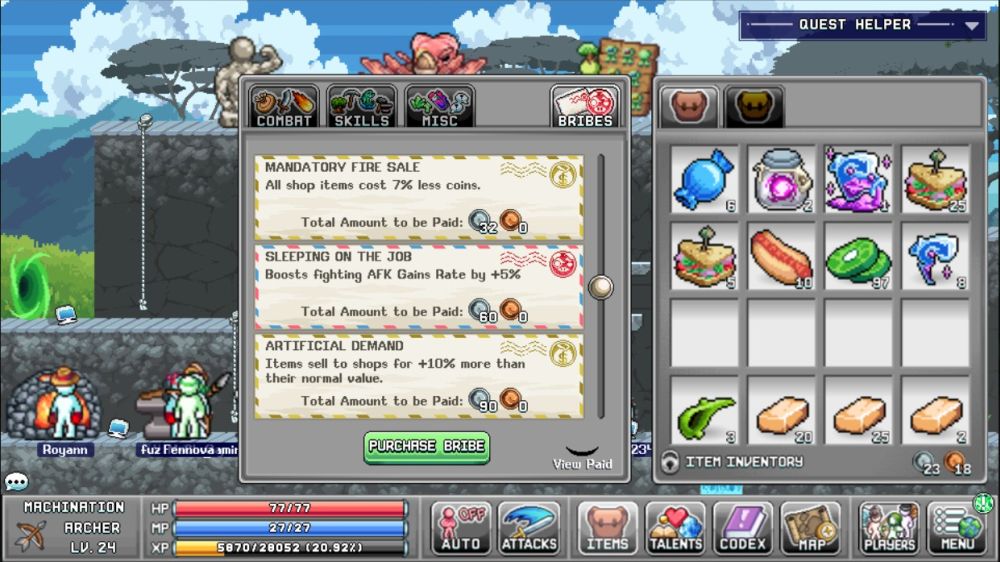
Bribes are permanent town upgrades that can give you a lot of benefits in town. With all the crafting, upgrading, and adventuring you’ll be doing, it’s a good idea to sink at least some of your own money into greasing the gears of Blunder Hills to get the most out of your AFK time. Any bribes you’ve bought affect all characters on your account.
Note that bribes can only be purchased once; to see the bribes you’ve already purchased, tap the View Paid button on the lower right of the bribes menu. Also, you’ll need to pay to unlock the next set of seven bribes. This can be done at any time, but I’d advise first sinking your money into the bribes that will actually help you in your current situation.
Statues
The slab of marble located at the top of the town is an NPC, thank you very much. You’ll need to do a minor quest to gain access to this NPC, who will provide you a way to passively improve yourself. To access the Statue Man, you’ll need to buy 1 Sculpting Tools from the store in the middle of town, then talk to the marble to reveal its true form.
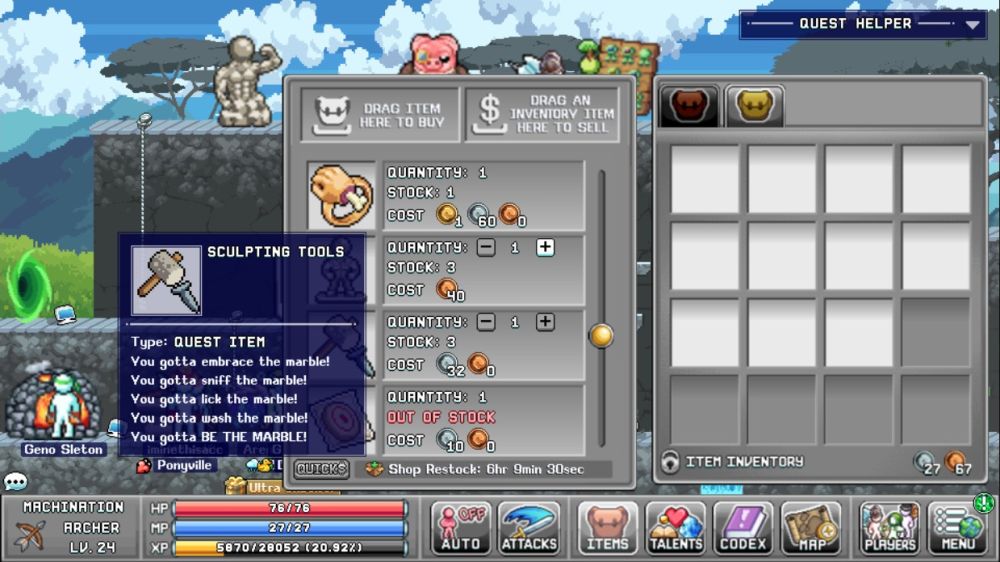
The Statue Man is where you deposit those statues you’ve (hopefully) been finding along your travels. Each new statue you deposit unlocks a new passive bonus, and any more statues of that type push that bonus even higher once you hit a certain threshold. Statues are rare drops from killing mobs (and killing trees, and killing ore rocks), so this is more of a side activity. Note that statue bonuses are per character.
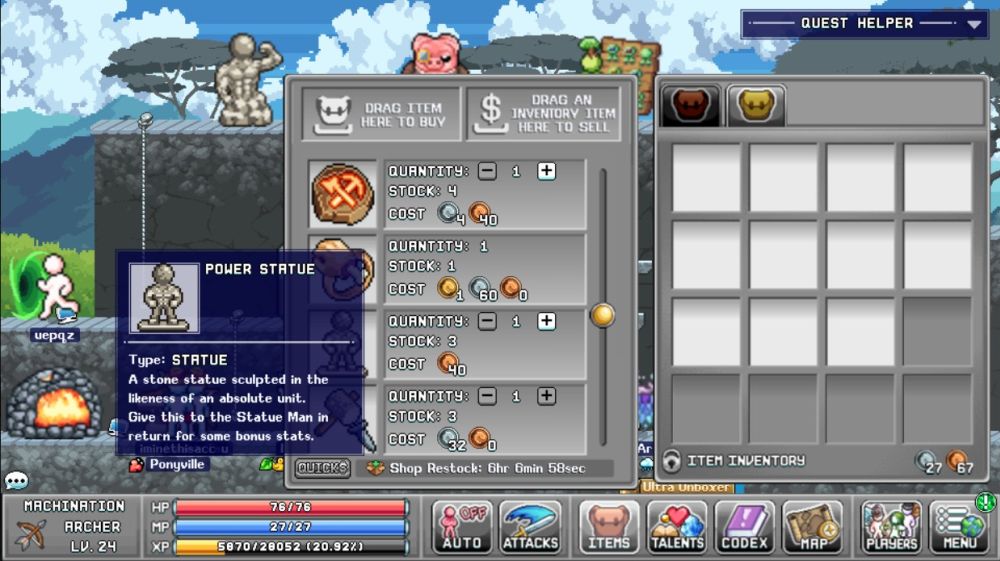
If you haven’t found any statues yet, don’t fret: you can buy up to 3 Power Statues from the same store.
Merits and Achievements
The merits board in town becomes available once you’ve chosen your base class from Promotheus in the not-a-dungeon map after Froggy Fields.
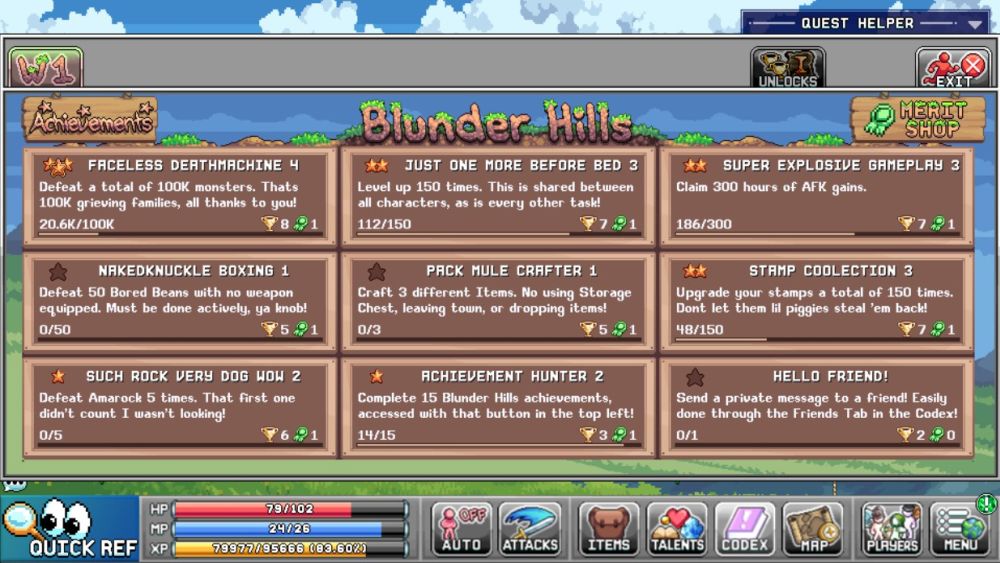
The merits board serves as a way to track your achievements, as well as get rewarded for completing certain milestones. More importantly, merits unlock new crafting recipes (tap Unlocks on the right hand side) and passive bonuses (tap Merit Shop on the right). Merit progress, unlocks, and merit benefits are shared across all your characters.
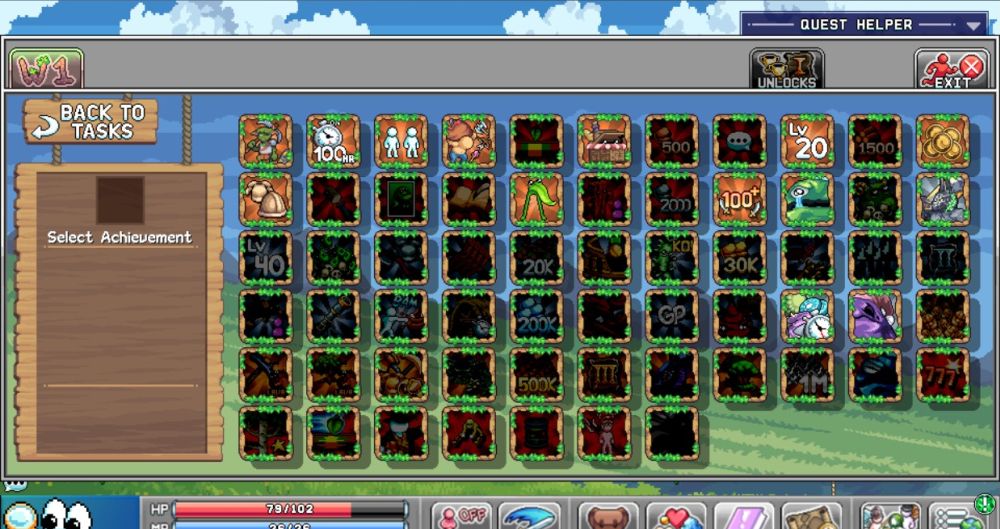
While you’re on the merit board, you can also tap Achievements on the left hand side to see a list of achievements that you can complete to both get gems and new RNG items for dungeons. I highly recommend you log in to IdleOn via Steam whenever you can as achievements are only registered and rewarded while you’re on the PC client. However, note that you still retroactively earn progress towards these achievements even if you’re playing on mobile.
Dewdrop Colosseum
You’ll find this eye-catching structure to the east of the upper part of Froggy Fields.
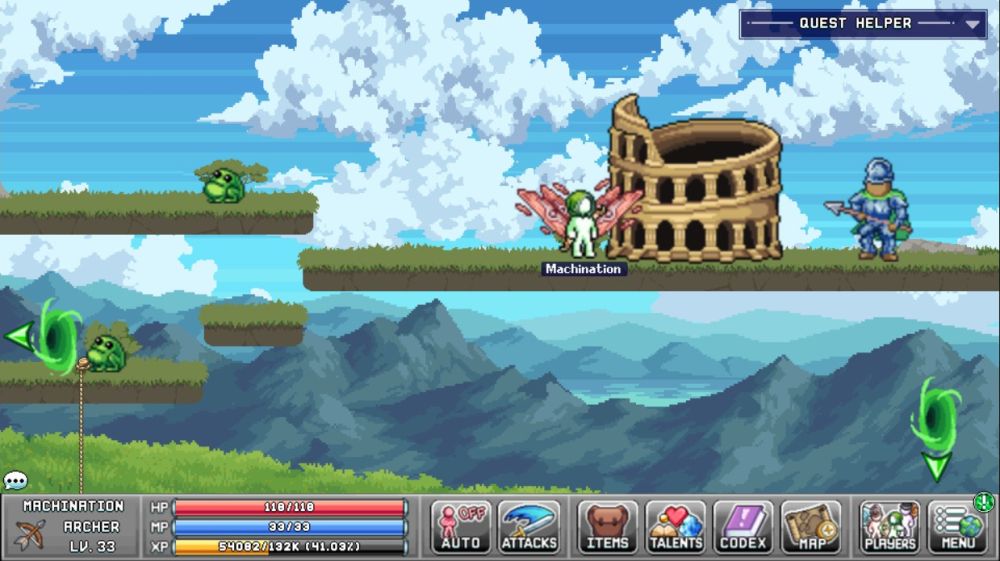
To access Dewdrop Colosseum, you’ll need to talk to Typhoon, the NPC in front of it, then survive an ambush of…frogs. Yes, the same frogs hopping around in that field. Once you’ve beaten back this formidable foe, the guard will recognize your combat prowess and give you access to the arena. He will warn you that he’ll recognize you even on other characters; in other words, you get one and only one ticket per day.
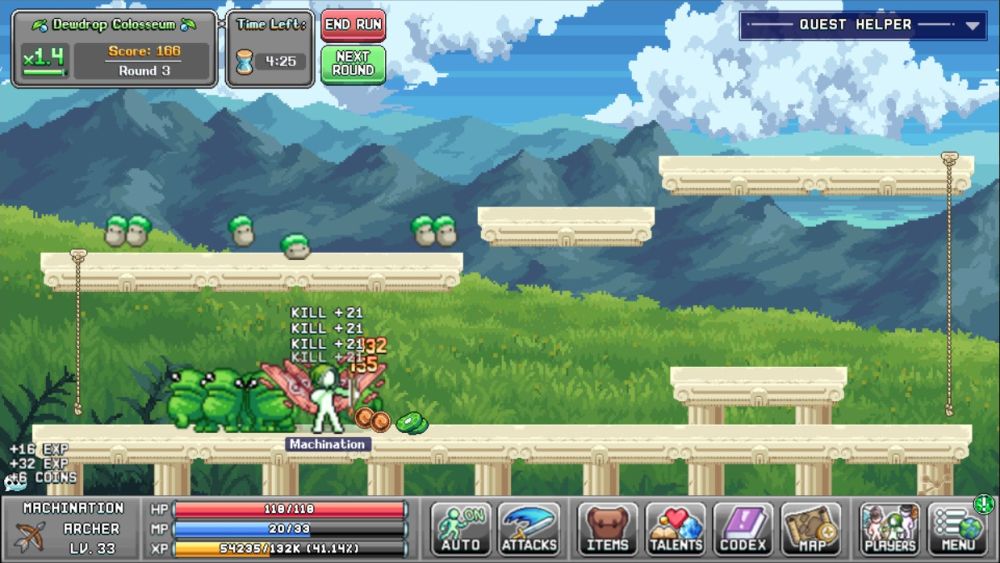
Inside Dewdrop Colosseum, you’ll be pitted against 15 waves of increasingly harder enemies, all of which can be found in the locales of Blunder Hills. The more you kill, the higher your score, and the higher your score, the better the prizes. You’ll have five minutes to score as many points as you can.
Spotting Baba Yaga
After changing to your base class, Promotheus will give you a follow-up quest to prove he isn’t crazy. All you need to do to complete this quest is to spot Baba Yaga.
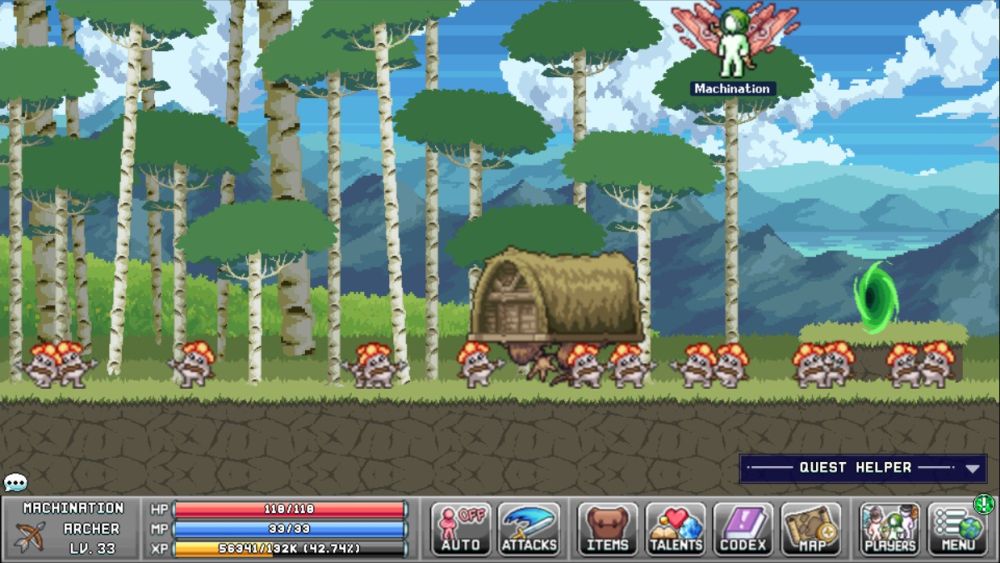
To spot this miniboss, you’ll need to unlock the Birch Enclave by beating up Bored Beans until the left portal opens. Baba Yaga spawns at the top of every hour, so try to park yourself a couple of minutes before the hour rolls over. The reward for this quest is the Alien Headband, a pretty neat hat that gives 3 Agi, 11 Wis, and 10% mana regeneration on top of having 4 defense.
You can also pick a fight with it if you want. It’ll be funny.
Teleport Around!
As you unlock more and more of Blunder Hills, your trips to and from town can get tedious. That’s where teleportation comes in.
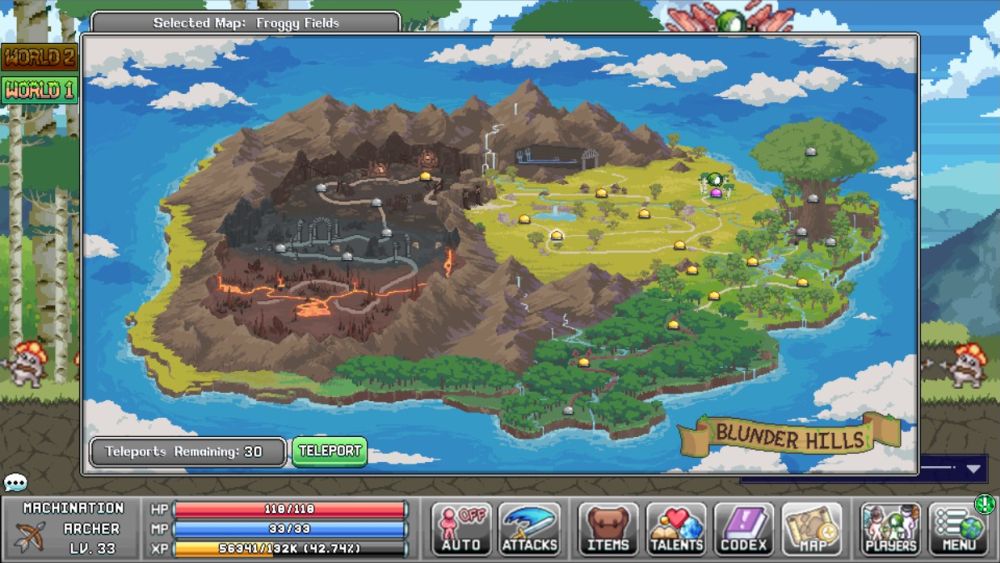
To teleport, just open the map and select which map you’d like to teleport to. Opening the map menu also shows you the name of the map you’re on, which is important as you’ll need to know the name of the map you want to go to if you want to avoid accidents. You only have a few teleports per day, but you can increase this limit by buying a permanent teleport income increase from the gem shop. Lastly, you can also buy Bottled Town Teleports at the store in town to save you a trip and a valuable teleport pass.
The Spikes Minigame
Ever wish there was a way to consistently earn gems without paying for them? There is – if you’re feeling lucky.
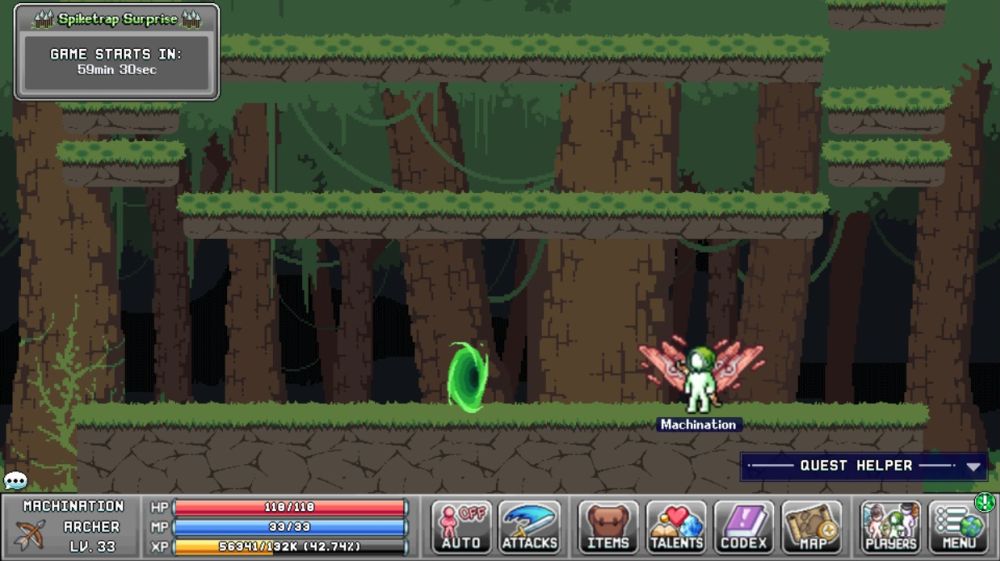
The Spiketrap Surprise minigame is available at the start of every hour, and can be accessed by navigating the treacherous spike platforms above the Carrotmans. There’s another, “secret” way to get here, which you probably found if you were thoroughly searching through the achievements in town. Type “If u love me let me go” in chat (without the quotation marks) to instantly be teleported to this minigame.
This minigame tasks you with surviving randomly spawning spikes, which are all but certain to one-shot you. It’s a game of chance, but you can earn up to 40 Gems reliably – all you need to do is survive round 1.
There’s no limit on this minigame, but be sure to be in the arena before the next hour rolls over: it starts at exactly zero seconds.
My First Dungeon
Running dungeons is very important – not only do you get sweet loot, but you also gain access to yet another way to passively boost your stats!
Dungeon Mechanics
Your stats in the overworld are not your stats in dungeons. You may be wondering why your max HP became 10 when you first entered the lobby map. Don’t worry – that happens to everyone. Your dungeon rank and stats are shared across all characters on your account. Second, your skills are also fine-tuned. Specifically, some skills are disabled. On the flipside, skills that can be activated are counted as if they were Level 50.
There are dungeon-only equipment drops that supersede your current gear. These items are very powerful, but they’ll also take up your equipment slots – so make sure you have inventory space. Dungeon equipment is special in that you can also pick up enhancements to get a completely random boost on them, which lasts for the duration of the dungeon. Note that each piece of equipment can only have one enhancement applied to it at a time!
Last but not least are a dungeon’s RNG items. These special items take the form of an orb – white for common, green for rare, blue for rarer, and so on. When you tap on these, you’ll be given a choice of a passive item that’ll help you with the dungeon, ranging from basic stuff such as increasing max HP to more complex fare such as doing way more crit damage, but being unable to deal damage with non-crits.
Grandfrog’s Bazaar
Grandfrog’s Bazaar is the very first dungeon in the game, and more often than not, you’ll see a lot of people in the lobby. The more people you have, the further you can go.
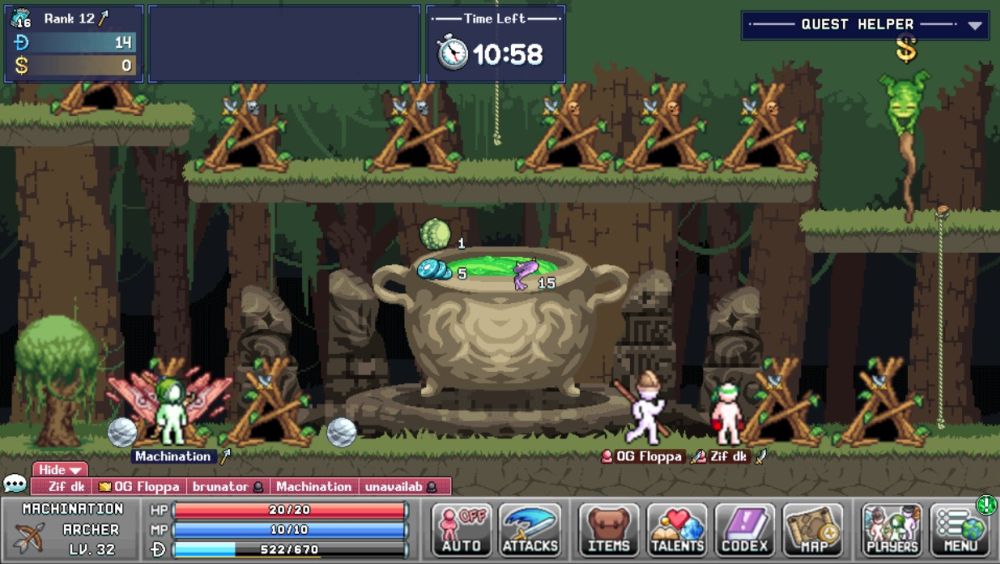
In Grandfrog’s Bazaar, your objective is to gather the ingredients floating above the pot by killing mobs. Colored frogs will drop the same color of ingredients – purple frogs drop legs, blue frogs drop meat, and so on. To drop items into the pot, go in front of it, then drop the items from your bag.
You’ll need to destroy the huts to get the frogs to spawn. While you can get green, purple, and blue frogs to spawn from the huts on the lower and middle platforms, you’ll have to climb to the top of the area to unleash red and gold frogs.
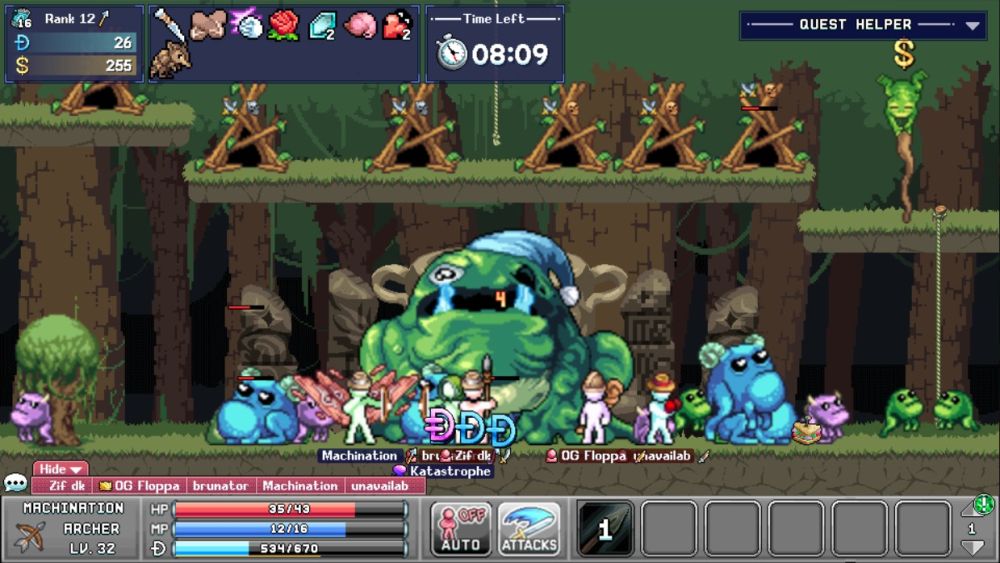
Each time you complete the ingredients, Grandfrogger will appear. Beat him up to get those sweet, sweet dungeon credits. After you beat him, the next set of ingredients will appear. The more times he’s summoned, the tougher Grandfrogger gets. Your ultimate objective is to score as many Grandfrogger kills as possible, as he drops a lot of credits and Flurbo edition points.
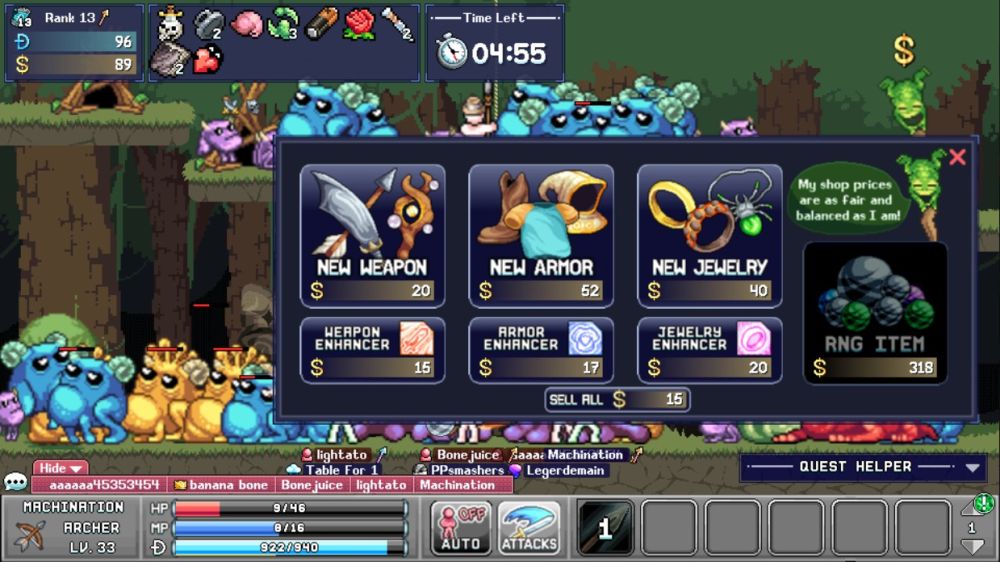
The Credits Shop
Once you’re done with the dungeon, it’s time to spend those credits. Tap the Open Shop button while you’re in the dungeon lobby to bring up the credits shop.
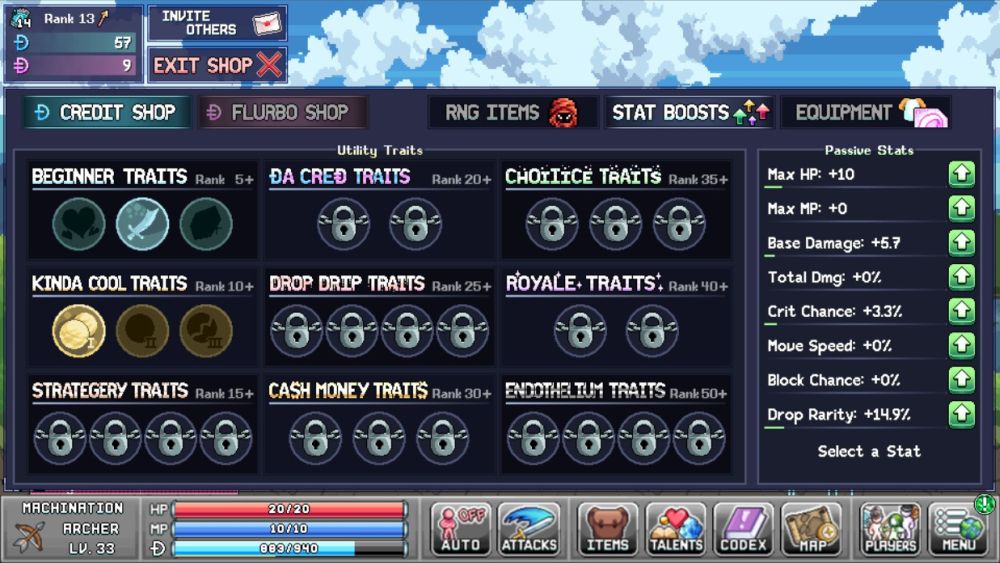
The credits shop is where you can beef up your dungeon stats. Apart from this, you can also improve the quality of your RNG items as well as the stats of your dungeon equipment. At certain dungeon ranks (you gain experience by doing dungeons), you’ll also gain a choice of one of three perks that applies while you’re in a dungeon. You can only pick one on each tree, but you’re not locked to your choice and can switch them out while you’re in the lobby.
The Flurbo Shop
The Flurbo shop, on the other hand, is more expensive since this is where you purchase permanent upgrades that apply outside of dungeons.
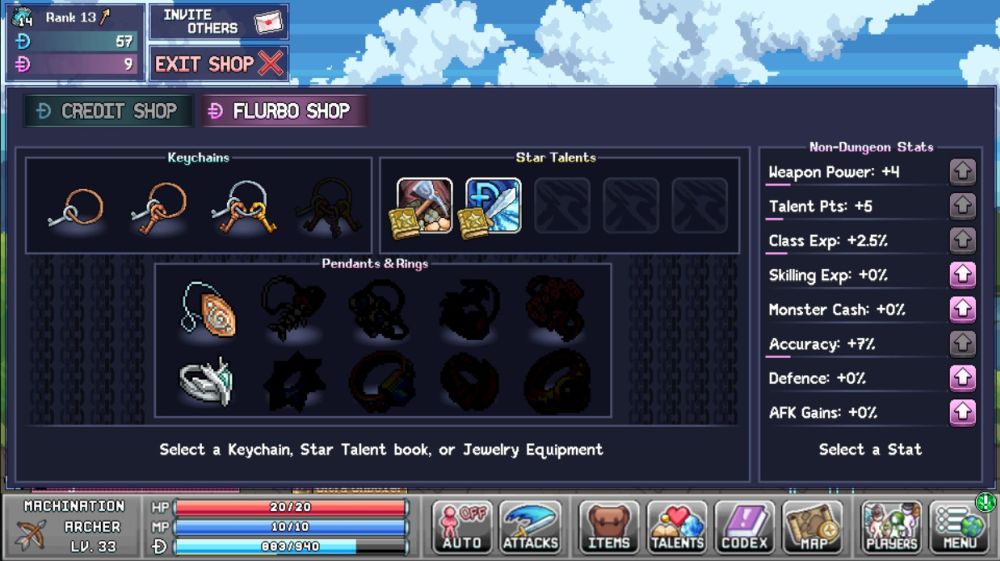
Flurbo cerdits can be used to not only buy stats like weapon power, talent points, or more experience, but can also be traded in for random keychains or specific pendants and rings. Flurbo points can also be used to purchase Star Talents, with a random level and with each purchase unlocking the next text.
Showdown with Amarok
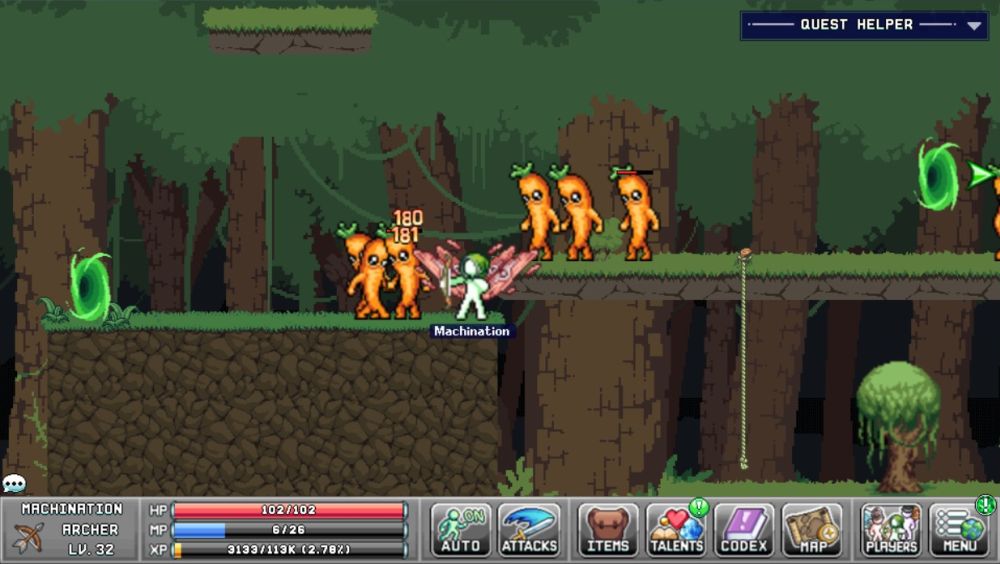
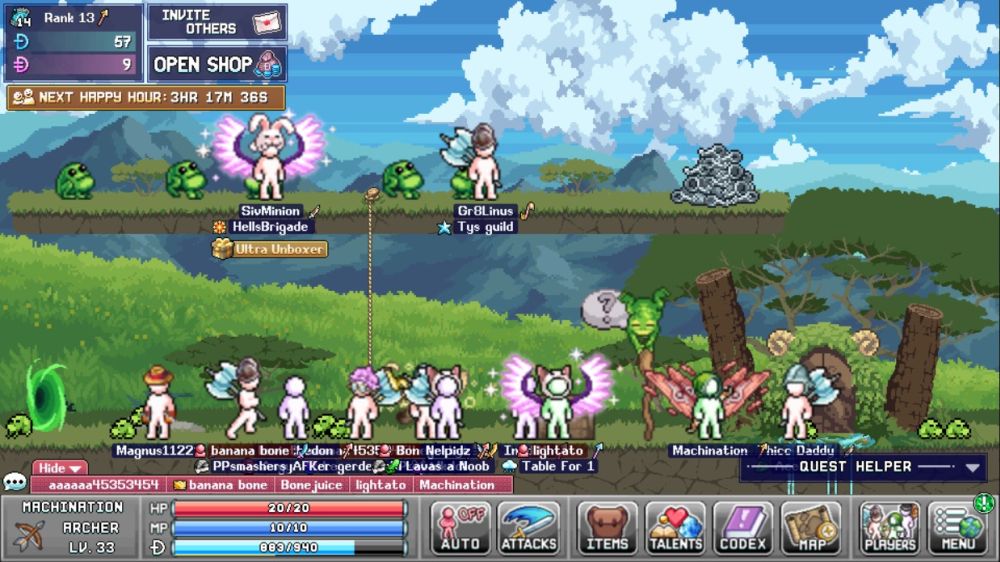
Your final goal in Blunder Hills is to defeat the stone golem Amarok to reclaim the portal stone that will let you enter the YumYum Desert. To reach this boss, you’ll need to venture far into the jungle, past the Carrotmans (yes, that’s the plural) and Glublins and make your way to the Encroaching Forest Villas map – it’s the one with all the mask-wearing NPCs, as well as a store.
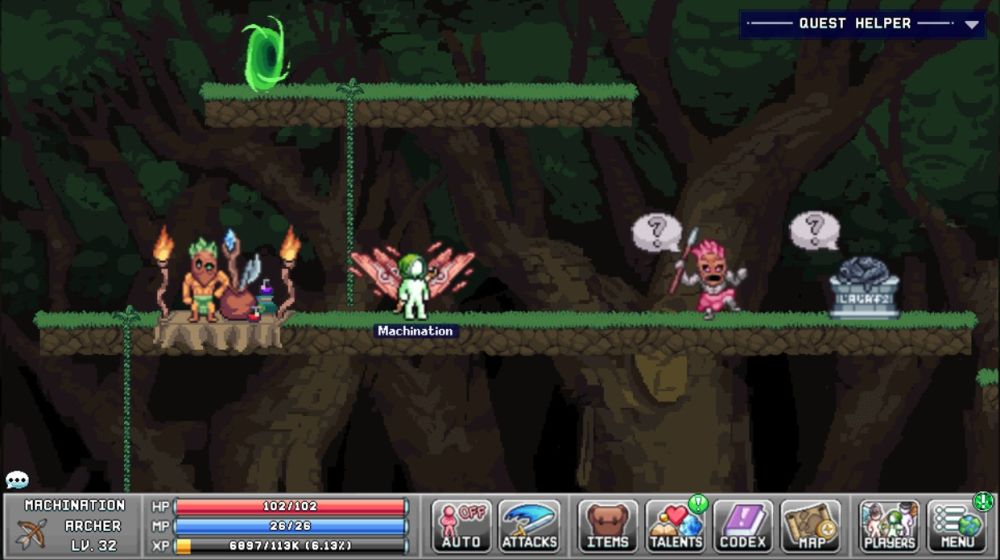
Once you’re here, you’ll need to complete a quest for Dog Bone, the ghost NPC who’s on the right side of the upper part of the map. You’ll need to beat up some Wode Boards, located at the bottom of the map, until you collect 10 bones. Bring the bones back to Dog Bone, and he’ll give you a bunch of keys to unlock the boss fight next to him. As an added bonus, Dog Bone will also give you some keys every day, plus a few more for every character you have that has reached this point. Each attempt, win or lose, will cost you one key.
For reference, these were my stats during the Amarok boss fight:
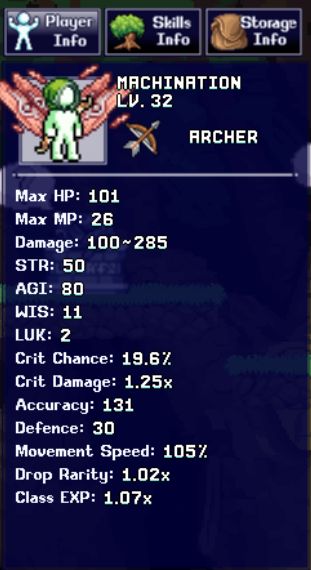
Make sure to bring a lot of food in – this is going to be a long fight, and if you’ll die if you’re not careful!
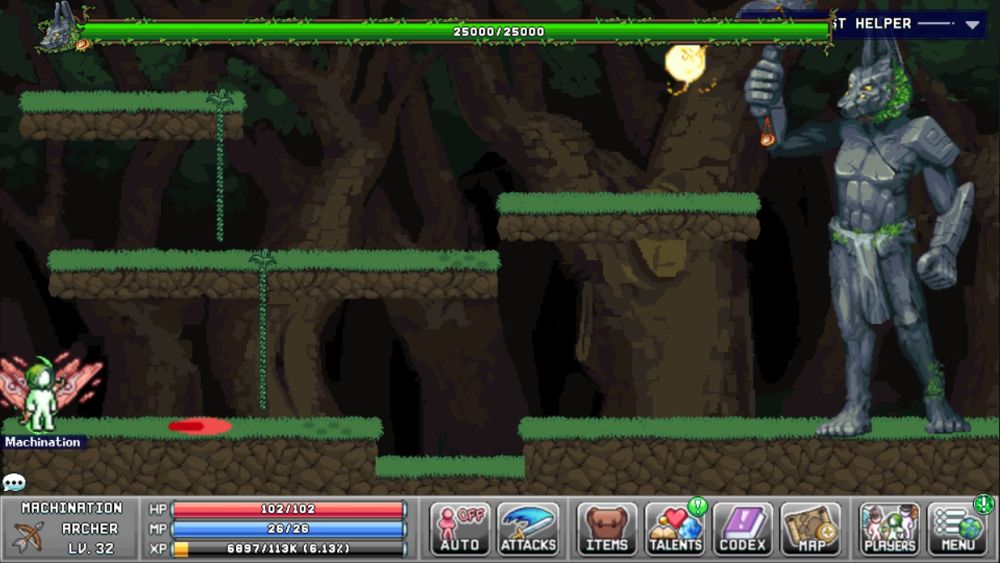
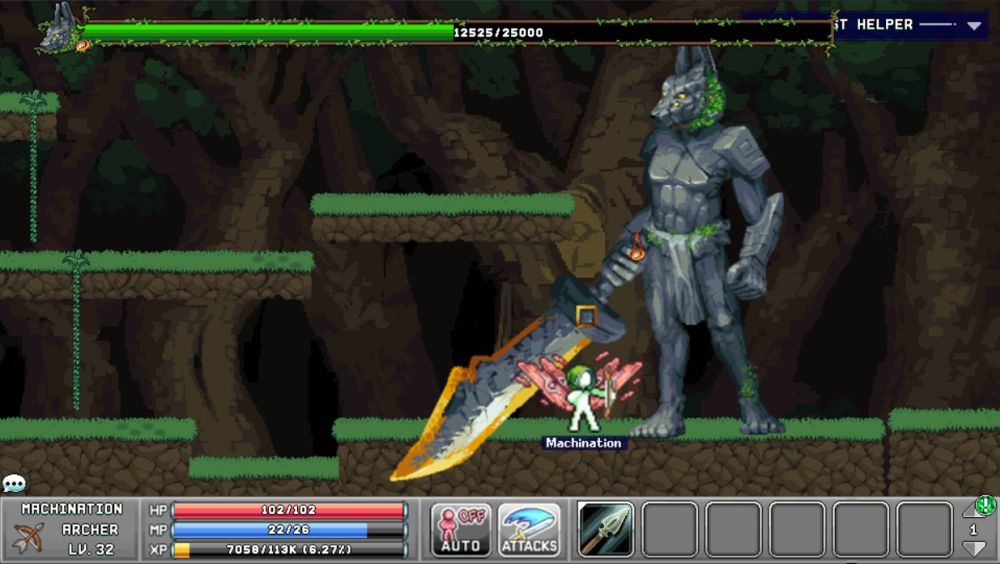
The Actual Boss Fight
Amarok isn’t a boss that you can just AFK. You’ll need to learn his mechanics if you want to send him packing and get the copy of Mighty Ducks 3 the Desert Topaz back. On Normal mode, Amarok has 25,000 HP, and you can hit him from two points: either his right arm on the upper platforms, or his right leg on the ground level.
Amarok has multiple attacks, each of which can be dodged by responding in time.
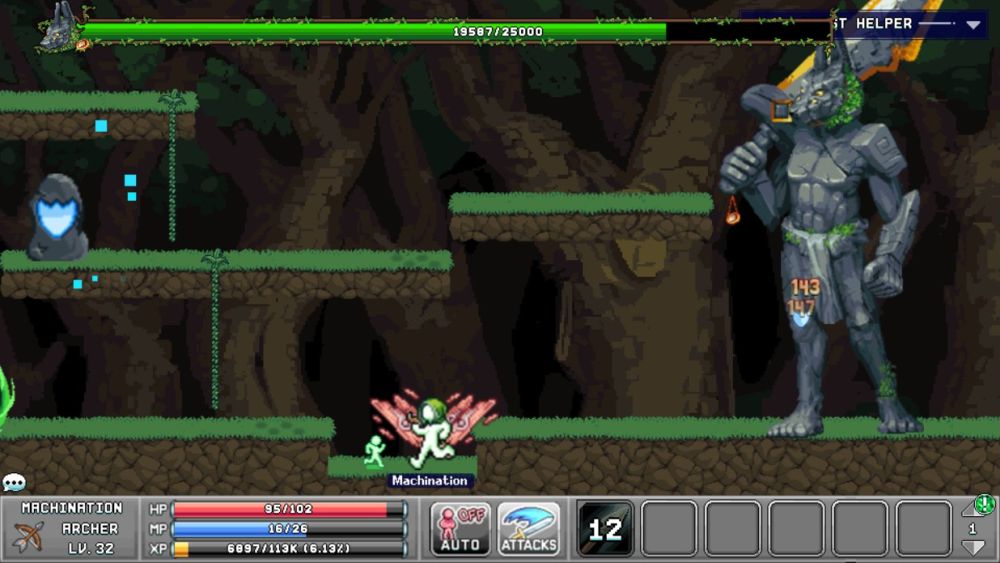
Fireballs
Amarok raises his sword, which will spawn 2-3 fireballs in the air, as well as add flashing targets on the ground. Stay out of the glowing areas to avoid this attack. Note that there’s a small AOE when the fireballs hit the ground, so sticking too close to the target areas will still result in some damage. The fireballs also cannot damage you via collision, only explosion. This attack doesn’t do much damage, so if you have to tank a hit to avoid a stronger attack, let it be this one.
Stomp
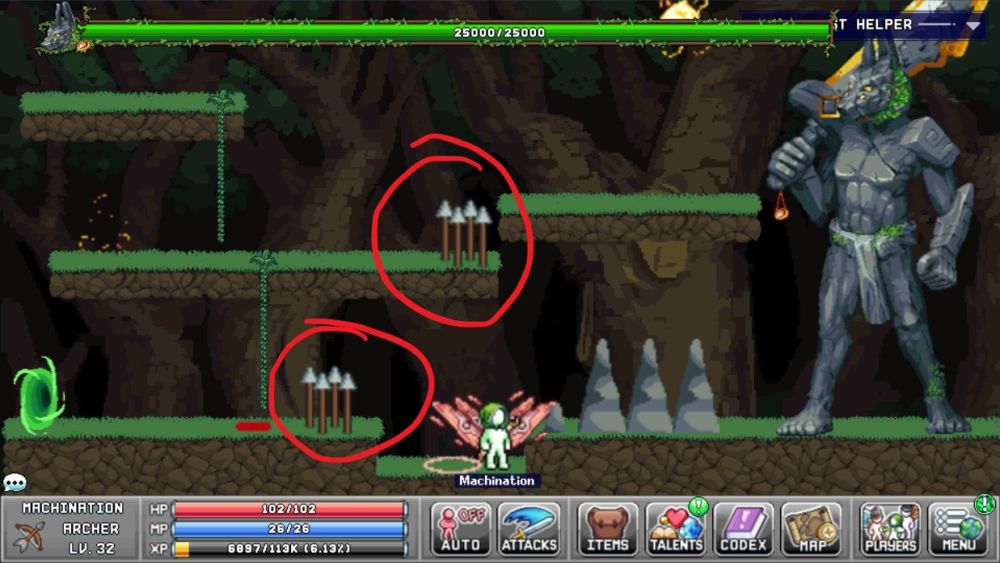
Amarok raises his right leg, then stomps the ground after a short delay. This does a lot of damage if he smashes you with his foot. Even if you’re out of range, watch out: the stomp will also send a wave of rocks forward on the lower platform, and will also trigger the spikes (circled in red). You can simply run to the lower platform to avoid this attack.
Uppercut
Amarok only uses this move if you’re on the upper platform. Amarok will extend his left arm, which will become bigger, then he’ll perform a powerful uppercut. To avoid this, run away from him as soon as you see it start. If this connects, it will do a ton of damage, so do your best to dodge this move.
Fist Missile
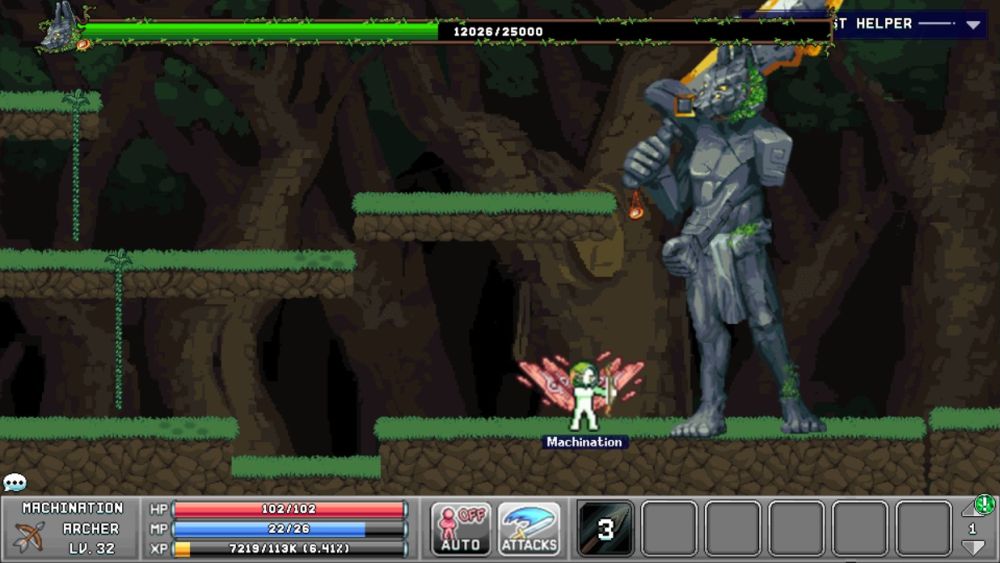
Amarok will extend his left arm forward as if to punch you. After a few seconds, the fist will swell and he’ll launch a rocket punch, which does considerable damage. The best way to dodge this attack is to stay close to Amarok, then as soon as the fist swells up (which is the cue that he’s about to shoot), move away from him. Do note that this attack tracks you until the fist swells up.
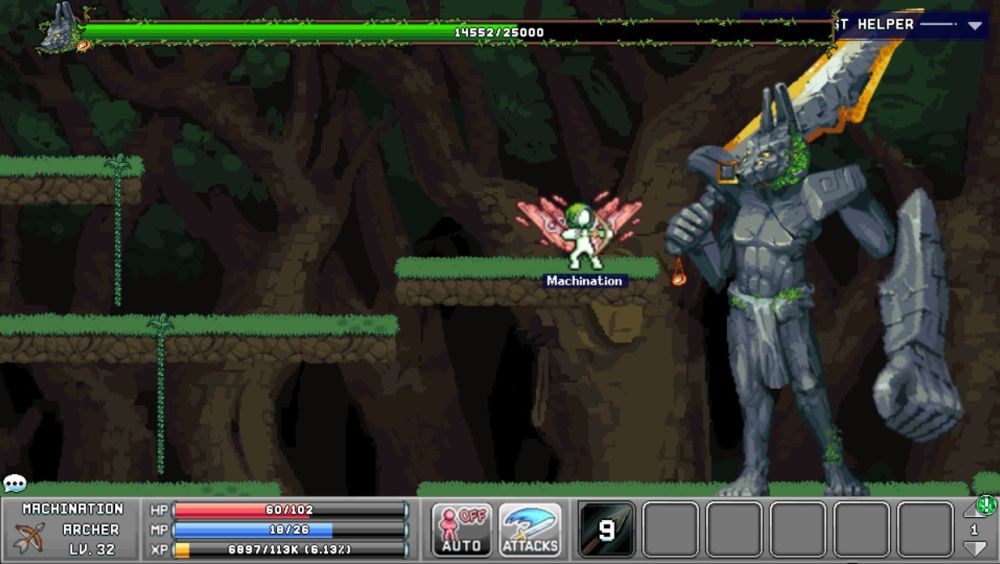
Sword Swing
Amarok raises his sword behind him, then swings it downwards in a large arc. This also does considerable damage, but it’s easy to see coming and avoid. As an added bonus, this attack cannot hit melee range characters on the lower platform, so you can use it as an opportunity to deal damage if you’re feeling plucky.
Summon Totems
Amarok pulls his left arm back, then summons a totem (with colored orbs!). The color of the orbs determine what kind of totem Amarok summons; blue lights mean that he’ll summon an Armor Totem, while green lights mean he’ll put up a Healing Totem. Both kinds of totems persist until they’re destroyed.
The Armor Totem shields whichever of Amarok’s body parts you’re level with, vastly reducing the damage he takes. The Healing Totem provides slow, constant regeneration. While it’s possible to outdamage the Healing Totem if you’re strong enough, I’d recommend always destroying the Armor Totem.
Sweet Victory!
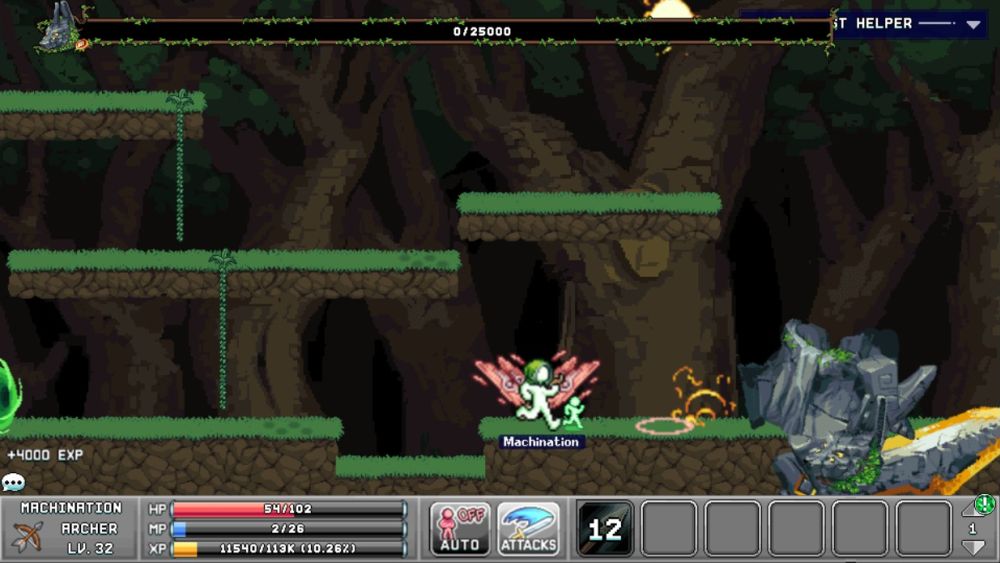
Keep your wits about you and don’t panic, and Amarok will slowly but steadily go down. Once he’s down (and once you’re done patting yourself on the back), don’t forget to nab the sweet loot he drops: lots of healing items, Amarok Slabs for crafting and other stuff, and most importantly, the Desert Topaz!
As a side note, if you’re farming Amarok, you can tap the refresh button on the upper left (below his health bar) to reset the fight and start another bout immediately. I hope you’ve got keys on hand!
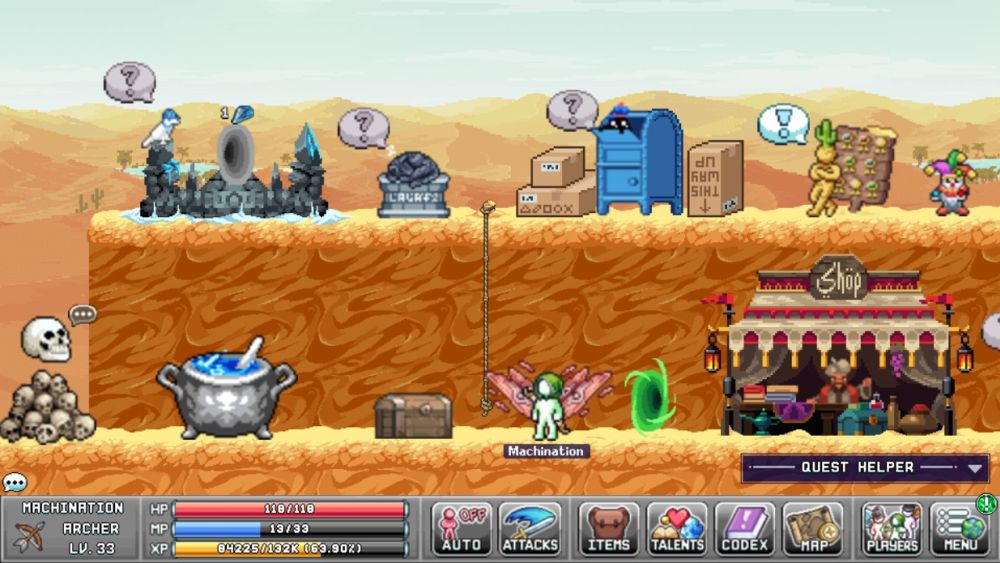
The Adventure Begins!
IdleOn is an MMO, and as you clear each world, you’ll find even more options available to you. After all, the journey to reclaiming your crown of epic gamer is expected to be long and arduous, so buckle up and get ready to grind!
That ends my beginner’s guide to IdleOn, and I hope you were able to pick something up to help you overcome the growing pains of being a new player. If you have something to add, or something to say, make yourself heard in the comments below!