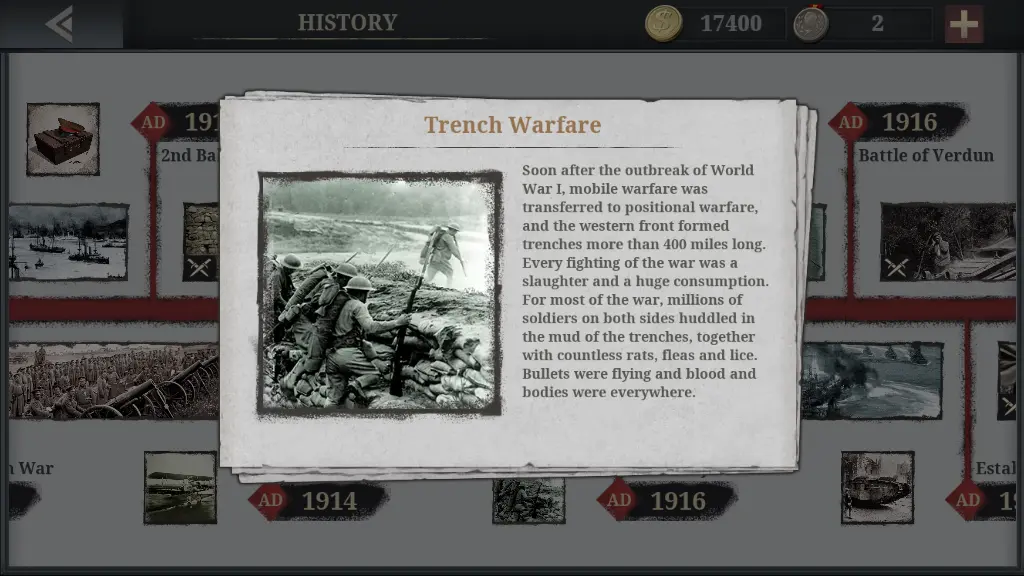
“When they came out of the battle, what a pitiful sight they were. Their expressions seemed frozen by a wisdom of terror; they sagged beneath the weight of horrifying memories.” – Marshal Petain, after inspecting soldiers from the Battle of Verdun
War! A gentleman’s game. Or at least all of you have been taught. War is a noble task undertaken by men of noble standing to maintain the nobility of a nation. As the honorable Archduke Ferdinand and his beloved wife Sophie, the Duchess of Hohenberg lie bleeding to death in Serbia, treaties written in defense of nations activate. These treaties, meant to uphold the peace after the Napoleonic Wars, inadvertently drag all of Europe, and soon the world, into war.
But it can’t be that bad! As you and your men, good Frenchmen in brazen, daring blues in defiance of the current trend of drab, cowardly greys, olives, and khakis of other militaries, march to the front this Year of Our Lord 1914, spirits are high. Perhaps, you and your men will all be home by Christmas.
1916. By now, you as a commander have sent many young, heroic Frenchmen to their ignoble deaths in the grey, shell-shattered hellscape of No-Man’s Land. How did we end up here, you try to remember. How did some Austrian duke and his wife getting shot in Serbia cause Frenchmen to ally with their long-hated foes the English to fight Germans?
The amazing wonders of modern technology mixed with nostalgic notions of military sportsmanship and glory combine to make a soul-crushing, industrial butchery beyond human imagination. Maxim machine guns mow soldiers down in numbers previously thought impossible. Sulfur mustard and chlorine gases burn blackened, pus-filled blisters through skin and lungs and drown men on dry land.
Artillery pounds day in and day out around the infinite line of trenchworks, barbed wire, and gun nests. The unceasing racket and shaking of the earth deprive you and your men of sleep and sanity. As if the mud, rats, and lice in the trenches weren’t bad enough. Tens and hundreds and thousands die every blood-smeared day to move the line forward a few yards.
By the Year of Our Lord 1918, France and all of Europe will have lost a whole generation of men to the inhuman machinations of this tragedy, The Great War, with nothing to show for it for all sides.
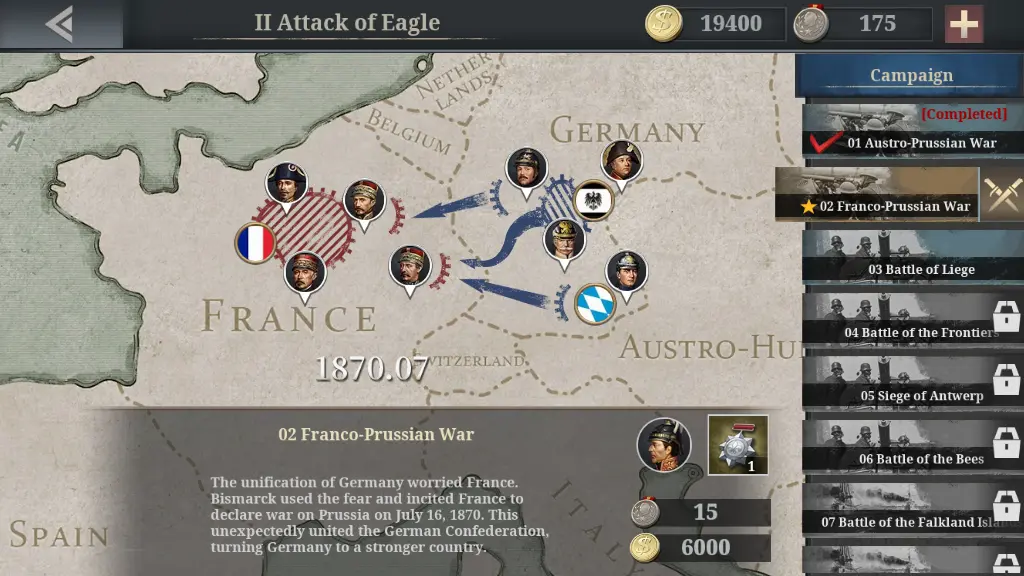
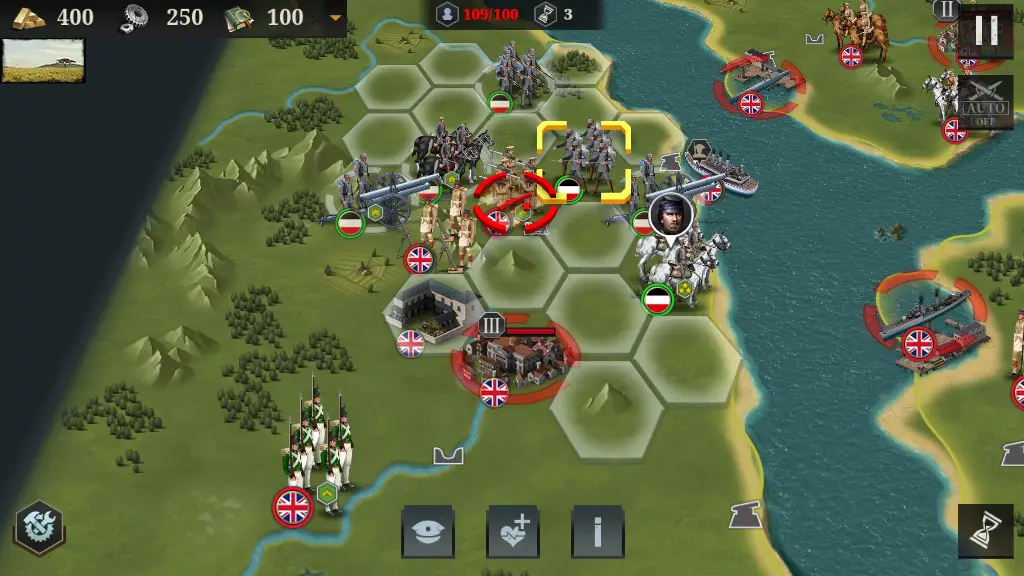
Welcome to our European War 6: 1914 beginner’s guide! A bit of a misnomer, European War 6: 1914, part of the European War series, is a turn-based strategy game created by Easytech set not just in The First World War from 1914 to 1918, but also in some of the various wars before it. This includes the American Civil War and the Austria-Prussian War which act as context for the events, politics, and tactics of the First World War.
It does take a few historical liberties though: For one thing, nobody had Armored Cars back in the American Civil War, and the Americans certainly didn’t use Civil War-era Carronades when they joined the big one in 1916! That being said, the gameplay in European War 6 can be quite cerebral, much akin to a hex-based version of Advance Wars. We hope our tips help you break the grievous stalemate over No-Man’s Land in your favor.
GENERAL TIPS
The First World War and the wars that acted as its political and strategic prequels were a strange era, one where many new modern weapons and tactics were being pioneered and used together with archaic thinking and sensibilities. Just like that war, European War 6: 1914 is a fairly odd strategy game that comes with its own quirks. Here are some general tips applicable to most situations, some requiring thinking outside of battle.
Hoard Healing Items

You start off with 25 Medical Kits and can either buy more from the Shop with Medals you own or watch ads and get achievements to take some. Save them for important missions and important units. The only times you should use these kits are when you’re stuck on a mission or if it’s a Star Mission with a particularly good reward, usually a new Commander for your army roster. Or heck, save ’em for Challenge Mode once you beat a Campaign!
Princesses: Home Front Support
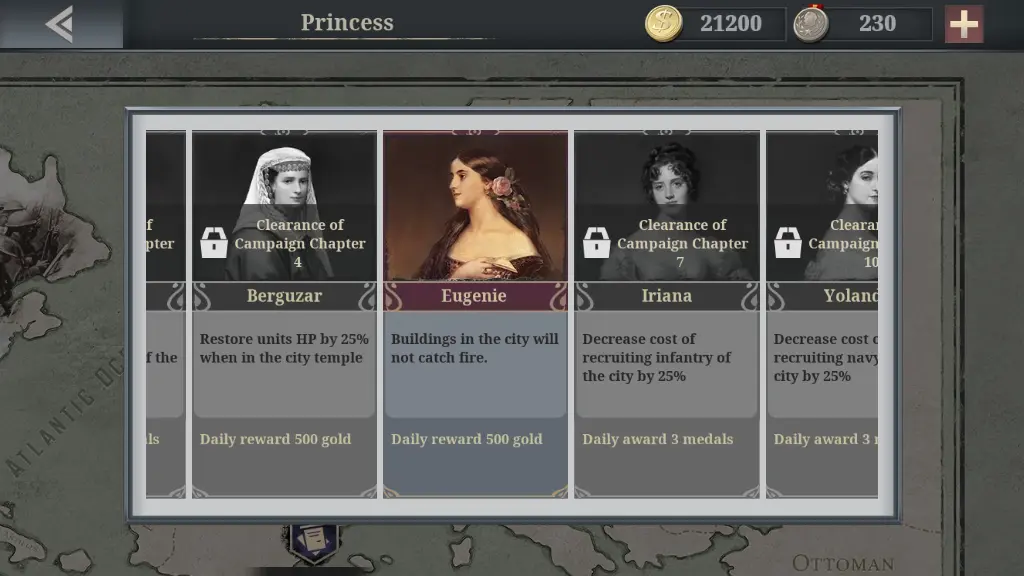
Princesses are a good reason to go through the campaign before going through Conquest Mode: You normally unlock Princesses by completing Campaign chapters, and each one you unlock gives you added daily rewards. They also come with support abilities: You can assign them to a City during battles to give the City various buffs, such as making them fireproof or reducing recruitment costs for certain buildings controlled by the city.
Star Missions
Star Missions are missions marked with a star symbol, usually unlocked alongside a normal mission after winning a battle. Prioritizing these is usually a good idea: They often contain useful rewards such as Medals, equipment, and most importantly, new Commanders. While these missions can be tough, they’ll make future missions easier for you thanks to all the stuff they unlock.
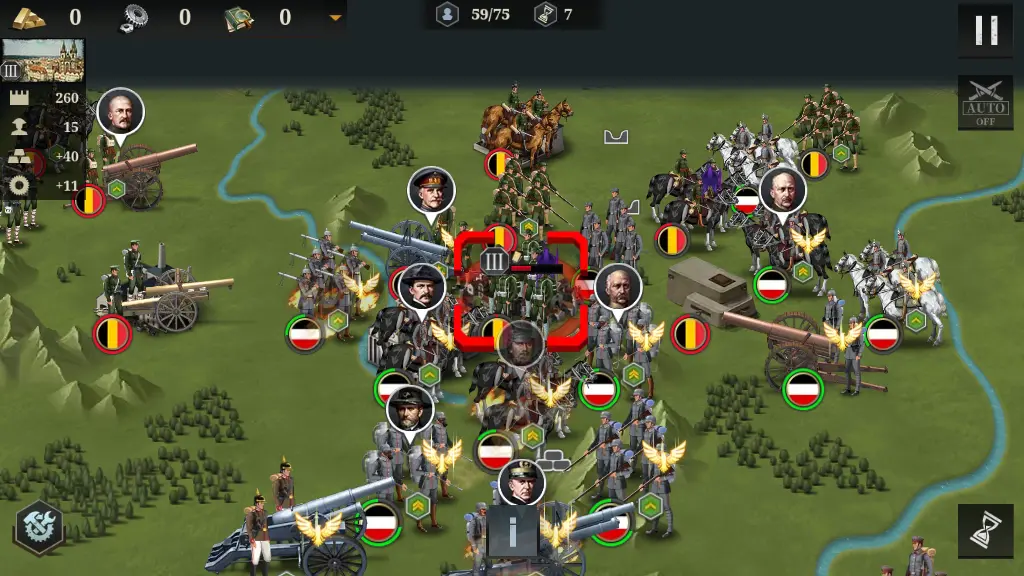
Commander Assignments
During a battle, you have the option to assign Commanders to individual units. Obviously, you match a unit to an appropriate commander, like having the infantry commander Ulysses S. Grant put in an infantry unit. Less obvious is the choice of when to assign a commander. Sometimes, it may be better to immediately assign commanders at the start of the game.
This may help you get an early advantage against enemies, especially if it’s a mission where the start of the fight is the hardest and you may want to hold a point down until you can muster a counter-attack.
Other times, you may want to hold your commanders in reserve until you unlock the higher tier units such as Armored Cars or New Infantry, then assign those high power units Commanders so they form the core of your assault. And if a match starts you and your opponent off with Heavy Machine Gunners, Tanks, and Field Artillery, you might as well assign your Commanders to those high-tier units, or at least to units with a high Veterancy level.
Positions First, Then Fire!
The UI encourages you to attack as soon as you finish giving move orders to an individual unit, should they be within range of the enemy by the end of their march. You can belay this by tapping elsewhere out of range and giving other units their move commands, doing the same every time you are prompted to attack. You will notice that your units will still have the ready-to-go circle under them, though you will be unable to do backsies.
There’s a good reason to move this way: This lets you more easily decide who shoots first, which should usually be the artillery! As units’ HP bars get lower, they deal less and less damage. This means you can fire your artillery to soften the enemy’s imminent counter-attack damage, then commence direct-combat-range violence in such a way that you decide who takes the worst of your enemy’s counter-attacks, thus saving the HP of your more valuable or mission-critical units.
Military Academy Tactics Cards
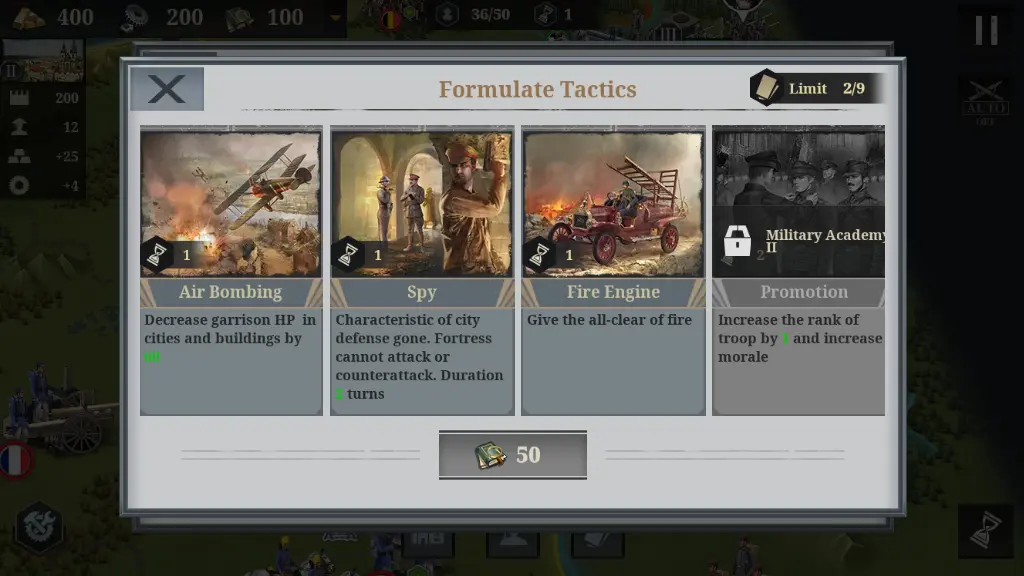
Every battle, you can use a City’s Military Academy to research Tactics Cards, which give you a single use of that tactic every time it is researched. Tactics Cards act like Support powers in games like Command and Conquer Generals or Tiberium Wars: You use a card, point at an appropriate target, and something happens to that target whether good or bad.
These cards can be very useful depending on the situation, whether it be for keeping up the pressure or turning a bad fight around. Our writer favors the March and Promotion cards since they help with the direct use of units, though they could stand to use the more offensive cards like Air Bombing more often.
Always make sure you read the card before researching it. You can research cards by tapping a City, tapping the City-looking icon at the bottom of the screen, then tapping the Military Academy. As for using tactics, you tap the City and tap the Card-shaped icon at the bottom of the screen.
MAKING GENERALS STRONGER
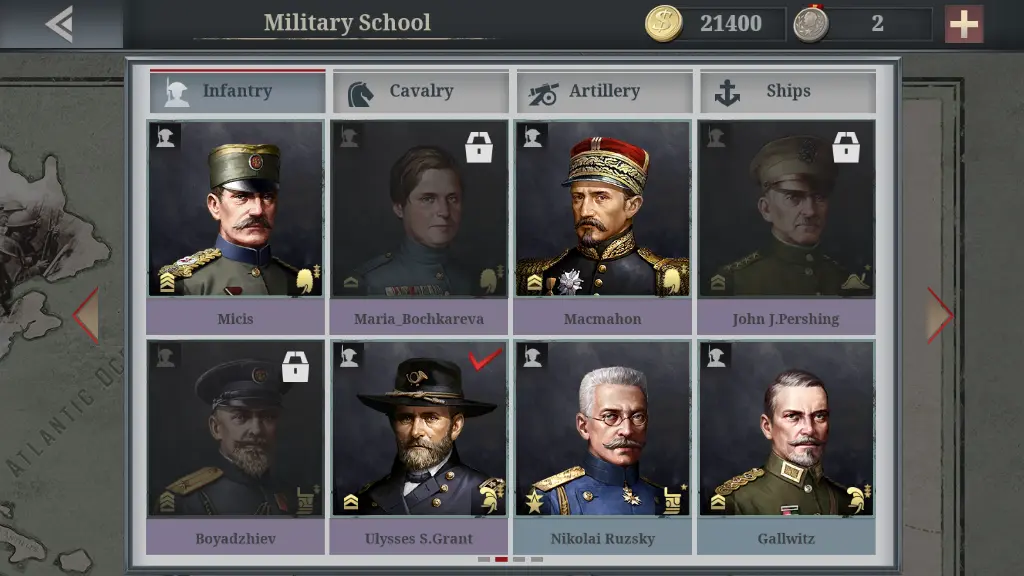
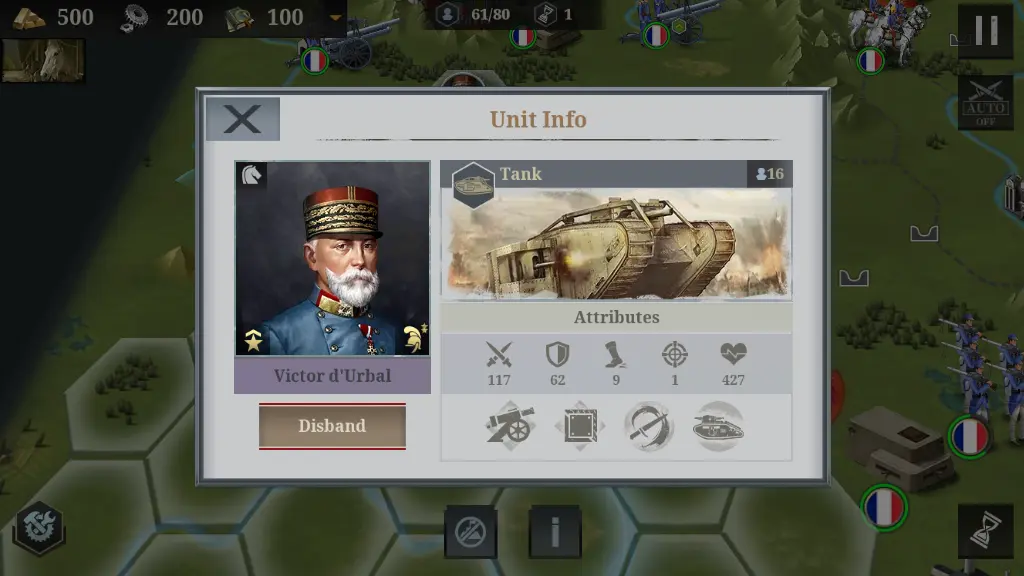
Generals are characters depicted by historical personalities you can unlock with Medals. You can assign them to units by tapping a unit, then pressing the button which looks like an officer’s peaked cap.
Generals have various skills which strengthen the unit they are attached to drastically, though they are quite biased with the kind of units they command and you’ll need to match their skills with the units those skills favor. Proper deployment of your Generals, in terms of timing, unit type, and positioning, can turn the tide of battle in your favor. Here is how you make Generals stronger.
Ranks
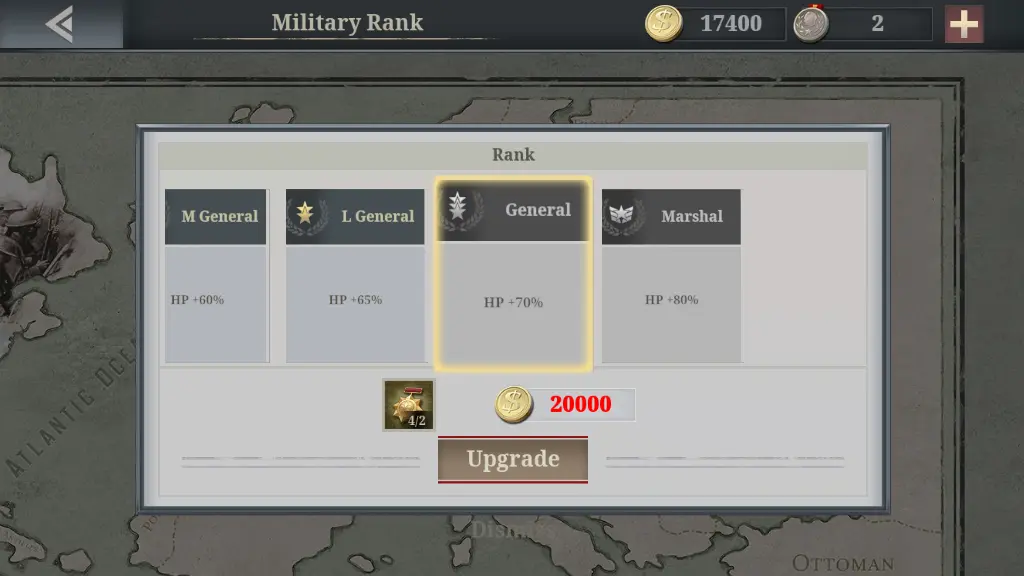
Ranks are the military rank of a General, and while simple, are quite powerful to upgrade: They just raise the HP of any unit they command by 30-80% depending on their Rank. Make sure to upgrade your most often used Commander’s Rank and always remember to deploy them. That HP boost is big enough to turn them into a giant pain to fight! Promoting a General’s rank requires Coins and Gold Medals.
Titles
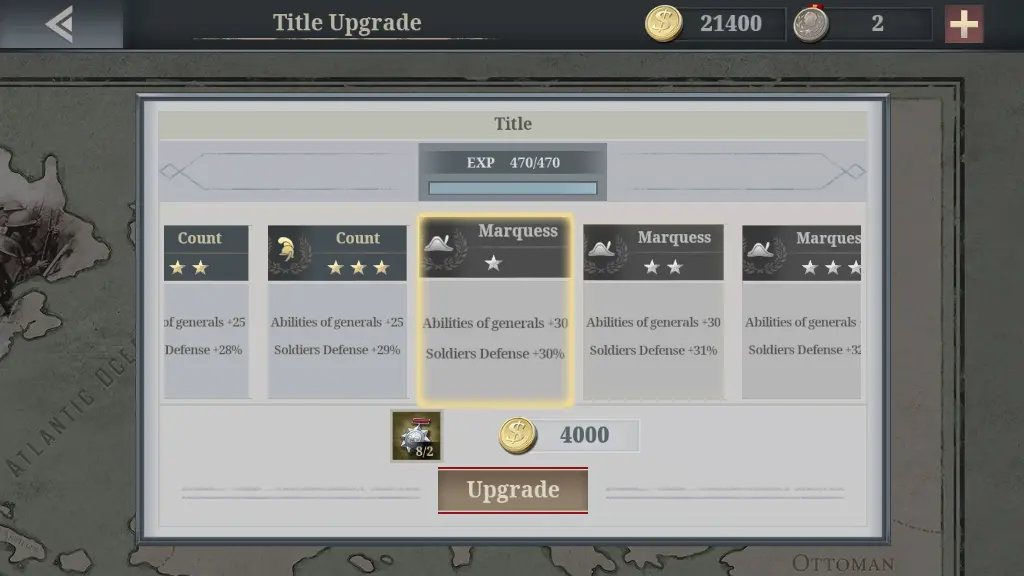
Titles are a General’s civilian rank as a politician. They’re pretty simple in that they raise a General’s Abilities stat and the Defense boost they give to any unit under their command, whether they match their preferred units or not. The lower the tier of a General, the lower their highest achievable title is, though it can vary from a General-to-General basis.
To confer Titles, you’ll need both Coins and Silver Medals and have accumulated enough EXP for the General by using them in combat to reach that title. You also need Titles to unlock higher-tier Skills for Generals.
Skills

Skills determine where you want to deploy a General, and are the best way to define a General. Skills are typically passive or chance-based, normally triggering if you get lucky while fulfilling a certain condition such as attacking the enemy with a certain unit type under the General’s command.
A General usually has one or a few generalist skills for any unit type, and a lot more skills for their favored unit types such as Infantry, Cavalry, or Artillery. To power them up, upgrade the General’s title until you reach the required title for the skill, then you spend Coins on the skill itself. You can reset a General’s skills using a Textbook.
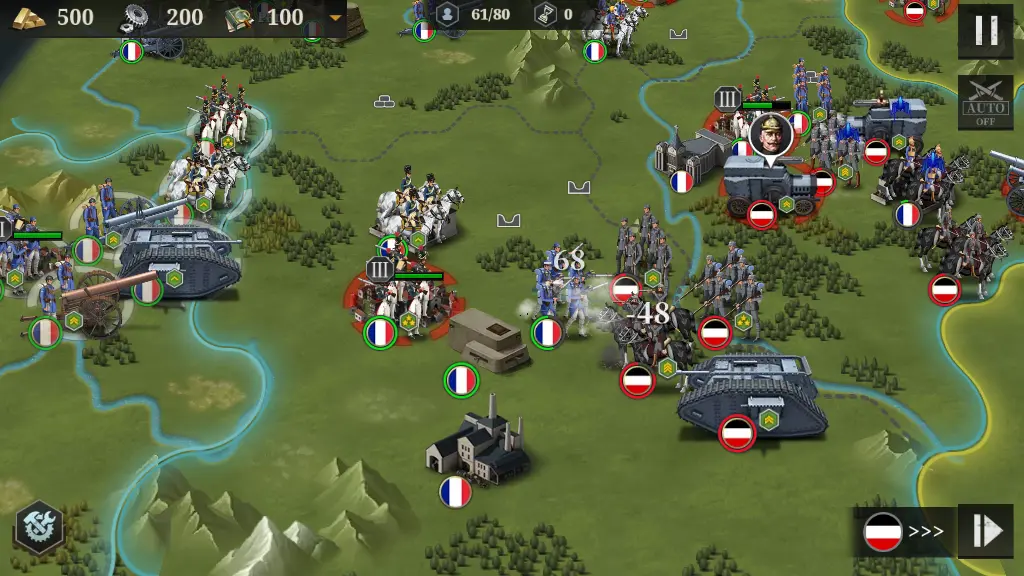
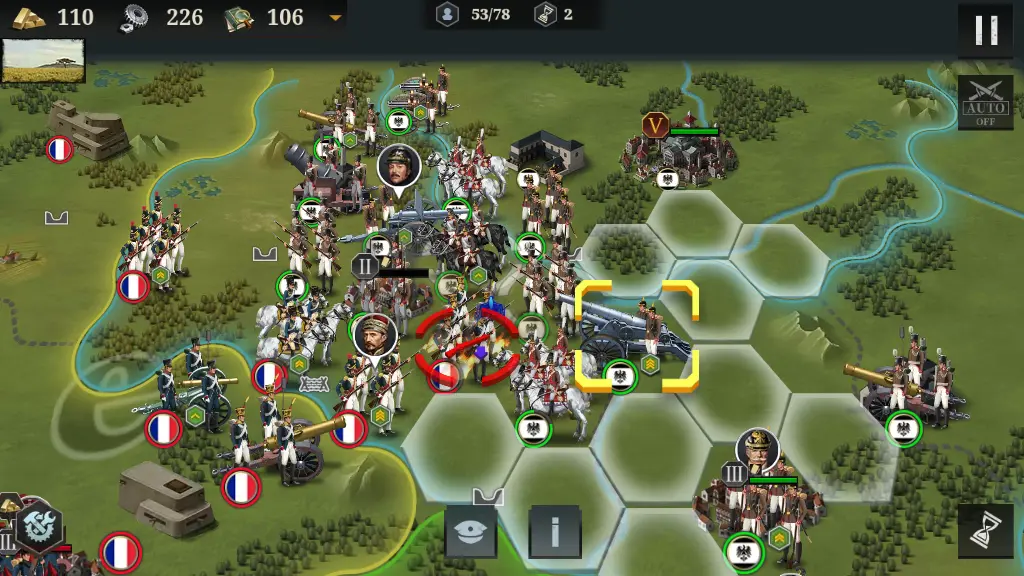
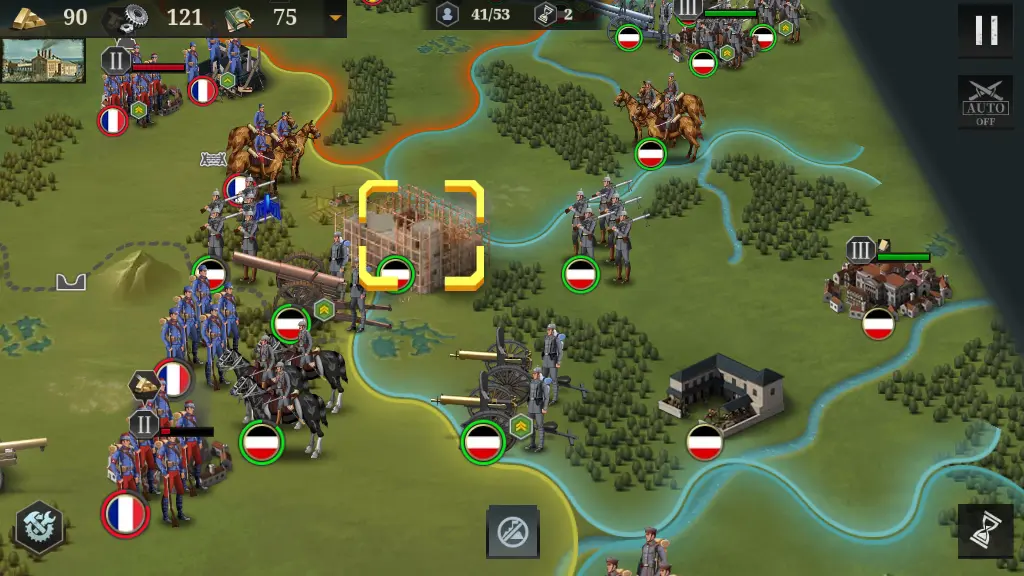
TRENCH WARFARE: DEFENSIVE TACTICS
The unhappy men stagnating in the trenches need a commander to lead them, and you’re it. Trench warfare is a horrible grueling affair for both the attacker and the defender, but the ones in the trenches can make it particularly nightmarish for the unfortunate enemy forced to charge across No-Man’s Land.
The use of trenchworks and engineers, proper defensive placement of structures and Forts, and use of artillery and positioning to ensure multiple defenders get a shot on a single target at once can help the enemy enjoy a most authentic trench warfare experience. Which is to say lots and lots of them will die.
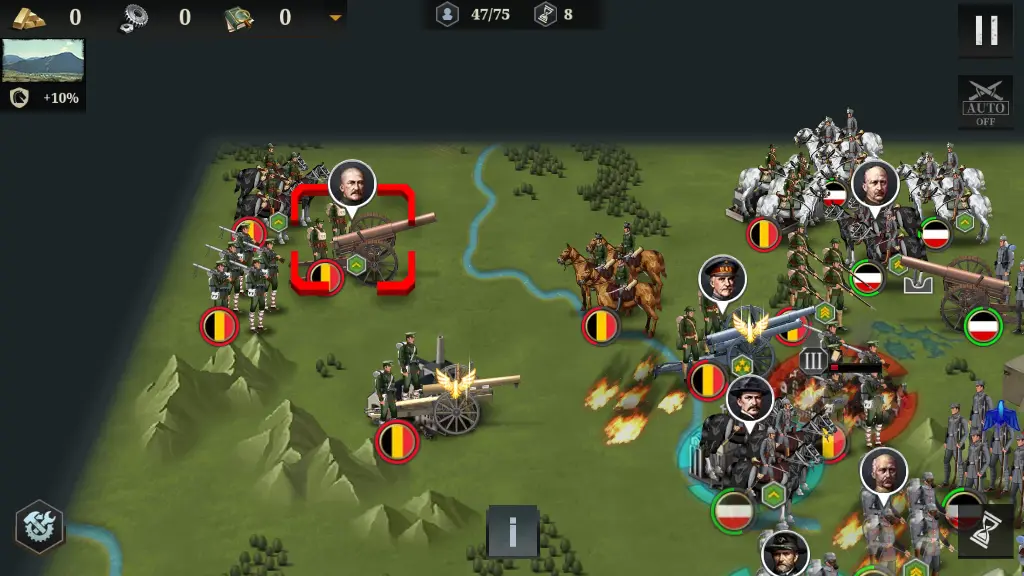
Focus Fire or Wide Attack?
If you are on the defense, you’ve got two options: You can focus fire on a target to blow a hole through the attacker’s lines and then have your forces counterattack through the hole, or spread your attacks out between multiple enemy units to weaken their firepower while keeping their units clogged up with their own traffic.
As a defender, what you pick mostly depends on the objective both the game and yourself place on your troops: The focused attack might be useful to reach enemy artillery units, while the wide attack may be helpful against massed direct-fire units (IE anything that has to be next to its target to attack) to render their attack power moot. Just remember that the enemy may retreat and attempt to form a defense if their units get too heavily damaged.
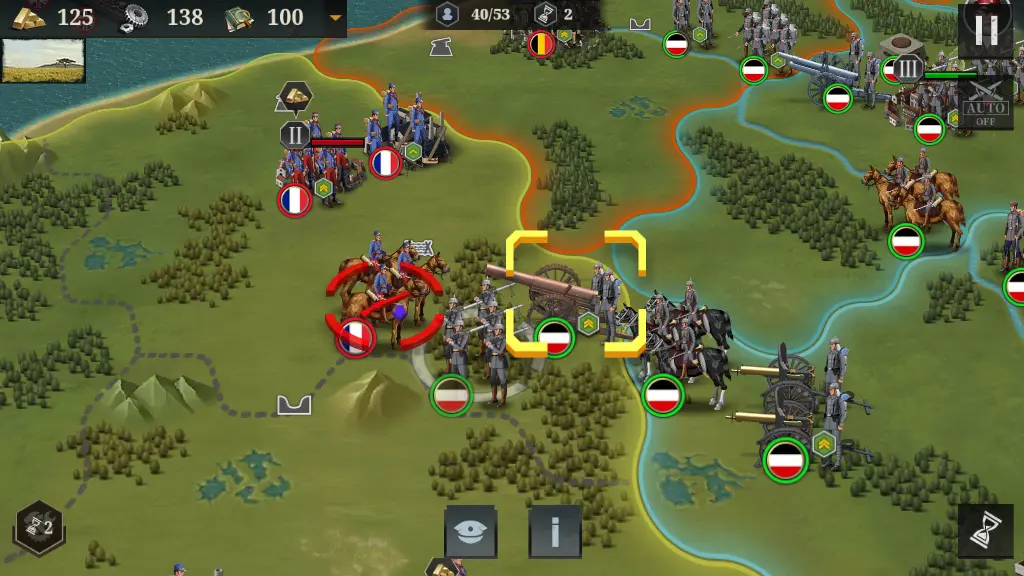
Terrain Advantage
One must know the terrain to not just move around the battlefield, but also to conduct an effective defense. Mountains protect against cavalry attack, forests protect against artillery, and no natural defenses protect against infantry.
Mountains and Forests can also restrict movement for most Cavalry and Artillery, though Infantry units don’t care about terrain movement penalties other than what comes from rivers. Rivers also heavily restrict movement by roughly halving a unit’s movement through it.
Cities also protect all units with their walls by taking some of the damage for the people within. Take a look at the terrain and decide where you want to put your defensive line, or where the enemy’s weak spots are in their own lines.
Fortifying Flat Land
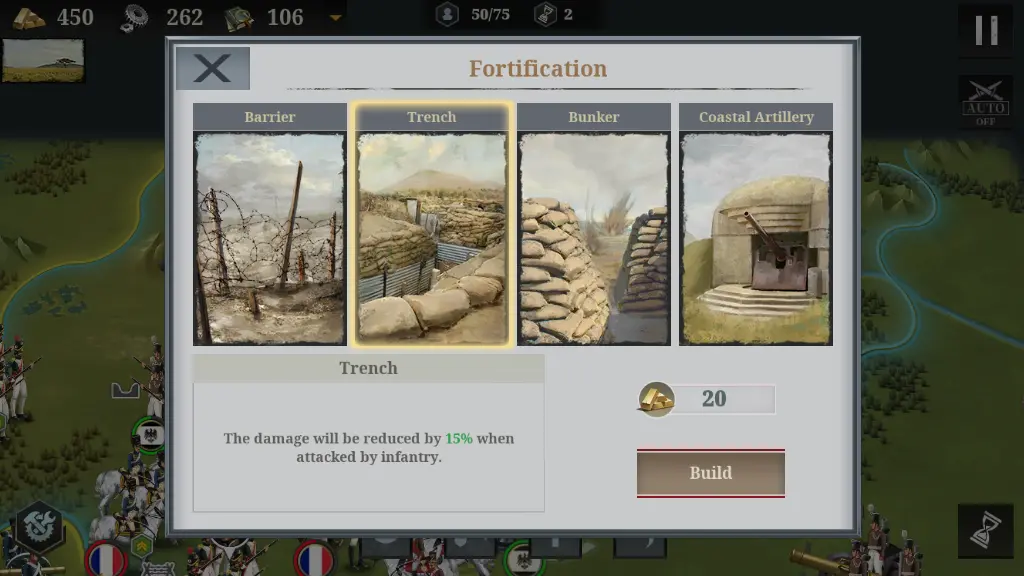
Now knowing your terrain is all well and good, but what if you’re stuck with a wide stretch of flat, indefensible No-Man’s Land between you and the enemy? That’s what Engineer units are for. Engineer units are marked with crossed shovels when inspected.
Usually, it’s the dirt cheap Militia and the highly trained New Infantry who can dig trenches and lay wire, mostly because Militia are press-ganged civvies in large numbers and New Infantry are trained well enough to carry the heavy loads needed for trenchwork.
Fortifications essentially act as constructible Terrain tiles you can place on flat plains. Engineers can set up Barriers to hamper Cavalry units (Except Tanks, which historically and in-game were built specifically to crush Barriers like barbed wire with their sheer weight), Trenches to protect against Infantry assault, Bunkers to shield units from Artillery barrages, and Coastal Artillery to increase any unit’s damage against naval forces too close to shore. They’re a good reason to always have a couple of Militia units around, so you always have access to Fortifications.
Fortress Construction

Beyond basic fortifications like trenches and wire, you can also set up defensive Forts of different sizes on flat land. You do it the same way you build Structures since they’re over at the furthest right of the Structure selection. The smallest Forts carry machine guns and can shoot enemies next to them, and the larger Large Forts and Imperial Forts after them pack artillery and can attack 2 tiles away.
Just remember: Forts take up Structure space, so you’re sacrificing space for a Stable or Factory if you have too few allotted structures for a City. You should also watch out for Artillery, Naval vessels, Imperial Russian Grenadiers, and French Old Guard units since they deal extra damage to Forts and Cities.
Defensive Barrage
When you set up a defensive line, putting some long-range artillery (Not Siege Artillery or Mortars since they are direct-fire units that happen to deal the Artillery damage type) behind that line is usually a good idea.
Even though Artillery does less damage to most units that aren’t Armored Cars, Tanks, Ships, Forts, or Cities, they still do enough to contribute if their HP is high, and having them fire first before your troops once the enemy hits your defensive line means the enemy will do less damage on the counterattack once you order the front of your line to fire. Do your best to make sure your defending units and the enemy’s objectives are within range of artillery cover fire.
Holding Fire
When you fire, the enemy fires back, as is right and gentlemanly to do so in a war. If a unit is weak but in a position to delay the enemy, it may be better to let them hold their fire so they don’t get killed immediately by counter-fire: This forces the enemy to waste movement points killing them on their own turn, often blocking that enemy from moving as far as it could have had it killed your unit during your own turn via counter-attack.
Besides, it’s often not worth it to attack a strong unit with a badly damaged unit, since the paltry damage your badly injured troops would cause often isn’t worth the turn the enemy will waste attacking the damaged unit (or taking a longer path around them) on the enemy’s turn.
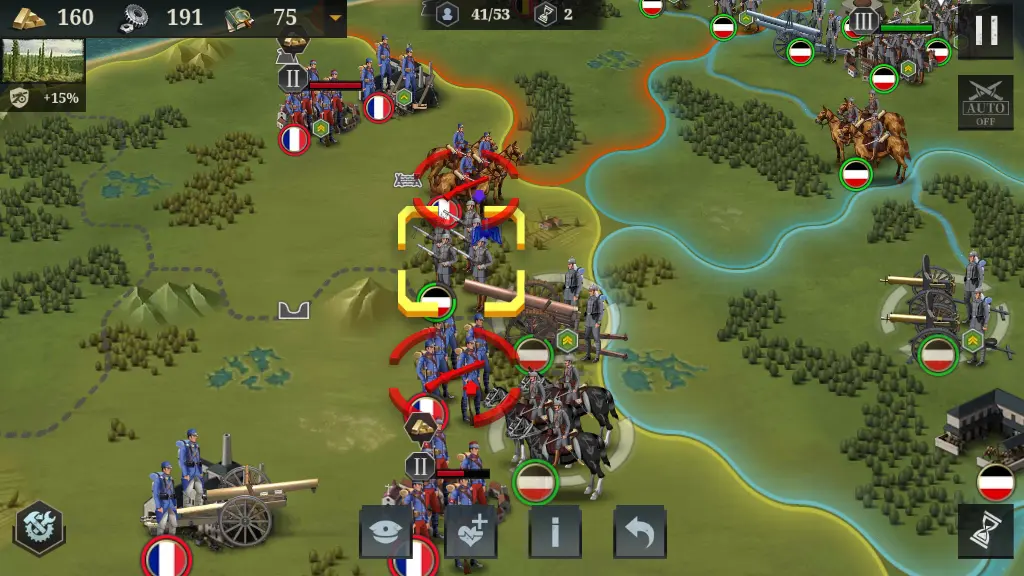
GENTLEMEN, FIX BAYONETS!: ON THE ATTACK
If you’re the commander blowing the whistle for your soldiers about to go over the top, it helps to know tactics better than just sending good men to die heroically but pointlessly in front of the enemy machine guns.
Focusing attacks on enemy weak points, going around the enemy to strike important targets, and always bringing artillery behind you are some of the more basic things you should know. Once you’re done defending or if a mission has an offensive objective, you can use some of these tips to break the deadlock depending on the situation you find yourself in.
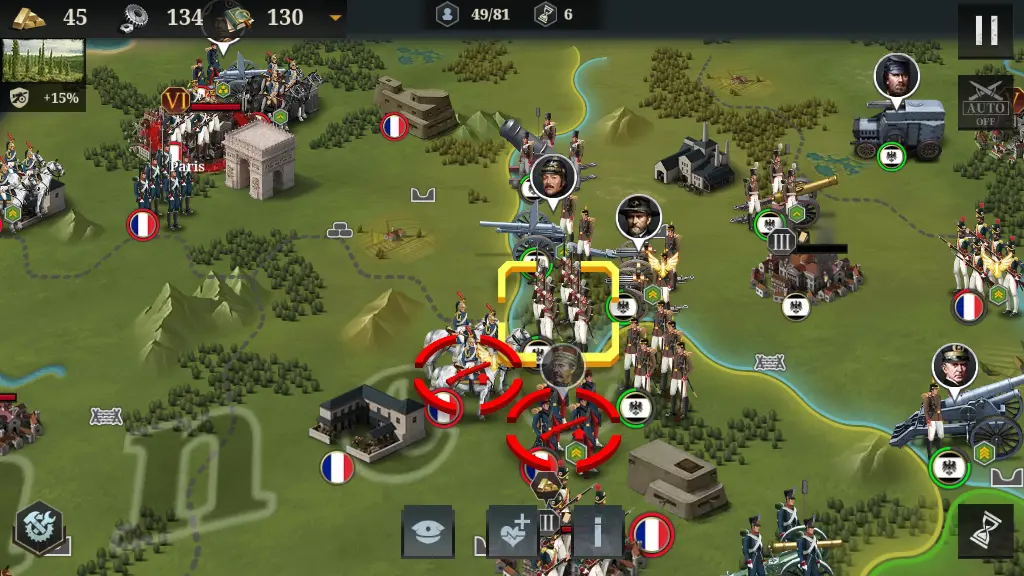
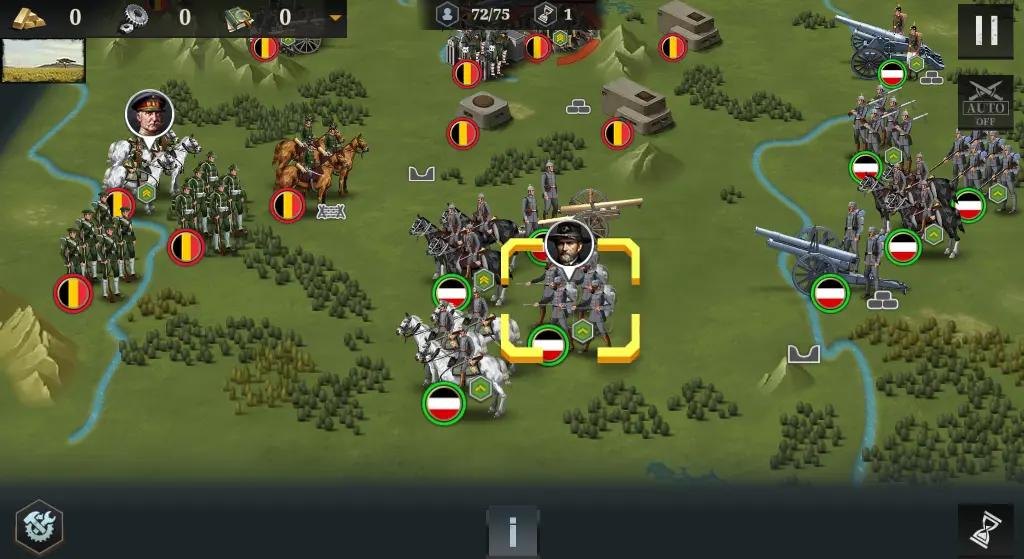
A Return to Maneuver Warfare
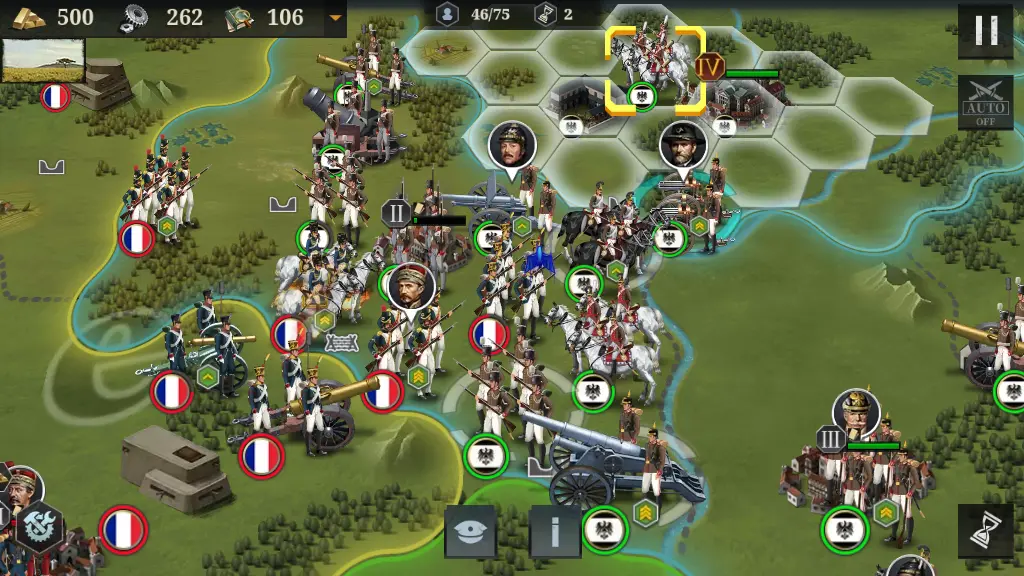
The typical image of the First World War is a static horror of men charging headlong into entrenched machine guns, gas, and artillery, though the reality is more complicated. Maneuver and combined arms warfare, while currently being difficult due to modern weapons and their deadliness stopping high-speed large-scale horse cavalry maneuvers, was quickly returning as a popular assault method on the infantry squad scale as armies scrambled and experimented tactically and technologically to break the mind-numbing deadlock of No-Man’s Land.
If a defender’s goal is to ensure multiple units get a shot at anyone stupid enough to attack their line, it’s the attacker’s goal to ensure their assault can surround or penetrate anyone stupid enough to stand their ground. The hex-shaped grid of the map means up to six units can strike one target, though realistically gunning for 3 plus artillery is good enough.
Probe the enemy line for weak spots such as holes, injured units, low veterancy units, or low-tier units, penetrate the line, then hit them from the back and engulf the rest of their army. If no hole is forthcoming, go around the target and do the same thing! They will either be forced to reply by strengthening their flanks and thus making their center more vulnerable, or holding their formation and giving your flanking units an easier time bypassing the line.
Focus Fire Weak Spots…
Unlike defending, on the attack it is usually much better to focus on enemy targets until they die. That way, you can break through the gap that the dead enemy makes and surround the enemy, or run to the objective, especially if it’s a city that needs capturing. Once your forces pour through that hole, the enemy is in deep trouble.
Focusing fire is especially important for dealing with enemy Generals: You’re usually attacking weaker units to break through and encircle the stronger General-supported units, since taking them one-on-one with anything less than another General-supported unit or a unit with both heavily superior veterancy and damage-type advantage rarely ends well.
… Then Target Enemy Generals
Speaking of focus-firing, one of the main reasons you are focusing on smashing through weak spots in the enemy line is to get in a better position to crowd the enemy Generals with your own army. General-supported units are incredibly dangerous since even bottom-tier Generals give them huge HP and damage buffs, rendering even lowly Militia units surprisingly irritating. That being said, Generals can only be deployed once per General on both sides for a max of 5: If you take one out, that’s a giant problem permanently solved for the rest of the battle.
Artillery Before Assault
Just as with defending, keeping your assault within range of your own artillery is usually a good idea. Artillery can fire before your troops attack to soften up enemy defenses. That way, your assault forces will take less damage from counter-attacking foes. You will also need artillery to smash through enemy Forts and destroy the enemy’s City walls so they can be captured by your units.
Cannon Fodder In Front Of The Elites
It may be tempting to simply save up for and try to spam the strongest unit currently available to you, such as Tanks, Armored Cars, and Heavy Machine Gunners. After all, they hard-counter a lot of annoying units like mid-tier Artillery spam and high-end cavalry, utterly shred Infantry which are rather common units, and are generally quite powerful.
The key word is try. You’ll soon change your tune if they get swarmed: It really helps to have a properly bulky army before deploying high-power units like Armored Cars, Tanks, and Heavy Machine Gunners. A mass of cheaper units such as Light Infantry and Militia can deny more land and space to the enemy than a few really strong units while protecting those high-value units from unnecessary damage.
If Artillery attacks first, this means lower-tier units attack next, and your expensive units should hit last, and if you think the blow will just about kill the target whenever possible to maximize the damage they deal while minimizing the damage they take.
Pit Stops In Enemy Camps
Speaking of map control, if you see an unguarded or exposed enemy-controlled production structure (Stables, Cities, Factories, Docks), plonk any available unit you own over it. While this does not capture the smaller production structures such as Stables, Factories, and Docks, it does disable them. The structure will stay disabled even if you move your troops out of it, though the enemy can put the structure back into operation if they move their own troops over it while they still control the City it’s connected to.
To make it even harder for the enemy, you can keep your units on top if you do it in the middle of a huge fight. This is much harder to do to Cities since you need to break their walls’ HP down first even if they’re empty. That being said, if the enemy City’s walls are in pieces and your troops are in marching range, take it before the enemy makes Infantry to block you off!
Offensive Camp Construction
When on the attack, it may be prudent to construct your Stables and Factories at or near the outer edge of your City’s control zone, pointed toward the enemy. While this puts them at greater risk of being disabled by crossing enemy troops, this also means your own units get to the front faster. Sometimes, it may even be worth demolishing existing buildings just to reposition them more effectively!
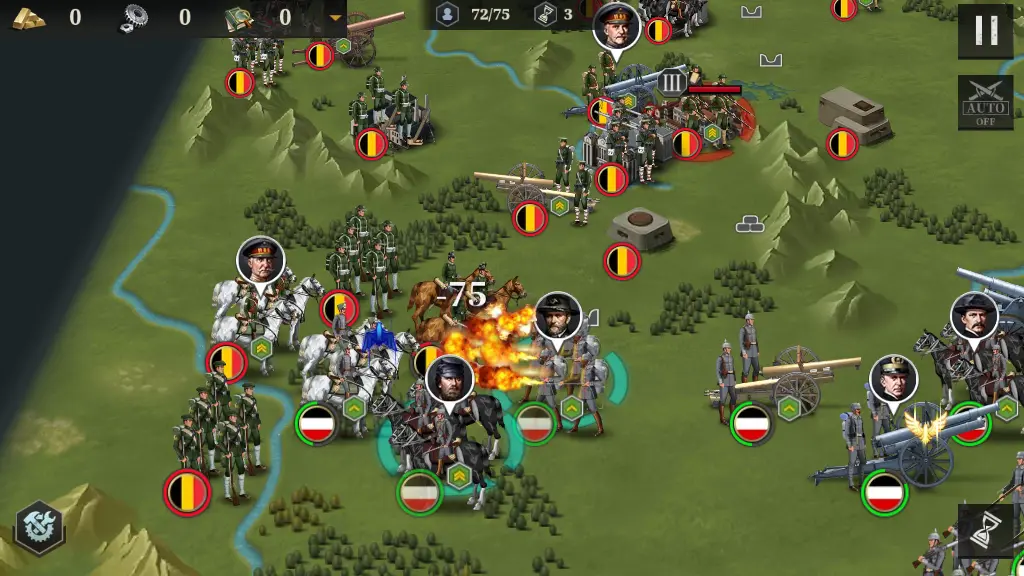
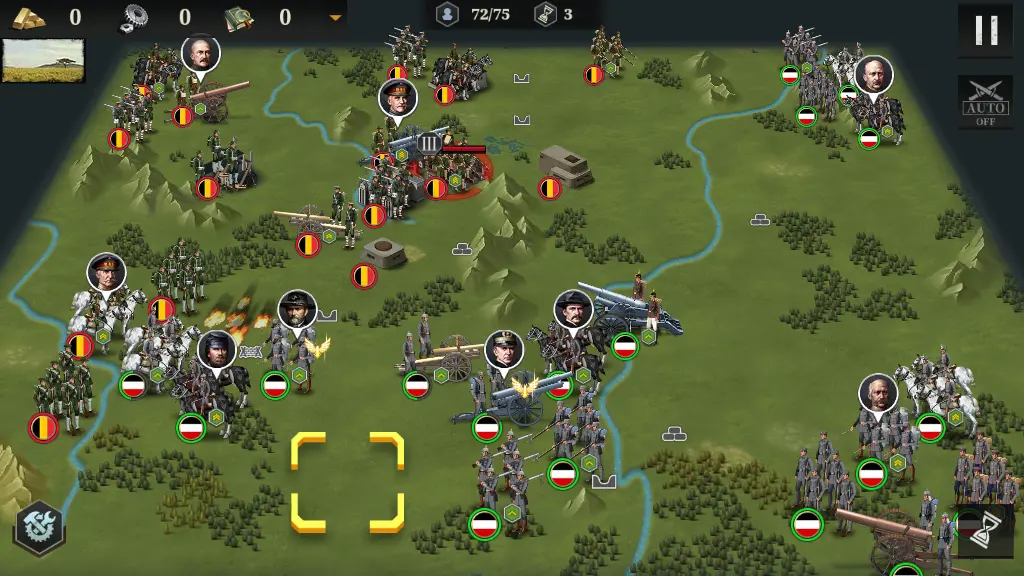
DAMAGE TYPES
There are several damage types in the game, indicated by the icons depicting what weapons a unit carries with them. They correspond with the armor types No Armor, Light Armor, Medium Armor, Heavy Armor, Armored as in vehicles, and City Defense as in anything made of bricks or cement.
Damage types change for certain units across different eras, such as Militia from the American Civil War using Muskets and Militia from the First World War using Rifles, so we figured showing the damage types would be more important than showing the unit types since their use cases can change drastically across different eras anyway.
Cold Weapons: The Chill of Blade and Bayonet
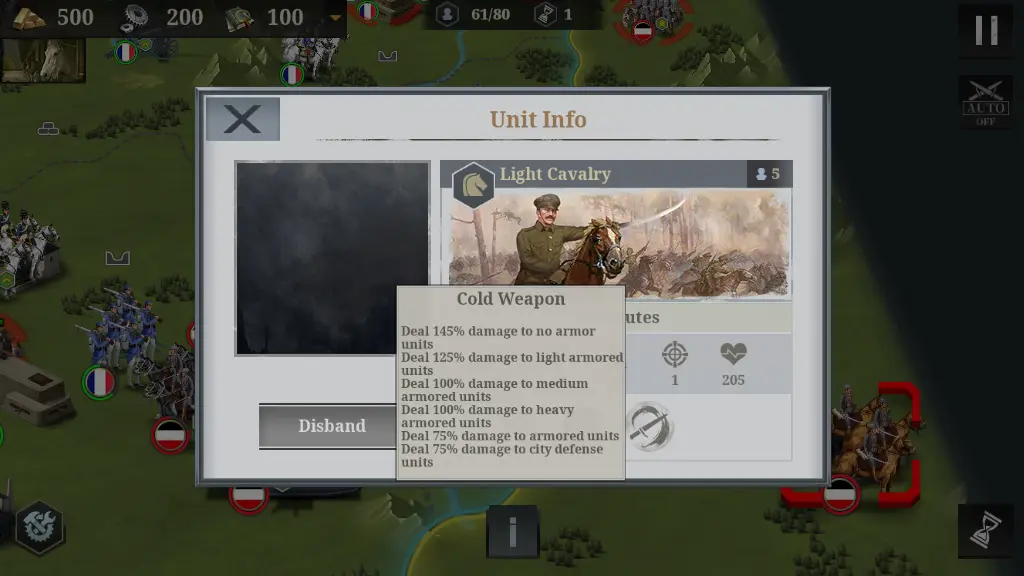
Typically reserved for Light Cavalry, Cold Weapon damage is what you get from using bladed melee weapons. This is the most straightforward damage type: The lighter the enemy’s armor, the more deadly it is.
As you can expect, this is pretty nasty against Infantry of all types, especially in the World War 1 era where all infantry wear the No Armor type, but pretty weak against Artillery and heavier horse Cavalry units who typically wear Medium armor, and entirely worthless against Armored Cars, Tanks and brick walls. Of course, Light Cavalry has a relatively poor attack power, so you don’t often see Cold Weapons doing a lot of damage anyway.
Musketry: Relics of a Bygone Age
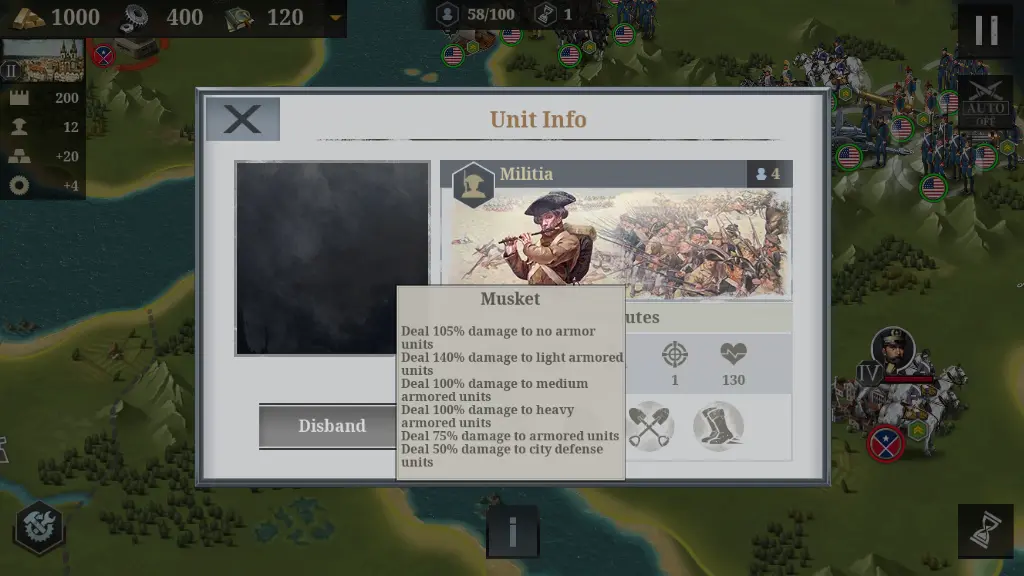
A common damage type in the pre-WW1 era missions but entirely being supplanted by Rifles (Unless you’re French Guard Cavalry!) once you hit missions in WW1 proper, Muskets are typically associated with high-tier pre-WW1 cavalry units and low-to-mid-tier Infantry units of the same era.
They are decent against No Armor, incredibly strong against Light Armor, deal only their base damage against medium and heavy armor, and as expected from squishy lead balls powered by primitive black powder, are complete garbage against Structures, Armored Cars, and Tanks.
Rifles: The Common Soldier’s Weapon
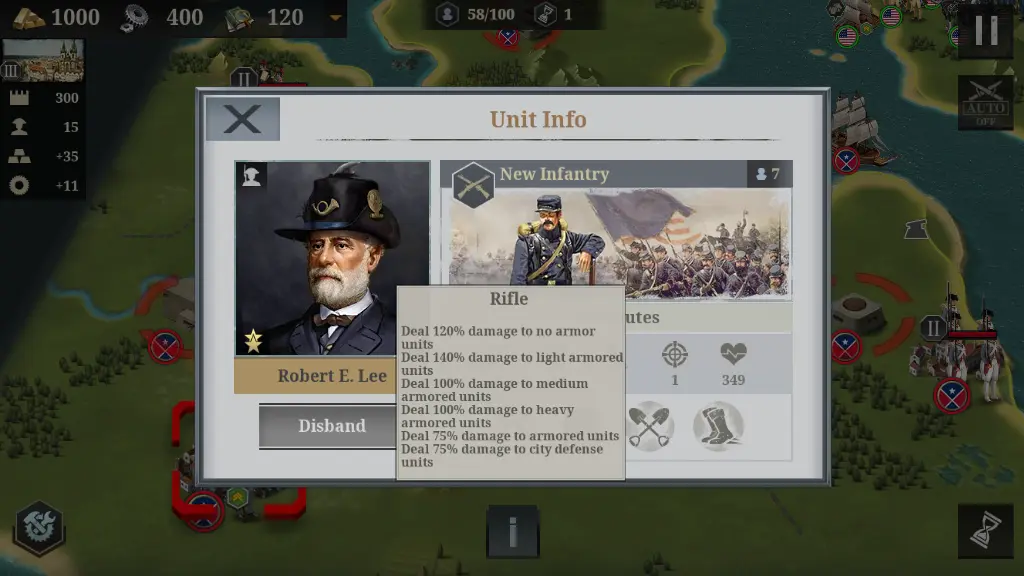
Reserved for New Infantry during the Civil War era but slowly replacing all Muskets until WW1 arrives, Rifles are fairly similar to Cold Weapons in damage spread, though they have the advantage of being put on units with much higher attack power than Light Cavalry. They’re a bit stronger vs Light Armor than No Armor, but other than that they match with Cold Weapons in their effectiveness, which is to say, they’re very good at killing Infantry and Horse Cavalry units.
As usual, they’re just okay against Artillery and their habit of wearing Medium and Heavy Armor, and utterly pathetic against anything with wheels, caterpillar tracks, or made of bricks.
Light Machineguns: Portable Fire Support
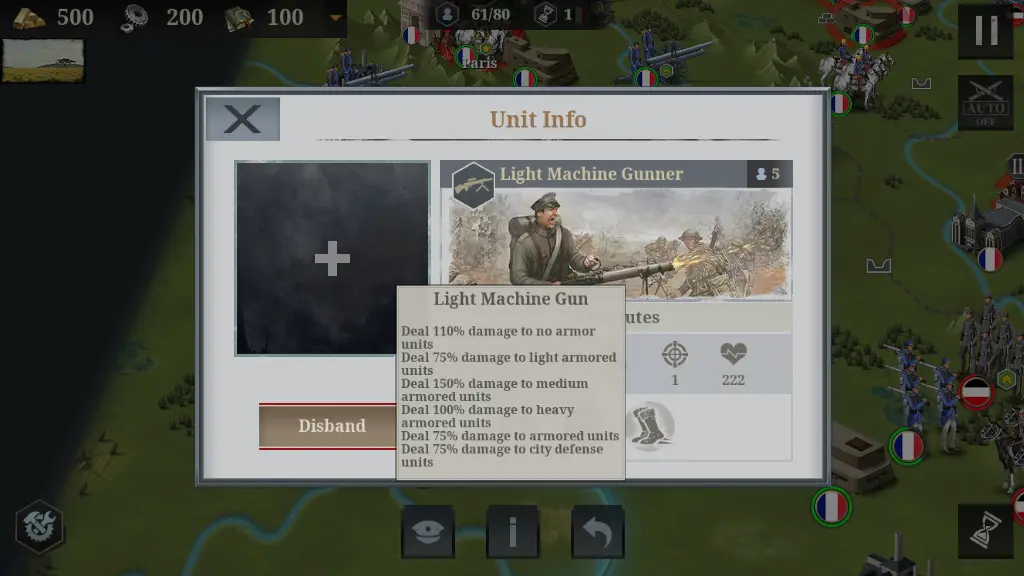
The Heavy Machinegun’s little brother, Light Machineguns are the final basic damage type you unlock, only available for the Light Machine Gunner infantry unit in the WW1 era missions and some nation-specific troops such as French Old Guard infantry.
They’re the opposite of Rifles and Muskets in terms of damage more or less: They’re weak against Light Armor, decent against No Armor which is common for WW1-era Infantry units anyway, and utterly destructive against Medium Armor, making them devastating when they get within shooting range of enemy Artillery units.
That being said, they’re only used by the mid-tier Light Machine Gunners, so their damage stat is only roughly equal to Light Infantry. Use them together as needed since they do well against different enemy types. Of course, the puny little bullets of Light Machine Guns don’t do much against armored vehicles and buildings.
Heavy Machineguns: Industrialized Murder
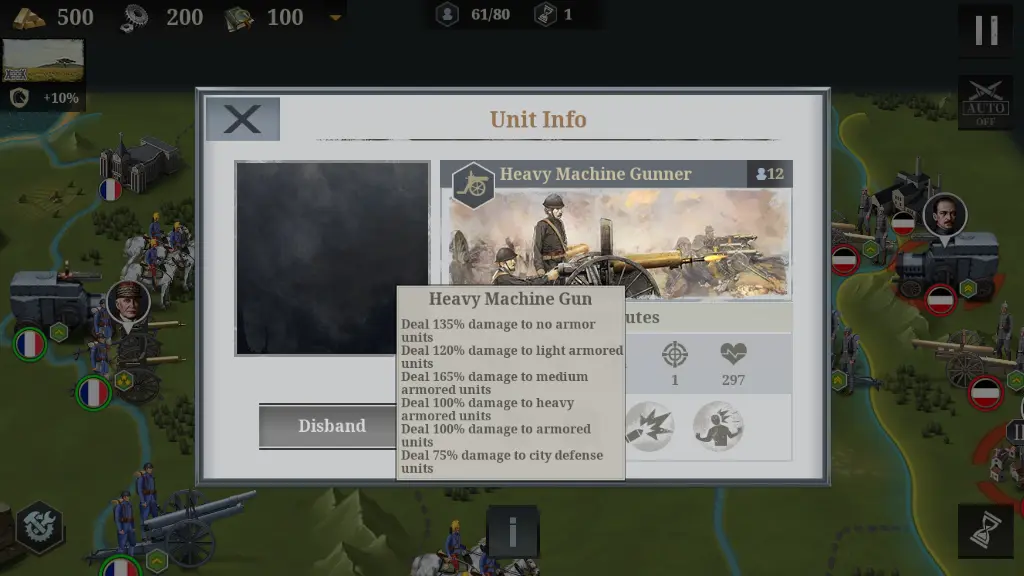
Available in the form of the Gatling Gun as early as the American Civil War, and as the Maxim Gun in World War 1, Heavy Machine Guns are used both by Armored Cars and Heavy Machine Gunner infantry.
Not only are Heavy Machine Guns the most deadly damage type as they deal base damage against Heavy Armor units and Armor used on vehicles and gruesomely high percentages against everything else that isn’t made of bricks, but they are also carried by two units with alarmingly high ATK stats, with the Armored Car hitting 65 and the Heavy Machine Gunner hitting 63, all before veterancy and Generals are taken into account.
This also means they are very hard to deploy as Heavy Machine Gunners and Armored Cars are highly expensive units and have to be deployed from heavily upgraded Cities. If you ever have to defend up close, giving a Heavy Machine Gunner a good Infantry Officer and sticking them inside a soon-to-be besieged City can work wonders as long as you have something to counter enemy Arty.
Flamethrowers: You’ll Never Forget The Smell
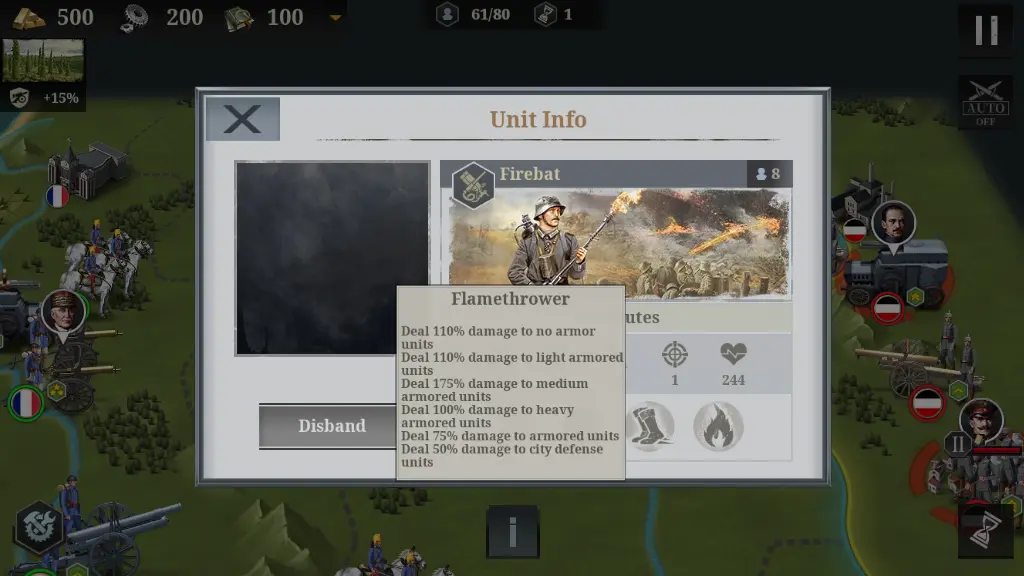
Feared and hated by their foes and sometimes even their friends, anyone captured alive carrying Flamethrowers was often not treated properly per laws about humane handling of POWs for one simple reason: Burning to death is one of the least fun ways to die, down near the bottom of the list with mustard gas, nuclear radiation, and Bubonic Plague.
Flamethrowers have a similar damage profile to Cold Weapons but are skewed in such a way that even against Heavy Armored units they can deal neutral damage. It’s also equipped exclusively on the German Firebat, a WW1-era unit with a disgustingly high ATK stat beating that of New Infantry.
Its high damage percentages mixed with the power of the one unit that uses it renders Firebats and their flamethrowers extremely dangerous. As a side note, Firebats can set Cities on fire to damage their internal structures, even if they do very little immediate damage to the City’s walls because of the Flamethrower’s percentages.
Artillery: Endless Deafening Horror
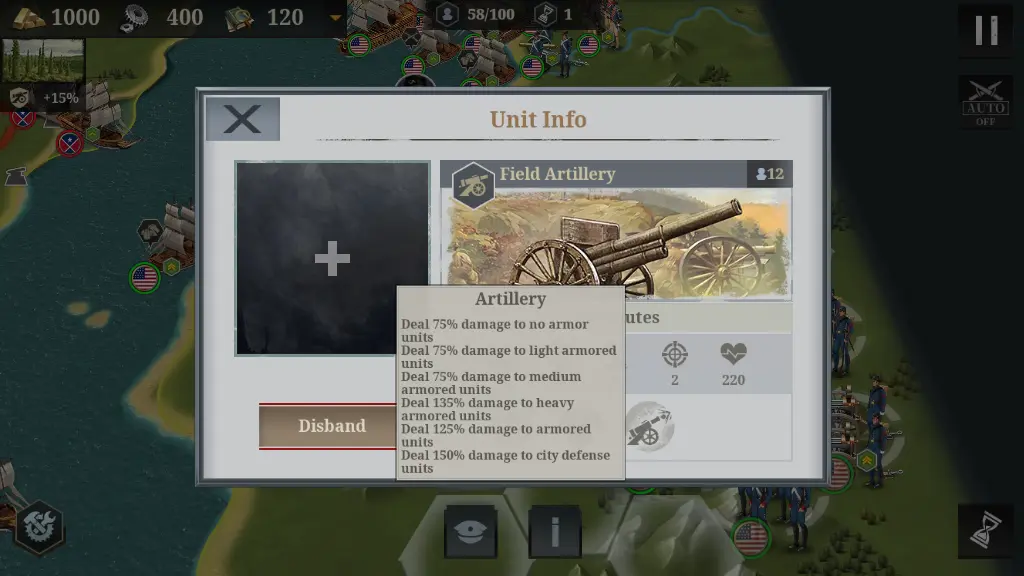
Finally, something that can break walls and kill Tanks! Artillery could be considered the weakest damage type in the game since its percentages are pretty bad against most of the common combat units, but the fact it’s often mounted on the only units that can fire past a single tile’s range more than makes up for it.
They are the opposite of Cold Steel: It’s very weak against No, Light, and Medium Armor, but alarmingly deadly against Heavy Armor, Armored vehicles, and City Defense structures. While Artillery will often just do enough to soften Infantry and most Horse Cavalry units, they can really mess up expensive late-game units like Armored Cars and Tanks provided they get the first shot in.
They are also pretty much mandatory for assaulting and capturing Cities since Artillery is the only damage type that does good damage against City walls other than Chase Guns, which rarely get within range to bombard Cities.
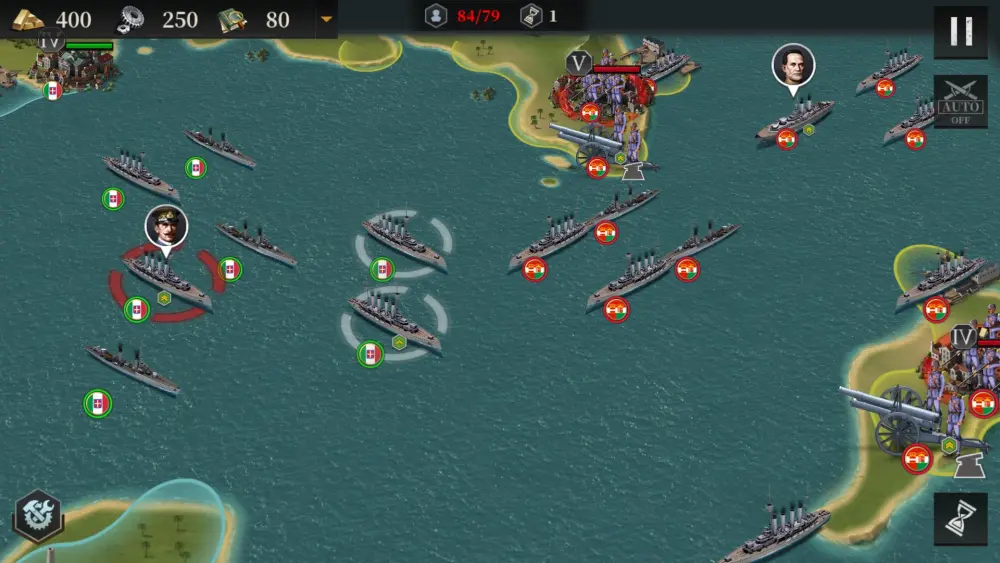
Chase Guns: Naval Bombardment
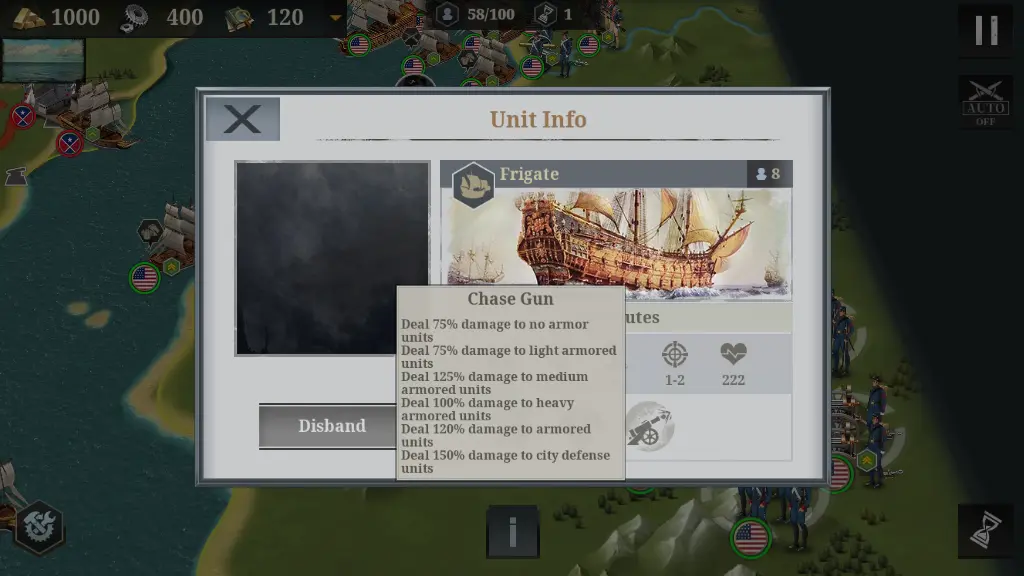
Chase Guns are basically Artillery but better: They have strong damage vs Medium Armor targets while having closely similar percentages to Artillery everywhere else, thus removing one of Artillery’s weaknesses. This would be amazing, except Chase Guns are only equipped on Naval units and you’re rarely in a position to use them against Cities.
Though they can be quite useful in Conquest Mode if you pick a country with access to the sea. Just like Artillery, Naval Units and their Chase Guns typically have a 2-tile firing range, allowing them to shoot past the shore.
And this ends our European War 6: 1914 Beginner’s Guide. We hope this helps you get your troops across No-Man’s Land and to a victory markedly less Pyrrhic than was common during the actual war. If you have your own tips, don’t hesitate to leave them as a comment below so other players can read them!
Brian
Saturday 14th of December 2024
What about income, the means to make more gold materials and how to use them properly.