Metroidvanias have always been one of my favorite game genres. There’s nothing quite like tense 2D platforming and combat action mixed with exploration, flavored with a sense of dread that’s tempered by the feeling that you’re continuously growing stronger. I’ve played most of the Castlevania series, Dead Cells, Hollow Knight, Salt and Sanctuary, Bloodstained, Blasphemous…and now Elderand.
In Elderand, you don the sabatons of a nameless mercenary destined (and presumably well-paid, it sounds like a suicide mission, after all) to end the tyranny of the vile Sserthris…at least, until you get shipwrecked and find yourself bereft of equipment and support. No matter.
To get to your goal, you’ll need to master deadly real-time combat, strengthen yourself via your experiences and arm yourself with better tools, and explore the mysterious land you find yourself in. It’s a bloody good time. Literally.
Elderand is available on the Google Play Store and the App Store; those looking to play it on stronger machines can also get the game on Steam. Note that this game was ported from the PC and is a paid game – there are no microtransactions or ads anywhere. I’ll be using the mobile version of the game for this beginner’s guide so you can easily follow along.
Veterans of Metroidvanias (both roguelike and not) as well as of FromSoft’s usual mechanics will quickly be able to intuit most of the game’s mechanics and should fit right in. If, however, you decided to pick the game up and are unfamiliar with the genre, I bid you welcome to this comprehensive guide to Elderand where I’ll arm you with the basic knowledge you need to grow stronger and hopefully triumph over the forces of darkness!
In this Elderand beginner’s guide, we’ll be covering:
- The UI.
- Basic concepts – leveling up, scaling, the various obstacles you’ll find in the castle, and so on.
- Mastering movement – movement is one of the few things you can control, and in Elderand, you’ll need to learn how to not only jump, hop, and dash your way to victory, but how to finely control your movements so that they become methods of attack, not just defense.
- A quick walkthrough of Delinquent’s Breach until Shakna (and a bit beyond) which will guide you in getting some nifty items to start your quest with. After that, you’re on your own!
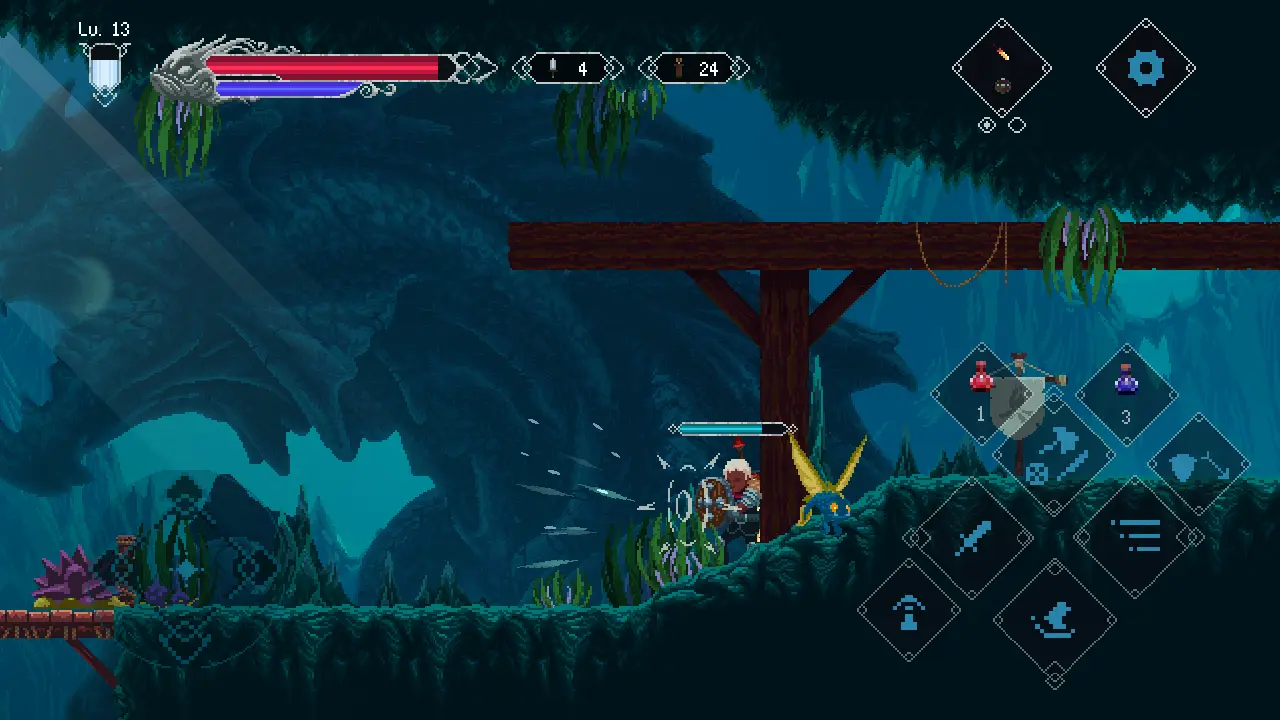
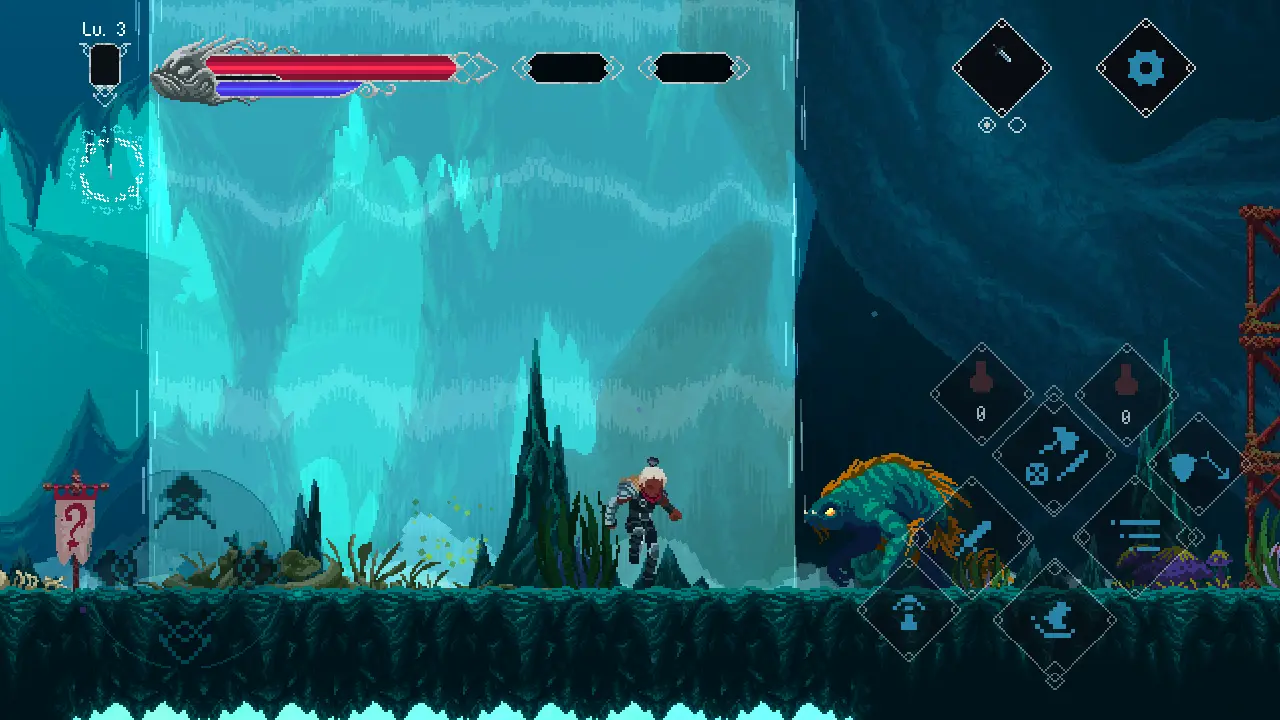
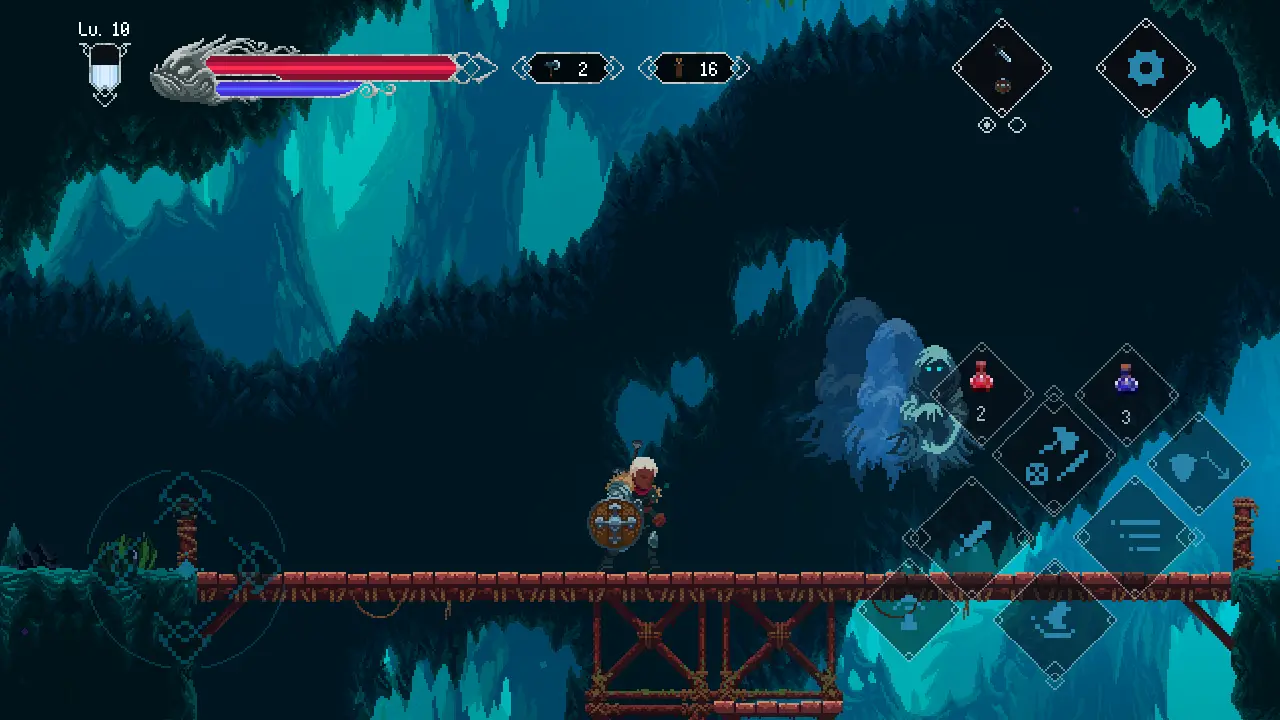
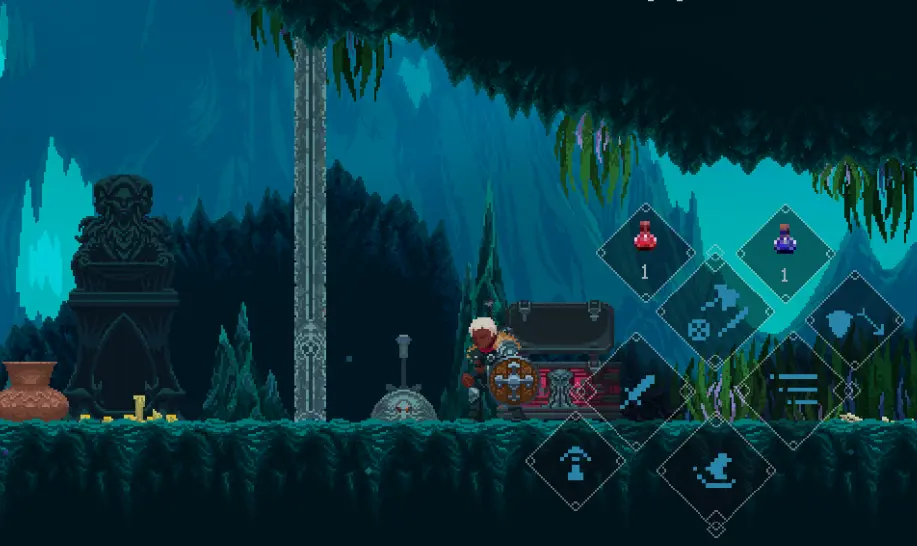
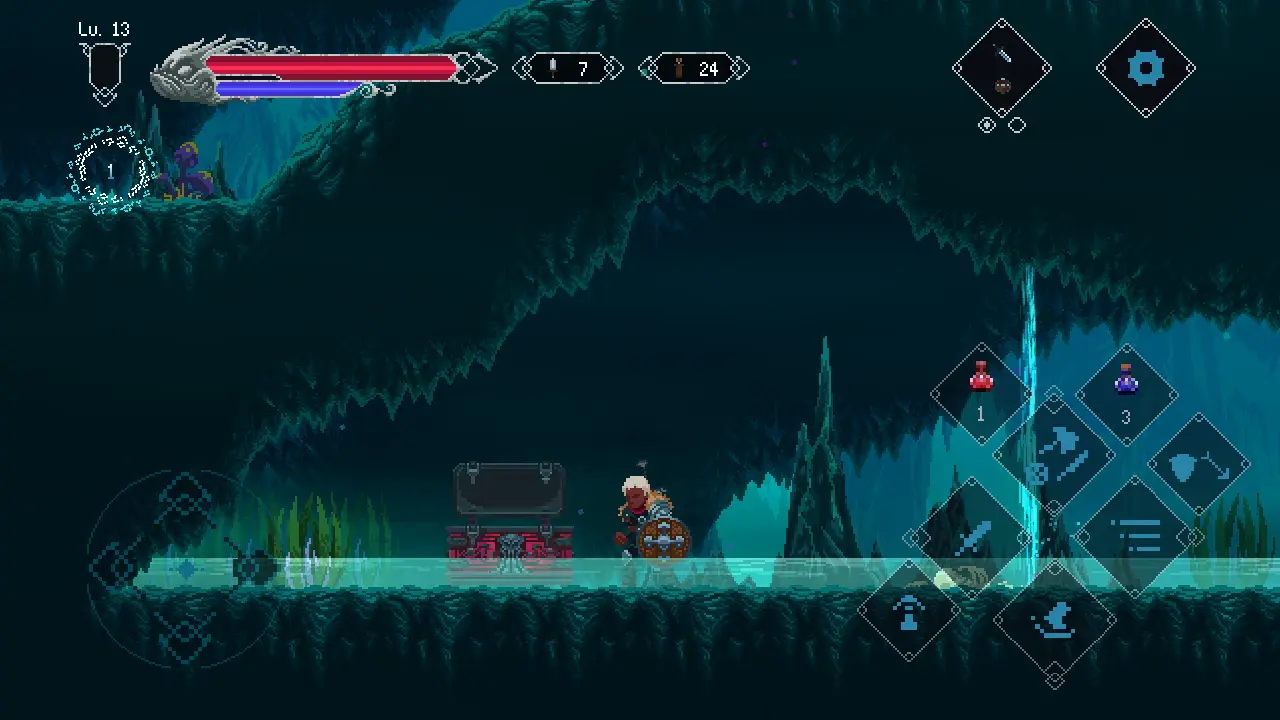
The UI
Let’s be real: one of the biggest obstacles to enjoying Elderand on mobile is the massive bunch of buttons the game gives you. It’s time to learn how to navigate them.
The UI
There’s a lot going on Elderand’s screen…
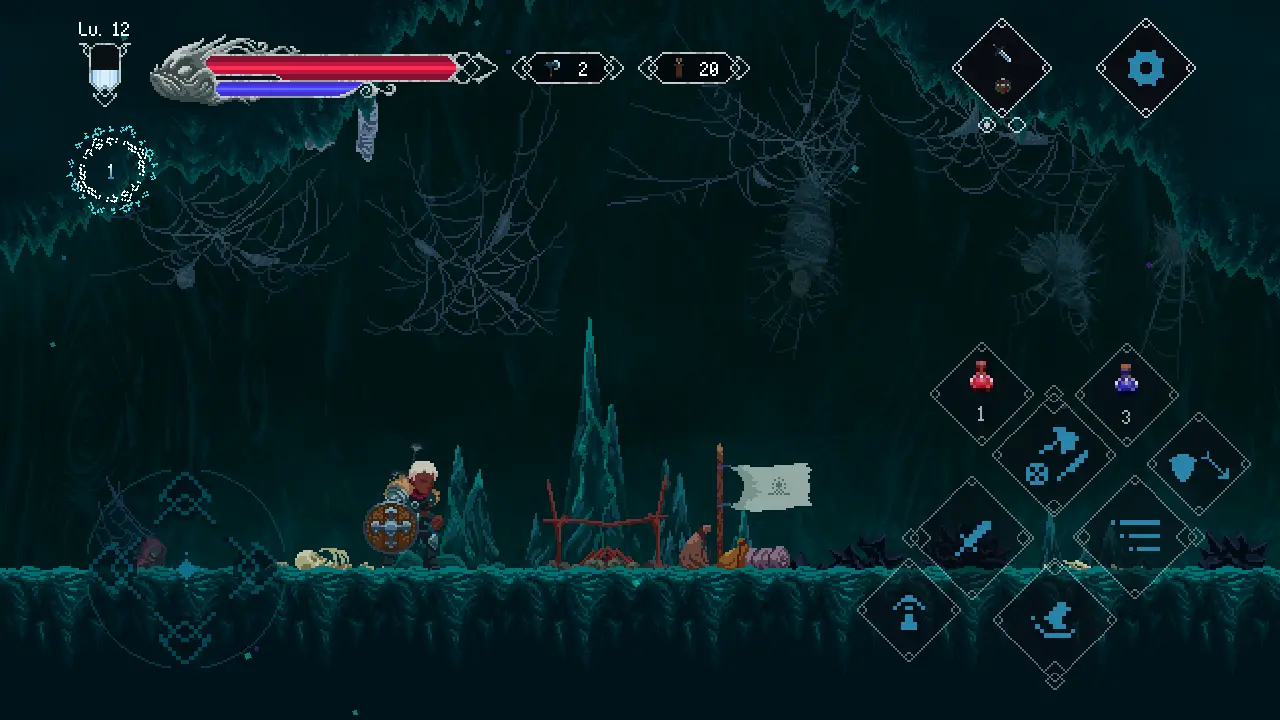
…so let’s get you acclimated. Let’s start with the upper left.
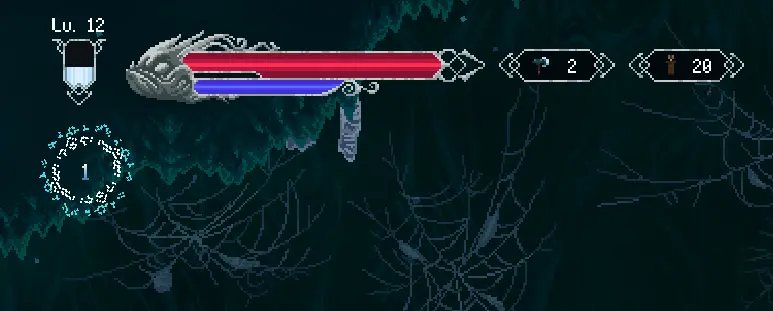
In the upper left, you can see your health (the red bar) and mana (the blue bar). Both of these can be replenished by picking up and using potions, and interacting with a save point also fully heals you.
To the left of that is your experience bar. As you kill monsters, the white part fills up, and when it gets full, you gain a point that you can spend on one of your four stats. You can also see your level above this bar.
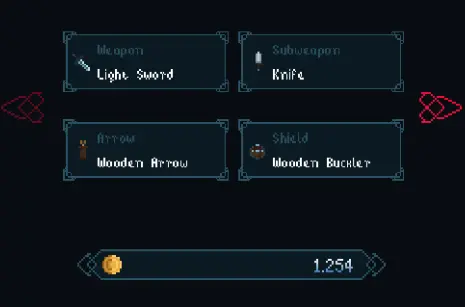
To the right of the health and mana bars are your subweapon and arrow ammo count. You unlock these as you play through the prologue, and more ammunition can either be purchased or found in pots.
Next is the right side of the screen:
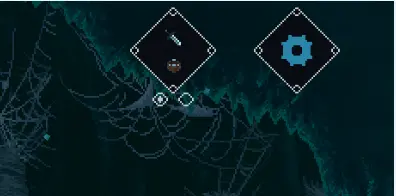
The left button on top of the screen allows you to switch equipment sets. You can have two equipment sets at a time, and both of them can be fully customized – as in not just different weapons, but different subweapons, armor, accessories, and so on.
The gear button beside it opens the main menu. Here, you’ll be able to access your equipment, read the notes you’ve been picking up, level up your character, view the map of the island you’ve uncovered so far, check your crafting and upgrade materials, and change the game’s settings (including difficulty).
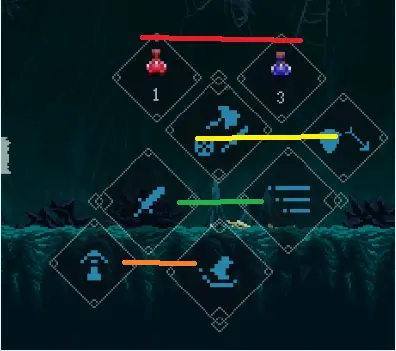
Finally, the bottom right of the screen.
On top (red line) you have your health and mana potions. By default, you can only have 3 of them at once but can replenish them via shops or drops from pots.
The yellow line’s first button is use subweapon, while the second one is use ability – the ability depends on your weapon or your off-hand equipment. With a shield, this ability will block; with a two-handed weapon, you’ll get different moves.
The green line’s first button is attack, while the second button is dash.
The orange line’s first won’t do anything…yet. Keep it in mind until later. The second button controls your jump.
Elderand 101: Basic Concepts
Now that you know how to move your character around and not get lost in the buttons, let’s get to the meat of the game. Here are the concepts you’ll need to know to beat Elderand.
Quick Tips:
- Make sure to spend your stat points when you level up!
- If you haven’t committed to a weapon yet, it’s always a good idea to raise Vitality. More HP means you can make more mistakes, which lets you explore better.
- A weapon’s scaling determines what stat causes it to gain damage. Always know what stats your main weapons scale off of.
- Note that subweapons also scale off stats.
- Tap on the red arrows on the equipment screen to view all your gear slots.
- You need to press the “Confirm” on the equipment screen to swap that piece of equipment out for another. Weird, I know.
- It’s worth going through the info pages of a piece of equipment as it may reveal extra abilities that can’t be condensed into a simple “stats up” page.
- You’ll eventually gain the ability to upgrade equipment, though we won’t touch on that.
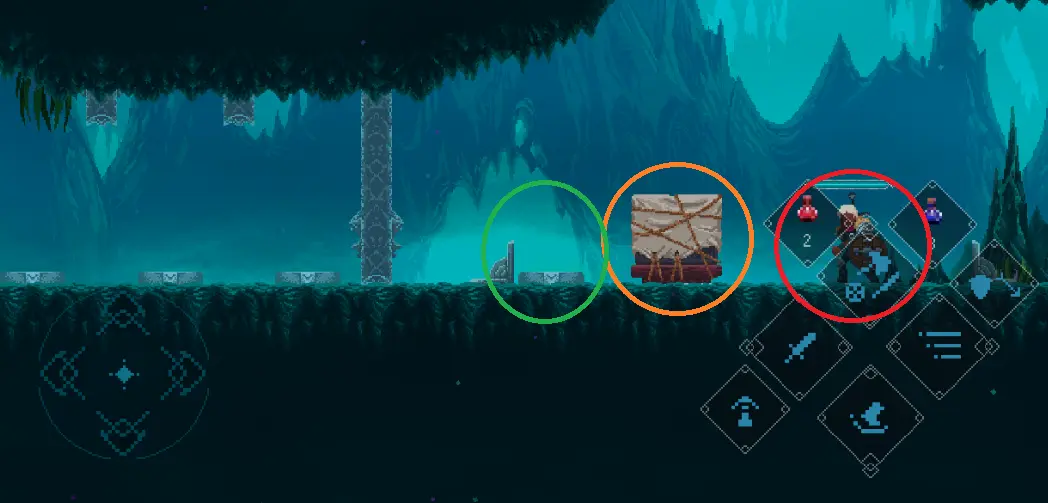
- A white banner with a campfire symbol means the succeeding room is a save point.
- Save points not only let you save your progress but also fully restore your health and mana.
- As you progress through the game, save points will allow fast travel and stat resets.
- You can spend your coins at shops. Coins are easy to get, so feel free to splurge.
- You’ll occasionally run across obstacles that you can’t overcome, such as a strange contraption or a chest that you just can’t reach. Remember where they are and come back after you’ve acquired the tools to deal with them.
Leveling Up and Stats
Don’t despair – there are stats in Elderand, and leveling up and growing stronger is core to the game’s experience. As you run around beheading various abominations and covering yourself in their innards, you’ll gain experience points. Earn enough experience points and you’ll level up, getting yourself 1 stat point.
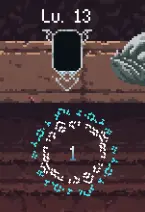
To level up, long tap on the stat point below your experience bar or go to the menu and go to “Character”. Either will bring up this screen.
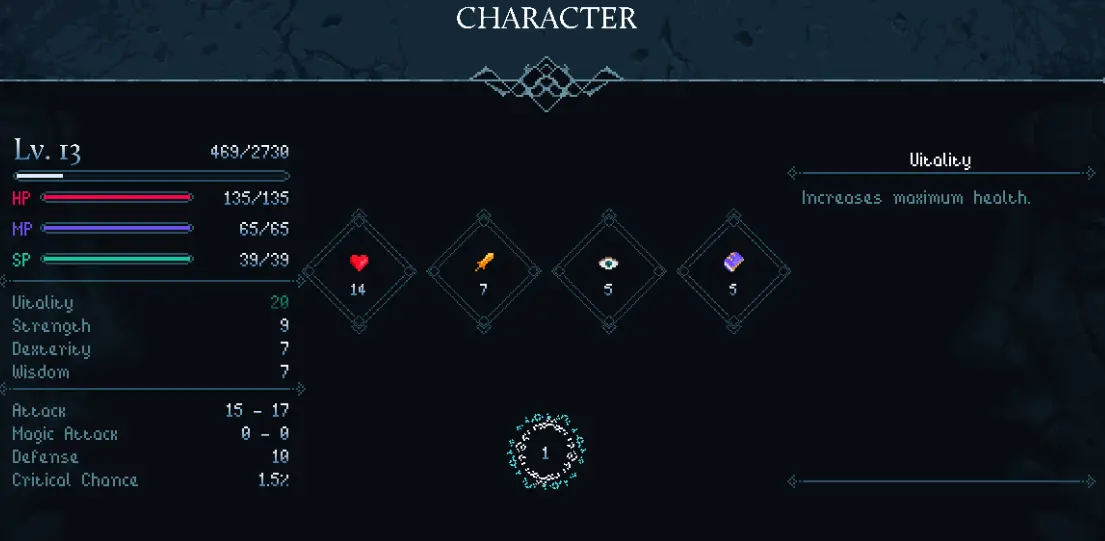
Tap and hold on one of the four stats to add one point to that stat. The stats that you can level up are:
- Vitality (the heart) gives you +5 maximum health per point. Honestly, you can’t go wrong with putting some points in Vitality. Unless you’ve already committed to a specific weapon and know what stat you’re scaling with (more on that in a little while), it’s a safe bet to put those points in Vitality as extra health is always useful.
- Strength (the sword) affects the damage of strength-scaling weapons, which cover medium to heavy melee weapons such as swords, axes, and maces. Strength also affects your SP (stamina points), with more Strength giving you more SP to burn.
- Dexterity (the eye)affects the damage of swift, finesse-y weapons such as bows, daggers, and more exotic fare. Each point also slightly raises your critical hit rate.
- Wisdom (the book) affects the damage of magical weapons, such as staves. Each point in Wisdom also gives you 5 more maximum mana.
There are also derivative stats that you can’t level up, but are derived from your 4 main stats:
- HP is your health points. Run out of these and you die.
- MP is your mana points. These are consumed by using the special attacks of magic weapons.
- SP is your stamina points. These are used in strenuous activities such as dashing or blocking.
- Attack is the average amount of damage you’ll do per weapon swing. This is influenced by what weapon you have equipped as well as its scaling. Again, more on that in a little bit.
- Magic Attack determines the amount of magic damage your weapons do. If you’re using a physical weapon, this will likely be 0.
- Defense determines how much damage you take from getting smacked around. Important for everybody.
- Critical Chance is the chance that an attack will do extra damage (and proc a nice “Critical!” text) when you hit an enemy.
Scaling
It’s important to know exactly what stat your preferred weapon scales off of. You may be pouring points into Strength but your daggers do the exact same damage as they did 5 levels ago. This is because of how each weapon scales.
Virtually every weapon and subweapon scales off a stat. To see what stat a weapon’s damage scales off of, look for the icon beside its damage number; in the image above, the Light Sword scales off my Strength. Thus, there’s not much point in me investing in other stats unless I also want to raise the damage of other weapon types!
Note that if a weapon has no icon beside its damage numbers, that means it doesn’t scale off any stat.
Equipment
Going into the island’s depths naked is a fantastic way to get yourself killed. That’s why we have multiple equipment slots to arm ourselves and keep ourselves defended from the many monsters roaming our new, unfamiliar world.
You have multiple equipment slots: a weapon, a subweapon, ammunition, a shield (if applicable), armor, two accessory slots, and two potion slots. Tap the red arrows on the left and right of the equipment screen to scroll through your various slots.
As you explore the island, you’ll find a lot of useful gear. To switch equipment, tap on the slot you want to change, then tap the “Confirm” button on the lower right. I spent an embarrassingly long time figuring that one out.
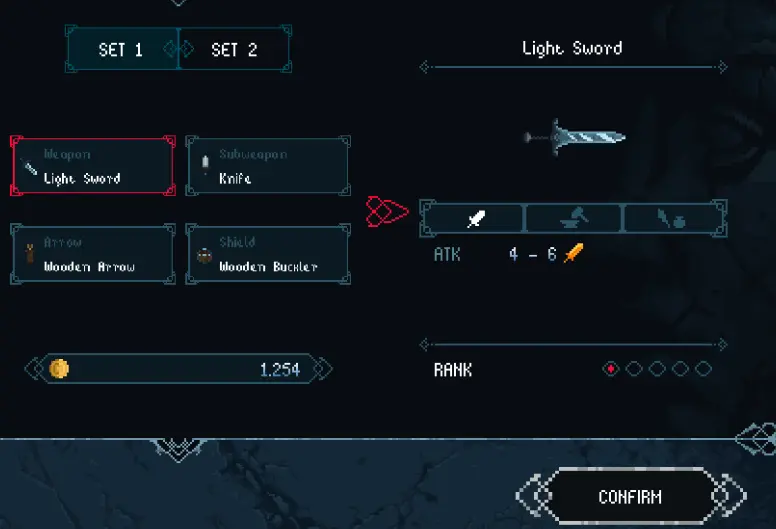
Tapping on a new piece of equipment while switching will show you how it will change your stats on the left side of the screen.
Remember that you have two equipment sets, so it’s a good idea to have two sets of equipment to tackle different combat situations. A melee weapon set and a ranged weapon set are generally a good idea, but that’s just the tip of the iceberg – you can, for example, have a gear set that weakens foes before finishing them off with slower, powerful hits from the second set!
It’s worth going through the pages of equipment. Sometimes there’s just lore, but other times, equipment will have effects that can’t be condensed into stats such as showing enemy health.
Tap on the panels below a piece of equipment’s summary to go through its pages. You may have noticed that there are materials that appear in some of these panels. Yes, you can upgrade equipment down the road.
Save Points
The castle is full of horrible monsters, but not all places are dangerous. Some are even safe…tranquil, even.

As you explore, you’ll find rooms with white banners with a campfire symbol on them. These signify save points, which not only let you keep your progress but also fully top up your health and mana. Be on the lookout for these the deeper you venture into the island.
Progressing through the game will make save points even more valuable as they’ll allow you to fast travel and even reallocate your stats, allowing you to try different builds. For now, though, don’t worry about that.
Shops
So now that you know that you can level up, how to get stronger, and how to keep your progress, you’ve probably been running around smashing everything. And probably got a nice bunch of coins in the process.
Coins are used to buy items in shops, which are occasionally found in certain rooms of the island. Here, you can trade the spoils of your ransacking for items that will actually help you survive, such as new weapons.
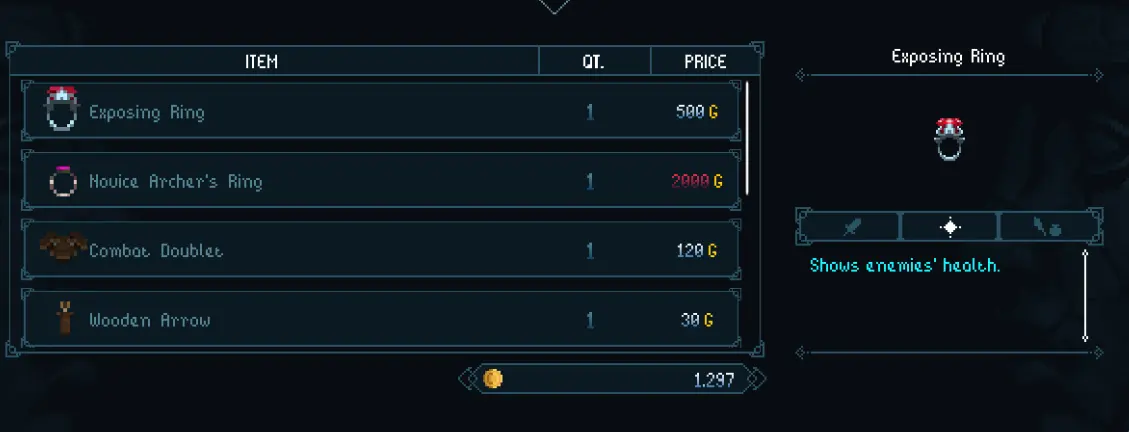
Since coins are easy to earn, feel free to splurge whenever you go shopping. The items you buy can make the difference between life and death, after all!
Obstacles and Backtracking
Finally, let’s talk about obstacles and backtracking. Presenting the player with obstacles that they can’t currently overcome as well as backtracking to said obstacles is a big part of Metroidvania gameplay.
Unfortunately, the game won’t mark these locations for you. You’ll have to remember for yourself where these obstacles were so that you can go back and overcome them when you have the tools to do so.
Mastering Yourself – Movement
While it may sound elementary, movement is one of the most important elements in a Metroidvania. Tight controls and mastery over the game’s mechanics will help you greatly in your quest to beat the game.
Quick Tips:
- Master the difference between long and short jumps. Hopping is a core skill in almost every Metroidvania.
- Air attacks are generally safer (though weaker) than ground attacks since you can change fall direction.
- You can both dash and backstep. These both consume stamina, so be mindful.
- If you have a shield in your offhand, you can block. This also consumes stamina. I would suggest instead getting the hang of dodging with backsteps and hops.
- As you progress through the game, you’ll gain more movement options. Integrate these into your play style as you see fit!
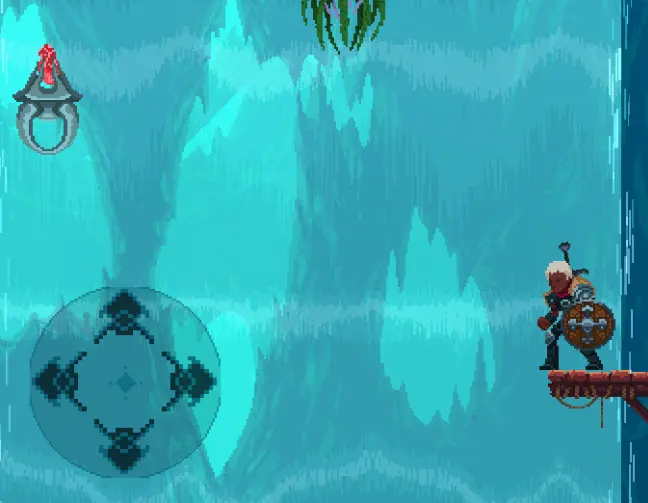
Hopping
One important trick that almost every Metroidvania employs is the hop.
Remember: the longer you hold the jump button down, the more airtime you get. Sometimes this is exactly what you want, especially when crossing pitfalls, avoiding traps, and jumping over enemies you don’t want to deal with right now. However, you can also just tap the jump button to do a shorter jump with less airtime, which is a fantastic combat tool. From animation canceling (jumping immediately after attacking to get out of the way) to hitting weak spots and even getting in a few counter hits, mastering how and where to use your hops will greatly improve your performance.
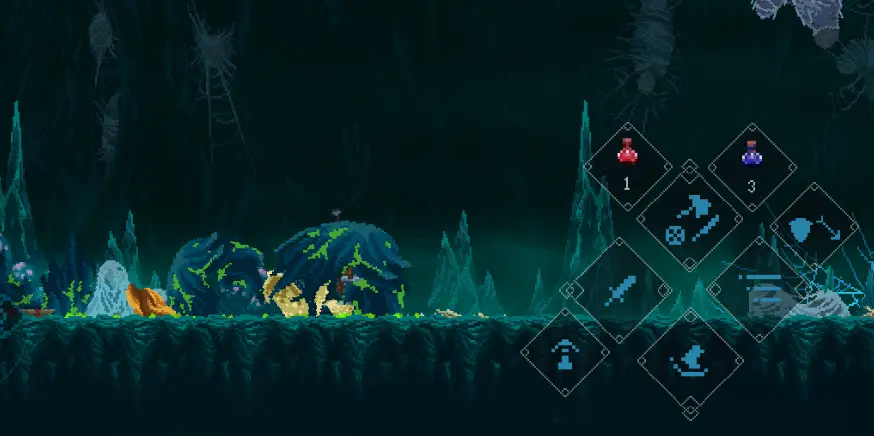
If you don’t believe me, have a look at this:
Behold, the bunny hop in action.
Air Attacks
While we’re on the topic of hopping, let’s talk about aerial attacks.

You may wonder exactly why we’re talking about this. After all, air attacks are slower and can’t combo, unlike ground attacks. However, the fact that you can change direction mid-fall makes air attacks very safe, and they’re an excellent combination of an offensive and defensive tool: jump in, make an attack, then fall backward. Rinse and repeat.
Dashing and Backstepping
You can dash and backstep in Elderand. While yes, you can use this as a simple faster movement tool, it also allows you to avoid enemy hits and make your own counterattack.
Tapping the dash button without inputting a direction will cause your character to backstep while inputting a direction causes them to dash that way instead.
Note that a dash is not a Souls roll. There are no invincibility frames during the dash – it’s your responsibility to predict enemy attacks and dash out of the way before they land!
Blocking
Blocking is another alternative if you’re a sword and board player.
Just like dashing, blocking requires stamina (SP). I would argue that it’s better to not rely on your block as most attacks can be avoided with careful repositioning (hops say hello) or just backstepping out of the way. Still, that’s just me. If you like blocking, play the game as you please!
More Movement Options
As you progress through the game, you’ll eventually gain more movement options. Each time you get one of these abilities, try to see how you can work it into your current fighting style. A good warrior seizes every opportunity, after all.
A Quick Walkthrough of Delinquent’s Breach
By this point, I’ve given you all the tools you need to succeed in the game, and it’s up to you to master them and come up with tricks of your own. If, however, you’d like a little extra help, here’s a walkthrough to guide you through Delinquent’s Breach up to the first boss of the game.
Delinquent’s Breach
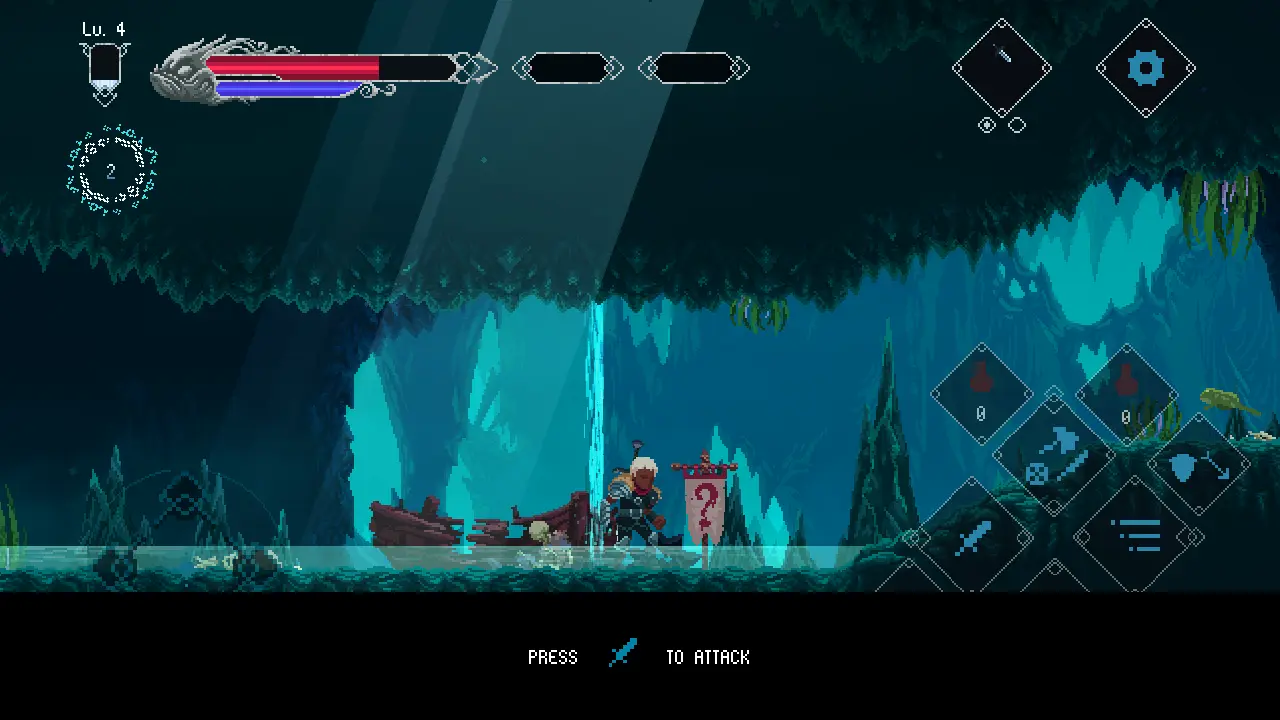
You’ll awaken from the shipwreck in an abandoned cavern? Whatever. We’ve got monsters to kill.
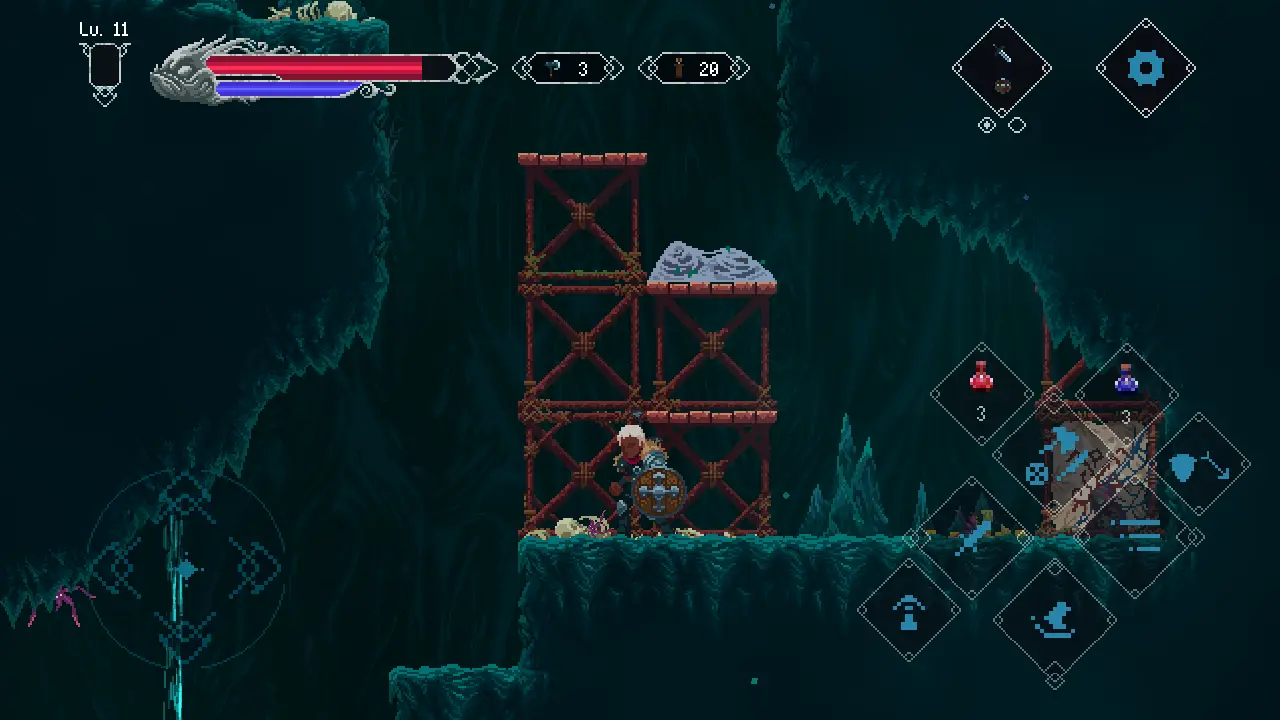
Keep heading all the way right (watch out for the geyser on the roof in the tight corridor) until you get the Light Sword, a simple weapon that will serve you well for the prologue.
Give it a few practice swings and get used to its moveset. Of special note is the crouching attack as the hitbox extends a bit beyond the platform you’re on, allowing you to get some cheeky attacks of your own.
The next room has a white flag – a save point. Continue past it to the right.
This room will test your jumping skills. You’ll need to do a long jump (hold jump down) to cross the pit, and unless you do it precisely, you’ll land in the spikes below. The spikes don’t do much damage but take the time to practice long jumping and precision platforming. If you get too injured, you can always pop back into the save point to heal. Once you cross the pit, be sure to smash the pots above you for some gold.
The next room will test your long jump ability by challenging you to climb up a bunch of platforms – again, watch out for the geyser on the left side. Proceed through the room, smashing pots as you go until you get to the chest, which will give you the Common Bow and some arrows. Remember that ammunition is limited before you go too crazy with the bow. Kill the spiders and proceed to the right.
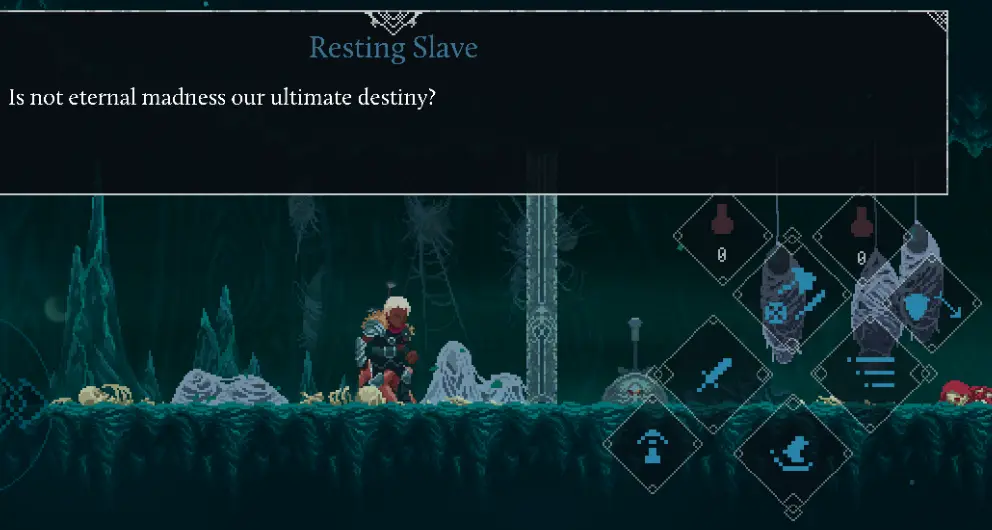
The next room brings us to our first fork. If you head right, you can fight some spiders in an ominous-looking tunnel and talk to a Restless Slave, who’ll despair at your situation.
There’s also a locked door here that you can only open from the other side, and we’ll get back to that later. Go back to the fork, and this time jump up the platforms. To the left will be a save point (which also contains a lore note), to the right will be the path we need to take, and above will be a chest we can’t quite reach yet. If only there was a way to jump even higher…
The right room will pit us against an actual challenging foe. This blue fish guy thing will alternate between slashing and spitting at you; if you stay too close it will slash, if you stay too far it will spit. Take this time to practice your backstep, dash, and jumping dodges – the save room is close by, after all. Once you’re happy, proceed through the room and get the Potion from the chest.
Bloodstained Writing
The rest of the room with the fish guy is inaccessible from where we are, so head right to behold the creepy wall.
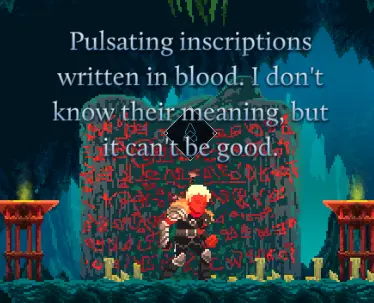
Beyond that is a door with pressure plates. Stand on a plate until the door is fully raised, then quickly dash through before it slams shut. Fight the ghost and the turtle in the next room (watch out for the snow on the ground as that signals where the ghost is casting) then head upwards and to the left.
This will bring us back to the upper level of the fish guy’s room. Dash into the canvas-covered block to push it down and create a shortcut, then proceed upwards. Open the chest on the right to get the Axe subweapon.
Head to the left side and grab the note, for lore reasons. Go to the waterfall on the left and jump off, keeping as far to the left as possible to nab the Lightbringer one-handed sword, a handy tool that also burns enemies it hits. Go back up (use the shortcut you just made) then head to the right this time to another save point.
Grab the Wooden Buckler from the chest. If you check the equipment screen, you’ll notice that just having it on raises your Defense by 2 but lowers Critical Chance by 0.5%. Crits are so infrequent at the start that I’d suggest sticking with the buckler anyway. You’ll find a fish guy to the right who will almost immediately spit at you, so get ready to block or dash/jump immediately. Bunny hops are still the way to go, though.
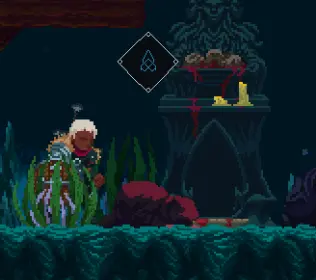
Before we head to the room on the right – which contains an elevator, let’s make a detour and go up to nab some new gear. Kill the fish guy in the way (you should be getting used to them by now) and the ghost and enter the room on the left with a red banner.
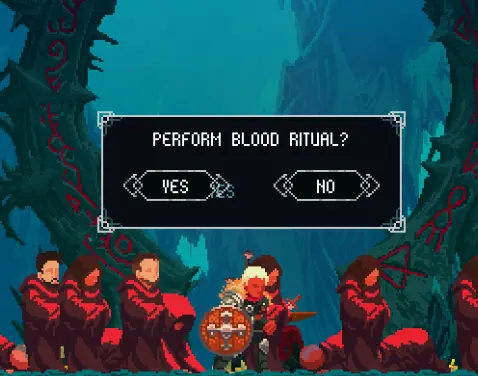
Walk up to the altar and choose to perform the blood ritual. This will cause you to take a chunk of damage (for reference, I took 44) and will kill the cultists in the room. Your reward for all this is the Blood Alliance ring, which grants 4 Vitality. Never say no to more health!
Keep going left as more treasure awaits.
Goodies Galore
If you’re looking for a Dexterity weapon, head to the left side of the room and open the chest in the next room – this gives you the Rattlesnake daggers, a very fast weapon that forbids the use of a shield.
Head upwards and kill the ghost on the bridge. There’s a save point to the right if you need it, but if you’re still fine, go left into a long corridor-like room. Be sure to grab the chest on the right side when you jump up as it’s loaded with coins, which we’ll be able to spend in a little bit. Continue to the left. You’ll notice a hole in the ceiling where light is shining through; this leads to the next zone, the Forest of the Exhausted, but I’ll only stick with you for the beginner zone. Go left to the next room.
This room has a push-block puzzle where you need to open all three doors to get to the goodies on the other side. You can figure it out yourself, but if you don’t have the time, here’s the solution:
Push the block to the plate marked in orange, stand on the plate marked in red (where I am) until the third door goes all the way up, then quickly hop up, stand on the green plate (again, until the door goes all the way up) then dash through.
Your reward for all this is the Forest Coat, an excellent piece of armor that boosts your Defense by 8!
Head back to the save point to the right of the bridge. From here, the choice is yours. If you head right, you’ll find a bunch of monsters (don’t be afraid of the space fish, it looks stronger than it actually is) and a chest with coins that will eventually lead you to the top of the elevator shaft. Alternatively, you can go back down from the bridge to the room where you got the Wooden Buckler and go to the elevator room on the right. I’ll assume you went with the former choice and nabbed the chest. Greed is good, after all.
Exiting the room to the right lands you at the topmost floor of the elevator. Call it.
Optional Challenge: Fallen Presbyter
Feel free to skip to the next section if you don’t feel like fighting the Fallen Presbyter yet. He’s important enough that I will use his proper name. To fight him, call the elevator, descend one level, then head right.
You don’t have to tangle with this guy, but if you’re up for a challenge, give it a go. Note that he does around 18-21 damage with his attacks (I didn’t fight him with the Forest Coat) so you’ll need to be familiar with blocking (or preferably, dodging) to beat this guy.
Once you enter the room to the right of the elevator, you’ll notice the music cutting out once you enter the room on the right. There’ll be a whole bunch of cultists bowing down to a statue of definitely not Cthulhu. Leap into the wall on the right to unveil a secret passage and the mini-boss.
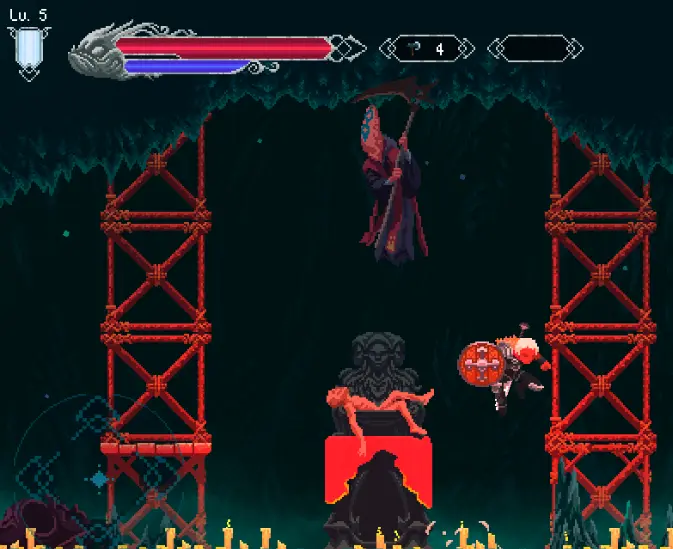
The Fallen Presbyter will spawn once you reach the altar at the end of the tunnel. He’ll teleport around erratically, trying to catch you off guard. The Fallen Presbyter chiefly has two attacks – he’ll either teleport above and throw his scythe, which will boomerang back to him, or he’ll teleport behind you and (nothing personal kid) shred you from behind. Patience is key here, as he has a lot of HP.
Note that only the left side of the room has a platform you can jump on; I found that the best way to damage him was to just wait on the ground for him to do his “teleport behind you attack”, move to make him whiff, then punish him. Watch out if you’re trying to retreat – he can and will teleport in front of you, potentially dealing a ton of damage and even killing you!
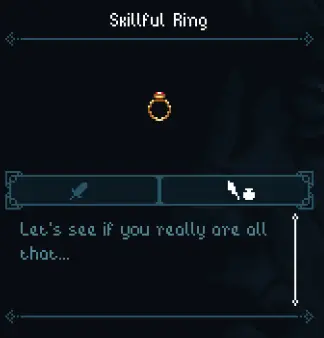
Upon killing The Fallen Presbyter, you’ll get a load of experience points, the Skillful Ring (grants +2 to all stats and is automatically equipped if you didn’t already have a ring), and upgrade materials which we can’t use yet.
Note that since the Fallen Presbyter is not a boss, he respawns if we refresh Firefox leave and re-enter the room. Equipment also only drops once from enemies, so you can’t farm him for more rings. You can, however, keep killing him for more experience points. High risk, high reward, right?
The Elevator: Down
If you’d rather not duel with The Fallen Presbyter just yet, let’s take the elevator down.
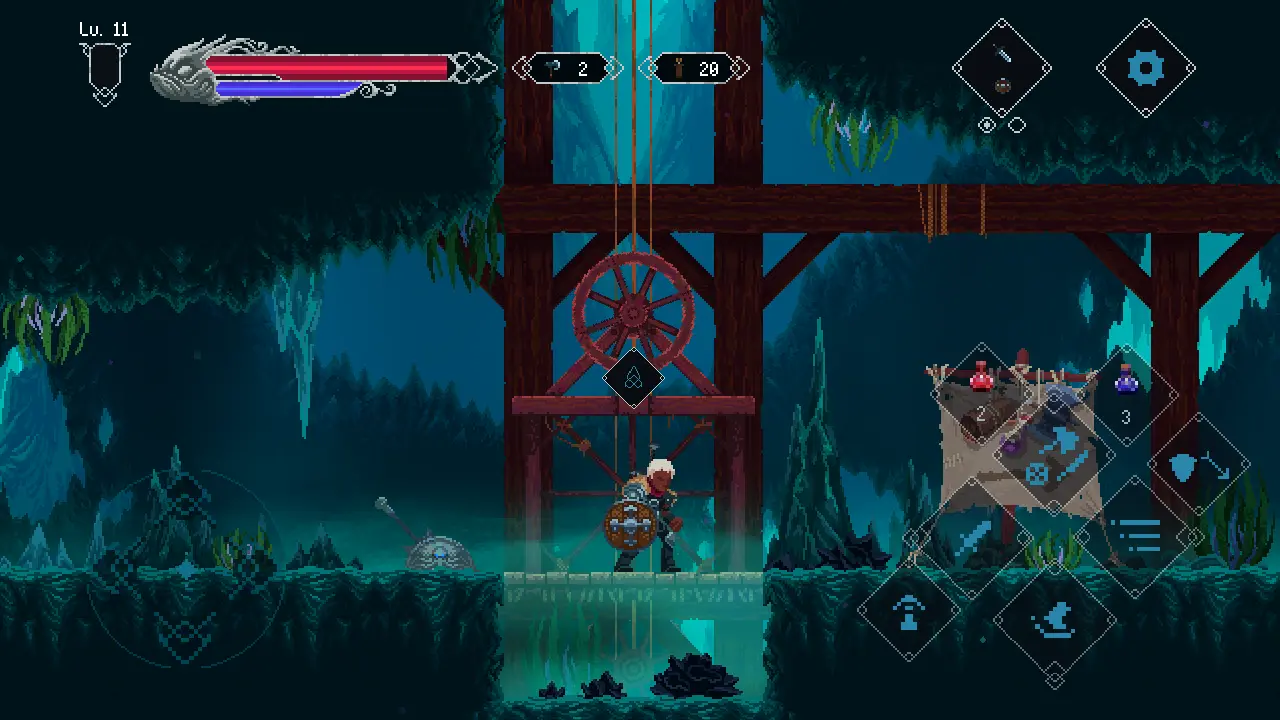
If you head to the right and follow the big sign, you’ll find the merchant Pollo. Feel free to burn all your cash here – better equipment makes you less likely to die.
If you head to the left, you’ll fight an upgraded version of the ghosts you’ve become familiar with; this one releases a whole stream of ice. Respect its power – back off from its AOE if you have to and pick at it from the side. Kill it and head downwards to open a chest with both a Health and Mana Potion.
Before going to the right though, head left to open a shortcut and open a chest that will boost our maximum mana!
Go back and head to the right to get the Charmed Staff, a two-handed weapon that allows us to spend mana for ranged attacks as well as bonk our enemies. No wonder they gave us mana upgrades, right?
Go past the room (watch out for the piranhas below the bridge) to find another cultist on the ground. Walk to the wooden barricade, jump and strike the wooden beam to bring down the hammer, then duck to get out of its way!
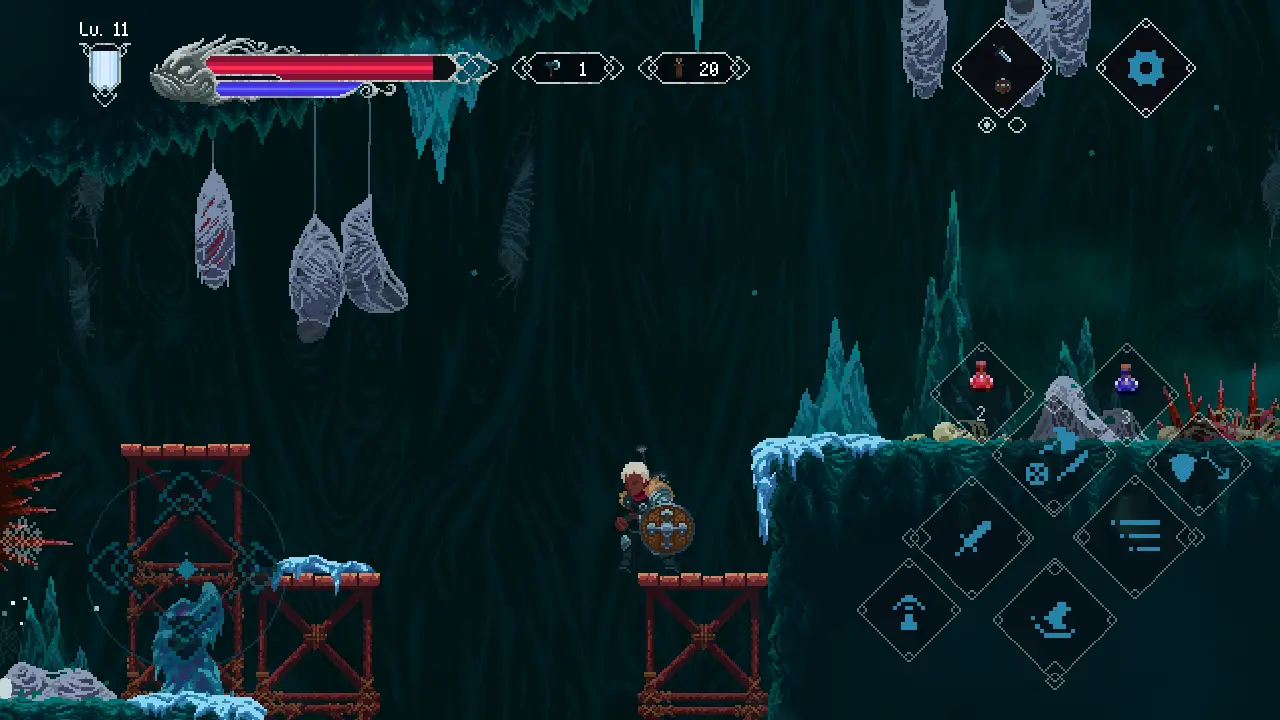
The Spider Shaft
Go down the shaft while watching out for spiders. Be sure to nab the note and the chest that gives a Max SP orb – it’s in the water.
Once you enter the next room, things will start looking familiar. Watch out for the new spider enemies as they’re pretty durable and hit hard. Explore these rooms thoroughly – there’s a Max HP orb in a chest in one of them.
If you keep heading all the way to the left, you’ll eventually reach the door where we left the Restless Slave – open the door and enjoy the shortcut back to camp. You don’t have to do this yet though, as it’s better to drop down a pit after killing an upgraded ghost – there’s also a save point to the left. Try to head to the right after dropping down though as there’s a note. Spooky.
Rest up and prepare for what comes next, then exit to the left.
Boss: Shakna
If the hanging corpses didn’t already clue you in, this is the lair of Shakna, presumably the broodmother of all the spiders you had to fight to get down here.
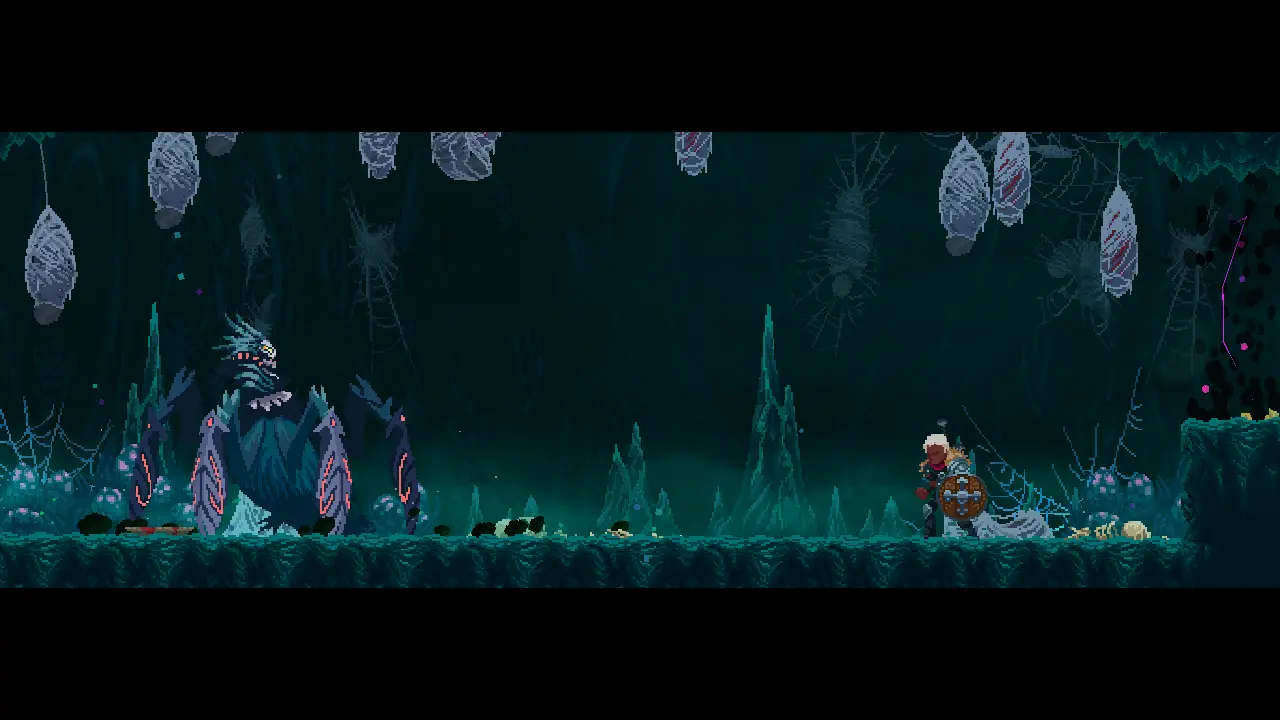
Shakna isn’t a particularly difficult boss, but she hits decently hard. She serves as a final test as to whether you understand the mechanics of Elderand.
Shakna has the following attacks:
- Stomp. Shakna walks up to you and stomps you with her front leg. Easily avoided by backstepping or jumping.
- Jump. Shakna leaps forward with a screech. Just don’t move – you’re safe below her.
- Web. Shakna’s eyes will gleam yellow before she fires a ball of webs at you. The projectile does minimal damage but will trap you if it hits. Jump or backstep to avoid this, and if you do get caught, mash the movement keys.
- Leap Slam. Shakna will leap high into the sky and slam the ground where you were after a moment. Be wary as she’ll sometimes use this move consecutively. She also tends to sneak in a Web shot in between Leap Slams.
- Enraged Leap Slam. At around 40% health, Shakna’s Leap Slam will be enhanced. Once she starts using these over her regular Leap Slams, she’ll do them in sets of 3. Like Leap Slam, Shakna will jump high into the air and slam the position you were in after a moment. Unlike Leap Slam, stalagmites will travel horizontally from where Shakna slams the ground. You’ll need to jump to avoid these and keep moving – this move can trap you in a corner.
The Elevator: Up
Once you’ve killed Shakna and rescued Guam from the cocoon behind her, it’s up to you where to proceed, but for the sake of completion (I told you I’d take you around Delinquent’s Breach, right?) let’s say you take the main elevator up and to the right.
You’ll enter a massive corridor. Be sure to drop down into the pits whenever you can as there’s a room with a lot of gold as well as another Max HP Orb in a watery area of the main room.
Keep heading right into another long corridor. This will exit into a room with an elevator that only heads up. Be ready to jump off to grab a chest full of coins to the left – don’t worry, you don’t take fall damage!
Ride it all the way up and you’ll find a save room in a new biome, Omulore, the Ruined City. The world is your oyster now – explore this place, or go back to the Forest of the Exhausted?
Evil Beware
Now that you’ve learned these basic concepts, you’ve started your journey into growing into a legitimate threat to the forces of darkness. Explore more, fight hard, and remember – survival is all that matters.
That concludes my beginner’s guide to Elderand, and I hope I was able to give you a better understanding of Elderand as well as arm you with the basic knowledge you’ll need to face down the various monstrosities the game has in store for you. If you have any suggestions on how to improve this guide or would like to share some of your tips and tricks, make yourself heard in the comment area!