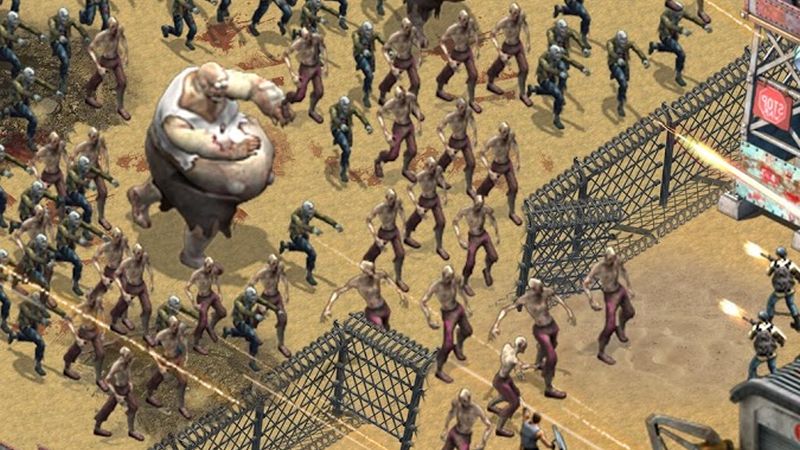
When the end of the world is upon us, survival will not be about winning one or two battles. In fact, it is wave after wave of attacks, and you are left wondering how much longer you can survive. Days 2 Die is a base-building strategy game for Android devices. In this game, you will not just be facing off against zombie hordes. You also have to worry about raids from other players who are hungry for resources.
The goal is to keep building up your base in order to fend off all forms of attacks. There are several types of resources that are needed to create different structures and equipment. You also have to train a variety of armed units, so you can send them out to gather resources outside your walls. This is your final stand, and our exclusive Days 2 Die strategy guide for base building is here to help you survive!
1. Go On A Building Spree
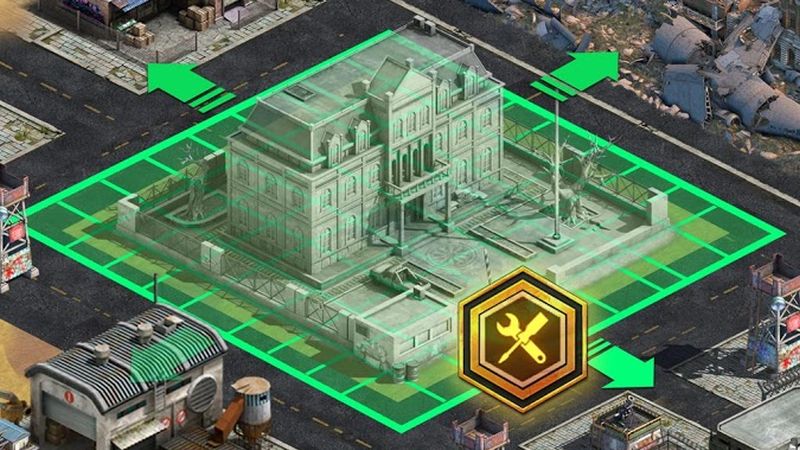

Days 2 Die gives you a free peace shield during the first few days of your base. A peace shield prevents other players from raiding your base for as long as it is up. That means you have to make the most out of the limited time you have in order to prepare for the onslaught of enemy players who are looking to bleed you dry. Make sure you make wise use of that time by building anything and everything you can. Once everything has been built up, upgrade every structure. Never let your building queue sit idle if you have resources to build or upgrade something. You can check how much time you have left on your peace shield by tapping on your City Hall.
2. Organize Your Base
When you start out, the game tutorial will just tell you to drag the buildings to the nearest empty space in the city. The good news is you are free to drag any structure to any part of your base. Just tap on a structure once then drag to where you want to take it. This is important because you want to keep your base as organized as possible. Keep similar structures together so you know where everything is. For example, you should keep unit production buildings together, so you can easily check which ones are done training units. You should also keep residential houses in tight clusters. Otherwise, you will spend a lot of time looking for that missing house when it’s time to upgrade.
3. Location Is Key

There is a bigger world map that you can access by tapping on the lower left corner of the screen. This is where you can plop down your city, and you will be asked to do so during the tutorial. The location of your city is one of the most important decisions you will make in this game. Combat units take time to march across the world map. That means the location of your city will determine how quickly your marching troops can gather resources. It also determines how long it will take for other marching troops to reach your base. Look for a location that has plenty of resources nearby. You should also consider settling down near your Alliance members, so they can quickly send you troops if you need it.
Don’t worry if you started the game without knowing these things. You are actually given free teleport passes that allows you to move your city anywhere on the map. Once you know where your Alliance buddies are, or when you find a good resource area, you can move your city. Keep in mind, though, that you can only use the free teleport passes until Level 5. After that, they will disappear, and you will need to purchase a new teleport pass if you want to move.
4. Find An Active Alliance
While we are on the subject of Alliances, you should know how important it is to find an active one to join. There are several benefits that you can gain from joining an Alliance. The first one has already been mentioned above. Other members can send you troops if you need them. Aside from that, they can also send you resources and help you speed up construction and research queues. Just tap on the handshake icon above your structure to ask for help. Of course, you should also return the favor by helping out other members as well. To see if anyone needs help, tap on the hammer icon on the right side of your screen then choose Alliance. Tap on Help and you will see all the members who need help with their queues. Click Help All to quickly help everyone on the list.
Alliances also have additional Technology that will give permanent boosts to all members once upgraded. These take a lot of resources to upgrade, though. Everyone in the Alliance must work together to make donations in order to upgrade Technology. Remember, you can only donate resources up to 20 times per day. Once that is used up, you will only be able to donate using premium currency. To check out the different Technologies available, and to make your donations, just. Once you are on the Alliance screen, tap on Technology to see the list.
Aside from the long-term benefit of getting new Technology, donating also lets you earn Alliance Honor points. These can be used to purchase different items from the Alliance Store. The store offers useful items like peace shields, production boosts, and teleport passes. They tend to cost a lot of points, so make sure you max out your 20 donations daily!
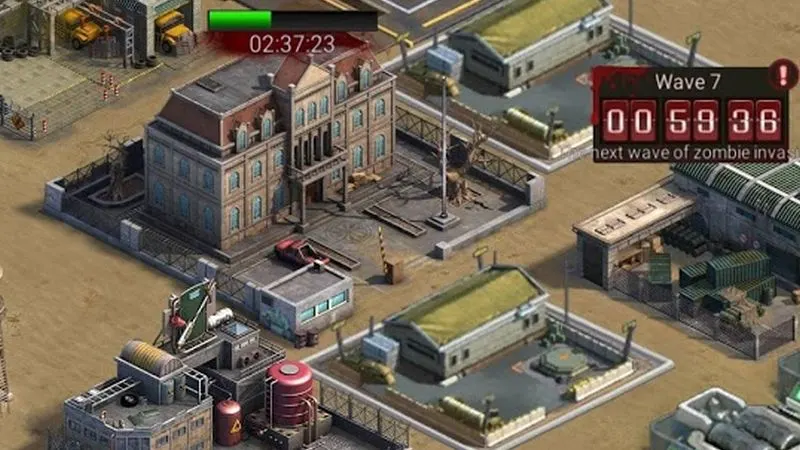
5. Repelling Zombie Waves
Unlike the human attackers, zombies are nice enough to tell you when they are on the way. You will see a timer on the upper right corner of the screen. On top of that, they won’t attack even if the timer is up. You will have to manually click on the invasion button to start the zombie attack. Why would you want to start a zombie attack? That’s because clearing a wave will reward you with resources and other goodies! Of course, you need to prepare your base well before the attack. The timer will reset after each attack, regardless is you fail or succeed. If you fail, the same wave will attack you after the timer. If you succeed, you will be given a longer preparation time because a stronger wave will come.
Aside from knowing when the zombies will come, it is also important to know where they will be coming from. You can check the direction of the attack by tapping on the timer. This will bring up a window that shows how many zombies are coming and the list of rewards you will receive after a successful defense. There are two buttons at the bottom. Tap on the first one to check the direction of the attack. If you are feeling confident, you can tap on the second button to spend some diamonds and start the attack immediately.
6. Max Out Your Depot
The peace shield will be disappearing soon. If you still have not built a strong enough base, at least try to max out your Depot. All resources that are stored in the depot cannot be raided by other players. The more resources you have stored in the Depot, the easier it will be for you to recover after you have been raided. Don’t forget that your resources do not automatically get stored in the Depot. Tap on the Depot and choose Resources to manage your resources.
7. Keep Queues Busy
There are several queues that you need to keep an eye on in Days 2 Die. You have your building queue that is used for construction and upgrade of structures. There is also a training queue for each of your unit producing structures. And there is a research queue at the lab. Make sure you always keep these queues busy in order to sustain the progress of your base. You need to keep upgrading structures in order to improve your overall performance. Unit training also has to be continuous, so you can keep sending out troops to gather resources. Finally, the laboratory queue can make a huge impact on how you will develop your city.
Keep in mind that you can only have one research queued up at a time even if there are four categories. This means you need to think about which category you would like to specialize in before you start your research. Some players like to upgrade their military power, while others prefer to build up defenses. Decide on your path and prioritize research that will support that.
8. Send Soldiers Marching


As we mentioned above, you can send out soldiers to occupy locations and gather resources. Make sure they are never sitting around at your base. Always send them out to gather resources. On of the good things about this game is that you can send out troops to gather Diamonds. They usually only gather a few at a time, but that is still free premium currency for you. If you have a lot of troops, you can split them, so you can send them on different errands.
One question a lot of new players ask is how many units they should send. The more units you send to a resource node, the more they will be able to gather. The more units you send to attack a zombie on the map, the easier the battle will be. With that in mind, if you are attacking a zombie, make sure you always adjust the sliders until you have just enough for an easy win. This way, you can send the remaining units to gather resources elsewhere.
9. Check Your Mail
The game does not have loud notifications to tell you if you have received mail. Since the mail is tucked away inside the Function menu, it is pretty easy to miss new messages. You will sometimes receive rewards in your mail for accomplishing certain tasks or reaching milestones. Important announcements are also often missed when they are overlooked inside the mailbox. Make it a habit to regularly check your mail by tapping on the hammer icon. There will be a red dot on the Mail icon if you have new messages.
10. Here’s What You Should Do Before You Attack
This is the biggest part of Days 2 Die. The ability to raid other players can help you advance more quickly thanks to the resources you will be stealing. Before you send your troops marching, however, there are a couple of things you need to think about. First of all, check if you have an active peace shield. If your shield is active, attacking will automatically forfeit any remaining time on it. On top of that, you will not be allowed to purchase another peace shield for an hour after you attack. That means you have a full hour that you are vulnerable to raids from other players. Ensure that your base is prepared for raids, or you will end up losing more resources instead of the other way around.
Another thing you need to check is if the person you are attacking is a member of a powerful Alliance. When you tap on a city that is not part of your Alliance, you will be given several options. You can attack directly by tapping on the icon with two guns. You can Scout to check how strong the base is, but keep in mind that this will still break your peace shield.
What you can do instead is to tap on Details. This will show you player information such as their current power and level, and how many kills they have. There will also be three buttons at the bottom. The lower left button will say Alliance Invite if the player is not part of any Alliance. Feel free to attack that person since he is not a member of any Alliance. The button will just say Alliance if he is a member of an Alliance. Tap on it to see how many members and points that Alliance has. The reason you want to know is because some Alliances send all of their members to retaliate. You will never be able to sleep again if you start a war with a powerful Alliance, so proceed with caution!
You are now fully equipped to survive in the post-apocalyptic world of Days 2 Die! Don’t forget any of the things you learned from our strategy guide and you will have the ultimate base in no time!