NEXON is a company that specializes in anime-based RPGs, and some of them include Darkness Rises, Dynasty Warriors, Fantasy War Tactics, and many others. The latest entry in this category is MapleStory M, which is now available for iOS devices as it brings the original MapleStory to mobile, giving you an “authentic MMORPG experience” where you can choose a character, or an Explorer and one of the five classes, create or form a guild, and team up to defeat some of the most epic bosses of Maple World. There are live game events, different dungeons to crawl through, and no shortage of quests to complete. Will you be lucky and skillful enough to make it all the way to the most “iconic” raid boss, and complete the epic story that underpins this very mobile game?
There’s so much to learn about this game, and it will soon become clear that a simple tutorial stage is not enough. But that’s why we’re here, because our MapleStory M strategy guide for beginners covers all of the essential areas that need to be covered if you’re at player level 1 to 20, and trying to make your way through Maple World one quest at a time. Read on if you’re having trouble with, or overwhelmed by any aspect of the game while in the earlier stages!
1. Choosing A Character


The first thing you need to do in MapleStory M is to create a character — your role is that of an Explorer, and you have five classes to choose from. Let’s take a look at each of them.
Dark Knights, according to the game’s description, are “mega beefy tanks with ridiculous strength and endless HP,” and typically use spears as their main weapon. Just like your typical tank, their attack (ATK) stats aren’t too special, but they possess a lot of hit points (HP) for added durability. Bow Masters are ranged characters, “masters of the bow and arrow” who could launch attacks from afar. They’re slightly squishier than Dark Knights but not the squishiest of the bunch, but if you prefer standing back and stalking your prey from a distance, this is the way to go. Night Lords are “mysterious explorers who are as agile as they are edgy,” and have high ATK stats and average HP, with a Claw as their main weapon. Bishops have additional ATK points and higher magic points (MP) than most, and are similarly squishy like Night Lords are, tied for the lowest base HP among the five classes. The game calls them “skilled magicians who control crazy powerful explosive spells” and suitably use Wands as their weapon of choice. Lastly, Corsairs are almost like tanks due to their high HP and low ATK, and are essentially pirate-type characters who use guns as their main weapons; in short, they double as tanks and ranged characters.
At the end of the day, it’s all up to you — your choice of character depends on your preferred play style. As you have five character save slots, we recommend trying each of them for yourself to see which one suits you the best.
2. Stay Idle And Auto-Quest, But Take Over When Needed
As you’ll find out soon enough, playing MapleStoryM can be deceptively easy, as the game puts you on AutoQuest mode almost immediately. That means the game will be controlling all your actions as you do whatever needs to be done in the quest — moving around, climbing ropes, teleporting, killing monsters, you name it. By default, the only time you resume control is when the quest is finished and you talk to the non-playable characters who had given you the quests — or the villains that you had just defeated (but not killed). That too applies in the middle of a quest, when there’s dialogue between your character and any NPC.
While the enemies you will be facing are generally easy enough to polish off — you should also have several potions at your disposal to use during the quest, and consuming them is also covered by AutoQuest — it also bears mentioning that there may be some situations where you need to take over. The AutoQuest AI is smart, but not as smart as it should be if you’re the one handling the controls and taking care of the monsters yourself.
3. Rewards, Rewards And Even More Rewards
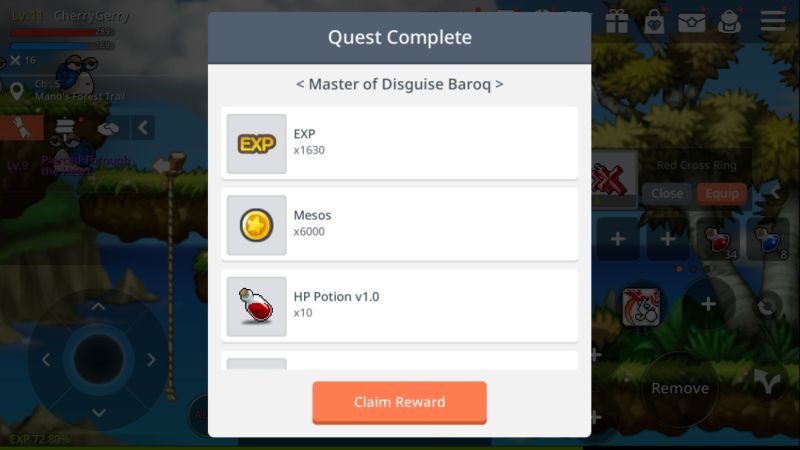
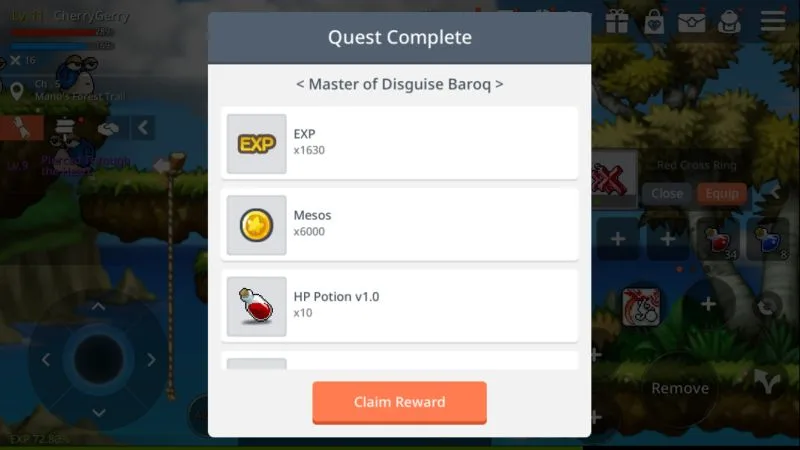
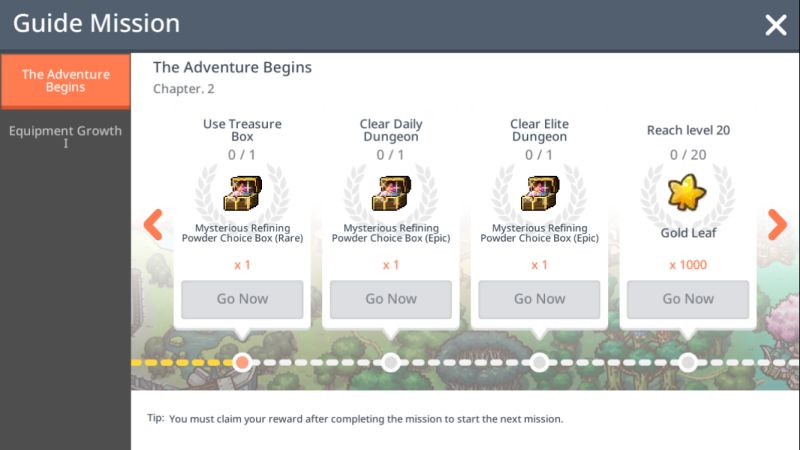
The rewards you earn for quest completion are one thing, and these will usually include common currency (Mesos), experience points (EXP), VIP Teleport Rocks, new weapons, items, and potions. But there are tons more rewards that are available in the game, starting with the Guide Mission rewards, which are the rewards you earn for completing the missions that are designed to guide you through the right path in the game. These may include Mesos, Refining Powder Choice Boxes, Gold Leaves, and more. The Event Rewards, Attendance Rewards, and Rest Rewards can be accessed by tapping on the calendar icon on the upper right menu — Event Rewards are for monthly attendance, or daily logins, an oftentimes include draw tickets that could give you a chance at some rare and powerful weapons, Attendance Rewards are based on the duration you remain logged into the game and usually include Mesos and food for your pets, and Rest Rewards, which similarly come in the form of Mesos and Refining Powder Boxes.
We’re not done with the rewards, as you’ve also got your Tasks, which are based on time-bound daily milestones (using a potion 10 times, drawing equipment, etc.), Achievements, which are based on cumulative milestones (reach level 15, collect 100,000 Mesos, etc.), and Weekly Missions, which are based on weekly milestones. For all of these, you will earn Gold Leaves, which are used to purchase items in the Gold Leaf Shop. Also take note that many rewards will be sent to your Mailbox, which is represented by the envelope icon on the upper right menu. You’ll have to go there in order to redeem those items!
As a bonus tip, the Gift menu does not refer to additional freebies! This is actually where you can purchase special packages that you could use to help improve your character, including Crystals, which are the game’s hard to acquire premium currency.
4. Take Part In The Dungeon Raids
Aside from the quests, which may take up most of your time in MapleStory M, you can also take part in a variety of dungeon raids, starting with the Daily Dungeons, which allow you to acquire jewels that increase your character’s stats. Once you reach level 15, you can collect “high rank items” by completing the Elite Dungeon, and once at level 25, you’ll have the Mini Dungeon to conquer — the game says this will help you “level up quickly.” Those are just three of the available dungeons in the game, as reaching milestone levels will allow you to unlock these dungeons, with the last one becoming available once you reach level 70. It always helps to break the monotony of questing by getting involved in these dungeon raids, and the best part of them all is that a lot of them allow for co-op raids, where you can work alongside other players to defeat the vicious monsters!
Just a word of advice for the Elite Dungeon raids — they could take a while to complete, and if you’re on your own, the Zombie Mushroom boss could instantly take you out in one go! You will be have the option to use Respawn Tickets to revive yourself and give yourself another chance at beating the boss, but take note that these can only be purchased with Crystals.
5. What Are Sweep Tickets?
As the game’s Fairy explains, Sweep Tickets are used to instantly defeat the monsters in the Elite Dungeon without having to actually do any fighting. These can be earned as rewards for completing certain quests or achievements (see the third tip), but there are catches when it comes to using these tickets. First of all, you can only use a Sweep Ticket on an Elite Dungeon that you’ve already completed. Secondly, you will also need to consider the Sweep Chance before using one — in other words, using a Sweep Ticket is not a guarantee that you will be able to perform a successful sweep! If the Sweep Chance is rather low, you’re better off not using one of them for the meantime.
6. Crystals – How To Get Them And Where To Use Them
This is something you’ve probably been wondering about since we first mentioned them in the rewards tip and talked about them, almost in passing. How do you acquire them anyway, aside from purchasing them at the Cash Shop (the one with the shopping bag icon) for $5 USD and up?
Mostly, you will be acquiring these Crystals by completing some of the more advanced quests in the game, which means you may likely struggle without them while in the first 20 levels or so, unless you’re willing to pay some real-life money. You can purchase a variety of items with your Crystals in the Cash Shop, including chests, special packages, and those all-important Respawn Tickets which we talked about earlier. You can also buy new and higher-end pet sidekicks at the Cash Shop, as well as aesthetic changes, e.g. new hairdos and facial expressions for your character. But we would obviously suggest against using your hard-earned Crystals for anything cosmetic that doesn’t have any bearing on your character’s stats, weapons, or ability to complete dungeons. By that, we mean prioritizing Respawn Tickets (normally via prompt after you get killed in a dungeon crawl), or items that provide buffs to your character or other vital improvements that could be of assistance. Pets are also a good choice, as they can improve your stats and make things easier as you go along.
7. Join A Party

MapleStory M, at the end of the day, is an MMORPG, and that means you’ll need to get social at some point and join a party. These allow you to explore different parts of the in-game map together, providing you some valuable support as you defeat more monsters, crawl through more dungeons, and level up faster, thereby improving your skills and stats. Remember that Maple World is quite a large and expansive in-game universe, and that it’s always better to go through things via team effort, instead of going solo, though the latter is always an option if you prefer to play without any assistance from human players.
Parties can consist of no more than 10 players, and it goes without saying that more players means a better chance of surviving some of the toughest dungeon bosses in the game.
8. Improve Your Equipment Too
Tap on the bag icon on the upper right and that will lead you to the Bag screen, where you can take a look a the various weapons, pieces of armor, and other items you have collected in your questing. Make sure that you’re improving those pieces of equipment by leveling them up, at the very least — in order to level up an item, you’ll need to tap on the weapon, then tap on the Forge tab. Make sure to have enough Mesos on you, as well as upgrade materials, mainly Refining Powder. Below the Level Up tab you’ll find the Rank Up tab, which allows you to rank up a weapon or other equipment that has reached its maximum level; this will again require Mesos, the item, and upgrade materials to complete the recipe. You can also fuse two pieces of equipment that have reached the maximum level (again, the recipe here includes the item, Mesos, and upgrade materials), or Enhance them with Mesos, with the option to use a Scroll to improve your chances of a successful enhancement.
Tyson Cho
Wednesday 18th of December 2019
THANKS!! I actually am new to this game and this one one of the easiest guide I've found.