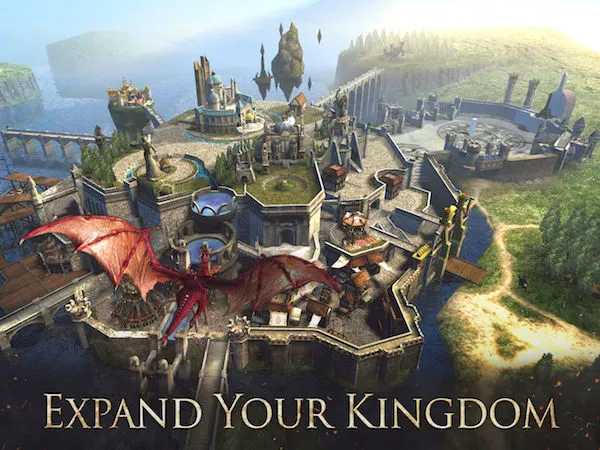
Only the descendant of the First Born can restore the kingdom to its former glory. In Netmarble’s new mobile game Iron Throne: Kingdoms, you are that chosen descendant. With Jorya as your guide, you will have to build your city from the ground up. Recruit heroes, train troops, and battle against the evil forces that are threatening to engulf the kingdom in darkness. Construct and upgrade various buildings in order to create the greatest city there is. Hunt down monsters, gather loot, and even raid other players. Try out the different game modes for a chance to win even more resources. Join an Alliance to secure the safety of your people. There are a lot of things you must do as the rightful heir to the throne. It can be overwhelming for anyone who steps into the game for the first time. It’s a good thing you can rely on our Iron Throne: Kingdoms tips, cheats and strategies for some help!
1. Follow The Growth Strategy

Looking at your citadel, you will most likely notice the Event icon that’s perched right on top of it. Tap on the icon to enter the Event menu. Once there, you will see various tabs, including the one for Growth Strategy. This Event gives you a set of goals for each day of your first week in the game. Don’t worry about having enough time to complete the goals because they are based on the number of hours you have been playing Iron Throne: Kingdoms, not the current day of the week. That means you will have a full 24 hours to complete the tasks of each day.
The Growth Strategy not only keeps you on track in terms of establishing your city, it also rewards you handsomely for completing the tasks on time. You can earn various resources, troops, and even Gold, the game’s premium currency. You also don’t have to stop once you complete the day’s tasks. In fact, it is recommended that you get a head start on the following day’s tasks to ensure you will be able to complete everything by the end of the 7-day Event.
2. Log In Every Day For Rewards
Aside from the Growth Strategy, you can also claim Daily Login rewards from the citadel’s Event page. You will be shown the rewards you can earn for the entire week. Rewards include Gold, speed up items, equipment, resources, and most importantly, VIP points. Make sure you don’t miss any of the rewards by logging in daily. Even if you don’t have time to play for the day, try to at least make time to log into the game to claim your daily reward. Don’t forget to check the citadel for other Events that you can take advantage of as well.
3. Grab Freebies Around The City
There are a few locations in the city where you can get freebies. All you have to do is claim them regularly. The first area is by the Docks where you can find the Foreign Trade Ship and the Island Trade Ship. The Island Trade Ship comes in every few minutes with a few minor rewards in tow. Tap on it to claim the rewards, and the ship will go on cooldown. Keep in mind that you will have to claim the item or else the ship won’t sail again to get another reward. The same is true for the Foreign Trade Ship that brings you a better reward every few hours.
Another place to look for freebies is in the water. You will see something swimming around in the water around your city. It will be highlighted in yellow when the reward is available. Tap on it to get a few silver coins.
This freebie refreshes every few minutes, so keep an eye out for the swimmer. Finally, you have the red dragon that sits on top of the floating island near your citadel. Tapping on him will give you Gold, so make sure you always check on him. Once you claim your Gold from the dragon, he will go on cooldown for three hours. Just be diligent in claiming all these freebies from around the city and you will be rich in no time!
4. Use Your Lord Skill Points
As you play Iron Throne: Kingdoms, you will slowly earn Lord Experience from every task that you do. You can also earn Lord Experience from using items. Once you earn enough experience, your Lord Level will increase. You will also receive five Lord Skill Points every time you level up. You can use these to upgrade various skills that you have.
To use your Lord Skill Points, just tap on the portrait of your character on the upper left corner. Once you are in your Lord menu, you will see a Lord Skills button on the upper right. Tap on it to open the Lord Skills menu. In this screen, you will see five numbered tabs on the top right side. The first three are unlocked by default, and you will need to raise your VIP level in order to unlock the remaining two.
These tabs are skill pages that let you level up your Lord Skills differently on each tab. This means you can pre-build skill sets for different strategies. For example, you can use the first tab to build up skills that focus on production and use the second one for a battle-focused skill set. This way, you just need to activate the corresponding tab depending on your current needs.
5. Appoint Hero Aristocrats
When you tap on your citadel, one of the options that will appear is the Appoint icon. Tapping on it will take you to the appointment screen where you can assign four heroes to different positions. These positions are Guard Captain, Treasurer, Architect, and Scholar. Make sure you check your Hero’s trait and assign them to the right position. For example, Haral has the Construction trait. It boosts construction speed by 3.9%. That means you should appoint him as an Architect in order for his trait to take effect.
Keep in mind that you can also change your Hero’s trait for 200 Gold. Just tap on the icon with two arrows in a circle just beside the Hero trait. This is important because you cannot send Aristocrats out to march. You will need your best marching Hero out on the field. If you don’t have any alternative options, you can just change the trait of an extra Hero that you don’t really use.
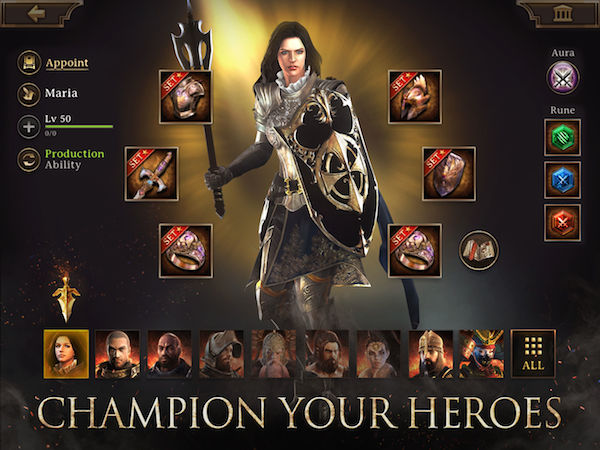
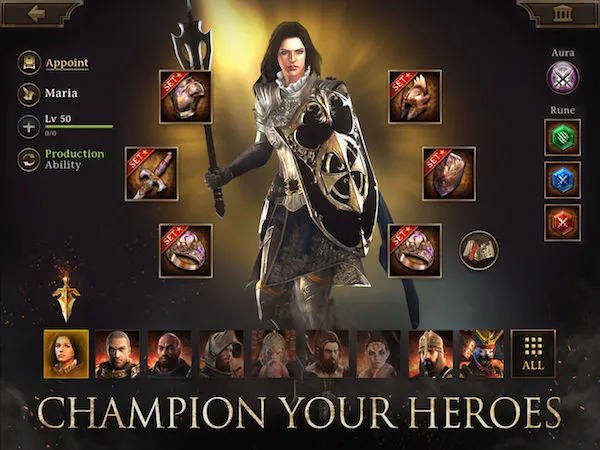
6. Beef Up Your Heroes
Each Hero can be leveled up and equipped with six different gears. Levelling up can be easy, depending on your resources. Heroes can level up when they go out to gather resources and kill monsters. You can also use Hero Experience items to level up Heroes that you don’t often send out. This is to ensure they stay somewhat viable in case you need them in the future.
When it comes to equipment, make it a habit to check the item’s effects. Some pieces of equipment are recommended for Aristocrats due to the bonuses they give. For example, one of the first sets you will complete in the game is the Architect’s set. Make sure you give all of these to Haral, since he is your Architect.
Aristocrat equipment will have recommendations highlighted in yellow just below the equipment name. Once your Heroes are all geared up, don’t forget to upgrade and enhance their equipment as well.
7. How To Unlock More Heroes

Except for a few Event Heroes, the Heroes in Iron Throne: Kingdoms cannot be purchased. You will need to unlock them by meeting certain prerequisites. You will have Maria at the beginning of the game. You will also receive Haral in the early parts of the tutorial. For the rest, you will need to check their requirements in the Hero screen. Tap on the plus sign in any empty Hero slot to get the list of Heroes. Choose any of the greyed-out portraits to view the information on that Hero. The unlock conditions will be listed at the top. For example, Freydis can be unlocked by completing the Town Mode Season 1 Epic Quest.
8. Check Out The Merchant
Just outside your city walls, beside the wall gates, is the Merchant. Tap on it to see various discounted deals that you can purchase with Gold and other resources. Right below the Merchant’s portrait is the daily jackpot which randomly appears whenever you refresh the list on the right. This is a great place to get discounted resources, Lord Experience items, speed up items, and VIP points. It is best if you hold out for the VIP point deals, but if you get the jackpot for the day, feel free to buy it if you want.
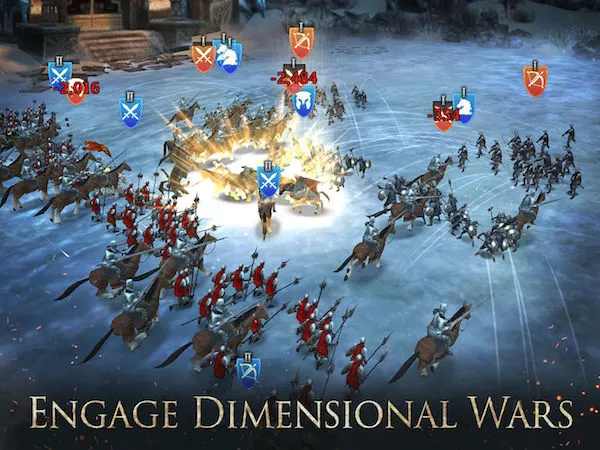
9. Fighting With Troops
When you are battling with troops, there are a few things you should keep in mind. The first thing you need to learn is the troop advantage. There are four types of troops in the game: Infantry, Cavalry, Archers, and Siege. Siege are neutral troops that have neither an advantage or disadvantage in battle. Infantry are strong against Cavalry. Cavalry are strong against Archers. Finally, Archers are strong against Infantry. Pay attention to the type of troops your opponent has before the beginning of battle and adjust the composition of your own army accordingly.
Another thing you should keep in mind when fighting with troops is the troop formation. Before the start of battle, you will be shown the position of your troops on the field. This is important because it is the only way for you to influence their final position on the battle field once the confrontation begins. Generally speaking, you would want your Siege and Archer troops at the back lines while the Cavalry and Infantry charge up front. Of course, this would change depending on the enemy formation as well. Finally, don’t forget to use your skills in battle. These use up Mana, so make sure you use them wisely and not just randomly drop them on the field.
10. Strengthen Your Troops


Heroes cannot win battles on their own. Make sure you take time to invest in your troops again. The most obvious way to strengthen your troops is to simply upgrade their respective training structures. Upgrading these structures to specific levels will allow you to train higher-tier troops. The higher the quality of your troops, the stronger they will be.
There are two other buildings that you should upgrade in order to help your troops. The Command Center determines the number of troops that can be deployed per march. Your troops will be useless if you can’t send them off to battle, so make sure you keep it upgraded. The Barracks, on the other hand, increases the training capacity and speed of all training structures. Keep it upgraded to be able to churn out a lot of troops.
Aside from building upgrades, there are a few more things you can invest in if you want even better troops. Your troops can get various buffs from your Heroes through Traits, gear, and Aristocrat roles. You can also research troop buffs at the Academy. Finally, some of your Lord skills are for troops. Invest points in them if you want to buff your troops further.
11. Join An Active Alliance
Tap on the Alliance button at the bottom of the screen to open the Alliance menu. If you are not yet a member of any Alliance, you will be given a list to choose from. Once you become a member, you will see the different options you have for the Alliance. Right off the bat, you will receive 500 Gold and a Premium Teleport item for joining an Alliance for the first time. Aside from these instant rewards, however, there are a lot of benefits for joining.
First off, joining an Alliance gives you access to Alliance Quests. These give you some easy rewards since all you have to do is tap on them to start a timer, then tap again to claim the rewards once the timer is up. You can get plenty of resources, Hero Experience items, and Honor Points through these quests. You can also get more rewards through the Alliance Gift and Attendance Rewards. Keep in mind that these are based on how active the other members are as well, so make sure you find an Alliance with players who actually go online.
Another benefit you get from joining an Alliance is that you can request for help in various ways. Your allies can help speed up any research or construction in your city. Once you reach higher levels, the timers will take hours, even days. You will then appreciate having a lot of helping hands to speed things up. Allies can also send you troop reinforcements in case you are planning an attack, or if you are being raided by another player.
Finally, you can ask for some resources from your Allies if you are ever short on anything. Just make sure you return the favor when they ask for help, or you may end up getting kicked out. Don’t forget to use the Premium Teleport Item to relocate your city to where your Alliance Hive is. Staying close to your Allies will allow them to send and receive help more quickly.
12. Play The Different Game Modes
There are several game modes that can be unlocked as your citadel grows. Playing these modes is not optional since they provide you with bonuses, rewards, and resources that will help you progress further in the game. We have listed them below to give you an idea on how to play them and what rewards you should expect.
Dimensional Battles – This is basically the Story Mode of the game. There are several stages in this mode that you can replay as you wish. You can earn up to three stars in each stage. The number of stars you earn depends on how much damage you take during the battle. The stars will be marked on your health bar at the top left. Completing stages with three stars will reward you with troops, resources, and equipment. Completing certain stages of this mode will also unlock additional content in Iron Throne: Kingdoms.
Town Mode – This is an RPG mode that has been integrated in the game. You will be rescuing one of your towns that has been sieged by the enemies. Make sure you take time to complete quests in this mode daily. You can earn up to three in-game buffs once you complete the related quests for the day.
Battle Royale – As the name suggests, this is a PVP arena where you can duke it out with a bunch of other players, and your goal is to be the last one standing. Winning in this mode will reward you with speed up items, construction material chests, and more.
Team Death Match – Same as the Battle Royale, you will be fighting against other players in this mode. This time around, however, you will be battling in two teams of 20 players. If your team wins, you get Gold and troops.
AR Mode – This mode lets you use Augmented Reality technology to make your citadel’s dragon appear in the real world. Use your camera and point it towards the sky to watch the dragon fly around for a bit. Doing so will activate one hour of VIP benefits. You can claim the VIP benefits up to three times per day, but you can watch the dragon as much as you want.
13. The To-Do List
Every game has its daily list of things the player must do. Iron Throne: Kingdoms is no exception. Make sure you attend to these tasks regularly in order for you to progress at a steady pace. The main place to check is the Quests tab which shows you several sub-categories of tasks. First on the list is the Challenges sub-category that lists down things that you must accomplish around the city. You are rewarded with various resources every time you complete these. Tasks mostly include upgrading specific buildings to certain levels. If you upgrade a building, there would most likely be a corresponding Challenge that will be completed, so check it often.
The second and third sub-categories are the Daily and Alliance Quests. These are a list of easy quests that don’t really need anything from you other than a few taps. Just tap them to start, then tap to claim your reward once the timer is up. The only thing you need to pay attention to is their reset time. Once the next batch is available, make sure you get them started right away.
The fourth sub-category is the VIP Daily Quest. These are quests that are made available to all players. It lists down tasks such as killing monsters, participating in battle, and so on. Completing VIP Daily Quests will reward you with VIP-related rewards. Don’t neglect these tasks if you want to raise your VIP level without spending real money.
The last sub-category in the Quests tab is the Chronicles. These are the equivalent of Achievements in most games because they reward you for reaching certain milestones in the game. You don’t really need to go out of your way to accomplish things under Chronicles since they will most likely be achieved as you play the game. It is just a matter of checking if there is a gift icon beside it since that would mean a reward is waiting for to be claimed.
14. Protect Your Resources

When you are still starting out, it might be fun to see your resources at the millions. Since you will be getting a lot of reward items in the beginning, you might be tempted to use them all at once. It might be fine during your first few days, since you will have beginner’s protection, but once your protective shield goes down, you will regret it. Avoid keeping a whole lot of resources in your city because they can be stolen by raiders.
Not all of your resources can be stolen, however. Those that are kept in the Warehouse are safe from marauders. Unfortunately, you can only store so much in your Warehouse. To increase the amount of resources you can keep safe, make sure you keep your Warehouse fully upgraded as much as possible.
15. Raiding Other Players
Now that you are a bit more confident, it is time to consider attacking other players in order to steal their resources. Before you send your troops marching, however, there are a few things you should take care of. The first thing you should do prior to raiding other players is building and upgrading your Watchtower. Doing so will allow you to gather more information when you scout your target. You will know the Lord’s level, Guard Captain’s gear, defensive stats, and so on.
Once you have your Watchtower up, make sure you start scouting. Don’t go charging blind or you will end up wasting time and resources. Just tap on the enemy base then tap on the Scout button. You will then receive a detailed report on the enemy in your Mail under the Battle tab. If somehow you still end up biting off more than you can chew even after Scouting, you can always Rally for Help. If you followed our earlier advice about teleporting near your allies, they should be able to send help before you make a fool of yourself.
One last thing you should consider before launching an attack is picking up a few War Items to buff yourself up. Examples of buffs that can be useful in raiding include 20% Enemy Attack reduction, 20% Troop HP Boost, Enemy Defense Reduction, and so on. Check out what buffs you can add on before heading for the enemy base!
16. Participate In Events To Get Rewards
There are several Events that you can participate in. On the top right area of the screen, you will notice a banner that has a timer. Tap on it to view the ongoing Events. At the moment, these Events would be the Solo Event and the Inferno Event. These two mostly involve building up your city and training troops. Each task you complete earns you points, and you will be given rewards whenever you reach certain milestones.
Aside from the milestone rewards, however, you will also be given additional rewards at the end of the Event timer if you managed to get into the leaderboards in terms of accumulated points. If you feel like you are joining an Event a little too late to catch up, you could still check out the Upcoming tab. This tab will show you the objectives of the next Event, allowing you to prepare beforehand.
Another Event you can look forward to is the Raid Event. This one lets you join all the players in Iron Throne: Kingdoms for an all-out war against the Death Knight. The game notifies players days in advance when a Raid Event is coming. Make sure you coordinate with your allies in order to come up with a strategy. You will most likely need to teleport to the location of the Death Knight or he will most likely fall while your troops are wandering around the map. Don’t forget to shield up before teleporting, though. A lot of enemy players will also be teleporting, and you will be a sitting duck if you don’t have a shield.
You are now ready to rule the kingdom! Stick to our Iron Throne: Kingdoms strategy guide and the throne will be yours! If you have any other tips or tricks to share, don’t hesitate to drop us a line!