Survival games have been gaining popularity in recent years, and one of the most popular titles has finally arrived on the mobile platform. ARK: Survival Evolved was originally released on Steam but has been recently ported to Android and iOS devices courtesy of Studio Wildcard. In the game, you will be thrown into a primitive world filled with dinosaurs. You start with nothing but your wits. You will have to gather resources, create tools, and build your own shelter in order to survive. That’s not all, though. Remember those dinosaurs? It turns out you can actually tame them! There are dozens of dinosaur types and you can catch them all, Pokemon-style! Tame as many dinosaurs as you can and watch them do your bidding. Just because you have dinosaurs for pets does not mean you can let your guard down, though. Other players will be preying on you, so check out our ARK: Survival Evolved beginner’s guide to ensure you come out on top!
1. Create Your Character
The character creation screen is pretty easy to understand. You just choose your gender, race, and size. You won’t be able to change your looks later in the game, so make sure you pay attention to what you are doing. There are several sliders that you can work with for your body parts. Keep tweaking until you have a character that you can live with for the rest of your in-game life.
2. Get Your Hands Dirty

As we mentioned, you won’t have anything when you start in the island. You will have to use your bare hands to gather resources. Punch trees in order to get wood. You can also walk around to look for small rocks to pick up. Other resources such as thatch, rope, and berries can be found while foraging. If your character is feeling too hot, just rest in the shade of a tree. Water is even easier to acquire for your thirsty character. Just swim around and he will automatically drink while underwater. Finally, you can build a campfire if you are cold. All these things can be done without tools, but that does not mean you should not work towards crafting new things.
One thing you should watch out for when using your bare hands is to avoid punching too much. If you go on a wood-gathering spree, you will notice that your character will eventually take damage. That makes sense since human hands aren’t really built for taking down trees. If you abuse your hands too much, you will end up taking too much damage. That’s the last thing you want when you are a fragile lowbie.
3. Rush Your Levels
One of your primary goals in the beginning should be to level up as quickly as you can. To do so, just keep performing tasks. Almost everything you do will give you experience needed for leveling up. Gather resources, craft items, build things, and so on until you have enough experience to level up. Once you have enough experience, you will receive a notification that you have a level available to use. Go to the stat boost screen to assign points to your chosen stats. Prioritize increasing health and weight early on to allow you to carry more things and survive a little longer. Speed is also a good investment since you won’t have a weapon early on, you will be running away from threats more.
4. Unlock New Recipes
Every time you level up, you are given engram points that can be used for unlocking new recipes. You get a new row of recipes with each level. There is no right or wrong answer here. Unlock what you need the most based on your current situation. The goal is to unlock everything anyway, so just pick whichever ones you want. For example, if you are more of a defensive player and prefer not to get into battles, then feel free to prioritize clothes that will keep you warm and reduce incoming damage. If you are the aggressive type, however, then you may want better weapons sooner.
5. Craft Tools And Items
Once you have enough materials, you can open your backpack to start crafting. Tap the backpack icon on the top left of the screen then choose the inventory tab. This is the crafting menu. Your first ever recipe will be a Stone Pick. You can craft it by combining wood, thatch, and stone. Crafting will be an integral part of your adventure, so make sure you familiarize yourself with the basics.
6. How To Craft Multiple Items

Crafting items can be tedious, especially when you have to do it one at a time. If you need to craft several of the same type of item, you can do it in batches. Just go to the crafting menu then look for the recipe of the item you want to create. Tap and hold on it until you see a slider. Drag the slider to set the number of items you want to craft then confirm. This is a good way to go if you will be crafting shelter construction materials or consumable items like arrows for your bow.
7. Use The Hot Bar
The items in your inventory can be dragged to your Hot Bar on the lower left of the backpack screen. Make sure you drag tools and berries there, so you won’t have to open the backpack every time you need something. The items in your Hot Bar will appear on the bottom right of the screen when you exit from the backpack. Tap on the items on the Hot Bar when you need to use them. This is especially useful when you notice on the top right that your needs are running low. You can just tap on what you need without much fuss.
8. Start A Campfire
The campfire is one of the most important items you will create in the early parts of the game since you won’t be able to build a shelter right away. To create a campfire, tap on it in your inventory. Drag it to where you want to place it then release. If you want to reset its position, just tap the undo button. You will need to feed your campfire some pieces of wood. Drag it from you inventory by tapping on the backpack icon. Once you have enough wood in the campfire, you can tap on Light Fire.
9. Know Your Tools
There are several tools that can be crafted and used in ARK: Survival Evolved. You need to know what to use them on in order to gain the most resources. The pick is used to gather thatch, flint, and meat. The Hatchet, on the other hand, is perfect for gathering wood, stone, and hide. Make sure you utilize the right tool for the job in order to gather a lot of resources quickly.
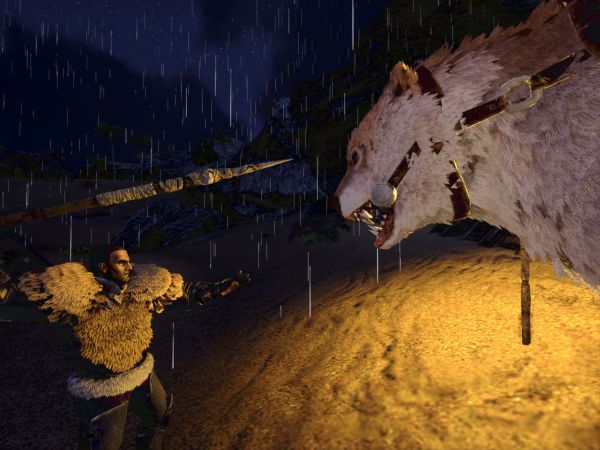
10. How To Tame Dinosaurs
This is one of the mechanics that players look forward to the most. You can tame a dinosaur without entering battle. This is the ideal option since you won’t risk getting killed. You will need a tranquilizer to passively tame a dinosaur, though. To create narcotics, you will need to combine spoiled meat and mejoberries using a mortar and pestle. The mortar and pestle can be crafter at level 6. Once you reach level 21, you will also be able to craft tranquilizer arrows that makes it easier to take down dinosaurs without having to fight.

One of the first dinosaurs you should tame is the Triceratops. You can ride them, making them great for hunting berries and gathering materials. Make sure you craft a Trike Saddle when you reach level 16, so you can ride the Triceratops as soon as you tame it. When you are ready, head for the beach and look for your Triceratops. Find a spot where you can approach it from high ground. This will allow you to get a clear shot using your bow without getting attacked easily. Hit the dino with five or six arrows until it goes down.
When the dinosaur has been subdued, approach it and stuff it with food. It will take a while for the taming bar to fill up, so feel free to take a look around in the meantime. Dinosaurs have food favorites that will make their taming quicker. Herbivores normally like plants like berries. Carnivores prefer cooked meat. Dodos mostly like tintoberries or azurberries. If you want to find out what food they prefer, highlight a dinosaur without any equipped weapon and they will show you. Once the Triceratops has been tamed, you can place the saddle on it and take a ride. Go around the island on top of your Trike and you will be able to harvest a lot of berries with ease.
11. Level Up Your Dino
Just because you have captured it does not mean you should just let it slave away. Make sure you take good care of your dinosaurs by leveling them up. Higher levels provide stat increases as well as new skills for your dinosaurs. You can level up a dinosaur by feeding it or by making fight other dinosaurs. Don’t forget to heal them when they are injured as well. A dinosaur can be raised up to level 71. That means you can have a very strong companion if you treat your dino right.
12. Use The Stamina Trick
Dinosaurs have limited stamina. That means they get tired if they sprint for too long. It is especially true for larger dinosaurs such as the Triceratops. One way to cheat your dinosaur’s stamina while still letting them gather berries, or whatever it is they are good at, is to not ride them. Face your dino and make it follow you. Once you have commanded it to follow, you can sprint ahead of it and it will keep up with you without using up any stamina.
13. Dino Breeding 101
Taming dinos can be exhausting. If you want more dinos running around your shelter, you might want to start breeding them. In order to breed, you will need two of the same species. After that, you need to build a small enclosed space to force the two dinos to get to know each other. You can simply build four basic walls as a makeshift pen. Once your pen is ready, you need to switch the two dinos to wander mode. Otherwise, they will not stay put in the pen and will try to follow you around. Just highlight the dinosaur, tap on the dino skill icon, then put a check on Enable Wandering box in the menu.
Now that your pair is snuggled up in the pen, you need to leave them alone. The amount of time it takes depends on the two dinosaurs and there is nothing you can do to speed things along. Trying to rush them will only result in resetting their progress. Just leave them be and go about your business. You will know they have hooked up when you see hearts above their heads and will have a mating progress bar below their name. When they are done, you will get an egg. Make sure it is a fertilized egg. A regular egg will not hatch no matter how much you incubate it.
To hatch your egg, you will need to expose it to heat. In the early parts of the game, you will only have campfires to rely on. Later on, you will be able to build air conditioning to make hatching a lot easier. In the meantime, build four or five campfires and set them down in a semicircle. Drop the egg in the center of the semicircle to ensure it is exposed to the flames of the campfire. Light up the campfires and wait for the egg’s incubation level to reach 100%. You may need to build more campfires if you fall short of 100%, though.
A timer will go down as the egg hatches. Make sure you have food for the baby dino while you are waiting for it to hatch. Once the timer is done, the baby will hatch. Highlight it and tap on the dino skull icon. Tap on Claim to instantly tame the new dino. Don’t forget to feed it right away by putting food in its inventory.
14. Look For Your Corpse
Death is an inevitable part of ARK: Survival Evolved. When you die, you will respawn with nothing, not even the clothes on your back. Your level and other character-related bonuses will remain, though. As much as possible, you would want to play it safe to avoid dying. If you somehow end up dead, however, you can still retrieve the items that you dropped. You just need to return to your corpse in order to loot it. You need to make it quick because you only have limited time to loot your dead body. Luckily, you won’t have to wander aimlessly. The navigation kit will tell you where your body is, so it should be easy enough to find it, provided you can survive the trip back.
If you already have a shelter, your character will respawn there. This is important because you can stash resources in your shelter. That means you won’t be making that trip back to your corpse empty handed. In fact, you may not even need to go back to your corpse at all if you managed to store enough resources in your home for that inevitable death.
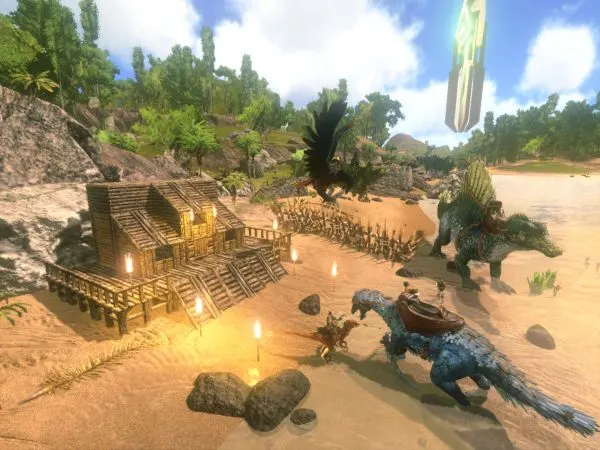
15. Build A Home

Some hardcore players invest a lot of time and resources in building forts. If you feel like it, you can follow in their footsteps. Before you get ahead of yourself, however, let us start with just a basic shelter. You will need to craft the different parts of your home before you start building. Check out the list below for the things you need.
– Four Foundations
– 15 Walls
– Four Roofs
– One Door
– One Doorframe
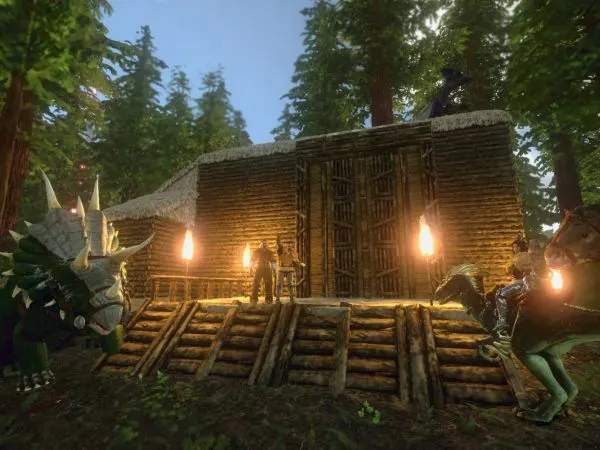
Once you have these, place them all in your Hot Bar. If you don’t have enough space, put the other items in your inventory first to make room for the building materials. This will make it easier for you to plop down the different parts without having to open the backpack each time. Start with the foundations. Tap on it in the Hot Bar and drag it into place. Once you have the foundation positioned properly, you can put up the walls. Don’t forget to leave one part of the wall blank so you will have space for the door and doorframe. Once you plug in the door, all that is left is to put the roof on top. The materials you created should be enough to build two levels plus a roof to cover everything.
The final touch to your home is a Simple Bed. You can unlock the Hide Sleeping Bag Engram when you reach level 4. When you do this, you will gain access to the Simple Bed. Craft the bed and place it in your home. Once you have a bed, you will be able to save your game on the bed until you choose to destroy it. If you are short on hide for the bed, you can kill off some Dodos on the beach and harvest from their carcass using your Hatchet.
16. Look For Blueprints
As we mentioned earlier, you will need to reach certain levels and spend Engrams in order to unlock recipes. The exception to this is when you find blueprints. These allow you to build the associated item without having to unlock it through engrams. You will also be able to craft even if you don’t meet the level required to unlock that item. Keep in mind, however, that you will still need the necessary materials. That means even if you find a high-level blueprint early in the game, if you don’t have the means to gather the necessary resources, you will still be unable to craft.
17. Get Free Amber
Amber is the game’s premium currency and it is only available on the mobile version. You can use it to purchase experience boosts, single-use items, and quick construction options. Keep in mind that you can play through the entire game and enjoy yourself without the need for Amber. That being said, it is still nice to have a few of these up your sleeve in case you start feeling the grind in later levels. You can buy Amber using real money, but if you want to keep your wallet closed, there are a few free options as well.
Amber can be harvested from dinosaurs, but the chances are pretty low. You can also find Amber deposits from time to time while you explore the island. The game also randomly gives out Amber as reward when you agree to watch video advertisements. If you are lucky, you might find it lying on the ground. Finally, you may be able to find some Amber by cracking open some special rocks.
18. Take A Sleeping Bag
When you are exploring the island, it’s easy to end up wandering a bit too far from your shelter. You might not have enough time before nightfall to make it back home. Sleeping on the ground will most likely get you killed. That’s what the Hide Sleeping Bag is for. It is a one-time use item, but you will be able to use it as a temporary spawn point while you are far from your shelter. It helps keep you warm through the night, protecting you from the elements.
19. Beware Of Beacons

When you see a light going towards the sky, you will probably wonder what it’s for. This is actually a marker for supply drops. These supply boxes contain useful resources, so you may want to check it out. There are a few things you need to remember before you head out, though. First of all, the beacons sometimes seem closer than they actually are. Make sure you are fully stocked before you head out. You should also remember that you won’t be the only one interested in these supplies. You might encounter hostile players on the way. Finally, supply drops are color coded, and you will need to meet the level requirement for each color in order to open it up. Check the list below to find out if your level is high enough for each box.
– White – Level 3
– Green – Level 15
– Blue – Level 25
– Purple – Level 35
– Yellow – Level 45
– Red – Level 60
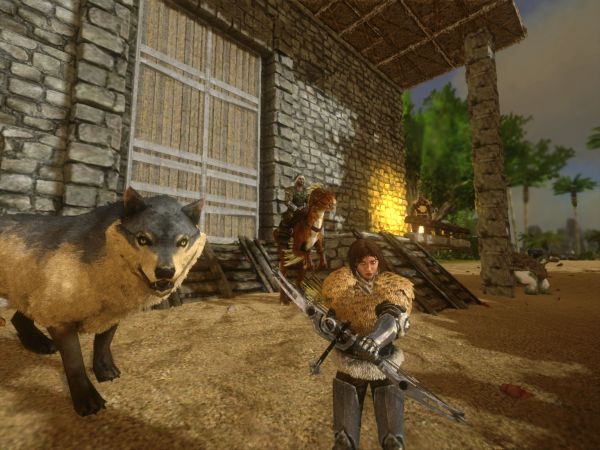
20. Look For Allies
A lot of survival games have a PVP option for players. That means you get to attack any other player you see. That may be more counterproductive, though. Think about it. Prehistoric humans survived for the longest time because they huddled together in tribes and supported each other. Attacking every person you see will not only make you a target for vengeful players, you also miss out on the opportunity to build alliances. Instead of hunting down fellow players, look for friends that will agree to build shelters together. You can start your own villages and support each other to ensure everyone’s survival.
21. Watch Your Weight
Looting is part of your survival but picking up too many items can be deadly. When your weight is too high, your character will slow down, making it easier for predators to catch you. If you go over your weight limit, you will stop completely until you get rid of all your excess baggage. Make sure you set out to gather specific items only. The only time you should pick up items that are not on your list is if they are too rare to pass up, like Amber. Sticking to your list of items to gather will help you stay focused and prevent you from over looting.
22. Check Your Torpor
Torpor is essentially your sleepiness level. When it is too high, your character will pass out. This goes up naturally as you exhaust yourself, so make sure you have a safe place to sleep. There are other reasons for torpor to go up, however. If you get hit by a tranquilizer, get stung by a scorpion, or attacked by a predator with torpor-based damage, your torpor level will go up. Wearing sturdy armor like the Flak Armor will help protect you from these attacks. You should also take along stimberries or stimulants, so you can negate the effects of torpor in a worst-case scenario.
23. Reset Your Stats
There are times when you feel like you have gone the wrong path in term of assigning points and unlocking recipes. If you want to reset your character without having to grind levels all over again, you can brew a Mindwipe. You cannot feed it to a dinosaur or another player, but once you consume it, all your stats will return to level 1. Don’t worry because all your points will be available for reassigning. Make sure you have a Canteen, Water Skin, or any other container to put the Mindwipe in once it is done brewing. We have listed the ingredients below for your reference.
– 8 Cooked Prime Meat
– 18 Narcotics
– 18 Stimulants
– 20 Mejoberries
It is time to make your mark on the mysterious island in ARK: Survival Evolved! We hope you’ve enjoyed our compilation of tips, tricks and cheats and learned something new! Thanks for reading and happy gaming!
Dinosaur from ark
Friday 29th of April 2022
Why are people taming me
Xavi
Friday 29th of April 2022
How do I tame a chicken?
ekon
Friday 28th of May 2021
cool thanks